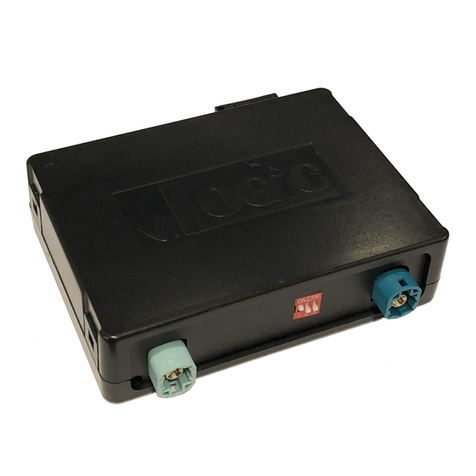
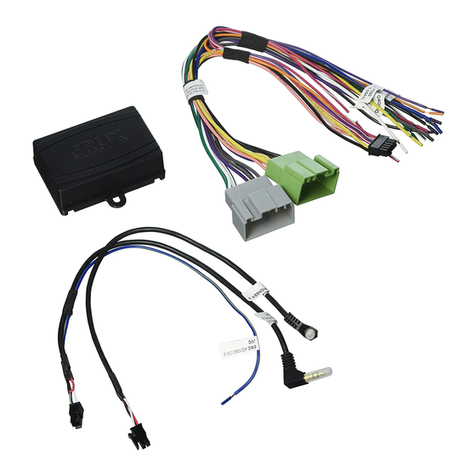
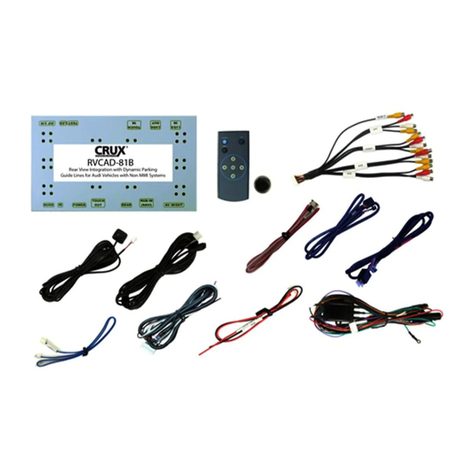
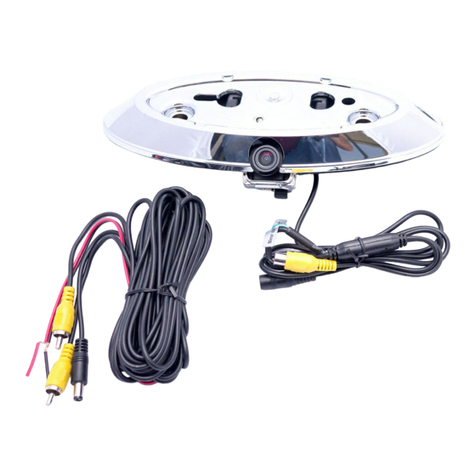
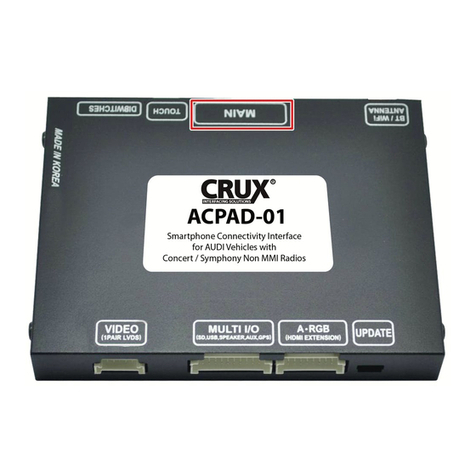
Crux ACPBM-77X User manual

Smart-Play
Power/Video Harness
USB Extension Cable Microphone
ACPBM-77X
Smart-Play Integration with Rear-View Camera Input for
E Series BMW with CCC Systems (6.5”or 8.8” Monitor) and 10-Pin LVDS Connector
R
INTERFACING SOLUTIONS
Crux Interfacing Solutions • 21541 Nordhoff Street, Unit C, Chatsworth, CA 91311
phone: (818) 609-9299 • fax: (818) 996-8188 • www.cruxinterfacing.com
rev.0724191 of 12
- Smart-Play Integraon system allows connecon of Android and other devices to the iDrive infotainment system.
- Control Apps using smartphone’s voice control feature or the factory iDrive Knob.
- Adds aermarket rear view camera input.
- Picture-in-picture mode combining aer-market rear-view picture with factory parking sensor graphics.
- Built-in on-screen display and setup.
- 1 trigger output (+12V max. 1A) for the camera power.
NOTE
- Android Phones must have a rmware version of 8 and above.
- For 2007 & up vehicles without a factory AUX input, add on the CRUX AUX-BM4 for audio.
- For 2007 & below vehicles without a factory AUX input, add on the CRUX AUX-BM5 for audio.
PRODUCT FEATURES:
PARTS INCLUDED:
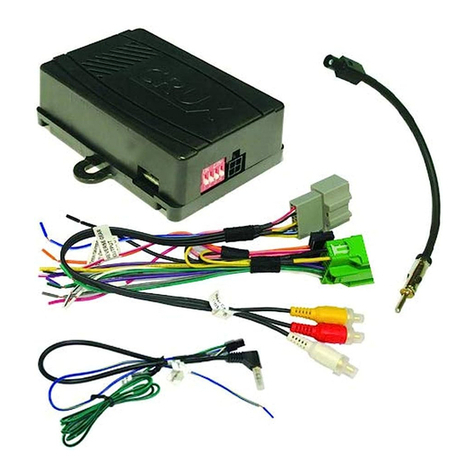
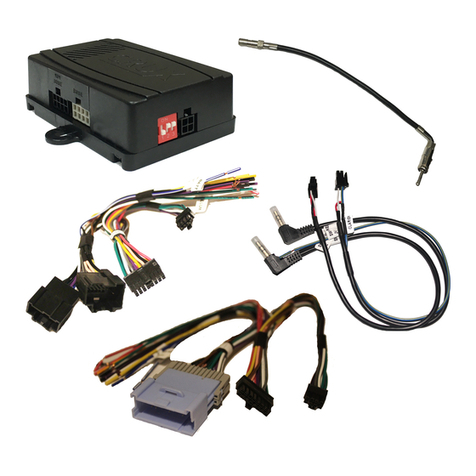
ACPBM-77X Module Power/CAN Harness ACPBM-77X Vehicle Harness
LVDS10 Cable 3.5mm to RCA Adapter Smart-Play Interface Module
1. DO NOT connect the Quadlock Connector to Factory Radio CD Headunit UNLESS the 10 Pin LVDS Cable has
been properly and completely connected to factory display and all the other 10 Pin LVDS cable connections have
been made according to the wiring diagram above or the factory display will be damaged;
2. DO NOT connect the 10 Pin LVDS Cable when the Radio is Powering ON or the factory display will be damaged;
3. When the Radio CD Headunit is active (powered ON ), DO NOT disconnect any of the 10 pin LVDS Connections
or the factory display will be damaged.
WARNING

Setting the DIP switches of the Interface Box.
DIPs 1 and 2 on the back of the interface-box is used to set the monitor size. DIP 3 must be set to OFF.
After each change of the DIP switch settings you have to execute a power reset of the interface box!
Crux Interfacing Solutions • 21541 Nordhoff Street, Unit C, Chatsworth, CA 91311
phone: (818) 609-9299 • fax: (818) 996-8188 • www.cruxinterfacing.com
rev.072419
2 of 12
INSTALLATION DIAGRAM:
R
INTERFACING SOLUTIONS
ACPBM-77X
DIP SWITCH SETTINGS:
LVDS OUT
LVDS IN
+12V Switching
Output 1 (Pink Wire)
Rear-View
Camera
(Not Included)
10-pin factory
LVDS Cable LVDS10 Cable
Back-Side of Factory
LCD Screen
*If using OEM Back-up
camera, leave REAR CAM
input unoccupied.*
*If installing after-market Back-Up
camera, use the pink wire to provide power to
to the camera, if not, please ignore this connection*
ACPBM-77X
Vehicle Harness
UART
POWER/VIDEO
Smart-Play Module
Vehicle Auxiliary
Input (AUX input)
Female RCA to
3.5mm jack
Male L & R RCA
Outputs (Audio)
AUX
POWER / CAN
FRONT
CAM
REAR
CAM
FW
UPDATE
Smartphone Cable
USB Input
OR
12V Green Output 2
to ACC power
(on Smart-Play Harness)
Power/CAN
Harness
iDrive Knob
Retention Cable
LVDS
IN
LVDS
OUT
v. 123
ON
Intelligent Solution
ACPBM-77X Module
ACC Power
Ground
Constant
Back of Headunit
See Warning below
Setting the DIP Switches of the VRFBM -77D
DIPs 1 and 2 on the back of the interface box are used to set the monitor type. The default seng is:
Vehicle / N avigation
Dip 1
Dip 2
Dip 3
M-ASK
OFF
No func
No func
CCC
ON
No func
No func
WARNING :
1. DO NOT connect the Quadlock Connector to Factory Radio CD Headunit UNLESS the 10 Pin LVDS Cable has
been properly and completely connected to factory display and all the other 10 Pin LVDS cable connections have
been made according to the wiring diagram above or the factory display will be damaged;
2. DO NOT connect the 10 Pin LVDS Cable when the Radio is Powering ON or the factory display will be damaged;
3. When the Radio CD Headunit is active (powered ON ), DO NOT disconnect any of the 10 pin LVDS Connections
or the factory display will be damaged.
2 / 10
Rev.040816
Smart-Play Integration with Rear-View Camera Input for
E Series BMW with CCC Systems (6.5” or 8.8”Monitor) and 10-Pin LVDS Connector

Crux Interfacing Solutions • 21541 Nordhoff Street, Unit C, Chatsworth, CA 91311
phone: (818) 609-9299 • fax: (818) 996-8188 • www.cruxinterfacing.com
rev.072419
3 of 12
R
INTERFACING SOLUTIONS
ACPBM-77X
INSTALLATION INSTRUCTIONS:
1. Installaon is done behind the front
panel.
2. Carefully remove the dashboard
front panel using a trim removal tool.
3. Pull out the front panel.
4. Remove the 2 torq screws (T-10)
under the LCD panel’s hood.
5. Remove the two screws bracing the
A/C control panel.
6. Remove the A/C control panel.
7. Remove the LCD screen panel. 8. Unplug the gray LVDS connector
from the back side of the LCD monitor.
9. Plug in the LVDS10 cable in place of
the factory gray LVDS connector.
Smart-Play Integration with Rear-View Camera Input for
E Series BMW with CCC Systems (6.5” or 8.8”Monitor) and 10-Pin LVDS Connector

Crux Interfacing Solutions • 21541 Nordhoff Street, Unit C, Chatsworth, CA 91311
phone: (818) 609-9299 • fax: (818) 996-8188 • www.cruxinterfacing.com
rev.072419
4 of 12
R
INTERFACING SOLUTIONS
ACPBM-77X
10. Connect both the gray LVDS con-
nector and other end of the LVDS10
cable to the ACPBM-77X module.
11. Remove the two screws bracing the
Headunit.
12. Remove the Headunit and unplug
the Quadlock connector.
13. Unplug the 2-pin ber opc cable
from the factory Quadlock connector.
14. If your vehicle doesn’t come with
an auxiliary audio input, you must get
an Auxiliary Input Interface kit (CRUX
AUX-BM4.
*if your vehicle has factory AUX, skip steps 14-16
15. Remove the 12-pin connector
(wire-side view) from the factory
Quadlock connector. Insert the pins
from the AUX-BM4 harness as follows:
White - Pin 2 / Red - Pin 7 / Black - Pin 8
16. Plug in the OBD coder in to the ve-
hicle’s OBD port to the factory system.
Once the module’s LED turns green,
you can remove the coder.
17. Plug in the 2-pin ber opc
connector previously removed from
the factory Quadlock connector to the
ACPBM-77X harness (Female side).
18. Plug the factory Quadlock connec-
tor in to the male side of the ACPBM-
77X harness.
2
7 8
Smart-Play Integration with Rear-View Camera Input for
E Series BMW with CCC Systems (6.5” or 8.8”Monitor) and 10-Pin LVDS Connector

Crux Interfacing Solutions • 21541 Nordhoff Street, Unit C, Chatsworth, CA 91311
phone: (818) 609-9299 • fax: (818) 996-8188 • www.cruxinterfacing.com
rev.072419
5 of 12
R
INTERFACING SOLUTIONS
ACPBM-77X
19. Tap the Black GND wire from the
Smart-Play Power/Video harness to the
black Ground wire on the ACPBM-77X
vehicle harness (Male Side).
20. Tap the Yellow constant wire from
the Smart-Play Power/Video harness to
the Red constant wire on the ACPBM-
77X vehicle harness (Male Side).
21. Connect the male 8-pin connector
from the ACPBM-77X to the female
8-pin connector on the Power/CAN
harness.
22. Tap the RED ACC wire from the
Smart-Play Power/Video harness to the
green +12V output on the ACPBM-77X
harness.
23. Plug in the female side of the
ACPBM-77X harness to the Headunit.
24. Plug the Video Out from the Smart-
Play Power/Video harness into the
FRONT CAM input on the module.
26. If installing an aermarket back-up
camera, plug the camera’s video out
to the REAR CAM input on ACPBM-77X
module. Use the PINK power output 1
wire provided on the Power/CAN har-
ness to power the camera. An image
is displayed in step 26. If retaining an
OEM camera or if you’re not installing
a back-up camera, skip steps 25 and 26.
25. Plug in the Power/CAN harness to
the ACPBM-77X module.
27. Connect the camera power wires to
the PINK power output 1 wire.
Smart-Play Integration with Rear-View Camera Input for
E Series BMW with CCC Systems (6.5” or 8.8”Monitor) and 10-Pin LVDS Connector

Crux Interfacing Solutions • 21541 Nordhoff Street, Unit C, Chatsworth, CA 91311
phone: (818) 609-9299 • fax: (818) 996-8188 • www.cruxinterfacing.com
rev.072419
6 of 12
R
INTERFACING SOLUTIONS
ACPBM-77X
29. If your vehicle has a factory AUX
input, use the 3.5mm to RCA Adapter
included in the kit to connect sound to
the factory audio system.
28. Connect the audio out RCAs from
the Power/Video harness to the RCA
inputs that were installed earlier.
30. Mount the microphone to a
locaon of your choice.
31. Connect the 3.5mm microphone
jack to the MIC input on the Power/
Video harness.
32. Connect the white wire with the
4-pin connector from the Power/CAN
harness to the UART port on the Smart-
Play module.
33. Connect the Power/Video harness
to the POWER/VIDEO port on the
Smart-Play module.
36. Check the OSD sengs and make
sure they match those on the next
page. Test the Back-Up camera. Put
gear in reverse and check for rear
camera image on screen. Go to Smart-
Play mode and test for funconality.
Once the cameras and Smart-Play
validaon is complete, mount the
ACPBM-77X and Smart-Play modules.
And nally, reinstall all the components
to their original set-up.
34. Connect the USB extenon cable
to the USB input on the Power/
Video harness for easier access when
connecng your smart-phone or USB.
35. Test the communicaon. Turn on
the ignion and check if LEDs are on.
Smart-Play Integration with Rear-View Camera Input for
E Series BMW with CCC Systems (6.5” or 8.8”Monitor) and 10-Pin LVDS Connector

Crux Interfacing Solutions • 21541 Nordhoff Street, Unit C, Chatsworth, CA 91311
phone: (818) 609-9299 • fax: (818) 996-8188 • www.cruxinterfacing.com
rev.072419
7 of 12
R
INTERFACING SOLUTIONS
ACPBM-77X
OSD Menu
Use the following buons to enter the ACPBM-77X OSD Menu:
BMW
OSD SETTINGS:
To ensure that Smart-Play works, make sure
these input sengs are in eect:
FRONTCAM (FVC) = SmartPhone
To retain the factory Back-Up Camera:
REARCAM (RVC) = OEM
To acvate an aermarket Back-Up Camera:
REARCAM (RVC) = ON
Shift knob to the right for 10 seconds to
enter OSD Menu Use Knob to navigate
menu and make selections
Use knob to navigate Smartplay/ Android
Auto apps and make selections
Hold the menu button to
change the video sources
Crux Interfacing Solutions • 21541 Nordhoff St., Unit C, Chatsworth, CA 91311
phone: (818) 609-9299 • fax: (818) 996-8188 • www.cruxinterfacing.com
rev.070919
11 of 13
R
INTERFACING SOLUTIONS
ACPAD-81Y
Smart-Play Integration with Multi Camera Inputs & USB Player
for AUDI Vehicles with MMI MIB/MIB2 Systems
OSD Menu Menu Item
OSD
POS. X 0-xxx
POS. Y 0-xxx
Size Small Small OSD menu window
Large Large OSD menu windows
Osd TimeOut 2-20
Info Version X.XX.XX Displays the current SW-version
Factory Reset
CONNECTING THE SMART-PLAY INTERFACE:
plugged in to the USB port using the smartphone’s OEM charger/data cable. The USB port on the
ACPBM-77X can be used to charge the Apple device or play videos or music from a USB thumb drive.
to the next enabled input. If all inputs are enabled the order is:
Rear CAM > Video Input (Smart-Play) > Repeat ...
ACPBM-77X
To exit the Smart-Play menu, hold the “Menu” button for 3-5 sec.
Switch the vehicle’s audio source to the AUX source. This will allow us to hear the Smart-Play audio
Smart-Play Integration with Rear-View Camera Input for
E Series BMW with CCC Systems (6.5” or 8.8”Monitor) and 10-Pin LVDS Connector
Note:
To exit the back-up camera image,
push down on the iDrive buon

Crux Interfacing Solutions • 21541 Nordhoff Street, Unit C, Chatsworth, CA 91311
phone: (818) 609-9299 • fax: (818) 996-8188 • www.cruxinterfacing.com
rev.072419
8 of 12
R
INTERFACING SOLUTIONS
ACPBM-77X
Crux Interfacing Solutions • 21541 Nordhoff St., Unit C, Chatsworth, CA 91311
phone: (818) 609-9299 • fax: (818) 996-8188 • www.cruxinterfacing.com
rev.070919
12 of 13
R
INTERFACING SOLUTIONS
ACPAD-81Y
Smart-Play Integration with Multi Camera Inputs & USB Player
for AUDI Vehicles with MMI MIB/MIB2 Systems
1. Picture above shows the HOME screen of the Smart-
with a USB thumb drive plugged in to the USB port.
2. Using the iDrive knob of the vehicle, navigate the
cursor to the Bluetooth icon (scrolling right). Image above
will appears on the screen the BT device name and
pairing code (0000).
device and connect to “CRUX Smart-Play_XXXX”.
4. Once the ACPBM-77X has connected via Bluetooth, it
5. Use the iDrive knob to navigate the cursor to the 6. Image above shows the “Home Screen” once the
smartphone is connected.
Smart-Play Integration with Rear-View Camera Input for
E Series BMW with CCC Systems (6.5” or 8.8”Monitor) and 10-Pin LVDS Connector
NOTE:
Make sure the audio source on the factory system is set to AUX mode (not AM/FM/Bluetooth). Also, if your smart-
phone is set to automatically connect to your factory bluetooth, make sure you void the connection. One way is to forget the
device (your vehicle) on your phone. This will avoid Smart-Play connection interferences. If you are using the wireless feature
and notice degraded audio or video quality, switch to the wired alternative, for it is a higher quality connection, unlike bluetooth.

Crux Interfacing Solutions • 21541 Nordhoff Street, Unit C, Chatsworth, CA 91311
phone: (818) 609-9299 • fax: (818) 996-8188 • www.cruxinterfacing.com
rev.072419
9 of 12
R
INTERFACING SOLUTIONS
ACPBM-77X
Video-In-Motion Function
It is possible to ac�vate and deac�vate the video-in-mo�on in the OSD menu “MISC” (Opera�on of the OSD:
see chapter “OSD-Opera�on”).
OSD-Menu
Menu Item
Setting
Description
MISC VIM
ON
Video-In-Mo�on ac�vated
OFF
Video-In-Mo�on deac�vated
NOTE: The Video-In-Mo�on func�on is permanently ac�ve without disturbing the naviga�on performance.
Selecting the Interface as Current AV Source
BMW 2-Button iDrive Mini 2-Button iDrive
A Long press of the Menu-button will select the interface as current video source.
A Short press of the CD Button or the MENU Button will switch the video sources (cameras or other video
source). Each short press will switch to the next enabled input. If all inputs are enabled the order is:
FRONT CAM
REAR CAM
…
Inputs which are not enabled are skipped.
CCC Navigation Screen
10 / 10
Rev.040816
Smart-Play Integration with Rear-View Camera Input for
E Series BMW with CCC Systems (6.5” or 8.8”Monitor) and 10-Pin LVDS Connector
Display sengs for Smart-Play
Adjust brightness, contrast, and saturaon for a more dened image.
To get to the Display menu, scroll to the SETTING icon in
the Smart-Play HOME menu, and select it.
Once in the SETTING menu, scroll to the Display submenu
and adjust the brightness, contrast, and saturaon to
your desired values.

Conguring the Trigger Outputs
You can congure the +12V trigger outputs in the OSD menu under MISC. The PINK wire (12V OUTPUT
1) is Power Out 1 for the cameras and Power Out 2 is for the Smart-Play module.
OSD Menu Menu Item Seng Descripon
Opon
Power Out 1
(PINK)
CAN +12V when the interface is on (red LED on)
ACC +12V when ignion is on
Cam +12V when camera input is acvated
(manually or automacally)
Power Out 2 CAN Smart-Play power on.
OFF Trigger output deacvated
Crux Interfacing Solutions • 21541 Nordhoff Street, Unit C, Chatsworth, CA 91311
phone: (818) 609-9299 • fax: (818) 996-8188 • www.cruxinterfacing.com
rev.072419
10 of 12
R
INTERFACING SOLUTIONS
ACPBM-77X
Tip: We recommend for all camera to use power out seng “Cam” and for Smart-Play the power out
seng of “CAN”.
Smart-Play Integration with Rear-View Camera Input for
E Series BMW with CCC Systems (6.5” or 8.8”Monitor) and 10-Pin LVDS Connector
Powerout sengs for Rear Aermarket Camera and Smart-Play
(Use the PINK (12V Output 1) wire to power the Rear camera)
In the OSD Menu under MISC, set “POWEROUT1” to
CAM. And set “POWEROUT2” to CAN
CAM
CAN

Image Sengs
The camera picture can be set in the OSD menu. For this seng
you must rst acvate the camera level and push the “MENU“
buon for 2 seconds to acvate the sengs menu. With the
rotaon knob you can select and change the “Brightness”,
“Contrast”, “Saturaon”, Hue” and “Sharpness”. Click “Exit” to
leave the sengs menu.
Crux Interfacing Solutions • 21541 Nordhoff Street, Unit C, Chatsworth, CA 91311
phone: (818) 609-9299 • fax: (818) 996-8188 • www.cruxinterfacing.com
rev.072419
11 of 12
R
INTERFACING SOLUTIONS
ACPBM-77X
OSD Sengs
You can change the basic conguraons of the interface in the OSD (on screen display).
OSD Menu Menu Item Seng Descripon
OSD
POS. X 0-xxx Horizontal posion of the OSD
POS. Y 0-xxx Vercal posion of the OSD
Size Small Small OSD menu window
Large Large OSD menu windows
Osd TimeOut 2-20 Time seng for automac OSD shuto
Info Version X.XX.XX Displays the current SW-version
Opon 1 Factory Reset Reset to factory default sengs
Note: The picture sengs will be retained for every camera input separately.
Smart-Play Integration with Rear-View Camera Input for
E Series BMW with CCC Systems (6.5” or 8.8”Monitor) and 10-Pin LVDS Connector

Crux Interfacing Solutions • 21541 Nordhoff Street, Unit C, Chatsworth, CA 91311
phone: (818) 609-9299 • fax: (818) 996-8188 • www.cruxinterfacing.com
rev.072419
12 of 12
R
INTERFACING SOLUTIONS
ACPBM-77X
VEHICLE APPLICATIONS:
Smart-Play Integration with Rear-View Camera Input for
E Series BMW with CCC Systems (6.5” or 8.8”Monitor) and 10-Pin LVDS Connector
2007 - 2011 1 Series 3-door hatchback
2007 - 2013 1 Series 2-door coupe (1M)
2004 - 2012 1 Series (5-door)
2008 - Up 1 Series Converble
2005 - 2011 3 Series Sedan
2005 - 2011 3 Series Wagon
2006 - 2013 3 Series Coupe
2007 - UP 3 Series Conveble
2004 - 2010 5 Series Sedan
2004 – 2007 5 Series Wagon
2004 - 2010 6 Series Coupe
2004 - 2010 6 Series Conveble
2007 - 2013 X5 Sports Acvity Vehicle
2008-2011 X6 Sports Acvity Coupe
Plug and Play Installa
Media Controller with controls by factory infotainment (iDrive)
Rear-view camera input
Front camera input
Front camera input can also be used as an Auxiliary Video Input
Manual switching to rear-view camera (only for vehicles with PDC buon)
Manual return from rear-view and front camera (cancellaon of automaswitching)
2 trigger outputs (+12V max. 1A), separately adjustable switching events (CAN, ACC, camera,
reverse gear)
Picture-in-picture mode combining amarket rear-view and front camera picture(s) with factory
parking sensor graphics
Compable with all factory video accessories (e.g. rear-view camera, Top-View Camera System)
E-series with Navigan System or radio with 6.5“ or 8.8“ monitor and 10-PIN LVDS Connector
1 / 10
Rev.040816
Interface Box
BM-77D Harness
Power/CAN Harness
LVDS10 Cable
1 SERIES
BMW
5 SERIES
6 SERIES
X SERIES
3 SERIES
Table of contents
Other Crux Automobile Accessories manuals

Crux
Crux Sightline PCM-3 User manual
Crux
Crux RVCTY-71L User manual

Crux
Crux RVCCH-75E User manual

Crux
Crux RVCCH-75F User manual

Crux
Crux Sightline RVCMB-78S User manual

Crux
Crux BEECR-35D User manual

Crux
Crux RVCCH-75B User manual

Crux
Crux RVCMZ-72D User manual

Crux
Crux ACPAD-01 User manual

Crux
Crux BEEBG-25 User manual
Popular Automobile Accessories manuals by other brands

CrimeStopper
CrimeStopper Electroplate EP-3000 installation instructions

Safe Fleet
Safe Fleet PRIME DESIGN VBB C11B quick start guide

Metra Electronics
Metra Electronics 99-5026 installation instructions

Trakm8
Trakm8 T10-Micro installation manual

SCC
SCC QUICK GRIP 1100 Series Installation and Removal Instructions

Metra Electronics
Metra Electronics 99-2008 installation instructions