manuals.online logo
Brands
  1. Home
  2. •
  3. Brands
  4. •
  5. danalock
  6. •
  7. Lock
  8. •
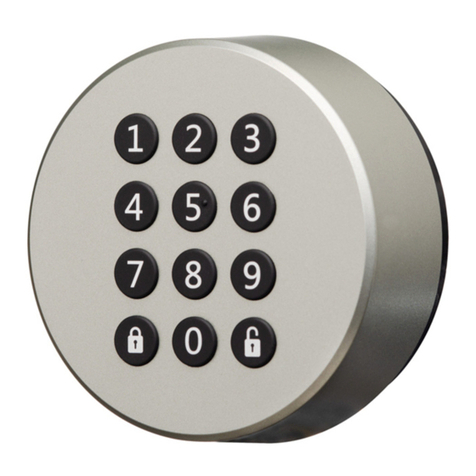
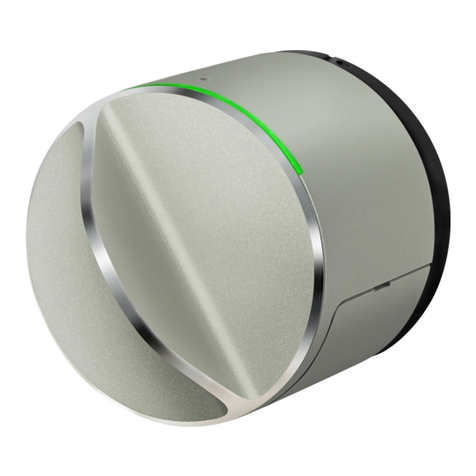
  9. danalock V3 EURO Product information sheet

danalock V3 EURO Product information sheet

The adjustable
cylinder as it is
in the box
3. Adjust the new cylinder
Measure from
center of screwhole
Back part
Outside Inside
=
Fits min. 35 mm
+7
=
7 space piece
7
Fits min. 40 mm
+10
=
10
10 space piece
Fits min. 45 mm
+15
=
15
15 space piece
Fits min. 50 mm
+22
=
22
22 space piece
Fits min. 55 mm
+25
=
25
25 space piece
Fits min. 60 mm
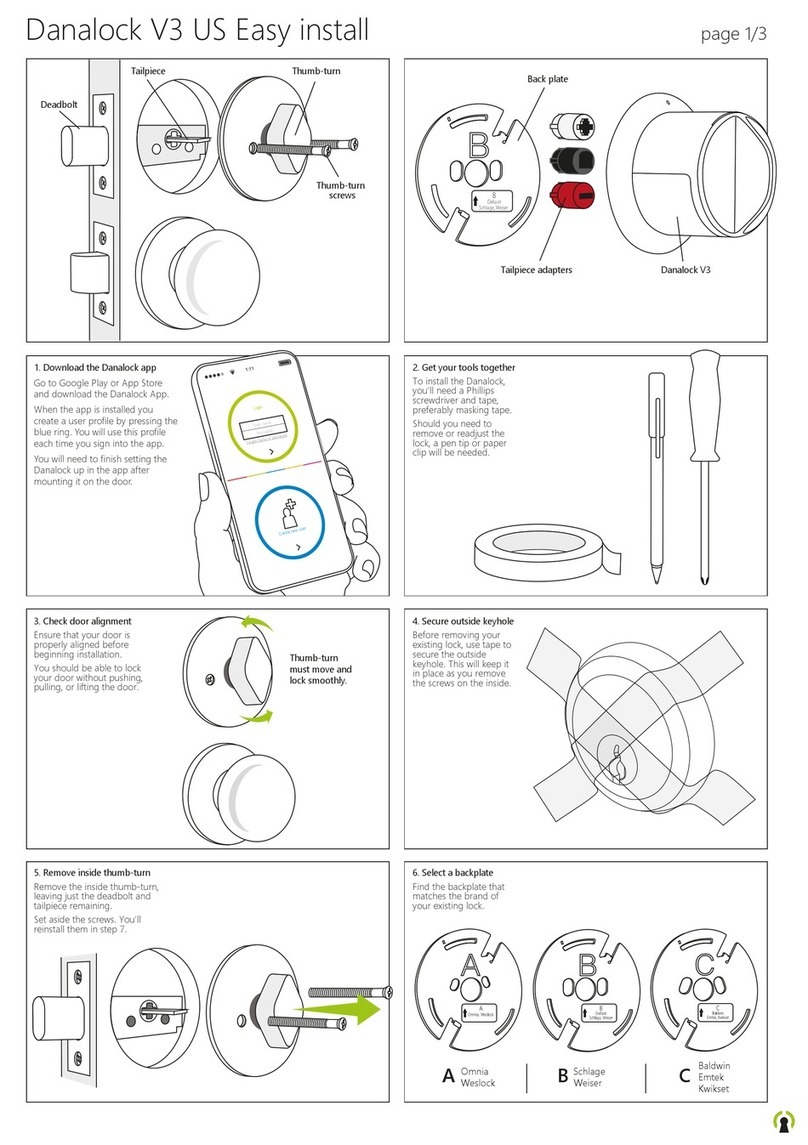
Danalock V3 EURO Easy install for rosette doors page 1/3
25
+7
7
1. Remove the old cylinder
First you have to remove
your current cylinder.
2. Pull out the old cylinder
Insert your key and turn it so the
cam lines up with the body of
the cylinder. Then it will be easy
to pull out of the hole in the
rosette.
Measure the back part
(on the outside of your
door) of the old cylinder
from the middle of the
screwhole and away
(see illustration).
In the Danalock box
you’ll find an adjustable
lock cylinder.
4. Just unscrew
the small screws
on both sides of
the part you want
to remove, and pull
the cylinder apart.
5. Insert new brass tube and spacer piece
6. Assemble the cylinder and
screw the tiny screws back in
on both sides of the cylinder.
When you remove one or
more parts of the cylinder
you’ll have to exchange
the brass tube in the
center with another
that fits the new
measurements.
Here is the different
combinations.
7. Size guide
Remove too big
spacer piece
and brass tube
Please look at the size
guide to the right to find
the length for the spacer
piece and brass tube.
+32
32
Tools needed
Parts involved on
your existing lock
To mount the Danalock
you need a Philips
screwdriver and two
pliers or a wire cutter.
Rosette spacers
Tailpiece
adapter
Small screwdriver
Mortise plate
Lock screw
Rosette plate
Cylinder Back plate Breakable screws
Cylinder
brass tubes
Adjustable
cylinder
Contents of the
Danalock box
you’ll need for
the easy install
cam
Unscrew the lock-screw
in the mortise-plate on
the side of the door.
Danalock V3 EURO Easy install for rosette doors page 2/3
8. Insert the
adjustable cylinder
Insert the new cylinder, and
re-insert the lock-screw in
the mortisse-plate to
fix the cylinder. (b)
Do not tighten the
screw to hard - make sure
the cylinder is working by
locking and unlocking
with your hand.
10. Break the screws the right length
If you don’t need all 3 spacers between
the cylinder and the rosette you have to
break or cut the cylinder screws
so they fit the distance.
11. Fasten the back plate to the cylinder
Now fasten the back plate to the
cylinder with the mortisse spacer
between them.
Make sure that the lock still works properly by turning the tailpiece. If you can’t lock
and unlock this way please loosen the cylinder screws. (b)
IMPORTANT!
Avoid pulling the
cylinder out of place
It is important that the
spacer flushes or sticks
out from the hole in
the rosette plate.
IMPORTANT! Check that the lock still works!
9. The right Rosette spacer
To avoid pulling the cylinder out of
place you need to find the right
spacer between the rosette and the
the new cylinder.
Unscrew the breakable screws that
holds the spacers together to the
adjustable cylinder, and choose the
spacer with the same or larger
thickness than the gap between
the cylinder and the rosette
surface. (a)
Click!
b
13. Attach the tailpiece adaptor
Insert the green tailpiece adaptor
in the center tube on the
backside of the Danalock.
Press on the adaptor
until a click ensures
it is fixed firmly to
the Danalock.
b
a
a
a
5 mm
10 mm
Rosette spacers
Breakable
screws
Use a wirecutter, two pliers
or bend the screws forth and back
several times in a vice to break them.
a
12. Give the tailpiece
the right length
To avoid damaging the danalock
you will have to shorten the new
cylinder tailpiece to max. 35 mm
from the door surface.
Use two pliers or a wire cutter
to shorten the tailpiece.
Go to Google Play or App Store
and download the Danalock App.
When the app is installed you
create a user profile by pressing the
blue ring. You will use this profile
each time you sign into the app.
19. Download the Danalock App
Turn the Danalock
clockwise until it clicks
to fasten it to the back
plate.
NOTE: If you need to
unfasten and retry, see
“Uninstall instructions”
at the end of the
manual.
16. Fasten the Danalock
If at any time you need to
dismount the Danalock from your
door, insert a pen tip into the hole
at the top inner edge of the lock
and press while turning the lock
counter-clockwise until the lock
releases.
This will not reset the lock or
disconnect it from your account,
but the lock may need to be
re-calibrated if fastened to your
door again.
21. Dismount instructions
page 3/3Danalock V3 EURO Easy install for rosette doors
15. Align the platemarks
Find the small marking on the edge of
the backplate and align the mark on the
back of the Danalock baseplate with it.
Now you are sure to hit the notches on
the backplate with the Danalock.
Pull out the plastic tab to
activate the batteries.
A light will flash to confirm
the Danalock is ready.
17. Activate batteries
Note: If the batteries are
disconnected, you will have
to re-calibrate the Danalock.
Your Danalock is now attached to
the door. Download and open the
Danalock app to finish setting it up.
Leave the door open, so the lock
isn’t influenced when calibrated.
18. Before downloading the app
20.
Add the lock in the app
14. Fit the tailpiece to the
middle of the housing base
Fit the Danalock over
the back plate.
Make sure the
tailpiece hits the
slide in the middle
of the adaptor.
Click!
You now need to add your
Danalock in the app.
Press ”Add lock” at the bottom
of the screen. A guide will lead
you through the installation
and configuration of your
Danalock.
Other manuals for V3 EURO

2

Other danalock Lock manuals

danalock V3 BT HK SCANDI User manual

danalock

danalock V3 BT HK SCANDI User manual

danalock V3-BTZBE User manual

danalock

danalock V3-BTZBE User manual

danalock BT100 Circle User manual

danalock

danalock BT100 Circle User manual

danalock V3 BT HK SCANDI User manual

danalock

danalock V3 BT HK SCANDI User manual

danalock V3-BTZU User manual

danalock

danalock V3-BTZU User manual

danalock V3 US Product information sheet

danalock

danalock V3 US Product information sheet

danalock V3 US Product information sheet

danalock

danalock V3 US Product information sheet

danalock V3 US Installation instructions manual

danalock

danalock V3 US Installation instructions manual

danalock V3 SCANDI ASSA 2000 User manual

danalock

danalock V3 SCANDI ASSA 2000 User manual

danalock V3 SCANDI User manual

danalock

danalock V3 SCANDI User manual

danalock Danapad PADV3-BT Guide

danalock

danalock Danapad PADV3-BT Guide

danalock V3-BTZB User manual

danalock

danalock V3-BTZB User manual

danalock Danapad V3 User manual

danalock

danalock Danapad V3 User manual

danalock Danapad V3 User manual

danalock

danalock Danapad V3 User manual

danalock V3 US User manual

danalock

danalock V3 US User manual

Popular Lock manuals by other brands

Numeris Versa Product guide

Numeris

Numeris Versa Product guide

AmazonBasics B07T2C4791 manual

AmazonBasics

AmazonBasics B07T2C4791 manual

JNF 20.937 quick start guide

JNF

JNF 20.937 quick start guide

Richter CZECH H.03 user guide

Richter

Richter CZECH H.03 user guide

Piot PiTraveler K200 quick start guide

Piot

Piot PiTraveler K200 quick start guide

Ferno F2 user manual

Ferno

Ferno F2 user manual

Flexlock Invisible manual

Flexlock

Flexlock Invisible manual

Bullseye S.D. Locks B500 Series Change instructions

Bullseye S.D. Locks

Bullseye S.D. Locks B500 Series Change instructions

U-tec Ultraloq UL3 installation instructions

U-tec

U-tec Ultraloq UL3 installation instructions

RCI 8310 Installation

RCI

RCI 8310 Installation

SCS Sentinel XO 404 Installation and operation manual

SCS Sentinel

SCS Sentinel XO 404 Installation and operation manual

D&D Technologies Magna-Latch installation instructions

D&D Technologies

D&D Technologies Magna-Latch installation instructions

Assa Abloy RIXSON FM9930 manual

Assa Abloy

Assa Abloy RIXSON FM9930 manual

Passtech FX200 user guide

Passtech

Passtech FX200 user guide

DOM Easykey Slim installation guide

DOM

DOM Easykey Slim installation guide

Dormakaba STV 2 Series Mounting instructions

Dormakaba

Dormakaba STV 2 Series Mounting instructions

Sargent and Greenleaf Comptronic 6124 Management guide

Sargent and Greenleaf

Sargent and Greenleaf Comptronic 6124 Management guide

SIMONSWERK KEEP CLOSED KCH 1701 Assembly instructions

SIMONSWERK

SIMONSWERK KEEP CLOSED KCH 1701 Assembly instructions

manuals.online logo
manuals.online logoBrands
  • About & Mission
  • Contact us
  • Privacy Policy
  • Terms and Conditions

Copyright 2025 Manuals.Online. All Rights Reserved.