-1-
143087 - Pro-Cast Mount Kit - PT 30/36 (14-April-2022)
PT30PT30PT30PT30
Overview of Mounting Pro-Cast Applicator
Mounting Steps
The following is an overview and suggested guide for
mounting a Pro-Cast Applicator to a Pro-Till 30/36.
(Refer to the overview and part pages for general
installation locations and component breakdowns.)
Pro-Till Preparation:
A. On some earlier Pro-Till models, two center hose
clamp weld plates will interfere with the front legs of
the Pro-Cast and need to be cut off (and the welds
ground flush). The Pro-Cast legs can then be clamped
properly to the Pro-Till frame.
Hoses should be routed
behind Pro-Cast legs.
B. On PT 30 models only,
the two Wing Carrier
Assemblies need to be
replaced with the new
ones supplied.Also, a Depth Stop needs to be added
to both of the PT 30 Wing Cylinders to limit stroke.
Pro-Cast to X-Frame Mounting:
1. Clean and prepare your Pro-Till, as desired, for
mounting the Pro-Cast applicator & kit components.
2. Center the main Pro-Cast unit (legs attached) over the
Pro-Till X-Frame and lower into place.
3. Secure the front legs with the appropriate front bolt
plates and 1/2" x 12" bolts / hardware.
4. Secure the rear legs with the appropriate RH/LH bolt
plates and 1/2" x 10" bolts / hardware.
Hydraulic Hoses and ISOBUS Cable Routing:
5. Hydraulic hoses and ISOBUS Cable will come
installed. Secure hydraulic hoses and ISOBUS cable
to the hitch frame with zip-ties. Follow existing
hydraulic hose routing.
IMPORTANT: Ensure that the ISOBUS
cable is supported as it comes out of the
ECU and secured to the hitch frame so
that it does not pull on the ECU.
Distribution Hose Routing Bar Bracket:
6. Center and install the Distribution Hose
Routing Bar Bracket and also the SMV
sign hose protector mounted on the rear
beam of the Pro-Till X-Frame behind the
Pro-Cast Applicator.
© 2022 Degelman Industries LP
Deflector Mounting Brackets:
9. Pre-assemble and install the deflector bracket
assemblies by attaching the correct clamp style
(A or B) onto the correct deflector bracket bolt
locations. The location overview pages show
the positioning information for assembling these
brackets and where they are to be installed
on the Pro-Till. These brackets vary and are
configured differently for the Pro-Till 30 and
Pro-Till 36 models. Please pay attention to the
configurations.
Center Frame Hose Slider Bracket:
7. Install the Center Frame Hose Slider Bracket onto
the front beam of the center frame.
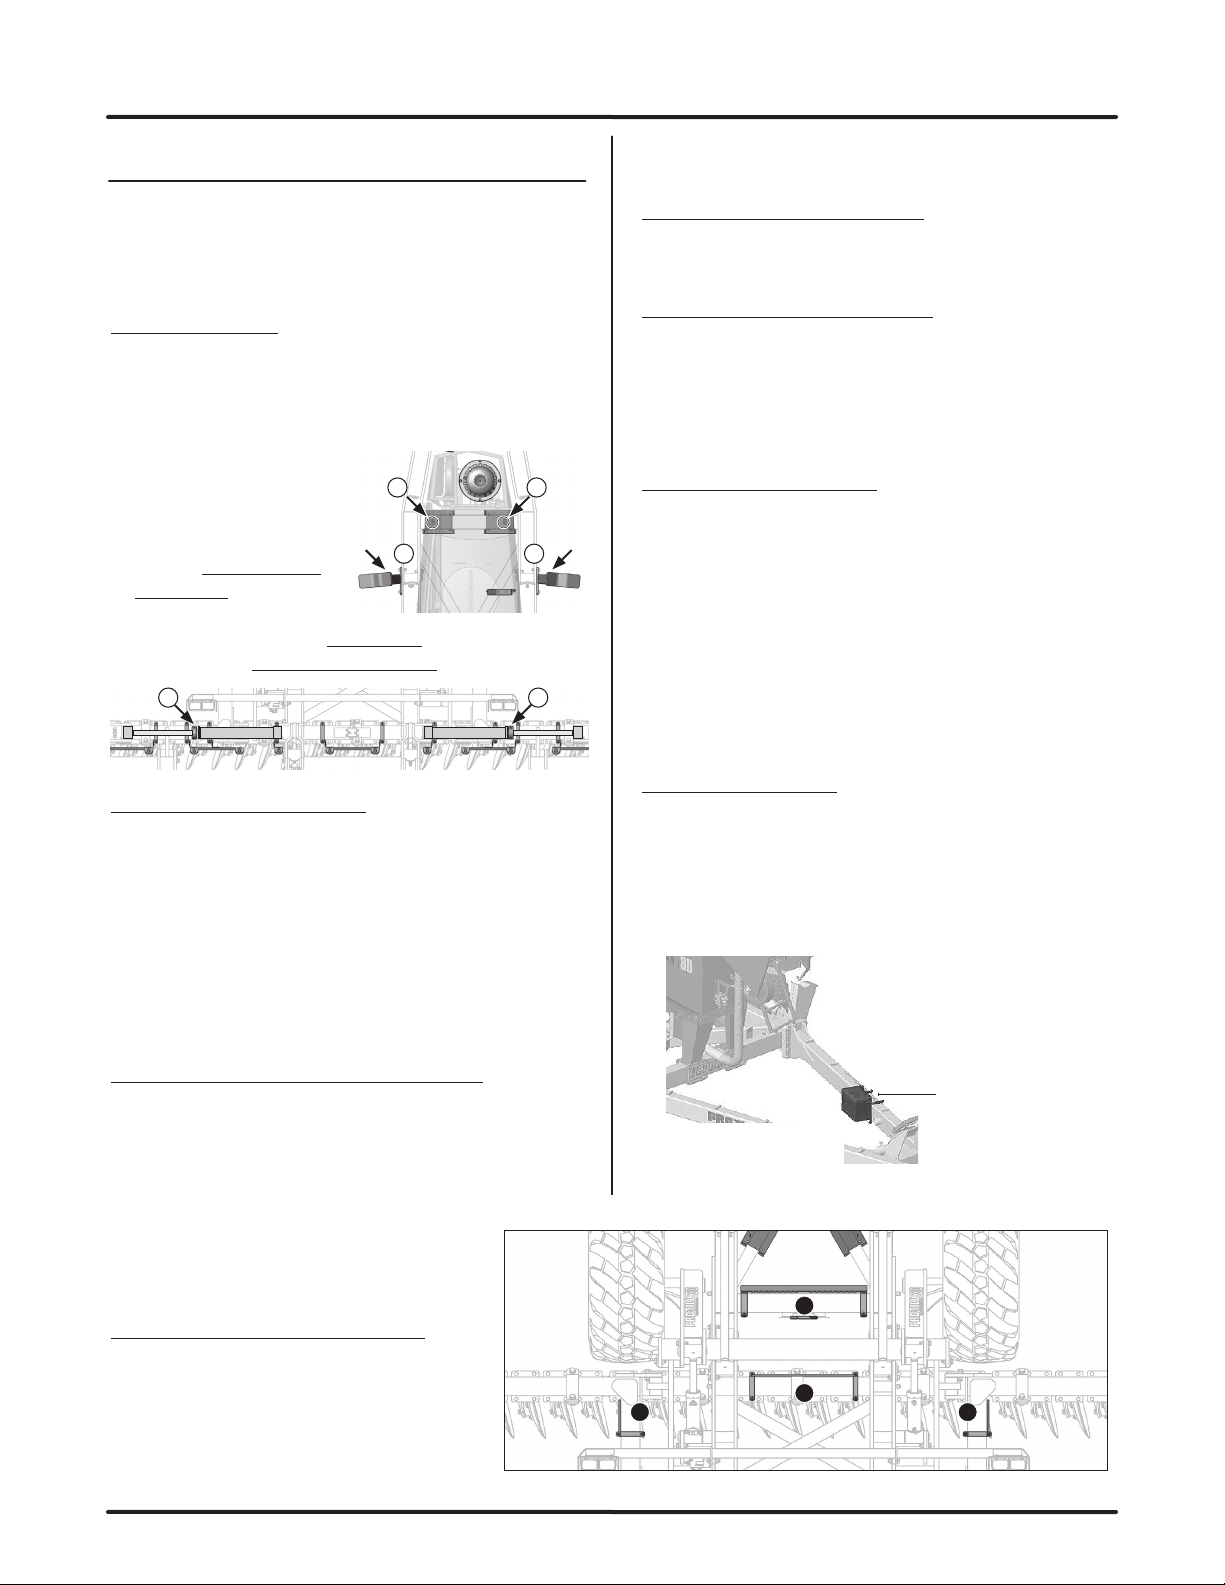
Wing Frame Slider Bars (LH & RH):
8. Install the Slider Bars on the LH & RH wing
frames in position shown in reference image
below. Install bracket towards front of frame to
ensure it will not impact light bar when folding
into transport.
Distribution Hose RoutingDistribution Hose Routing
Bar BracketBar Bracket
Center Frame HoseCenter Frame Hose
Slider BracketSlider Bracket
LH WingLH Wing
Slider BarSlider Bar
RH WingRH Wing
Slider BarSlider Bar
6
7
8 8
SuggestedSuggested
ToolboxToolbox
InstallationInstallation
LocationLocation
Toolbox Holder Bracket:
10. A suggested location to install the toolbox
holder bracket and tool box is shown below.
Customers may choose to locate the toolbox in
a different location, but please be advised it
is recommended to install facing inward as to
avoid tractor wheel/track contact during turns,
or other locations that may
allow the toolbox to be
damaged during operation
or folding for transport.
Reference only, actualReference only, actual
Pro-Till model may differ.Pro-Till model may differ.
A
B B
A
B B PT30PT30PT30PT30 LH WingLH Wing
CylinderCylinder
RH WingRH Wing
CylinderCylinder