manuals.online logo
Brands
  1. Home
  2. •
  3. Brands
  4. •
  5. DREAMS
  6. •
  7. Indoor Furnishing
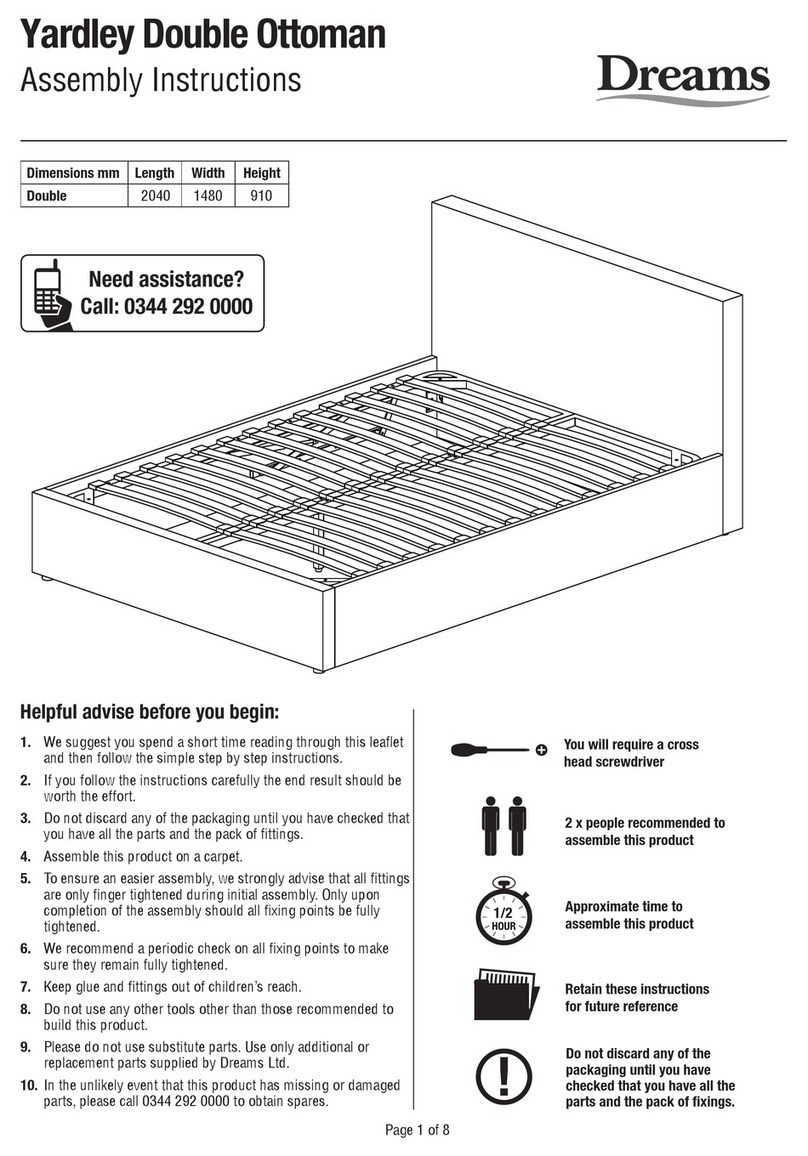
  8. •
  9. DREAMS Murphy Ottoman Bed User manual

DREAMS Murphy Ottoman Bed User manual

Two person
assembly
1.5 hour approx
assembly time
Murphy Ottoman Bed
MK2 201123
Murphy Ottoman Bed - Assembly guide - Page 2
Thank you
Hello, thanks for choosing to purchase your bed from Dreams - you're now on your way to your best
ever night's sleep. Before you begin building your bed, please take a moment to read through the
instructions and make sure that you've got all the relevant parts listed on the following pages.
Assembly tips
Before you begin, it’s best to identify all parts and fittings to build your bed.
We advise laying these out on the floor to check you have everything, and
familiarising yourself before building.
Help and support
At Dreams, it’s our mission to give the whole nation a great night’s sleep - this
means that the quality of our products is of utmost importance to us. If there
are any issues with your product or any missing parts, please contact our Help
Centre on 0800 652 6750, where a member of our team will be happy to help.
(For customers based in Northern Ireland, please call 028 9050 8300)
Safety and care
It’s really important to ensure children and animals are kept away from the
assembly area, as there are small components used in this bed which could
present a choking hazard. All plastic and wrapping materials should also be
To keep your little ones busy, there is a colouring page inside the back cover.
Recycling
Please ensure that packaging is disposed of in a safe and environmentally
friendly way, and recycle where possible. Our assembly instructions are
printed on recycled paper. Please keep your assembly instructions safe
to refer back to in the future.
We recommend that you build your new bed in the room you’d like it to be
located - this will help prevent any risk of damage to your newly built bed
whilst moving it.
Top tip
A
B
C
D
E
F
F
G
H
K
K
L
L
I
J
G
Murphy Ottoman Bed - Assembly guide - Page 3
Fabric Strap
M
Cross head screwdriverTape measure
Tools required
Parts
Important information
Identify which base you have purchased as the assembly method may change.
If you have purchased the Ottoman base please follow the instructions below in the current order.
If you have purchased a Sleepmotion base, please follow the assembly instructions provided in the Sleepmotion
side rail pack 3L. Once the base is built please follow the AI provided in pack 3L to build your frame around the
Sleepmotion Base.
1
1
1
1
1
2
A. Headboard
B. Footboard
C. Side rail - Left
D. Side rail - Right
E. Slat Frame Support Rail
F. Angle Brackets
2
1
2
1
2
2
1
Parts list
H. Metal Lift up Slat Frame
I. Mattress Stoppers
J. Cross Bar
K. Bedsides
L. Metal Legs for Bedsides
M. Power adapter with 90º LV plug
G. Storage Base Boards
Murphy Ottoman Bed - Assembly guide - Page 4
Fittings
Please check you have all the parts listed below with your product:
Hardware needed for fitting metal slat frame,
packed in side rail pack 3 - hardware pack (E)
a x14 b x14 c x14
k x2
e x6 i x6
j x2
817161514131211101019876543210cm
Flange lock-nuts (M8)
for gas-lift pistons
Nuts for M8 bolt
Metal Connection Plates
Bolts (M8x30mm) for fitting
side rails (C&D) to headboard
& footboard (A&B)
Spring Washers for M8 bolts
l x8
Flat Washers for M8 bolts
b x20 c x28
Bolts (M8x45mm) for
fitting metal slat frame
(H) to gas-lift mechanisms &
fitting slat frame support rail
(E) to footboard (B)
Bolts (M8x20mm) for
fitting metal connection plates
(j) and cross bar (J) to metal
slat frame (H)
a x8
Bolts (M8x30mm) for fitting
angle brackets (F) to side
rails (C&D) & footboard (B)
Flat Washers for M8 bolts
Spring Washers for M8 bolts
Hardware needed for fixing side rails to headboard & footboard
packed in side rail pack 3 - hardware pack (D)
Hardware needed for fixing bedsides to headboard
packed in headboard pack 1 - hardware pack (B)
h x1
Spanner for M8 nuts
f x4 g x16
Spring Washers for M8 bolts
e x4
Flat Washers for M8 bolts
b x4 c x4
Threaded studs (M8x60mm)
for fitting bedsides (K) to
headboard (A)Nuts for M8 bolts
Screws (4x20mm) for fitting
metal legs (L) to bedsides (K)
(N.B. may include x4 spare
screws)
m x6
Bolts (M8x40mm) for bolting
wings to main headboard
Spring Washers for M8 bolts Flat Washers for M8 bolts
b x6 c x6 d x1
Allen Key for M8 bolts
Hardware needed for fixing wings to headboard
packed in headboard pack 1 - hardware pack (A)
Power Plug
Power Plug - connects the LV socket on rear of
headboard to wall socket - hardware pack (C) M
Murphy Ottoman Bed - Assembly guide - Page 5
1
Folding Headboard - use pack 'A'
Left
Right
Unfold wings, unzip compartments and retrieve
hardware packs (A) & (B) & (C) from compartment
in left hand wing.
Hardware
Packs A & B
Hardware
Packs A, B & C
m
x6
b
x6
c
x6
d
x1
m
cb
d
Unclip both cables and pass through access
hole into main headboard compartment.
Bolt each wing to main headboard - screw three
bolt sets (m), (b) & (c) into the pre-tapped holes
on each side - tighten with allen key (d).
a) Connect USB terminals
together (x).
b) Connect lighting cables
together (y) making certain
both red cables are on same
side of both the plug & the
socket as shown below.
c) Re-zip compartments and
headboard assembly is now
complete.
M
i)
ii)
iii)
iv)
Hardware
Packs A, B & C
Power Plug
pack (C)
(y)
(x)
Connectlighting cables together (y)
makingcertain both red cables are on
samesideof the plug& socket as shown.
(y)
Connectlighting cables together (y)
makingcertainboth red cables are on
sameside of the plug &socket as shown.
(y)
Connectlighting cables together(y)
makingcertain both red cables are on
samesideof the plug & socket as shown.
(y)
Connectlighting cables together(y)
makingcertain both red cables are on
samesideof the plug& socket as shown.
(y)
Connectlighting cables together(y)
makingcertain both red cables are on
samesideof the plug & socket as shown.
(y)
Connectlighting cables together(y)
makingcertainboth red cables are on
samesideof the plug & socket as shown.
(y)
Murphy Ottoman Bed - Assembly guide - Page 6
A
3
2
Bedside assembly - use pack 'B'
g
x12
f
x4
f x2
gx6
g
K
L
x2
c
x4
b
x4
h
x1
e
x4
c
b
h
e
M
Screw the threaded bolts (f) into the
tapped holes in rear of the bedside chests
until they stop, do not over- tighten..
K
For safety, remove glass during this step
and place well away from the workplace.
.
.
4
Bed assembly - use pack 'D'
10mm
10mm
A
B
a
c
b
a
x8
b
x8
c
x8
a
c
b
Murphy Ottoman Bed - Assembly guide - Page 7
M
Murphy Ottoman Bed - Assembly guide - Page 8
5
6
90%
a
cb
d
A
C
&
D
G
G
a
x4
b
x4
c
x4
d
x1
C
D
Bed assembly - use pack 'D'
Lift the Headboard into final position.
Please do not drag it across the floor
or the legs on the bedsides may be
damaged. Also make certain
the power cable is not
trapped.
B
a
cb
d
C
&
D
90%
B
a
x2
b
x2
c
x2
d
x1
Metal slat frame assembly
use pack 'E'
7
100%
a
x8
b
x8
c
x10
d
x1
l
x2
a
c
d
b
Make certain the bed is squared up
as shown in the diagram then tighten
all bed assembly bolts 100%.
F
C D
&BB
E
l
c
d
Murphy Ottoman Bed - Assembly guide - Page 9
F
F
E
8
ii)
iii)
Fitting position for cross bar (J) is
clearly labeled at the end of the slat
frame (H). Pass the bar through the gap
between first & second slat.
Carefully open the frame.
x2
F
I
T
C
R
O
S
S
B
A
R
H
E
R
E
i)
j
x2
i
x6
c
x6
d
x1
b
x6
J
The cross bar fixing plates sit
on top of each side of the slat
frame (H), sit the plates on the
round labels. Align with the
threaded holes and loosely fix
through the plates using bolts
(i), spring washers (b) & flat
washers (c).
Using Allen key (d), now
tighten all six bolts 100%.
H
i
c
b
J
To top of slat frame, fit two
connection plates (j). Using four
sets of bolts (i), spring washers
(b) & flat washers (c), screw into
the threaded inserts on top of
the frame.
Please do not tighten 100% yet.
Murphy Ottoman Bed - Assembly guide - Page 10
H
i
b
c
j
H
Murphy Ottoman Bed - Assembly guide - Page 11
9
ii)
i) Un-tie the hinge mechanism,
and take out the transit block.
Hold bars forward
Slat Frame Support Bar
c
x12
l
x6
b
x6
h
x1
e
x6
d
x1
l
d
c
b
c
he
Bolt into centre of long holes
iii) With help from an assistant, lift
slat frame (H) onto slat frame support
bars aligning first set of holes on slat
frame with first set of holes in
support bars (nearest to headboard).
iv) Using three bolt sets on each side
(b), (c), (e) & (l), fix slat frame to the
support bars but do not tighten fully yet.
C D
&
C D
&
Murphy Ottoman Bed - Assembly guide - Page 12
11
Carefully lay frame down making sure
there is an even gap all round as in the
sketch.
Hold frame securely then tighten all six bolt
sets 100% using spanner (h) & allen key (d).
h
x1
d
x1
During this next step, the assistant should
hold up the slat frame. On side rails (C&D)
slide gas-lift piston stems (X) onto the axles
(Y ) then fit the flange lock-nuts (k).
SMALL GAP
h
k
(X)
(Y)
k
10
8 mm
h
x1
k
x2
Tighten nuts with spanner (h) - but do not over-tighten.
A small gap is needed so stems can move freely - this
is important - see sketch below.
C D
&
Murphy Ottoman Bed - Assembly guide - Page 13
Before moving the slat frame, place a mattress on top of the slats as without a mattress in
place the speed of movement is quick and may cause injury so be careful.
Carefully lower the frame with the hand-strap ensuring the frame sides are aligned with the
side rails; there should be an even gap on each side. If not aligned, check bed is still square
(see Step 7) and if it is, but gaps are still not even, re-align the slat frame.
Depending on the weight of the mattress, the rising speed will vary so be careful until you get
used to the speed. Always use the strap to lift or lower the frame - keep fingers well away
from the moving parts.
When fully assembled and the mattress in position, please raise & lower the ottoman 4/5
times to ensure the gas pistons are fully lubricated.
13
Note: Be very careful what
you store under the bed -
the top of an item, like a
suitcase or a box must not
touch the slats or they may
be damaged. Maximum
storage height is 305mm .
12
Push x2 Mattress Stoppers (I) into
metal frame, they should go all the
way through the upper & lower
metal sections.
I
H
Care and maintenance
Here are some tips to keep your new bed in tip-top condition
Cleaning
To clean your new bed, we'd advise using a warm damp cloth or if fabric,
remove dust using a low suction vacuum cleaner - please do not use abrasive
chemicals or bleach as this may damage the product.
Checking and moving
Periodically we recommend you check that the screws or fixtures haven't
become loose, over time. To move your new bed, we recommend lifting it
where possible, as dragging or pushing it could cause damage to your flooring.
Wood
Please note each of our wooden pieces are unique, meaning that markings and
shade can vary slightly between beds. Over a period of time, the wood might
lighten or fade slightly due to light exposure.
Fabric
Please note depending on the lighting, positioning and surroundings of your
period of time the colour might lighten or fade slightly due to light exposure.
Metal
Metal tends to be more resilient to everyday wear and tear. We recommend to
gently dust your metal furniture and keep it dry to maintain its look.
Murphy Ottoman Bed - Care and maintenance guide - Page 14
L
10
33
34.5
Over Slat
Under Slat
W
H
6
3
37.5
2.3
Slat
5.3
Overall Dimensions (LWH cm)
Double: 211 x 230 x 112
King: 221 x 245 x 112
Internal Dimensions (LWH cm)
Double: 195 x 138 x 30.5
02 :gniK 5 x 153 x 30.5
Bedside Dimensions, (WDH cm)
42 x 34 x 56.5
Distance between slats (cm)
Double: 9
King: 8.7
Thank you for shopping with us - we hope you have
a great night's sleep
Little dreamers
Keep the little ones entertained while
you assemble your new purchase.

Other DREAMS Indoor Furnishing manuals

DREAMS Downton Bed Single User manual

DREAMS

DREAMS Downton Bed Single User manual

DREAMS Arrenburg Bed User manual

DREAMS

DREAMS Arrenburg Bed User manual

DREAMS Kyoto TV Bed User manual

DREAMS

DREAMS Kyoto TV Bed User manual

DREAMS Louis Chrome Bed Double User manual

DREAMS

DREAMS Louis Chrome Bed Double User manual

DREAMS DRIFT TV BED User manual

DREAMS

DREAMS DRIFT TV BED User manual

DREAMS Jackson Bed King User manual

DREAMS

DREAMS Jackson Bed King User manual

DREAMS Earlswood B/S User manual

DREAMS

DREAMS Earlswood B/S User manual

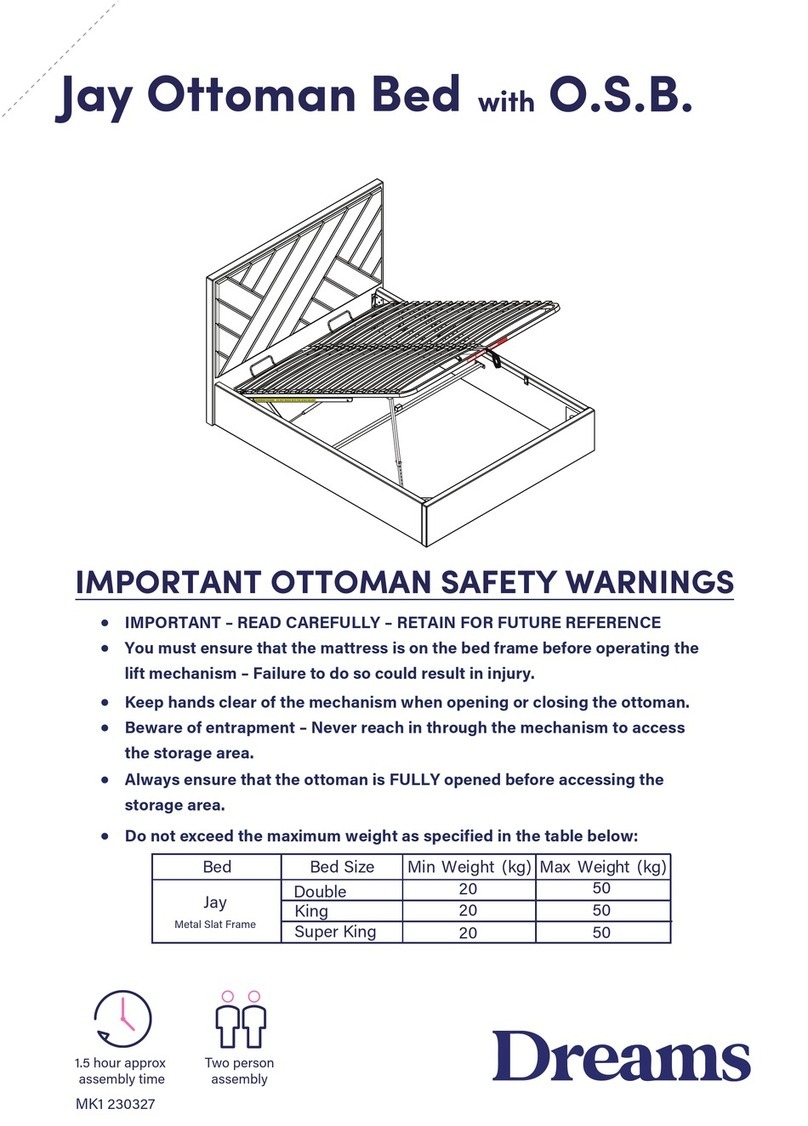
DREAMS Yardley Double Ottoman User manual

DREAMS

DREAMS Yardley Double Ottoman User manual

DREAMS TEMPUR Reign Ottoman User manual

DREAMS

DREAMS TEMPUR Reign Ottoman User manual

DREAMS MOORE BED User manual

DREAMS

DREAMS MOORE BED User manual

DREAMS Alana Lifestyle Bed User manual

DREAMS

DREAMS Alana Lifestyle Bed User manual

DREAMS LANGFORD STORAGE BED Double User manual

DREAMS

DREAMS LANGFORD STORAGE BED Double User manual

DREAMS Soren User manual

DREAMS

DREAMS Soren User manual
DREAMS LUGANO SINGLE BED User manual

DREAMS

DREAMS LUGANO SINGLE BED User manual

DREAMS AVA BED User manual

DREAMS

DREAMS AVA BED User manual

DREAMS Single Jasmine User manual

DREAMS

DREAMS Single Jasmine User manual

DREAMS Knightsbridge User manual

DREAMS

DREAMS Knightsbridge User manual

DREAMS Tribeca User manual

DREAMS

DREAMS Tribeca User manual

DREAMS FRANCIS OTTOMAN User manual

DREAMS

DREAMS FRANCIS OTTOMAN User manual

DREAMS Nelson Bed King User manual

DREAMS

DREAMS Nelson Bed King User manual

DREAMS Angel User manual

DREAMS

DREAMS Angel User manual

DREAMS QUEST BED User manual

DREAMS

DREAMS QUEST BED User manual

DREAMS Bond Oak-High Foot End-Linen User manual

DREAMS

DREAMS Bond Oak-High Foot End-Linen User manual

DREAMS Glacier King Bed User manual

DREAMS

DREAMS Glacier King Bed User manual
Popular Indoor Furnishing manuals by other brands

Regency LWMS3015 Assembly instructions

Regency

Regency LWMS3015 Assembly instructions

Furniture of America CM7751C Assembly instructions

Furniture of America

Furniture of America CM7751C Assembly instructions

Safavieh Furniture Estella CNS5731 manual

Safavieh Furniture

Safavieh Furniture Estella CNS5731 manual

PLACES OF STYLE Ovalfuss Assembly instruction

PLACES OF STYLE

PLACES OF STYLE Ovalfuss Assembly instruction

Trasman 1138 Bo1 Assembly manual

Trasman

Trasman 1138 Bo1 Assembly manual

Costway JV10856 manual

Costway

Costway JV10856 manual

moss DESIGN Caisson Credenza Assembly instructions

moss DESIGN

moss DESIGN Caisson Credenza Assembly instructions

Aquaglide FULL DECK 15.0 owner's manual

Aquaglide

Aquaglide FULL DECK 15.0 owner's manual

AREBOS AR-HE-SW30 user manual

AREBOS

AREBOS AR-HE-SW30 user manual

Till-Hilft Fulda 87005.330 Assembly instructions

Till-Hilft

Till-Hilft Fulda 87005.330 Assembly instructions

Twoey Outside 2010 quick start guide

Twoey Outside

Twoey Outside 2010 quick start guide

Hettich Easys 200 operating instructions

Hettich

Hettich Easys 200 operating instructions

The bedboss RELAX 404 Series owner's manual

The bedboss

The bedboss RELAX 404 Series owner's manual

Oeseder Möbelindustrie Bern 991 720 Assembly instructions

Oeseder Möbelindustrie

Oeseder Möbelindustrie Bern 991 720 Assembly instructions

Costway HW68469 user manual

Costway

Costway HW68469 user manual

Next ALIX A27743 Assembly instructions

Next

Next ALIX A27743 Assembly instructions

BROSA Hans Assembly guide

BROSA

BROSA Hans Assembly guide

Prodigg MINIKA PBA015T-FUR installation manual

Prodigg

Prodigg MINIKA PBA015T-FUR installation manual

manuals.online logo
manuals.online logoBrands
  • About & Mission
  • Contact us
  • Privacy Policy
  • Terms and Conditions

Copyright 2025 Manuals.Online. All Rights Reserved.