manuals.online logo
Brands
  1. Home
  2. •
  3. Brands
  4. •
  5. Ecom
  6. •
  7. Measuring Instrument
  8. •
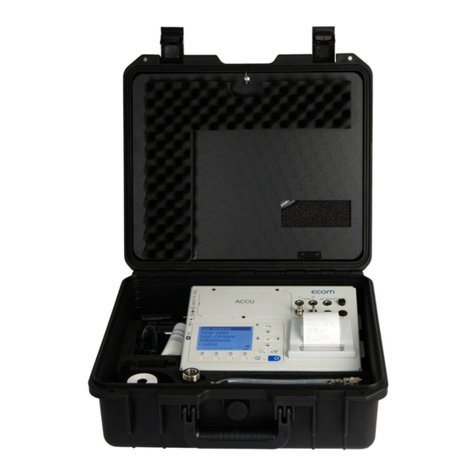
  9. Ecom EN2 User manual

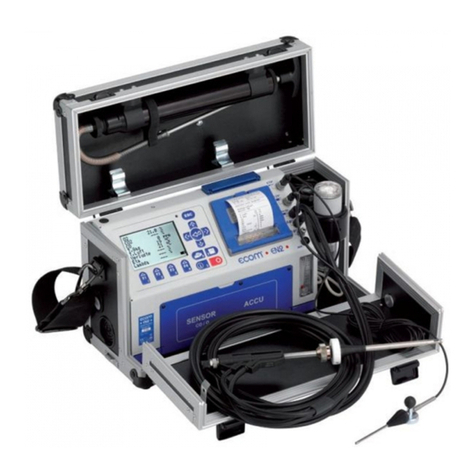
Ecom EN2 User manual

***READTHISFIRST***
QUICKSTARTGUIDE
INSPECT YOUR ANALYZER AT ONCE.
Contact ECOM America, Ltd. with any questions or concerns.
(877) 326-6411 or [email protected]
WWW.ECOMUSA.COM
***READTHISFIRST***
SETUP PROCEDURE
1. Connect sample line connections to the analyzer, electrical
connections must be made prior to start-up.
Either
2. Plug in power supply to ensure analyzer is
fully charged before each use.
3. Power-Up the Analyzer.
4. Select Gas Analysis by pressing
5. Now select your fuel type.
Analyzer may prompt “Datalogging?”Press
F4 to choose NO. The EN2 will now do a
self check for 1 minute and then you are
ready to test.
You are now ready to perform an emissions test using the ECOM EN2.
Insert the probe into the designated sampling port, allow the analyzer to draw a sample
for a minimum of 3 minutes so the readings will stabilize.
F1: Stand-by Mode
F2: Quick Print
F3: CO Bypass Pump on/off
F4: Allows user to customize
display values
EXIT to main screen
ENTER to select
POWER KEY
SCROLL Keys
Pressing the UP/
DOWN Keys will
zoom in on the
display
For best results, let the analyzer acclimate to the testing environment for 15 minutes, then
re-start the analyzer. This will allow the analyzer to set a more accurate temperature
compensation and zero reference set point.
Example: If you want to capture a reading
every 15 seconds, enter 15 as your value. After
you press enter, you will see the interval appear
beside SAVE to MMC. Now scroll up to DATA-
LOGGER and press
DATA LOGGING STEPS
4. Select DATA PROCESSING and press
3. Press once to return to the main menu
1. Insert MM card into slot located on the top-right of the
analyzer. MM Card must be between 32MB to 2GB
2. After initial start-up you will be in GASANALYSIS
mode, the display shows real time readings
5. Scroll down to select DATA LOGGER press
7. Input desired logging interval in seconds, press
6. Scroll down to select SAVE to MMC press
8. Analyzer will prompt “Start dl? Are you
sure?” press F1 to choose YES
Analyzer is now in DATALOGGING mode,
you will see a blinking disc in the upper right
corner indicating that you are logging data.
9. Now press twice to return to the main
menu, scroll up and select GASANALYSIS
10. When test complete, press
12. Select DATALOGGER press
11. Scroll down and select DATAPROCESSING press
to return to main menu
13. Analyzer will prompt “Finish dl? Are you sure?” Press F1 to chooseYES
and press
14. Press twice to return to main menu
You are done! Remove MM card and insert into your PC using a card reader,
your results will be saved as a .CSV file in MS Excel.
again
REPLACEMENT PARTS
O2 Sensor RBR75297
CO Sensor RBR75307
NO Sensor RBR75298
NO2 Sensor RBR75296
Water Trap Filter 75316
Printer Paper PRT79274
In-Line Filter RBR71185
 Keep your analyzer charged at all times. This will maintain the integrity of the NO (Nitric
Oxide) sensor and keep your battery properly charged.
 Analyzer operating range is –20°F to 115°F
 Calculated Values such as CO2, Lambda, Losses & Efficiencies will not display unless O2
readings are below 20.5% and the GAS temp is 5°F higher than the ambient temperature.
 Exposing your analyzer to gas concentrations that exceed the stated ranges of each sensor
may shorten the expected life of the sensor. After prolonged testing, please disconnect the
sample line and blow compressed air through it back toward the probe. This blows out
any soot and also dries the sample line. It is also good practice to dry the water trap bowl
and allow the analyzer to run in fresh air for up to 30 minutes in order to clear out resid-
ual gases and moisture. In some applications where ammonia may be present in the ex-
haust stream, it is necessary to perform the above functions, and also allow the analyzer to
run in fresh air for several hours to purge the ammonia.
THINGS TO KEEP IN MIND
 Ensure to check all of your filters before each use. Change filters when visibly dirty to
prevent premature damage to the sensors and maintain the pump rate.
 When you are done using the analyzer for the day, remove probe from source and allow
analyzer to purge fresh air for 5-10 minutes prior to shutting it down. Fresh air purge ex-
tends the life of the sensors.
 Avoid storing your analyzer for prolonged periods at high temperatures. The analyzer
should be stored at room temperature whenever possible.
CALIBRATION
 The sensors in your ECOM EN2 require periodic calibration.
The frequency of calibration is dependent on usage and testing
objectives & requirements.
ECOM Offers small portable calibration gas tanks for your
convenience, please contact ECOMAmerica for more details.
ECOMAmerica offers complete on-site
training for use, maintenance and calibration
of your analyzer. Contact your ECOM
representative today for more details on this
valuable service.
WWW.ECOMUSA.COM
Other manuals for EN2

2

Other Ecom Measuring Instrument manuals

Ecom LSG User manual

Ecom

Ecom LSG User manual

Ecom Ex-MP4 a User manual

Ecom

Ecom Ex-MP4 a User manual

Ecom CN User manual

Ecom

Ecom CN User manual

Ecom DP User manual

Ecom

Ecom DP User manual

Ecom EN2 User manual

Ecom

Ecom EN2 User manual

Ecom i.roc Ci70 -Ex Installation instructions

Ecom

Ecom i.roc Ci70 -Ex Installation instructions

Ecom EN2-F User manual

Ecom

Ecom EN2-F User manual

Ecom ecom-AK User manual

Ecom

Ecom ecom-AK User manual

Ecom J2KN User manual

Ecom

Ecom J2KN User manual

Ecom Quad Dock Ethernet User manual

Ecom

Ecom Quad Dock Ethernet User manual

Ecom J2KNpro Tech User manual

Ecom

Ecom J2KNpro Tech User manual

Ecom J2KNpro Tech User manual

Ecom

Ecom J2KNpro Tech User manual

Ecom B User manual

Ecom

Ecom B User manual

Ecom UNO User manual

Ecom

Ecom UNO User manual

Ecom ecom-DP User manual

Ecom

Ecom ecom-DP User manual

Ecom ECOM-D User manual

Ecom

Ecom ECOM-D User manual

Ecom Ex-Tacho 10 User manual

Ecom

Ecom Ex-Tacho 10 User manual

Ecom EN3 User manual

Ecom

Ecom EN3 User manual

Ecom UNO-CO User manual

Ecom

Ecom UNO-CO User manual

Ecom Ex-MX2 Installation instructions

Ecom

Ecom Ex-MX2 Installation instructions

Ecom ECOM-D User manual

Ecom

Ecom ECOM-D User manual

Ecom J2KNpro Tech User manual

Ecom

Ecom J2KNpro Tech User manual

Ecom EN2 User manual

Ecom

Ecom EN2 User manual

Ecom J2KNpro Tech User manual

Ecom

Ecom J2KNpro Tech User manual

Popular Measuring Instrument manuals by other brands

Simpson 897 Operator's manual

Simpson

Simpson 897 Operator's manual

Nibe EMK 500 Installer manual

Nibe

Nibe EMK 500 Installer manual

LARTET DC-24 user manual

LARTET

LARTET DC-24 user manual

Brüel & Kjær 4423 Instructions and applications

Brüel & Kjær

Brüel & Kjær 4423 Instructions and applications

AEMC instruments 5070 user manual

AEMC instruments

AEMC instruments 5070 user manual

Milwaukee MW802 user manual

Milwaukee

Milwaukee MW802 user manual

Zeiss MEL 80 manual

Zeiss

Zeiss MEL 80 manual

horiba HP-200 instruction manual

horiba

horiba HP-200 instruction manual

mru NOVAplus biogas user manual

mru

mru NOVAplus biogas user manual

Digatron DT-50S manual

Digatron

Digatron DT-50S manual

CONDTROL NEO G200 user manual

CONDTROL

CONDTROL NEO G200 user manual

TAG Heuer POCKET PRO user manual

TAG Heuer

TAG Heuer POCKET PRO user manual

Klein Tools CL900 instruction manual

Klein Tools

Klein Tools CL900 instruction manual

Elite Element DCM-120100C instruction manual

Elite Element

Elite Element DCM-120100C instruction manual

Simex SRT-94-XA user manual

Simex

Simex SRT-94-XA user manual

Consilium CFD5000 T / CM4.3 Service maintenance manual

Consilium

Consilium CFD5000 T / CM4.3 Service maintenance manual

Pyxis SP-900 Operation manual

Pyxis

Pyxis SP-900 Operation manual

WINTACT WT85 instruction manual

WINTACT

WINTACT WT85 instruction manual

manuals.online logo
manuals.online logoBrands
  • About & Mission
  • Contact us
  • Privacy Policy
  • Terms and Conditions

Copyright 2025 Manuals.Online. All Rights Reserved.