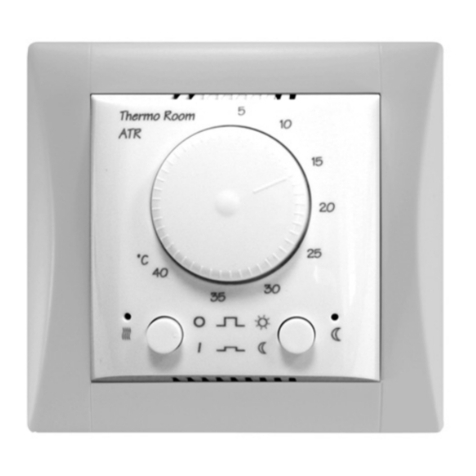
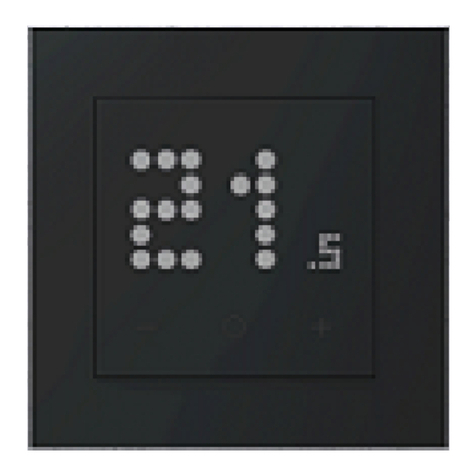
Elko iNels RFTC-10/G User manual

RFTC-10/G
Simple wireless temperature controller
EN
02-56/2015 Rev.3
Made in Czech Republic
Characteristics /
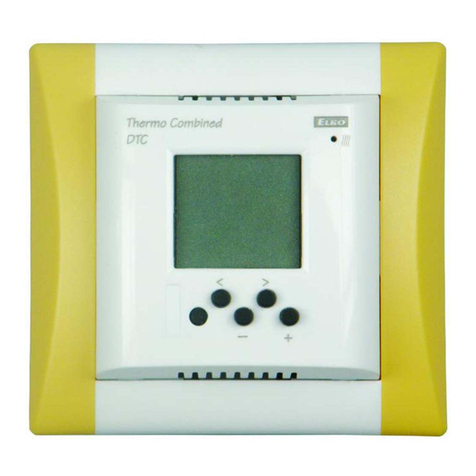
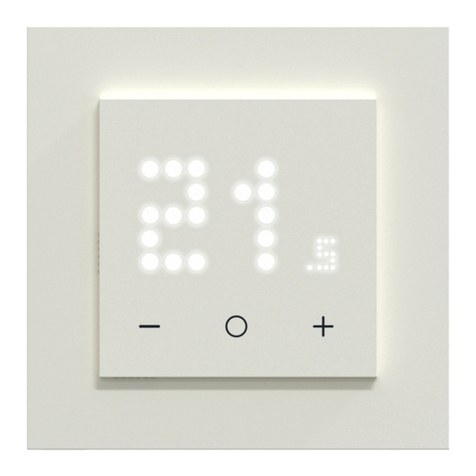
• The simple controller in design LOGUS90 measures the room temperature by internal sensor, and
based on the set temperature, it sends a command to control heating.
• The temperature controller can be used in one of two ways:
- For controlling an additional heat source (heater, oil radiator, radiant panel) with multi-
function switching units RFSA-6x, RFUS-61 or RFSC-61.
- For sufficient temperature correction (± 5 °C) over the course of the program set in the
system unit (change in temperature applies until the following set change of the heating
program in the system unit).
• These can be combined with system units: smart RF box eLAN-RF or touch unit RF Touch.
• Manual control by buttons on the unit.
• Range of measured temperature 0 - 55 °C.
• The backlit LCD display displays the current and set temperature, status (ON/OFF), battery status, etc.
• Battery power (1.5 V / 2x AAA - included in supply) with battery life of around 1 year based on
frequency of use.
• The flat rear side of the device enables its placement anywhere in the room where you wish to
measure temperature.
• Range up to 100 m (in open space), if the signal is insufficient between the controller and unit,
use the signal repeater RFRP-20 or protocol component RFIO2that support this feature.
• Communication frequency with bidirectional protocol iNELS RF Control.
• Color combination of heating unit in design of frames LOGUS90 (plastic, glass, wood, metal, stone).
1/7
12
Using a screwdriver, snap off
the moldings in the frame.
Gently pull to remove the
cover. 3By gently bending the lower
part, snap the device out - be
careful not to damage the
device.
Assembly /
Device and frame separately /
Device complete with frame /
45
Slide the batteries into the
battery holders. Observe the
polarity. After inserting the
batteries, the FW version will
appear for 1 s, then the current
measured temperature.
Snap on the cover. By pressing gently, snap the
device into the frame.
The broken out moldings
must be along the sides of the
device.
+
-
AAA
+
-
AAA
+
-
AAA
+
-
AAA
°C
25.0
By pressing gently, snap the
device with frame into the
lower part so that the holders
of the lower part go through
the broken out moldings in
the frame.
8Remove the protective foil
covering the display.
°C
25.0
6
°C
25.0
Click!
°C
25.0
7
Click!
1Carefully pull off the insulation
strip.
After removing the insulation
strip, the FW version will
appear for 1s, then the current
measured temperature.
2Remove the protective foil
covering the display.
°C
25.0
Controlador inalámbrico simple de temperatura
ES
ELKO EP, s.r.o. | Palackého 493 | 769 01 Holešov, Všetuly | Czech Republic | e-mail: [email protected] | Support: +420 778 427 366
ELKO EP ESPAÑA, S.L. | C/ Josep Martinez 15a, bj | 07007 Palma de Mallorca | e-mail: [email protected] | Tel.: +34 971 751 425 | Fax: +34 971 428 076
www.elkoep.com / www.elkoep.es
Característica
• Controlador simple en diseño LOGUS90, mide la temperatura de ambiente con su sensor interno y a
base de temperatura ajustada envía orden para control de la calefacción.
• El controlador de temperatura se puede utilizar de dos maneras:
- Para la regulación de las fuentes adicionales de calefacción (estufas, radiadores de aceite, panel
radiante) con unidades de conmutación multifunción RFSA-6x, RFUS-61 o RFSC-61.
- Corrección temporal de la temperatura (± 5 °C) durante el programa ajustado en la Unidad del
sistema (este cambio dura hasta el siguiente ajuste del programa de calefacción en la Unidad de
sistema).
• Se puede combinar con una de las tres Unidades del sistema: RF Caja inteligente eLAN-RF o Unidad táctil
RF Touch.
• Control manual mediante los botones en la unidad.
• Rango de temperatura medida 0.. 55 °C.
• Pantalla LCD retroiluminada, muestra la temperatura actual y establecida, el estado de conmutación
(ON / OFF) y estado de la batería...
• Alimentación de pilas (1.5V / 2 x AAA - incluido en embalaje) con vida útil de aprox. 1 año de acuerdo
a la frecuencia de uso.
• Parte posterior plana del dispositivo le permite conectarlo en cualquier lugar en el área donde se
desea medir la temperatura.
• Alcance de hasta 100 mts (al aire libre), en caso de señal insuficiente entre controlador y la unidad se
puede utilizar el repetidor RFRP-20 o unidades con protocolo RFIO2, las cuales tienen esta función.
• Frecuencia de comunicación con protocolo bidireccional iNELS RF Control.
• Combinaciones de colores de la Unidad de temperatura en el diseño de LOGUS90 (plástico, vidrio,
madera, metal, piedra).
Montaje
Dispositivo de forma separado y el marco
Con un destornillador estalle
las piezas prensadas en el
marco.
Tirando suavemente retire la
cubierta.
Con una dilatación leve de
la parte inferior libere el
dispositivo - tenga cuidado de
no dañar el dispositivo.
Al soporte de baterías del
dispositivo RFTC-10/G inserte
las pilas. Tenga cuidado con la
polaridad.
Cuando se inserten las
baterías se muestra a 1s la
versión de FW, despues la
temperatura medida actual.
Encaje la cubierta.
Sujete el dispositivo con
una ligera presión al marco.
Liberadas piezas prensadas
del marco deben estar en los
lados del dispositivo.
Sujete el dispositivo con una
ligera presión con el marco a
la parte inferior de modo que
los soportes han pasado por
las liberadas piezas prensadas
del marco.
Retire la película protectora
de la cubierta de pantalla.
Dispositivo completo con marco
Tire con cuidado la cinta
aislante.
Después de retirar la cinta
aislante a 1s aparecerá la
versión de FW, a continuación
la temperatura medida actual.
Tire la película protectora de
la cubierta de pantalla.

RFTC-10/G
Simple wireless temperature controller
EN
02-56/2015 Rev.3
Made in Czech Republic
Display /
1.
2.
3.
4.
5.
6.
7.
9.
1. Signal strength - (1 bar - weak signal, 3 bars - strong
signal) the symbol does not display if the controller
is not programmed or it is not possible to establish a
connection with the programmed switching unit or
system unit.
2. Circuit temperature measured.
3. Circuit temperature set.
4. Circuit status indicator.
5. Temperature / time indication.
6. Battery status indicator - only displays in case of low
battery power - indicates that the power is insufficient to
provide reliable communication with the programmed
switching unit or system unit.
7. Locked for adjustment.
8. Confirmation of temporary temperature adjustment.
9. Temperature measured in °C / °F.
control buttons v /
display /
control buttons ^ /
hidden buttons PROG /
v ^
• Hidden button PROG - pressing the hidden button
is performed by the programming tool (part of the
packaging) or a long thin object without a sharp point.
• Control is performed the control button v/^.
^
pressing control button > 2s
- unlocking for adjustment - longer than 2 seconds,
the symbol goes off and the displayed value
starts flashing
- after making adjustments pressing the button
^
the setting is confirmed - the set value stops
flashing and symbol is displayed
^
pressing control button < 2s
- moving upwards / setting higher value
^pressing control button > 2s
- return to the original value
^pressing control button < 2s
- moving downwards / setting lower value
2/7
Control /
8.
Radio frequency signal penetration through various construction materials /
programming tool /
☺
☺
☺
☺
RFRP-20
☺
60 - 90 % 80 - 95 % 20 - 60 % 0 - 10 % 80- 90 %
brick walls wooden structures
with plaster boards
reinforced
concrete metal partitions common glass
Avoid rapid temperature changes, direct sunlight and excessive moisture. The temperature units should not be
located near windows or heating equipment, etc., which could affect the internal temperature sensor.
°C
Controlador inalámbrico simple de temperatura
ES
ELKO EP, s.r.o. | Palackého 493 | 769 01 Holešov, Všetuly | Czech Republic | e-mail: [email protected] | Support: +420 778 427 366
ELKO EP ESPAÑA, S.L. | C/ Josep Martinez 15a, bj | 07007 Palma de Mallorca | e-mail: [email protected] | Tel.: +34 971 751 425 | Fax: +34 971 428 076
www.elkoep.com / www.elkoep.es
Transmisión de señales de radiofrecuencia en varios materiales de la construcción
pared de ladrillo estructuras de
madera con placas
de yeso
hormigón armado chapas
metálicas vidrio normal
Control
botón de control v
pantalla
botón oculto PROG
botón de control ^
herramienta de programación
• Botón oculto PROG - pulsación al botón oculto realice
con herramienta incluida de programación o un objeto
no conductor, largo y fino que no tiene una punta afi-
lada.
• El control se realiza con botones de control v/^.
^
pulsación del botón de control > 2s
- desbloqueado para el ajuste - símbolo desaparece
y el valor mostrado comienza a parpadear
- después de ajuste el pulso
^
confirma los ajustes,
valor de ajuste deja de parpadear y se iluminará el
símbolo
^
pulsación del botón de control < 2s
- movimiento con flecha abajo/ indicando un valor
inferior
^pulsación del botón de control > 2s
- volver a la configuración inicial
^pulsación del botón de control < 2s
- movimiento con flecha arriba / indicando un valor
superior
Visualización de pantalla
1. Intensidad de la señal (1 grado - señal débil, 3 grados -
señal de calidad) símbolo no aparece si el controlador no
está programado o no se puede comunicar con la unidad
programada o con RF Touch / eLAN-RF.
2. Temperatura medida de circuito.
3. Temperatura ajustada del circuito.
4. Indicación del estado de circuito.
5. Indicación de temperatura / hora - la hora se muestra sólo
en combinación con RF Touch.
6. Indicador de la batería - sólo aparece en caso de
batería baja - indica que la tensión no es suficiente para
comunicarse de forma fiable con la unidad programada o
RF Touch / eLAN-RF.
7. Cerrado para el ajuste.
8. Confirmación de corrección temporal de temperatura.
9. Valor de temperatura °C / °F.
No exponga la unidad a los cambios bruscos de temperatura, luz solar directa y la humedad excesiva. Los
controladores de temperatura colocan de manera que no están cerca de ventanas o dispositivos de la calefacción
etc., que puede afectar el sensor de temperatura interno.

RFTC-10/G
Simple wireless temperature controller
EN
02-56/2015 Rev.3
Made in Czech Republic
Programming and control of RF switching actuators /
°F
°C
^^
°C°C
^
^
Unlock RFTC-10/G for modification by pressing ^. Set DEV
- RFSA by pressing
^
. Confirm settings by pressing ^.
Programming /
>2s
1 x
Press the hidden button Prog
of the RFTC-10/G for 2s to get
to the Settings Menu.
1
°C
25.0
By pressing
^
, you will move
in Menu to TMP - display of
measured temperature value.
Unlock the modifications
menu by pressing ^. By
pressing
^
^
, select °C or °F.
Press ^to confirm settings.
By pressing
^
, you will move
in Menu to 000000 - address.
By pressing ^, unlock the
modifications menu. Set
the address of the required
switching unit by pressing
^
^
(address is a six-digit
code provided on each unit).
Confirm settings by pressing
^.
34
^
^
^ ^
By pressing
^
, you will move
in Menu to OFS - offset of
temperature sensor. By pressing
^, unlock the modifications
menu. By pressing
^
^
, set
the offset based on individual
requirement in the range of
-5...+5°C (-10...+10°F). Press ^to
confirm settings.
By pressing
^
, you will
move in Menu to HYS -
switching hysteresis. Unlock
the modifications menu by
pressing ^. By pressing
^
^
, set the hysteresis based
on individual requirement in
the range of 0.5...5°C (1...10°F).
Press ^to confirm settings.
°C
°C
^
°C°C
^
^
^
5
°C
°C
^
°C°C
^
^
^
6
3/7
By pressing
^
, you will move in
Menu to BLT - display brightness
(backlighting). Unlock the
modificationsmenu by pressing
^. By pressing
^
^
, set the
display brightness based on
individual requirement in the
range of 10% - 100%. Press ^
to confirm settings.
Press the hidden button Prog to exit the Settings Menu.
Note: Actuator returns from the setup menu to the basic display
automatically 30s after the last pressing of the button.
7
^
%
%
%
^
%
^
^
< 2s
1 x
8
°C
25.0
2
^^
^
^
Controlador inalámbrico simple de temperatura
ES
ELKO EP, s.r.o. | Palackého 493 | 769 01 Holešov, Všetuly | Czech Republic | e-mail: [email protected] | Support: +420 778 427 366
ELKO EP ESPAÑA, S.L. | C/ Josep Martinez 15a, bj | 07007 Palma de Mallorca | e-mail: [email protected] | Tel.: +34 971 751 425 | Fax: +34 971 428 076
www.elkoep.com / www.elkoep.es
Programación y control con unidad de conmutación
Programación
Pulsación > 2s al botón oculto
Prog el RFTC-10/G entra al
MENU de ajustes.
Pulsación ^desbloquea RFTC-10/G para editar. Pulsación
^
ajusta dispositivo DEV - RFSA. Pulsación ^confirma los
ajustes.
Pulsando
^
entra en Menu
a la 000000 - dirección.
Pulsación ^desbloquea
la edición. Mediante
^
^
Ajuste la dirección de la unidad
de conmutación deseada
(dirección es un código de
seis dígitos asignado a cada
unidad de RF). ^confirme
los ajustes.
Pulsando
^
entra al menú
TMP - se muestran las valores
de medición de temperatura.
Pulsación ^desbloquea
la edición. Mediante
^
^
elige °C o °F. ^confirme los
ajustes.
Pulsando
^
entra al
Menu de HYS - histéresis
de conmutación. Pulsando
^desbloquea la edición.
Mediante
^
^
ajuste
la histéresis según las
necesidades individuales en
el rango 0.5...5°C (1...10°F). ^
confirme los ajustes.
Pulsando
^
sigue en Menu
al OFS - offset del sensor
de temperatura. Pulsando
^desbloquea la edición.
Mediante
^
^
ajuste
offset según las necesidades
individuales en el rango
-5...+5°C (-10...+10°F). ^
confirme los ajustes.
Pulsando
^
sigue en Menu
al BLT - la intensidad de fondo
de la pantalla. Pulsando
^desbloquea la edición.
Mediante
^
^
ajuste la
intensidad del fondo según las
necesidades individuales en el
rango 10...100%. ^confirme
los ajustes.
Al pulsar el botón oculto Prog sale de Menú de ajustes.
Nota: 30s desde el último pulso al botón, unidad volverá al modo
de funcionamiento de forma automática.

RFTC-10/G
Simple wireless temperature controller
EN
02-56/2015 Rev.3
Made in Czech Republic
Switch to displaying the set
temperature by pressing
^
or
^
(if the display backlighting
is activated, the first press
illuminates the backlighting
and the second press switches
the display). The displayed
value flashes. Press
^
^
to
set the required temperature.
The display shows
continuously the current
measured temperature.
Control - temperature change /
5 seconds after the last
pressing of the button, the
display of the set temperature
switches back to the current
temperature - the value is
saved in the memory.
on / off - indicates the
switching actuator contact
switching status.
31 2
°C
20.0
OFF
°C
22.0 °C
20.0
On
Programming and controlling with RF Touch / eLAN-RF /
Programming with RF Touch /
Unlock RFTC-10/G for modification by pressing ^.
Set DEV - RFt by pressing
^
. Confirm settings by pressing ^.
On the control unit, enter the
address of RFTC-10/G (see
manual of control unit).
6
xxxxxx
address /
An address listed on the back of of the actuator is used for programming
and controlling the temperature actuator by RF Touch / eLAN-RF.
%
Press the hidden button Prog
the RFTC-10/G for 2 s to get to
the Settings Menu.
By pressing
^
, you will move
in Menu to xxxxxx - address.
The displayed address RFTC-
10/G is fixed and cannot be
changed (corresponds to
address provided on rear of
unit).
3
^
^
By more presses of
^
, you
will move in Menu to:
• TMP - displaying the
measured temperature
value.
• OFS - offset of temperature
sensor.
• BLT - backlight intensity of
display.
Can be set individually
according to steps 4, 6 and 7
see programming.
4
xxxx
xx °C
°C
< 2s
1 x
Press the hidden button Prog
to exit the Settings Menu.
Note: RFTC-10/G returns from
the setup menu to the basic
display automatically 30s
after the last pressing of the
button.
5
°C
25.0
>2s
1 x
1
°C
25.0
2
^^
^
^
Programming /
4/7
Controlador inalámbrico simple de temperatura
ES
ELKO EP, s.r.o. | Palackého 493 | 769 01 Holešov, Všetuly | Czech Republic | e-mail: [email protected] | Support: +420 778 427 366
ELKO EP ESPAÑA, S.L. | C/ Josep Martinez 15a, bj | 07007 Palma de Mallorca | e-mail: [email protected] | Tel.: +34 971 751 425 | Fax: +34 971 428 076
www.elkoep.com / www.elkoep.es
Control - cambio de temperatura
La pantalla muestra continu-
amente la temperatura actual.
Pulsando
^
o
^
se mostrará
la temperatura ajustada (si la
luz de fondo está activada,
primera pulsación del botón
enciende la luz del fondo y
la segunda pulsación cambia
la visualización). El valor
mostrado parpadea. Pulsando
^
^
ajusta la temperatura
deseada.
Después de 5 segundos
desde el último pulso se la
visualización de temperatura
ajustada cambia de nuevo
a la temperatura real - así
se guarda el ajuste de
temperatura.
on / off - estado del contacto
de la unidad de conmutación.
Programación y control con RF Touch / eLAN-RF
dirección
Para programación y control del sensor de temperatura mediante RF Touch /
eLAN-RF sirve dirección indicada en la parte trasera de la unidad.
Programación con RF Touch
Pulsación > 2s del botón
oculto Prog entra el RFTC-10/G
al Menu de ajustes.
Pulsando ^desbloquea el RFTC-10G para editar. Pulsando
^
ajusta el DEV - al RFt. Pulsando ^confirme los ajustes.
Pulsando
^
entra en Menu
al xxxxxx - dirección. Dirección
mostrada del RFTC-10/G es
fija y no puede ser cambiada
(corresponde a la dirección
que aparece en la parte
trasera de la unidad).
Proximas pulsaciones
^
entra en Menu al:
• TMP - muestra valor medido
de la temperatura.
• OFS - offset del sensor de
temperatura.
• BLT - intensidad de fondo de
la pantalla.
Puedeajustar individualmente
según los pasos 4, 6 y 7, vea
programación con unidad de
conmutación.
Al pulsar el botón oculto
Prog sale de Menú de ajustes.
Nota: 30s desde el último
pulso al botón, unidad
volverá al modo de
funcionamiento de forma
automática.
A la unidad del sistema se
introduce la dirección RFTC-
10/G (ver manual unidad del
sistema).
Programación

RFTC-10/G
Simple wireless temperature controller
EN
02-56/2015 Rev.3
Made in Czech Republic
Press the button
^
or
^
to
display the set temperature
(if the display backlighting
is activated, the first press of
the button illuminates the
backlighting and the second
press switches the display).
The displayed value flashes.
Press
^
^
to set the
required temperature.
The display continuously
shows the current measured
temperature and signal
strength.
Control - temporary temperature adjustment /
5 seconds after the last
pressing of the button, the
display of the set temperature
switches back to the current
temperature - the value is
saved in the memory.
After pressing
^
, a symbol is displayed for 1s on the display of
RFTC-10/G - this confirms the temporary temperature correction.
A change in the heating program set in the system unit
terminates temporary temperature correction.
4
°C
22.0
The time format (12h/24h) is
displayed based on settings in
the system element. The display
switches back to the current
value when
^
^
is pressed
or automatically after 10s.
The time display can be acti-
vated in the basic temperature
display by pressing ^.
Control - time display /
If the connection with the
RF Touch is not available, the
time is not displayed --:--.
31 2
°C
22.0 02:56 --:--
1
°C
22.0
2
°C
20.0
3
°C
22.0
Programming with eLAN-RF /
Unlock RFTC-10/G for modification by pressing ^. Set DEV
- elan by pressing
^
. Confirm settings by pressing ^.
Press the hidden button Prog
the RFTC-10/G for 2 s to get to
the Settings Menu.
>2s
1 x
1
°C
25.0
2
^^
^
^
Programming /
5/7
Controlador inalámbrico simple de temperatura
ES
ELKO EP, s.r.o. | Palackého 493 | 769 01 Holešov, Všetuly | Czech Republic | e-mail: [email protected] | Support: +420 778 427 366
ELKO EP ESPAÑA, S.L. | C/ Josep Martinez 15a, bj | 07007 Palma de Mallorca | e-mail: [email protected] | Tel.: +34 971 751 425 | Fax: +34 971 428 076
www.elkoep.com / www.elkoep.es
Control - corrección temporal de temperatura
En la pantalla se muestra con-
tinuamente la temperatura
actual y la calidad de señal.
Pulsando
^
o
^
se mostrará
la temperatura ajustada (si la
luz de fondo está activada,
primera pulsación del botón
enciende la luz de fondo y la
segunda pulsación cambia la
pantalla). El valor mostrado
parpadea. Pulsando
^
^
ajusta la temperatura
deseada.
Después de 5 segundos
desde el último pulso se la
visualización de temperatura
ajustada cambia de nuevo
a la temperatura real - así
se guarda el ajuste de
temperatura.
Después de pulso
^
se mostrará en la pantalla de RFTC-10/G a
1s el símbolo - así, es la corrección temporal de temperatura
confirmada.
La corrección temporal de temperatura se acaba con cambio del
programa de calefacción ajustado en el RF Touch.
Control - visualización del tiempo
Visualización del tiempo en
la visualización básica de la
temperatura actual se activa
pulsando ^.El formato de hora (12h/24h)
se muestra según el ajuste
en RF Touch. Después de
pulsar
^
^
o después de
10s la visualización del tiempo
vuelve a la visualización de la
temperatura actual.
Si no hay la conexión con el
RF Touch, se muestra sólo el
formato --:--.
Programación
Programación con eLAN-RF
Pulsación > 2s del botón
oculto Prog entra el RFTC-10/G
al Menu de ajustes.
Pulsando ^desbloquea el RFTC-10G para editar. Pulsando
^
ajusta el DEV - al elan. Pulsando ^confirme los ajustes.

RFTC-10/G
Simple wireless temperature controller
EN
02-56/2015 Rev.3
Made in Czech Republic
6/7
Replacement of a battery /
Using a screwdriver, remove
the lower part.
Using a screwdriver, carefully
pry off the molding and snap
out the device from the frame.
3Using a screwdriver, gently
slide the device out from
the cover - be careful not to
damage the device.
45
Remove the original dead
batteries. Slide new batteries
into the battery holder.
Observe the polarity.
After inserting the batteries,
the FW version will appear for
1s, then the current measured
temperature.
Snap on the cover. By pressing gently, snap the
device into the frame.
The broken out moldings
must be along the sides of the
device.
+
-
AAA
+
-
AAA
+
-
AAA
+
-
AAA
°C
25.0
°C
25.0
12
6
°C
25.0
Click!
On the control unit, enter
the address of RFTC-10/G (by
means of the application iHC
- see manual of control unit).
6
%
By pressing
^
, you will move
in Menu to xxxxxx - address.
The displayed address RFTC-
10/G is fixed and cannot be
changed (corresponds to
address provided on rear of
unit).
3
^
^
By more presses of
^
, you
will move in Menu to:
• BLT - backlight intensity of
display.
Can be set individually
according to step 7 see
programming.
4
xxxx
xx
< 2s
1 x
Press the hidden button Prog
to exit the Settings Menu.
Note: RFTC-10/G returns from
the setup menu to the basic
display automatically 30s
after the last pressing of the
button.
5
°C
25.0
Press the button
^
or
^
to
display the set temperature
(if the display backlighting
is activated, the first press of
the button illuminates the
backlighting and the second
press switches the display).
The displayed value flashes.
Press
^
^
to set the
required temperature.
The display continuously
shows the current measured
temperature and signal
strength.
Control - temporary temperature adjustment /
5 seconds after the last
pressing of the button, the
display of the set temperature
switches back to the current
temperature - the value is
saved in the memory.
1
°C
22.0
3
°C
22.0
2
°C
20.0
6
Controlador inalámbrico simple de temperatura
ES
ELKO EP, s.r.o. | Palackého 493 | 769 01 Holešov, Všetuly | Czech Republic | e-mail: [email protected] | Support: +420 778 427 366
ELKO EP ESPAÑA, S.L. | C/ Josep Martinez 15a, bj | 07007 Palma de Mallorca | e-mail: [email protected] | Tel.: +34 971 751 425 | Fax: +34 971 428 076
www.elkoep.com / www.elkoep.es
Cambio de las baterías
Mediante un destornillador
retire la parte inferior. Mediante un destornillador
cuidadosamente retire el
moldeado y desenganche el
dispositivo de la caja.
Mediante un destornillador,
deslice suavemente la unidad
de la tapa - tenga cuidado de
no dañar el dispositivo.
Extraiga las baterías iniciales
y descargadas. Al soporte de
las baterías, inserte las baterías
nuevas. Tenga cuidado con
la polaridad. Después de
insertar las baterías se muestra
a 1s la versión FW, después la
temperatura medida actual.
Coloque la tapa.
Sujete el el dispositivo
con una ligera presión al
marco. Molduras del marco
deben estar en los lados del
dispositivo.
Pulsando
^
entra en Menu
al xxxxxx - dirección. Dirección
mostrada del RFTC-10/G es
fija y no puede ser cambiada
(corresponde a la dirección
que aparece en la parte
trasera de la unidad).
Proximas pulsaciones
^
entra en Menu al:
• BLT - intensidad de fondo de
la pantalla.
Puede ajustar individualmente
según los pasos 7, vea
programación con unidad de
conmutación.
Al pulsar el botón oculto
Prog sale de Menú de ajustes.
Nota: 30s desde el último
pulso al botón, unidad
volverá al modo de
funcionamiento de forma
automática.
A la unidad del sistema se
introduce la dirección RFTC-
10/G (mediante aplicación iHC -
ver manual unidad del sistema).
Control - corrección temporal de temperatura
En la pantalla se muestra con-
tinuamente la temperatura
actual y la calidad de señal.
Pulsando
^
o
^
se mostrará
la temperatura ajustada (si la
luz de fondo está activada,
primera pulsación del botón
enciende la luz de fondo y la
segunda pulsación cambia la
pantalla). El valor mostrado
parpadea. Pulsando
^
^
ajusta la temperatura
deseada.
Después de 5 segundos
desde el último pulso se la
visualización de temperatura
ajustada cambia de nuevo
a la temperatura real - así
se guarda el ajuste de
temperatura.

RFTC-10/G
Simple wireless temperature controller
EN
02-56/2015 Rev.3
Made in Czech Republic
By pressing gently, seat the
device into the lower part so
that the holders of the lower
part go through the broken
out moldings in the frame.
Technical parameters /
Instruction manual is designated for mounting and also for user of the device. It is always a part of its packing.
Installation and connection can be carried out only by a person with adequate professional qualification upon
understanding this instruction manual and functions of the device, and while observing all valid regulations.
Trouble-free function of the device also depends on transportation, storing and handling. In case you notice any
sign of damage, deformation, malfunction or missing part, do not install this device and return it to its seller. It
is necessary to treat this product and its parts as electronic waste after its lifetime is terminated. Before starting
installation, make sure that all wires, connected parts or terminals are de-energized. While mounting and servicing
observe safety regulations, norms, directives and professional, and export regulations for working with electrical
devices. Do not touch parts of the device that are energized – life threat. Due to transmissivity of RF signal, observe
correct location of RF components in a building where the installation is taking place. RF Control is designated only
for mounting in interiors. Devices are not designated for installation into exteriors and humid spaces. The must not
be installed into metal switchboards and into plastic switchboards with metal door – transmissivity of RF signal is
then impossible. RF Control is not recommended for pulleys etc. – radiofrequency signal can be shielded by an
obstruction, interfered, battery of the transceiver can get flat etc. and thus disable remote control.
Warning
Safe handling /
7/7
°C
25.0
7
Click!
When handling a device unboxed it is important to avoid contact with liquids. Never
place the device on the conductive pads or objects, avoid unnecessary contact with the
components of the device.
Supply voltage:
Battery life:
Temperature oset:
Oset:
Display:
Backlight:
Transmission / function indicator:
Temperature measurement input:
Temp. meas. range and accuracy:
Control
Transmission frequency:
Signal transmission method:
Minimum control distance:
Range in open area:
Other data
Operating temperature:
Operating position:
Mounting:
Protection:
Electromagnetic radiation degree:
Dimensions: frame - plastic
Frame - metal, glass, wood, grate
Weight:
Related standards:
Attention:
When you instal iNELS RF Control system, you have to keep minimal distance 1 cm between each units.
Between the individual commands must be an interval of at least 1s.
Controlador inalámbrico simple de temperatura
ES
ELKO EP, s.r.o. | Palackého 493 | 769 01 Holešov, Všetuly | Czech Republic | e-mail: [email protected] | Support: +420 778 427 366
ELKO EP ESPAÑA, S.L. | C/ Josep Martinez 15a, bj | 07007 Palma de Mallorca | e-mail: [email protected] | Tel.: +34 971 751 425 | Fax: +34 971 428 076
www.elkoep.com / www.elkoep.es
Coloque el dispositivo con
una ligera presión con el
marco a la parte inferior de
modo que los soportes de la
pieza inferior han pasado las
molduras del marco.
Manipulación segura con el dispositivo
Al manipular el dispositivo sin su embalaje / caja es importante evitar el contacto con
líquidos. Nunca ponga el aparato sobre almohadillas y objetos conductores, no toque los
componentes en el dispositivo de forma innecesaria.
Especificaciones técnicas
2 x 1.5V battery / pila AAA
1 year / año
2 buttons / botones / ^
± 5 °C
LCD, characters / LCD, carácteres
YES, active-blue / Sí, activo- azul
symbols / símbolos
1x internal sensor / sensor interno
0..+55°C; 0.3°C of the range / del rango
866 MHz, 868 MHz, 916 MHz
bidirectionally addressed message / mensaje dirigida bidireccionalmente
20 mm
up to / hasta 100 m
0..+55 °C
wall-mounted / vertical a la pared
gluing/screwing / pegado/atornillado
IP30
2
85 x 85 x 20 mm
94 x 94 x 20 mm
66 g (without batteries / sin baterías)
EN 60669, EN 300 220, EN 301 489 Directives / directiva RTTE,
NVč.426/2000Sb (Directive / directiva 1999/ES)
Tensión de alimentación:
Vida de la baterías:
Corrección de la temperatura:
O set:
Pantalla:
Retroiluminación:
Indicación de la comunicación:
Medición de la temperatura:
Rango y precisión de medición:
Control
Frecuencia:
Modo de transmisión de señal:
Distancia minima de control:
Alcance al aire libre:
Más información
Temperatura de funcionamiento:
Posición de funcionamiento:
Montaje:
Protección:
Grado de contaminación:
Dimensiones: Marco - plastico
Marcos - metal, vidrio, madera, granito
Peso:
Normas conexas:
Advertencia
El manual de uso está dirigido para la instalación y el usuario del dispositivo. Manual siempre está incluido en
embalaje. La instalación y conexión puede realizar sólo personal con adecuadas cualificaciones profesionales, de
conformidad con todas las regulaciones aplicadas, y que está perfectamente familiarizado con estas instrucciones
y funciones del dispositivo. Función del dispositivo también depende del transporte, almacenamiento y la
manipulación. Si se observa cualquier signo de daño, deformación, mal funcionamiento o pieza que falta, no instale
este producto y devolvelo al vendedor. Con el producto y sus componentes debe ser tratado después de su vida
útil como con residuos electrónicos. Antes de iniciar la instalación, asegúrese de que todos los cables, partes o
terminales conectados están sin la conexión a la red. En el montaje y el mantenimiento se deben observar las
normas de seguridad, normas, directivas y reglamentos para trabajar con equipos eléctricos. No toque las partes
del dispositivo que están conectadas en la red - puede producir peligro de vida. Debido a la transmisibilidad de la
señal RF, observe la correcta ubicación de los componentes RF en un edificio donde la instalación se lleva a cabo. RF
Control está diseñado para montaje en interiores, las unidades no están diseñados para la instalación en exteriores
y espacios húmedos, no se pueden instalar en cuadros eléctricos de metal y en cuadros eléctricos plásticos con
puerta de metal - lo que empeora transmisividad de la señal RF. RF Control no se recomienda para el control de
dispositivos que ofrecen funciones vitales o para controlar dispositivos tales como bombas, el. calentadores sin
termostato, ascensores, montacargas, etc. - Señal de radiofrecuencia puede estar bloqueado por una obstrucción,
interferida, la batería del controlador puede estar ya sin energía, etc. y por lo tanto el control remoto puede ser
incapacitado.
Advertencia:
En la instalación de iNELS RF Control debe haber una distancia mínima entre las diferentes unidades
de un centímetro.
Entre los diferentes ordenes debe pasar al menos 1s.
Table of contents
Other Elko Thermostat manuals
Popular Thermostat manuals by other brands

Elster
Elster ROOMSTER II RTx user manual

Honeywell
Honeywell VisionPRO IAQ installation guide

Honeywell Home
Honeywell Home T6 Pro Z-Wave TH6320ZW2003 Operation instructions
Sundirect
Sundirect Smart2.0 operating instructions

Salus
Salus RT510 installation manual
ensto
ensto ECO10BTW-J Installation and operating instructions
