manuals.online logo
Brands
  1. Home
  2. •
  3. Brands
  4. •
  5. Enabling Devices
  6. •
  7. Toy
  8. •
  9. Enabling Devices Visual Speech Trainer User manual

Enabling Devices Visual Speech Trainer User manual

This manual suits for next models

1

Other Enabling Devices Toy manuals

Enabling Devices Bubble Hurricane 2239 User manual

Enabling Devices

Enabling Devices Bubble Hurricane 2239 User manual

Enabling Devices 7570 User manual

Enabling Devices

Enabling Devices 7570 User manual

Enabling Devices Press & Glow Spinner User manual

Enabling Devices

Enabling Devices Press & Glow Spinner User manual

Enabling Devices Krazy Kats Ginger User manual

Enabling Devices

Enabling Devices Krazy Kats Ginger User manual

Enabling Devices Busy Box Traffic Light 1810 User manual

Enabling Devices

Enabling Devices Busy Box Traffic Light 1810 User manual

Enabling Devices Boppin' Beaver User manual

Enabling Devices

Enabling Devices Boppin' Beaver User manual

Enabling Devices 646 Mini User manual

Enabling Devices

Enabling Devices 646 Mini User manual

Enabling Devices Rock & Roll Rider User manual

Enabling Devices

Enabling Devices Rock & Roll Rider User manual

Enabling Devices St. Bernard Puppy User manual

Enabling Devices

Enabling Devices St. Bernard Puppy User manual

Enabling Devices Funtastic User manual

Enabling Devices

Enabling Devices Funtastic User manual

Enabling Devices Mini Carillon User manual

Enabling Devices

Enabling Devices Mini Carillon User manual

Enabling Devices Baa Baa Baby Lamb User manual

Enabling Devices

Enabling Devices Baa Baa Baby Lamb User manual

Enabling Devices 4542 User manual

Enabling Devices

Enabling Devices 4542 User manual

Enabling Devices 1464 User manual

Enabling Devices

Enabling Devices 1464 User manual

Enabling Devices 3951 User manual

Enabling Devices

Enabling Devices 3951 User manual

Enabling Devices Cheap Talk 8 Six Level User manual

Enabling Devices

Enabling Devices Cheap Talk 8 Six Level User manual

Enabling Devices Under The Sea User manual

Enabling Devices

Enabling Devices Under The Sea User manual

Enabling Devices 1593 User manual

Enabling Devices

Enabling Devices 1593 User manual

Enabling Devices Seven Message Take N’ Talk Go! Board Series User manual

Enabling Devices

Enabling Devices Seven Message Take N’ Talk Go! Board Series User manual

Enabling Devices Twiddles Pup with Vibration User manual

Enabling Devices

Enabling Devices Twiddles Pup with Vibration User manual

Enabling Devices 720 User manual

Enabling Devices

Enabling Devices 720 User manual

Enabling Devices Holiday Music Box User manual

Enabling Devices

Enabling Devices Holiday Music Box User manual

Enabling Devices Mickey Bubble Blower 2332 User manual

Enabling Devices

Enabling Devices Mickey Bubble Blower 2332 User manual

Enabling Devices B Woofer Guitar User manual

Enabling Devices

Enabling Devices B Woofer Guitar User manual

Popular Toy manuals by other brands

FUTABA GY470 instruction manual

FUTABA

FUTABA GY470 instruction manual

LEGO 41116 manual

LEGO

LEGO 41116 manual

Fisher-Price ColorMe Flowerz Bouquet Maker P9692 instruction sheet

Fisher-Price

Fisher-Price ColorMe Flowerz Bouquet Maker P9692 instruction sheet

Little Tikes LITTLE HANDIWORKER 0920 Assembly instructions

Little Tikes

Little Tikes LITTLE HANDIWORKER 0920 Assembly instructions

Eduard EF-2000 Two-seater exterior Assembly instructions

Eduard

Eduard EF-2000 Two-seater exterior Assembly instructions

USA Trains EXTENDED VISION CABOOSE instructions

USA Trains

USA Trains EXTENDED VISION CABOOSE instructions

Modellbau Laffont Z1601 Assembly instructions

Modellbau Laffont

Modellbau Laffont Z1601 Assembly instructions

NOCH 12905 instruction manual

NOCH

NOCH 12905 instruction manual

Eduard Ki-61-Id quick start guide

Eduard

Eduard Ki-61-Id quick start guide

Viessmann Vollmer 45616 Mounting instruction

Viessmann

Viessmann Vollmer 45616 Mounting instruction

Vollmer 42004 Mounting instruction

Vollmer

Vollmer 42004 Mounting instruction

Phoenix Model CLASSIC-EP instruction manual

Phoenix Model

Phoenix Model CLASSIC-EP instruction manual

H-KING Sopwith Camel British WW1 Fighter instruction manual

H-KING

H-KING Sopwith Camel British WW1 Fighter instruction manual

MODSTER Predator 4x4 Crawler user manual

MODSTER

MODSTER Predator 4x4 Crawler user manual

DHK Hobby 8136 User instruction manual

DHK Hobby

DHK Hobby 8136 User instruction manual

THUNDER TIGER Raptor 50 V2 kit manual

THUNDER TIGER

THUNDER TIGER Raptor 50 V2 kit manual

Timberkits Skateboarder instructions

Timberkits

Timberkits Skateboarder instructions

Hangar 9 Funtana 125 Assembly manual

Hangar 9

Hangar 9 Funtana 125 Assembly manual

manuals.online logo
manuals.online logoBrands
  • About & Mission
  • Contact us
  • Privacy Policy
  • Terms and Conditions

Copyright 2025 Manuals.Online. All Rights Reserved.

For Technical Support:
For Technical Support:For Technical Support:
For Technical Support:
Call our Technical Service Department,
Monday through Friday, 9am to 5pm (EST)
1-800-832-8697
customer_support@enablingdevices com
Visual Speech Trainer #9153
USER’S GUIDE
50 Broadway
Hawthorne, NY 10532
Tel 914 747 3070 / Fax 914 747 3480
Toll Free 800 832 8697
www enablingdevices com
Great visual learning tool!
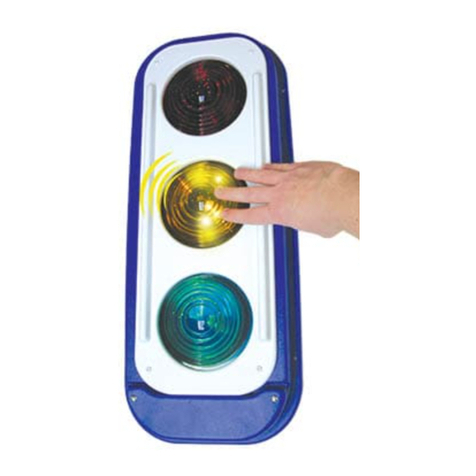
This talking device allows the user to visualize the formation of his/her words It
stores up to 20 seconds of speech and allows you to record four 5 second messages
Simply touch the plate switch to activate your pre-recorded message and begin
training This device is a great tool for speech/language pathologists! This device can
also be externally activated by plugging your switch into a jack on the side Size: 14"H
x 10"W x 5½"D Requires 4 AA Batteries Weight: 2½ lbs
Operation:
Operation:Operation:
Operation:
1 The Visual Speech Trainer requires 4 AA Alkaline batteries to operate Use
alkaline batteries only (e g Duracell or Energizer brand) Do not use rechargeable
batteries or any other type of batteries because they supply lower voltage and the
unit will not perform properly Never mix old and new batteries together or
different brands or types together
2 The battery compartment is located on the bottom of the unit Carefully remove
the small screw from the battery compartment and slide the battery compartment
cover off Observing polarity, install four AA size batteries into the holder Replace
the battery compartment cover and replace the screw
3 It is best to have the back of the unit facing you during programming, as this is
where all of the features and the microphone are located
4 Turn the unit on by turning the ON/OFF/VOLUME knob (black knob located on the
right side) clockwise You will hear an audible click when the unit turns on
5 Next, turn the message knob (black knob with the “1 - 2 - 3 - 4” label next to it) so
that the white indicator portion is pointing towards the “1” This indicated that you
will be recording the 1st of four messages
6 To record, simply press and hold the red “RECORD” button on the back of the
unit, while simultaneously holding down the message switch plate (yellow switch
plate) While continuing to hold the button and plate down, speak your message
(the microphone is the small black “fuzzy” circle) Make sure that it is 5 seconds
or less Release both the button and the plate when you finish recording
7 To play back your message, press the yellow message switch plate It is not
necessary to continue holding the plate down when listening to the message The
unit will continue to playback the entire message, even if pressure on the plate is
released
Important Notes:
Important Notes:Important Notes:
Important Notes:
• The memory of this unit is capable of holding up to a total of 20 seconds of
speech information Each message should be 5 seconds or shorter
• The mirror is made out of high impact plastic It is held onto the unit via two
thumb screws on the back of the unit See photos on back for removable and
installation Please Note: Do not over-tighten the thumb screws or damage will
occur
8 Now turn the black message knob so that the white indicator points towards the
“2 ” Record your second message the same way Do the same for message #3
and message #4
9 You do not need to record all four messages if it is not appropriate for your
needs Make sure that all messages you do record are 5 seconds in length or
shorter
10 The unit will retain recorded information indefinitely, even if the batteries are
disconnected Previously stored information will be erased only when a new
recording is performed
11 Volume can be adjusted using the “ON/OFF/VOLUME” knob
You can also access the recorded messages with your own external capability
switch Simply plug your switch into the 1/8” female jack located on the side of
the unit Make sure to have a tight connection
Troubleshooting:
Troubleshooting:Troubleshooting:
Troubleshooting:
Problem:
Problem:Problem:
Problem: The unit fails to operate, or operates incorrectly
Action #1:
Action #1: Action #1:
Action #1: Make sure that the four AA batteries are fresh and installed according to
proper battery polarity
Action #2:
Action #2: Action #2:
Action #2: Make sure that the unit is turned ON and it turned up to an audible
volume
Action #3:
Action #3:Action #3:
Action #3: Make sure there is no dirt or obstacles between the yellow switch plate
and the housing of the unit
Action #4:
Action #4: Action #4:
Action #4: Make sure that you are holding both the red RECORD button and the
switch plate down while recording
Action #5:
Action #5: Action #5:
Action #5: Make sure that each message is 5 seconds in length or less
Action #6:
Action #6:Action #6:
Action #6: Disconnect the power by removing one of the batteries for 20 seconds in
order to reset the unit Re-install the batteries If the unit does not work correctly,
replace all the batteries paying careful attention to proper polarity
Care of the Unit:
Care of the Unit:Care of the Unit:
Care of the Unit:
The Visual Speech Trainer can be wiped clean with any household multi-purpose, non-
abrasive cleaner and disinfectant
Do not use
Do not useDo not use
Do not use abrasive cleaners, as they will scratch the surface of the unit
Do not submerge
Do not submergeDo not submerge
Do not submerge the unit, as it will damage the electrical components
Rev
RevRev
Rev
6
66
6/5
/5/5
/5/17
/17/17
/17