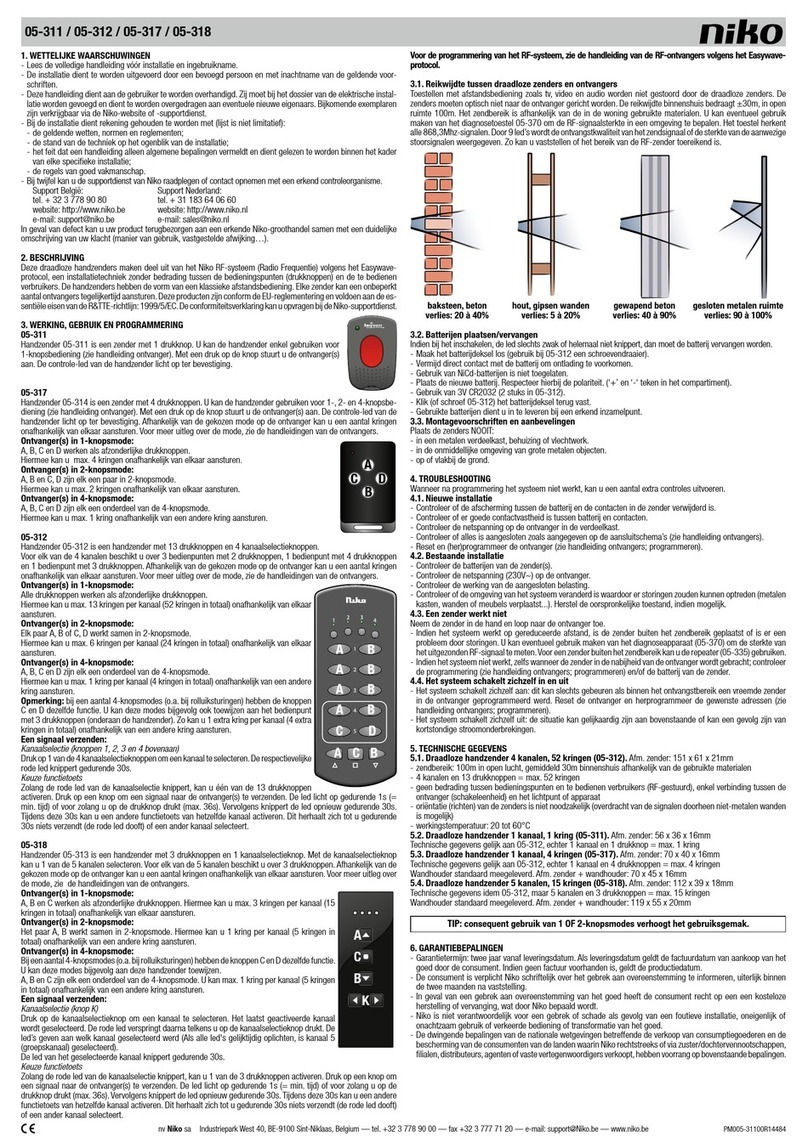
Podľa popisu v návode príslušného prijímača je mož-
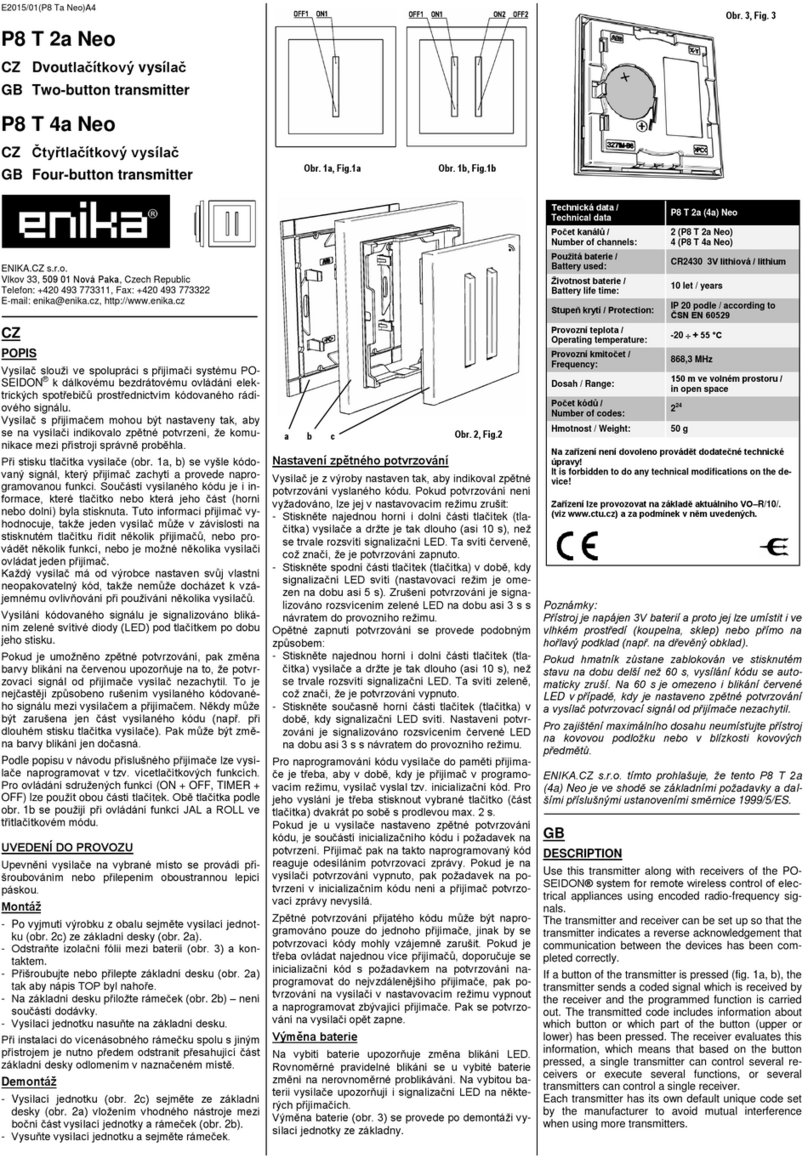
né vysielače naprogramovať v tzv. viactlačítkových
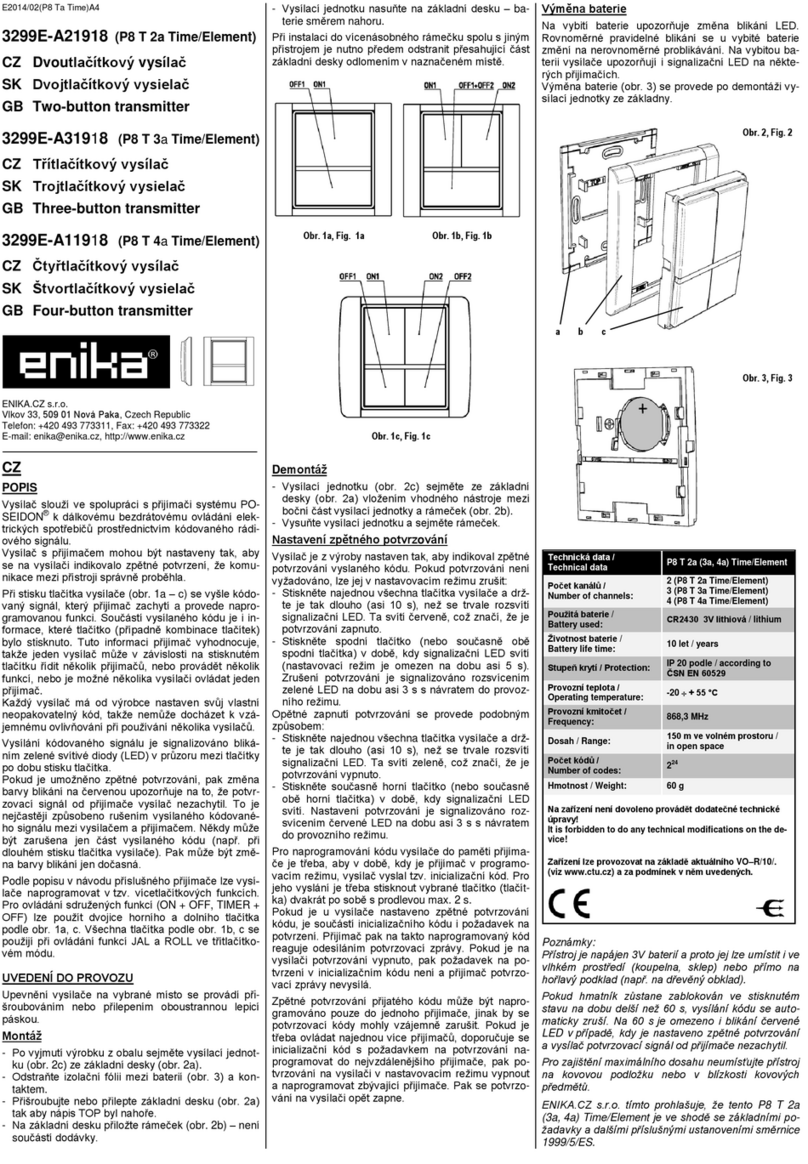
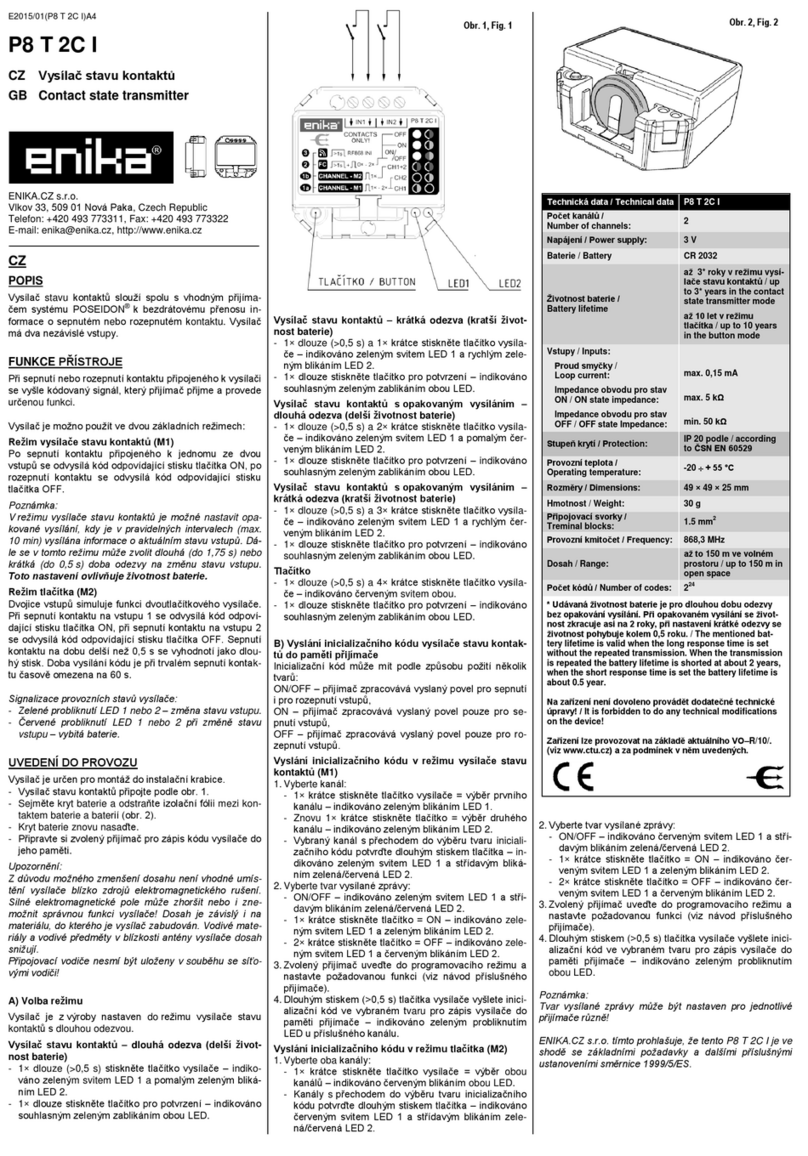
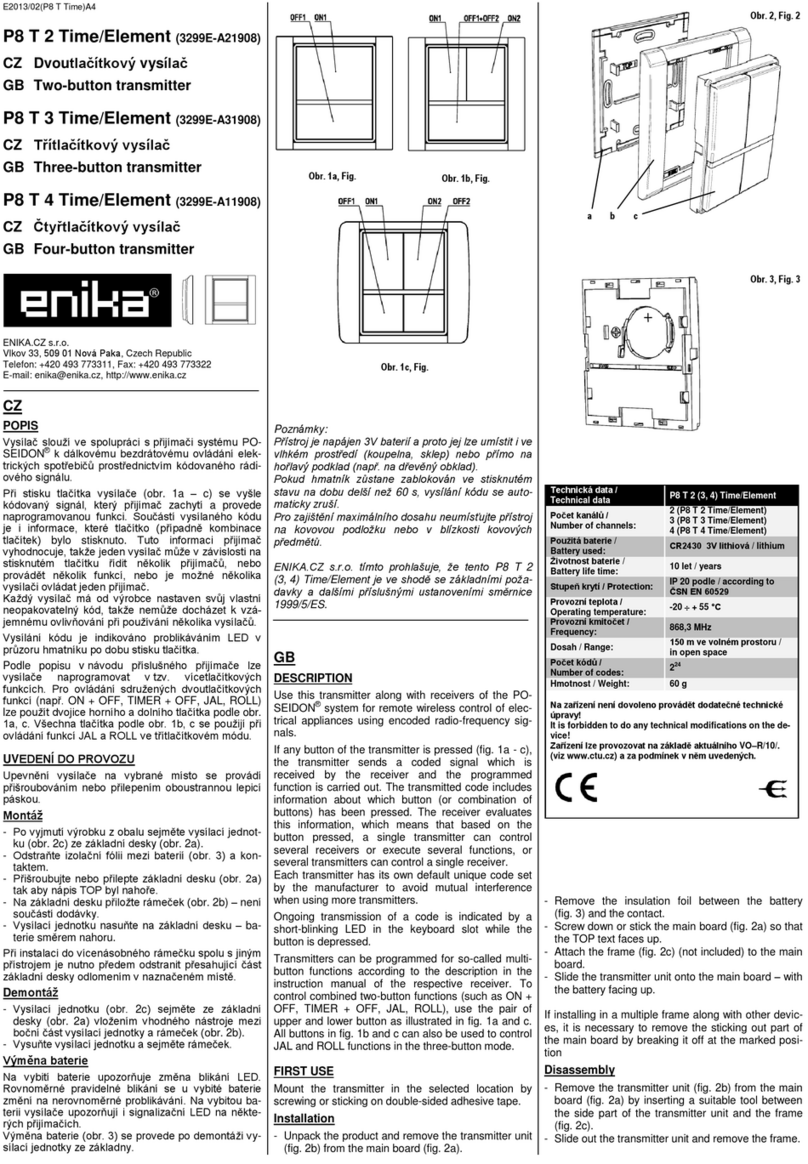
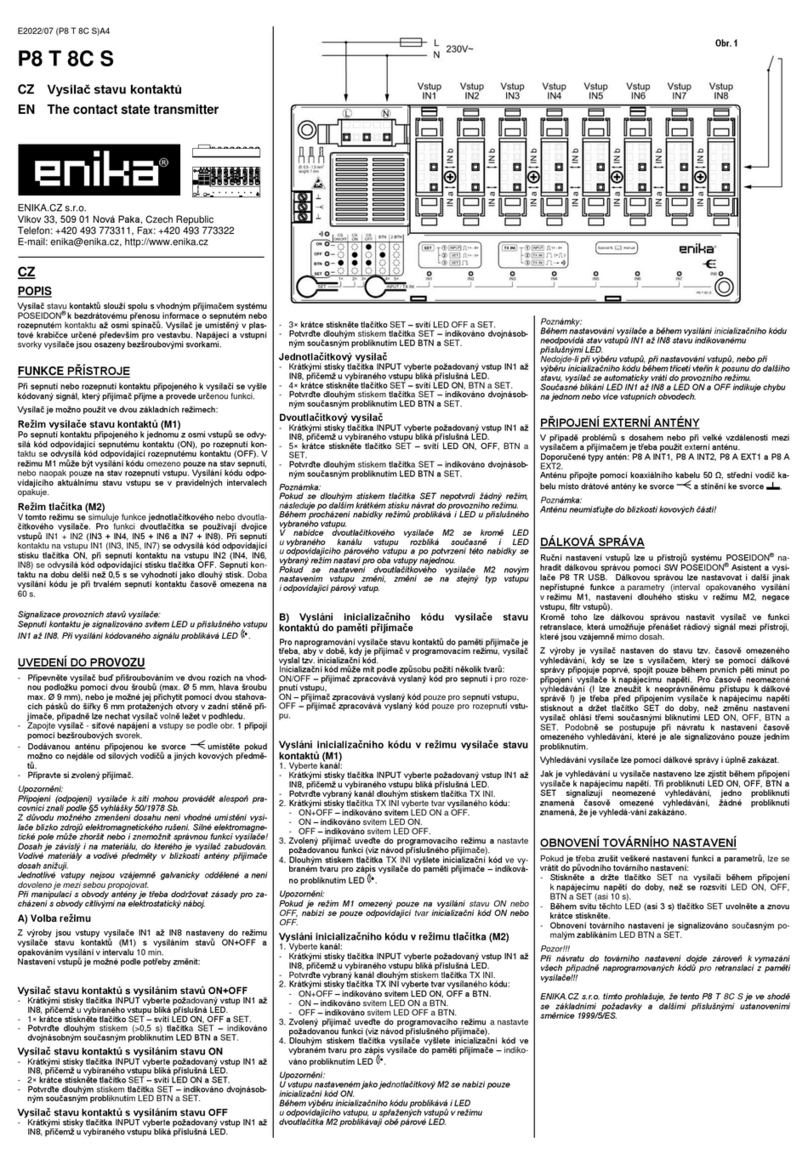
funkciách. Pre ovládanie združených funkcií (ON +
OFF, TIMER + OFF) je možné použiť pravúalebo ľa-
vúpolovicu hmatníka (obr. 1). Tieto polovice hmatní-
ka je možné použiť aj pri ovládaní funkcií JAL a ROLL
v dvojtlačítkovom móde. Celý hmatník sa použije pri
ovládaní funkcií JAL a ROLL v trojtlačítkovom móde.
UVEDENIE DO PREVÁDZKY
Vysielač sa na zvolené miesto upevňuje priskrutko-
vaním alebo prilepením obojstrannou lepiacou pás-
kou.
Montáţ
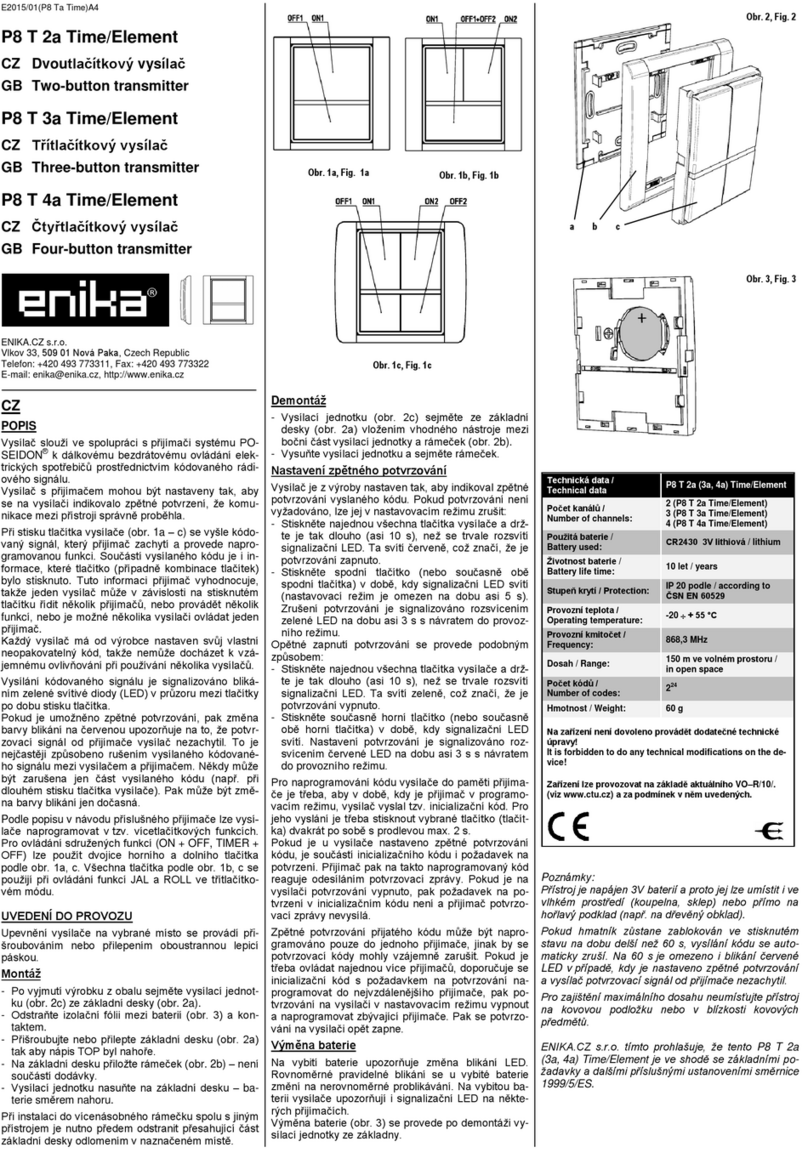
- Po rozbalení výrobku z obalu oddeľte vysielaciu
jednotku (obr. 2c) zo základnej dosky (obr. 2a).
- Odstráňte izolačnú fóliu medzi batériou (obr. 3) a
kontaktom.
- Priskrutkujte alebo prilepte základnú dosku (obr.
2a) tak, aby nápis TOP bol hore.
- Na základnú dosku priložte rámček (obr. 2b) –nie
je súčasťou dodávky.
- Vysielaciu jednotku nasuňte na základnú dosku –
batérie smerom dole.
Pri inštalácii do viacnásobného rámčeka spolu s iným
prístrojom je nutnédopredu odstrániť presahujúcu
časťzákladnej dosky odlomením v naznačenom
mieste.
Demontáţ
- Vysielaciu jednotku (obr. 2c) oddeľte od základnej
dosky (obr. 2a) vložením vhodného nástroja medzi
bočnú časťvysielacej jednotky a rámček (obr. 2b).
- Vysuňte vysielaciu jednotku a oddeľte rámček.
Nastavenie spätného potvrdzovania
Vysielač je z výroby nastavený tak, aby indikoval
spätné potvrdzovanie vyslaného kódu. Pokiaľ potvr-
dzovanie nie je požadované, je možné ho v nastavo-
vacom režime zrušiť:
- Stlačte naraz všetky rohy hmatníka vysielača a drž-
te ich tak dlho (asi 10 s), než sa trvalo rozsvieti sig-
nalizačná LED. Tásvieti červená, čo znamená, že
je potvrdzovanie zapnuté.
- Stlačte súčasne spodnú polovicu hmatníka (OFF1 +
OFF2) v dobe, kedy signalizačná LED svieti (nasta-
vovací režim je obmedzenýna dobu asi 5 s). Zru-
šenie potvrdzovania je signalizovanérozsvietením
zelenej LED na dobu asi 3 s s návratom do pre-
vádzkového režimu.
Opätné zapnutie potvrdzovania sa vykoná podobným
spôsobom:
- Stlačte naraz všetky všetky rohy hmatníka vysielača
a držte ich tak dlho (asi 10 s), než sa trvalo rozsvieti
signalizačná LED. Tásvieti zelená, čo znamená, že
je potvrdzovanie vypnuté.
- Stlačte súčasne hornúpolovicu hmatníka (ON1 +
ON2) v dobe, kedy signalizačná LED svieti. Nasta-
venie potvrdzovania je signalizovanérozsvietením
červenej LED na dobu asi 3 s s návratom do pre-
vádzkového režimu.
Na naprogramovanie kódu vysielača do pamäte prijí-
mača je treba, aby v dobe, kedy je prijímač v progra-
movacom režime, vysielač vyslal tzv. inicializačný
kód. Na jeho vyslanie je treba stlačiť vybranú časť
hmatníka dvakrát za sebou so zdržaním max. 2 s.
Pokiaľ je u vysielača nastavenéspätné potvrdzovanie
kódu, je súčasťou inicializačného kódu aj požiadavka
na potvrdenie. Prijímač potom na takto naprogramo-
vaný kód reaguje odosielaním potvrdzovacej správy.
Pokiaľ je na vysielači potvrdzovanie vypnuté, potom
požiadavka na potvrdenie v inicializačnom kóde nie je
a prijímač potvrdzovacie správy nevysiela.
Spätné potvrdzovanie prijatého kódu môže byť na-
programovanéiba do jedného prijímača, inak by sa
potvrdzovacie kódy mohli vzájomne rušiť. Pokiaľ je
treba ovládať naraz viac prijímačov, doporučuje sa
inicializačný kód s požiadavkou na potvrdzovanie na-
programovaťdo najvzdialenejšieho prijímača, potom
potvrdzovanie na vysielači v nastavovacom režime
vypnúť a naprogramovaťostatné prijímače. Potom sa
potvrdzovanie na vysielači opäť zapne.
Výmena batérie
Na vybití batérie upozorňuje zmena blikania LED.
Rovnomerné pravidelné blikanie sa u vybitej batérie
zmení na nerovnomerné preblikávanie. Na vybitú ba-
tériu vysielača upozorňujú aj signalizačné LED na
niektorých prijímačoch.
Batéria sa vymieňa (obr. 3) po demontáži vysielacej
jednotky zo základne.
Poznámky:
Prístroj je napájaný3V batériou a preto ho je možné
umiestniťaj vo vlhkom prostredí (kúpeľňa, pivnica)
alebo priamo na horľavý podklad (napr. na drevený
obklad).
Pokiaľ hmatník zostane zablokovanýv stlačenom
stave na dobu dlhšiu než 60 s, vysielanie kódu sa au-
tomaticky zruší.
Pre zaistenie maximálneho dosahu neumiestňujte
prístroj na kovovú podložku alebo v blízkosti kovo-
vých predmetov.
ENIKA.CZ s.r.o. týmto prehlasuje, že tento P8 T 4
Tango je v zhode so základnými požiadavkami a ďal-
šími príslušnými ustanoveniami smernice 1999/5/ES
GB
DESCRIPTION
Use this transmitter along with receivers of the PO-
SEIDON® system for remote wireless control of elec-
trical appliances using encoded radio-frequency sig-
nals.
The transmitter and receiver can be set up so that the
transmitter indicates a reverse acknowledgement that
communication between the devices has been com-
pleted correctly.
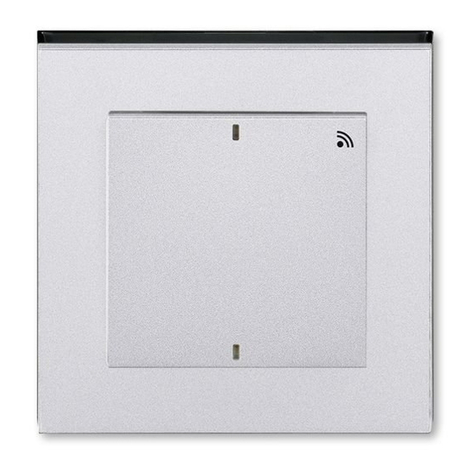
If keypad of the transmitter is pressed (fig. 1), the
transmitter sends a coded signal which is received by
the receiver and the programmed function is carried
out. There are four switches under each corner of the
keypad. The transmitted code includes information
about which switch (or combination of switches) has
been pressed. The receiver evaluates this infor-
mation, which means that based on the pressed part
of the keypad, a single transmitter can control several
receivers or execute several functions, or several
transmitters can control a single receiver.
Each transmitter has its own default unique code set
by the manufacturer to avoid mutual interference
when using more transmitters.
Ongoing transmission of a coded signal is indicated
by a green flashing LED in the keypad slot while the
keypad is pressed.
If reverse acknowledgement is enabled, a change in
flashing color to red indicates that the transmitter has
not received the acknowledgement signal from the
receiver. This can most likely be caused by interfe-
rence of the transmitted coded signal between the
transmitter and receiver. Sometimes, only a part of
the transmitted code may be interfered (for example,
if the transmitter keypad is pressed for long). In such
case, the change in flashing color is temporary only.
Transmitters can be programmed for so-called multi-
button functions according to the description in the in-
struction manual of the respective receiver. To control
associated functions (ON + OFF, TIMER + OFF), use
the left or right half of the keypad (fig. 1). The same
half of the keypad can be used to control receivers in
JAL and ROLL functions in two-button mode. The
whole keypad can also be used to control JAL and
ROLL functions in the three-button mode.
FIRST USE
Mount the transmitter in the selected location by
screwing or sticking by double-sided adhesive tape.
Installation
- Unpack the product and remove the transmitter unit
(fig. 2c) from the main board (fig. 2a).
- Remove the insulation foil between the battery
(fig. 3) and the contact.
- Screw down or stick the main board (fig. 2a) so that
the TOP text faces up.
- Attach the frame (fig. 2b) (not included) to the main
board.
- Slide the transmitter unit onto the main board –with
the battery facing down.
If installing in a multiple frame along with other devi-
ces, it is necessary to remove the sticking out part of
the main board by breaking it off at the marked posi-
tion.
Disassembly
- Remove the transmitter unit (fig. 2c) from the main
board (fig. 2a) by inserting a suitable tool between
the side part of the transmitter unit and the frame
(fig. 2b).
- Slide out the transmitter unit and remove the frame.
Reverse acknowledgement setting
By default, the transmitter is set to indicate the re-
verse acknowledgement of the transmitted code. If
there is no need to use acknowledgement, it is possi-
ble to disable it in the setup mode:
- Press all four corner of the keypad simultaneously
and hold them until the indication LED lights up
permanently (approx. 10 s). The light is red, indi-
cating that reverse acknowledgement is enabled.
- Press lower half of the keypad (OFF1 + OFF2)
while the indication LED is lit (setup mode is limited
to approximately 5 s). To indicate disabled reverse
acknowledgement, the green LED lights up for ap-
prox. 3 s and then the device returns to the opera-
tion mode.
If you want to enable reverse acknowledgement
again, proceed in the similar way:
- Press all four corner of the keypad simultaneously
and hold them until the indication LED lights up
permanently (approx. 10 s). The light is green, in-
dicating that reverse acknowledgement is disabled.
- Press upper half of the keypad (ON1 + ON2) while
the indication LED is lit. To indicate enabled re-
verse acknowledgement, the red LED lights up for
approx. 3 s and then the device returns to the oper-
ation mode.
To program the transmitter code to the receiver
memory, it is necessary for the transmitter to send a
so-called initialization code during the time the re-
ceiver is in the programming mode. To send the ini-
tialization code, press the selected part of the keypad
twice with a pause between the two presses no lon-
ger than 2 s.
If the reverse acknowledgement of the code is ena-
bled on the transmitter, an acknowledgement request
is included in the initialization code as well. As a reply
to such programmed code, the receiver will send a
reverse acknowledgement message. If the reverse
acknowledgement is disabled on the transmitter,
there will be no request for acknowledgement in the
initialization code and the receiver will not send
acknowledgement message.
Reverse acknowledgements of the received code can
be programmed to a one receiver only, otherwise,
acknowledgement codes could interfere with each
other. If multiple receivers are to be controlled, it is
recommended to program the initialization code in-
cluding the request for acknowledgement to the fur-
thest receiver, then disable acknowledgements using
the setup mode in the transmitter, and then program
the remaining receivers. After that, enable reverse
acknowledgement in the transmitter again.
Replacing the battery
A weak battery is indicated by a change in the LED
flashing. If the battery is weak, even and regular
flashing will change to irregular flashing. Indication
LEDs in some receivers will indicate a weak battery in
the transmitter, too.
If you need to replace the battery (fig. 3), dismount
the transmitter unit from the main board.
Notes:
The device is powered by a 3V battery and therefore
can be placed even in a humid area (such as a bath-
room or cellar) or directly on a flammable base (such
as a wood wall lining).
If the keypad remains blocked in the depressed posi-
tion for a period longer than 60 s, transmission of the
code will automatically be cancelled. The red LED
flashing is limited for 60 s even when the reverse
acknowledgement is enabled and the transmitter has
picked up no acknowledgement code from a receiver.
To ensure the maximum range, do not place the de-
vice on a metal base or near metal objects.
ENIKA.CZ s.r.o. hereby declares that this P8 T 4a
Tango complies with the essential requirements and
other relevant provisions of Directive 1999/5/EC.


