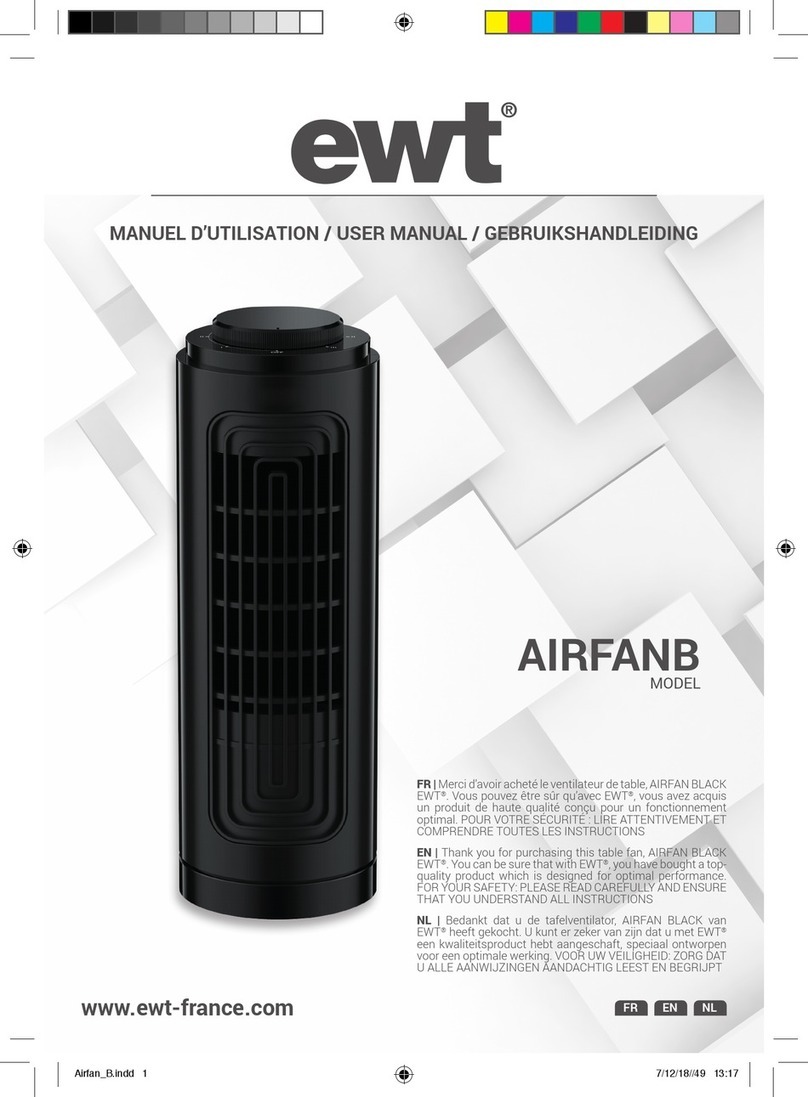
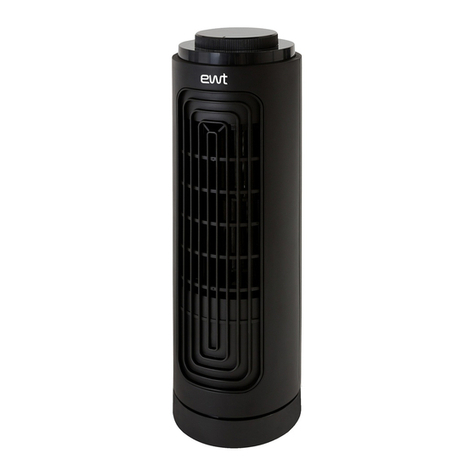
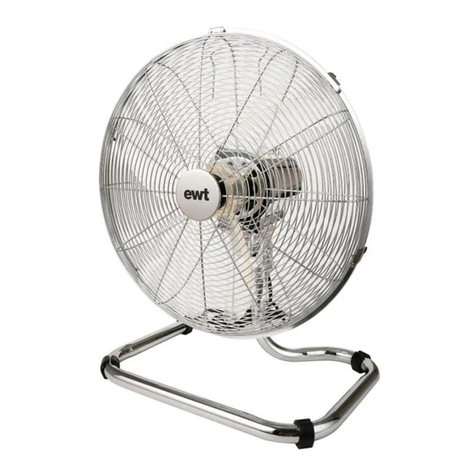
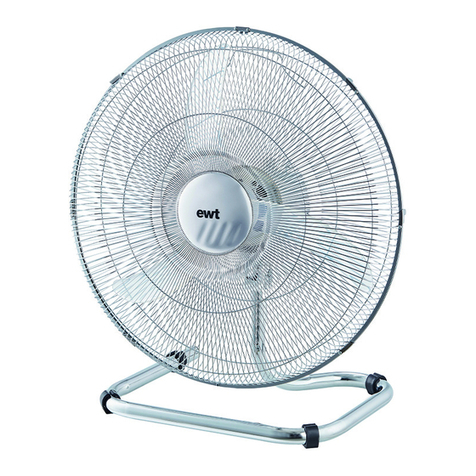
EWT OSCILLOR50 User manual

OSCILLOR50
NL PL SVFR ENDE
The product complies with all the required European product safety, Electromagnetic compatibility and environmental standards. It is fully compliant with the LVD, EMC, RoHS and
Eco design directives.
©Glen Dimplex. All rights reserved. Material contained in this publication may not be reproduced in whole or in part, without prior permission in writing of Glen Dimplex.
08/54826/0 - Issue 1
Manual_Oscillor_2020.indd 1Manual_Oscillor_2020.indd 1 15/12/20 08:1715/12/20 08:17

2
FR SVPLNLDE EN
FR
1. Grille frontale
2. Ecrou de l’hélice
3. Pales
4. Écrou de sécurité de la grille
arrière
5. Grille arrière
6. Arbre du moteur
7. Moteur
8. Bouton de contrôle des vitesses
9. Bouton d’oscillation
10. Câble électrique
11. Pied de support # 1
12.Grande
13. Pied de support # 2
14.Petite
A. Arrêt
B. Vitesse rapide
C. Vitesse moyenne
D. Vitesse lente
DE
1. Vordergitter
2. Sicherheitsmutter des
Vordergitters
3. Blätter
4. Sicherheitsmutter des
Hintergitters
5. Hintergitter
6. Welle des Motors
7. Motor
8. Kontrollknopf für die
Geschwindigkeit
9. Knopf für die Oszillation
10. Stromkabel
11. Stützfuß #1
12. Große Befestigungsschraube #1
13. Stützfuß #2
14. Kleine Befestigungsschraube #2
A. Bei Stillstand
B. Hohe Geschwindigkeit
C. Mittlere Geschwindigkeit
D. Geringe Geschwindigkeit
FR ELEMENTS DE L’APPAREIL / DE EXPLOSIVZEICHNUNG / EN COMPOSITION OF YOUR UNIT
NL ONDERDELEN VAN HET TOESTEL / PL RYSUNEK POGLĄDOWY / SV SPRÄNGSKISS
FR | Merci d’avoir acheté le brasseur d’air OSCILLOR50 EWT®. Vous pouvez être sûr qu’avec EWT®, vous avez acquis un produit de haute qualité conçu
pour un fonctionnement optimal. POUR VOTRE SÉCURITÉ: LIRE ATTENTIVEMENT ET COMPRENDRE TOUTES LES INSTRUCTIONS.
DE | Vielen Dank für Ihren Kauf des Tischventilators OSCILLOR50 EWT®. Sie können sicher sein, dass Sie mit EWT®ein hochwertiges Produkt erworben
haben, das so entworfen wurde, dass es optimal funktioniert.LESEN SIE ZU IHRER SICHERHEIT DIE GESAMTE ANLEITUNG AUFMERKSAM UND
BEHERZIGEN SIE IHREN INHALT.
EN | Thank you for purchasing this air brewer OSCILLOR50 EWT®. You can be sure that with EWT®, you have bought a top-quality product which is
designed for optimal performance. FOR YOUR SAFETY: PLEASE READ CAREFULLY AND ENSURE THAT YOU UNDERSTAND ALL INSTRUCTIONS.
NL | Dank voor uw aankoop van de ventilator OSCILLOR50 EWT®. Met EWT®kunt u rekenen op een product van hoge kwaliteit ontworpen voor een
optimale werking. VOOR UW VEILIGHEID: LEES AANDACHTIG EN RAA VERTROUWD MET ALLE INSTRUCTIES.
PL | PL | Dziękujemy za zakup cyrkulatora powietrza OSCILLOR50 EWT®. Wybierając EWT®, dokonali Państwo zakupu najwyższej jakości produktu,
który został zaprojektowany z myślą o optymalnej pracy. DLA PAŃSTWA BEZPIECZEŃSTWA: PROSIMY O UWAŻNE PRZECZYTANIE I ZROZUMIENIE
WSZYSTKICH INSTRUKCJI.
SV | SE | Tack för att du har köpt denna OSCILLOR50 EWT®luftbryggare. Du kan vara säker på att du med EWT®har köpt en produkt av högsta kvalitet
om är utformad för optimal prestanda. FÖR DIN EGEN SÄKERHET: VAR GOD LÄS OCH FÖRSÄKRA DIG ATT DU FÖRSTÅR ALLA INSTRUKTIONER
Manual_Oscillor_2020.indd 2Manual_Oscillor_2020.indd 2 15/12/20 08:1715/12/20 08:17

3
FR SVPLNLDE EN
EN
1. Front grill
2. Blade centre cap
3. Blades
4. Back grill safety nut
5. Back grill
6. Motor shaft
7. Motor
8. Speed control button
9. Oscillation button
10. Power cable
11. Supporting pole # 1
12. Large mounting screw #1
13. Supporting pole # 2
14. Small mounting screw #2
A. Off
B. High Speed
C. Medium Speed
D. Low Speed
NL
Voorste rooster
2. Kapje midden schroef
3. Schoepen
4. Veiligheidsmoer achterste rooster
5. Achterste rooster
6. Motoras
7. Motor
8. Knop regeling snelheden
9. Knop zwenking
10. Elektrische kabel
11. Voet # 1
12. Grote stelschroef #1
13. Voet # 2
14. Kleine stelschroef #2
A. Stop
B. Hoge snelheid
C. Matige snelheid
D. Lage snelheid
PL
Przednia kratka
2. Środkowanasadkałopatek
3. Łopatki
4. Nakrętkabezpieczeństwatylnej
kratki
5. Tylna kratka
6. Wałsilnika
7. Silnik
8. Pokrętłoregulacjiprędkości
9. Pokrętłooscylacji
10. Kabel elektryczny
11. Noga # 1
12.Dużaśrubamocująca#1
13. Noga # 2
14.Małaśrubamocująca#2
A. Wyłącz
B. Szybkaprędkość
C. Średniaprędkość
D. Niskaprędkość
SV
Främre galler
2. Bladets mittlock
3. Blad
4. Bakre galler säkerhetsmutter
5. Bakre galler
6. Motoraxel
7. Motor
8. Hastighetskontrollknapp
9. Oscilleringsknapp
10. Strömsladd
11. Stödstång # 1
12. Stor monteringsskruv #1
13. Stödstång # 2
14. Liten monteringsskruv #2
A. Av
B. Hög hastighet
C. Medelhastighet
D. Låg hastighet
FR
1. Grille frontale
2. Ecrou de l’hélice
3. Pales
4. Écrou de sécurité de la grille
arrière
5. Grille arrière
6. Arbre du moteur
7. Moteur
8. Bouton de contrôle des vitesses
9. Bouton d’oscillation
10. Câble électrique
11. Pied de support # 1
12.Grandevisdexation#1
13. Pied de support # 2
14.Petitevisdexation#2
A. Arrêt
B. Vitesse rapide
C. Vitesse moyenne
D. Vitesse lente
DE
1. Vordergitter
2. Sicherheitsmutter des
Vordergitters
3. Blätter
4. Sicherheitsmutter des
Hintergitters
5. Hintergitter
6. Welle des Motors
7. Motor
8. Kontrollknopf für die
Geschwindigkeit
9. Knopf für die Oszillation
10. Stromkabel
11. Stützfuß #1
12. Große Befestigungsschraube #1
13. Stützfuß #2
14. Kleine Befestigungsschraube #2
A. Bei Stillstand
B. Hohe Geschwindigkeit
C. Mittlere Geschwindigkeit
D. Geringe Geschwindigkeit
COMPOSITION OF YOUR UNIT
, vous avez acquis un produit de haute qualité conçu
ein hochwertiges Produkt erworben
haben, das so entworfen wurde, dass es optimal funktioniert.LESEN SIE ZU IHRER SICHERHEIT DIE GESAMTE ANLEITUNG AUFMERKSAM UND
, you have bought a top-quality product which is
designed for optimal performance. FOR YOUR SAFETY: PLEASE READ CAREFULLY AND ENSURE THAT YOU UNDERSTAND ALL INSTRUCTIONS.
kunt u rekenen op een product van hoge kwaliteit ontworpen voor een
, dokonali Państwo zakupu najwyższej jakości produktu,
który został zaprojektowany z myślą o optymalnej pracy. DLA PAŃSTWA BEZPIECZEŃSTWA: PROSIMY O UWAŻNE PRZECZYTANIE I ZROZUMIENIE
har köpt en produkt av högsta kvalitet
om är utformad för optimal prestanda. FÖR DIN EGEN SÄKERHET: VAR GOD LÄS OCH FÖRSÄKRA DIG ATT DU FÖRSTÅR ALLA INSTRUKTIONER
Manual_Oscillor_2020.indd 3Manual_Oscillor_2020.indd 3 15/12/20 08:1715/12/20 08:17

4
NLFR PLEN SVDE
Important : lire attentivement ces
instructions avant utilisation et
les conserver soigneusement pour
référence ultérieure.
• DANGER ! Ne placez jamais l’ap-
pareil sous une source d’eau
(pluie, robinet…), risque de choc
électrique.
• ATTENTION – N’UTILISEZ JA-
MAIS CET APPAREIL DANS UNE
PIECE HUMIDE TELLE QUE SALLE
DE BAIN OU À PROXIMITÉ D’UN
LAVABO, D’UNE BAIGNOIRE,
D’UNE DOUCHE, D’UNE PISCINE,
ETC...
•Cetappareilestconçuexclusive-
ment pour une utilisation privée
et pour l’usage prévu. Les utilisa-
tions autres que celles prévues
dans le manuel d’instruction ne
sont pas autorisées et peuvent
être dangereuses.
• Cet appareil peut être utilisé par
des enfants à partir de 8 ans, par
des personnes aux capacités
physiques, sensorielles ou men-
talesréduitesou manquantd’ex-
périence et de connaissances à
condition qu’elles aient été pla-
cées sous surveillance ou qu’elles
aient reçu des instructions concer-
nant l’utilisation de l’appareil en
toute sécurité et qu’elles com-
prennent les dangers encourus.
Les enfants ne doivent pas avoir
accès, ni jouer avec l’appareil.
• Cet appareil ne peut être nettoyé
ou utilisé par des enfants sans
supervision. Tenir l’appareil hors
de portée des enfants de moins
de trois ans ou maintenir une sur-
veillance constante.
• Les enfants âgés de 3 à 8 ans
peuvent allumer/éteindre l’appa-
reil sous réserve qu’il ait été pla-
cé ou installé dans une position
d’utilisation normale, uniquement
sous la supervision d’un adulte et
après avoir reçu des instructions
concernant l’utilisation sûre de
l’appareil et compris les risques
encourus. Les enfants âgés de 3 à
8 ans ne peuvent brancher, régler
et nettoyer l’appareil ni effectuer
d’opérations de maintenance.
• ATTENTION : An d’éviter tout
danger dû au réarmement in-
tempestif du coupe-circuit ther-
mique, cet appareil ne doit pas
être alimenté par l’intermédiaire
d’uninterrupteurexterne,comme
une minuterie, un programma-
teur, un système de commande
à distance ou être connecté à un
circuit qui est régulièrement mis
sous tension et hors tension par
le fournisseur d’électricité.
CONSIGNES DE SÉCURITÉ
• N’utilisez pas un appareil endom
magé.
l’appareil et le cordon d’alimen
tation ne soient pas abîmés. Si
le cordon électrique est endom
magé, il doit être remplacé par le
fabricant, par un technicien agréé
ou
d’éviter tout danger.
• Utiliser l’appareil uniquement
avec la tension indiquée sur l’éti
quette signalétique.
• Branchez l’appareil uniquement
sur une installation électrique
conforme
avec une protection de circuit
temporisée.
té
se trouvant sur ce disjoncteur
ne puisse dépasser l’intensité du
disjoncteur (16A).
• Les réparations sur les appareils
électriques doivent être effec
tuées uniquement par un profes
sionnel
non conforme peut entraîner des
risques importants pour l’utilisa
teur.
• Ne pas utiliser de multiprises,
de rallonge, d’adaptateur pour le
branchement de l’appareil, risque
de surchauffe et d’incendie.
• Par mesure de sécurité, débran
cher l’appareil lorsqu’il n’est pas
utilisé et avant toute absence pro
longée.
Manual_Oscillor_2020.indd 4Manual_Oscillor_2020.indd 4 15/12/20 08:1715/12/20 08:17

5
NLFR PLEN SVDE
prennent les dangers encourus.
Les enfants ne doivent pas avoir
Cet appareil ne peut être nettoyé
ou utilisé par des enfants sans
supervision. Tenir l’appareil hors
de portée des enfants de moins
de trois ans ou maintenir une sur-
Les enfants âgés de 3 à 8 ans
peuvent allumer/éteindre l’appa-
reil sous réserve qu’il ait été pla-
cé ou installé dans une position
d’utilisation normale, uniquement
sous la supervision d’un adulte et
après avoir reçu des instructions
concernant l’utilisation sûre de
l’appareil et compris les risques
encourus. Les enfants âgés de 3 à
8 ans ne peuvent brancher, régler
et nettoyer l’appareil ni effectuer
tout
danger dû au réarmement in-
tempestif du coupe-circuit ther-
mique, cet appareil ne doit pas
être alimenté par l’intermédiaire
comme
une minuterie, un programma-
teur, un système de commande
à distance ou être connecté à un
circuit qui est régulièrement mis
sous tension et hors tension par
• N’utilisez pas un appareil endom-
magé.Vériezrégulièrementque
l’appareil et le cordon d’alimen-
tation ne soient pas abîmés. Si
le cordon électrique est endom-
magé, il doit être remplacé par le
fabricant, par un technicien agréé
ou toute personne qualiée an
d’éviter tout danger.
• Utiliser l’appareil uniquement
avec la tension indiquée sur l’éti-
quette signalétique.
• Branchez l’appareil uniquement
sur une installation électrique
conformeauxnormesenvigueur
avec une protection de circuit
temporisée.Vériezquel’intensi-
témaximaledetouslesappareils
se trouvant sur ce disjoncteur
ne puisse dépasser l’intensité du
disjoncteur (16A).
• Les réparations sur les appareils
électriques doivent être effec-
tuées uniquement par un profes-
sionnel qualié. Une réparation
non conforme peut entraîner des
risques importants pour l’utilisa-
teur.
• Ne pas utiliser de multiprises,
de rallonge, d’adaptateur pour le
branchement de l’appareil, risque
de surchauffe et d’incendie.
• Par mesure de sécurité, débran-
cher l’appareil lorsqu’il n’est pas
utilisé et avant toute absence pro-
longée.
• Ne pas utiliser l’appareil si le cor-
don d’alimentation se trouve sous/
sur l’appareil. La prise doit être ac-
cessible après l’installation.
• Ne tirez jamais sur le cordon d’ali-
mentation pour déplacer l’appa-
reil. Veillez toujours à ce que le
cordon d’alimentation soit libre
en cas de changement d’emplace-
ment. N’enroulez jamais le cordon
d’alimentation autour de l’appa-
reil.
• Veillez à ce que le cordon d’ali-
mentation ne présente pas de
risque de faire trébucher.
• Ne pas recouvrir le cordon d’ali-
mentation par un tapis, moquette,
couverture...
• Toujours tenir la prise lorsque
vous branchez ou débranchez
l’appareil. Ne débranchez jamais
en tirant sur le cordon. Risque de
choc électrique et de dommage.
• Arrêtez d’abord l’appareil avant de
retirer la prise secteur.
• Ne pas placer l’appareil juste en
dessous d’une prise murale ou
d’unboîtierdeconnexion.
• L’appareil doit être stocké dans un
endroit sec, à l’abri de l’humidité
et dont la température est com-
prise entre 15°C et 25°C.
• N’immergez ou ne poser jamais
l’appareil dans l’eau ou tout autre
liquide. Débranchez immédiate-
ment la prise secteur si l’appareil
Manual_Oscillor_2020.indd 5Manual_Oscillor_2020.indd 5 15/12/20 08:1715/12/20 08:17

6
NLFR PLEN SVDE
se retrouve mouillé ou humide.
• N’utilisez pas l’appareil avec les
mains mouillées ou humides.
•N’utilisez pas l’appareil en exté-
rieur (il n’est pas conçu pour une
utilisation en plein air).
• Ne laissez pas l’appareil en
marche sans surveillance.
• Ne pas poser d’objets sur le des-
sus de l’appareil.
• Ne pas s’assoir sur l’appareil.
• Ne soumettez pas l’appareil à
la chaleur (radiateur, four…), au
rayonnement solaire direct ou à
l’humidité.
• Toujours utiliser l’appareil vertica-
lement.
•Faites attention aux risques de
dommages que présentent les
arêtes vives de l’appareil.
• Avant de nettoyer l’appareil, tou-
jours débrancher la prise secteur.
• AVERTISSEMENT : Ne pas couvrir
l’appareil. Ne pas placer de maté-
riauxoudevêtementssurl’appa-
reil ou entraver la circulation d’air
autour de l’appareil.
• NE PAS BLOQUER LA VENTILA-
TION!Vériezrégulièrementque
les entrées et sorties d’air ne
soient pas obstruées.
• Ne pas placer l’arrivée d’air de
l’appareilàproximitédemursou
derideaux(1m).L’obstructiondu
passage de l’air risquant de ré-
duiresonecacité.
• Ne rien introduire à travers les en-
trées et sorties d’air (doigt, stylo,
outil…)
• NE PAS tenter de réparer ou de
régler tout dispositif électrique
ou mécanique. Dans ce cas, votre
garantie serait annulée. L’intérieur
de l’unité ne contient aucun élé-
ment réparable par l’utilisateur.
Touteréparationdoitêtreconée
àuntechnicienqualié.
• AVERTISSEMENT : An d’éviter
tout risque d’incendie ou de choc
électrique, veiller à ne pas utiliser
l’appareil avec un dispositif de
commande à semi-conducteur.
• AVERTISSEMENT : An d’éviter
tout risque de suffocation, veiller à
retirer tout le matériel d’emballage,
notamment les éléments en plas-
tique et en EPS, et les tenir hors de
portée des personnes vulnérables,
des enfants et des bébés.
• AVERTISSEMENT : An d’éviter
tout risque de strangulation avec
le cordon d’alimentation, veiller à
surveiller les enfants et les per-
sonnes vulnérables se trouvant à
proximitéduproduit,quel’appareil
soit en cours d’utilisation ou non.
• Ne pas laisser tomber d’objets
dans les ouvertures. Ne pas insé-
rer d’objets dans les ouvertures.
• Ne pas débrancher l’appareil ti-
rant sur le câble d’alimentation.
• Ne pas démonter l’appareil.
CARACTÉRISTIQUES
Référence
Puissance
Nombre de vitesses
Oscillation
Inclinaison réglable
Interrupteur d’oscillation
Nombre de pales
Matière des pales
Matière grille
Diamètre grille
Grille démontable
Poignée
Tension
Fréquence
Dimensions produit (LxPxH)
Poids produit
INSTRUCTIONS D’UTILISATION
AVANT LA PREMIÈRE UTILISATION
1. Veuillez lire attentivement ces instructions avant d’utiliser l’appareil et conservez-les pour une consultation ultérieure.
2. Vériez
3. Avant
ASSEMBLAGE
1. Placez
2. Dévissez le capuchon de l’hélice (2) en tournant dans le sens des aiguilles d’une montre. Dévissez l’écrou de sécurité (4)
de l’arbre du moteur (6) en le tournant dans le sens contraire des aiguilles d’une montre.
3. Fixez
moteur.
4. Fixez
aiguilles
de l’arbre du moteur (6).
5. Dévissez la vis (14) située en bas de la grille.
6. Assemblez la grille frontale (1) et la grille arrière (5) en plaçant le crochet (15) en haut. Serrez à l’aide des loquets situés
tout
d’avoir
INSTRUCTIONS D’UTILISATION
1. Branchez l’appareil sur la prise secteur.
2. Activez le ventilateur en tournant le bouton de contrôle de vitesse (9) situé à l’arrière dans le sens des aiguilles d’une
montre. Le bouton permet également de régler la vitesse en sélectionnant la position RAPIDE ”3”, MOYENNE ”2” ou
LENTE ”1”.
3. Pour
Veillez à ne pas insérer les doigts à travers la grille.
4. Tournez le bouton dans le sens contraire des aiguilles d’une montre pour éteindre le ventilateur.
VITESSE
Tournez le bouton de contrôle de vitesse (9) pour régler la vitesse de ventilation sur la position RAPIDE ”3”, MOYENNE “2” ou
LENTE “1”. Tournez le bouton dans le sens contraire des aiguilles d’une montre pour arrêter la ventilation.
OSCILLATION
Pour activer l’oscillation, poussez le bouton de commande de l’oscillation vers le bas (8). Relevez le bouton de commande de
l’oscillation (9) pour arrêter l’oscillation.
Manual_Oscillor_2020.indd 6Manual_Oscillor_2020.indd 6 15/12/20 08:1715/12/20 08:17

7
NLFR PLEN SVDE
Ne rien introduire à travers les en-
trées et sorties d’air (doigt, stylo,
tenter de réparer ou de
régler tout dispositif électrique
ou mécanique. Dans ce cas, votre
garantie serait annulée. L’intérieur
de l’unité ne contient aucun élé-
ment réparable par l’utilisateur.
conée
d’éviter
tout risque d’incendie ou de choc
électrique, veiller à ne pas utiliser
l’appareil avec un dispositif de
commande à semi-conducteur.
d’éviter
tout risque de suffocation, veiller à
retirer tout le matériel d’emballage,
notamment les éléments en plas-
tique et en EPS, et les tenir hors de
portée des personnes vulnérables,
d’éviter
tout risque de strangulation avec
le cordon d’alimentation, veiller à
surveiller les enfants et les per-
sonnes vulnérables se trouvant à
l’appareil
soit en cours d’utilisation ou non.
Ne pas laisser tomber d’objets
dans les ouvertures. Ne pas insé-
rer d’objets dans les ouvertures.
Ne pas débrancher l’appareil ti-
rant sur le câble d’alimentation.
CARACTÉRISTIQUES
Référence OSCILLOR50
Puissance 90 W
Nombre de vitesses 3 : lente, moyenne, rapide
Oscillation Oui : automatique
Inclinaison réglable Oui : manuelle
Interrupteur d’oscillation Oui
Nombre de pales 3
Matière des pales Plastique transparent
(plussilencieuxquedespalesenmétal)
Matière grille Métal
Diamètre grille >50 cm
Grille démontable Oui : facile à nettoyer
Poignée Oui
Tension 220-240V~
Fréquence 50 HZ
Dimensions produit (LxPxH) 55x32x60cm
Poids produit 4,90 kg
INSTRUCTIONS D’UTILISATION
AVANT LA PREMIÈRE UTILISATION
1. Veuillez lire attentivement ces instructions avant d’utiliser l’appareil et conservez-les pour une consultation ultérieure.
2. Vériezsilatensiondevotreréseauélectriquelocalcorrespondàcellequiguresurl’appareil.
3. Avantlapremièreutilisation,retirezleslmsouautocollantsprotecteursdel’appareil.
ASSEMBLAGE
1. Placezlesupportenpositionverticale.Fixezlemoteur(7)ausupport(11)àl’aidedelavisdusupport(12).
2. Dévissez le capuchon de l’hélice (2) en tournant dans le sens des aiguilles d’une montre. Dévissez l’écrou de sécurité (4)
de l’arbre du moteur (6) en le tournant dans le sens contraire des aiguilles d’une montre.
3. Fixezlagrillearrière(5)surl’arbredumoteur(6)enalignantbienles3troussurles3emboutssituésàl’avantdu
moteur.Fixezlagrillearrièreàl’aidedel’écroudesécurité(4)enletournantdanslesensdesaiguillesd’unemontre.
4. Fixezl’héliceduventilateur(3)surl’arbredumoteur(6).Serrezlecapuchondel’hélice(2)danslesenscontrairedes
aiguillesd’unemontre.(Important:assurez-vousquelecapuchondel’hélice(2)estsusammentserrésurlasurface
de l’arbre du moteur (6).
5. Dévissez la vis (14) située en bas de la grille.
6. Assemblez la grille frontale (1) et la grille arrière (5) en plaçant le crochet (15) en haut. Serrez à l’aide des loquets situés
toutautourdelagrilleetplacezlavisdexationsituéesurlebasdelagrille(14)pourvotresécurité.Assurez-vous
d’avoirtoutbienxé.
INSTRUCTIONS D’UTILISATION
1. Branchez l’appareil sur la prise secteur.
2. Activez le ventilateur en tournant le bouton de contrôle de vitesse (9) situé à l’arrière dans le sens des aiguilles d’une
montre. Le bouton permet également de régler la vitesse en sélectionnant la position RAPIDE ”3”, MOYENNE ”2” ou
LENTE ”1”.
3. Pourréglerladirectionduuxd’airverslehautouverslebas,relevezoubaissezl’unitédumoteuroulagrillearrière.
Veillez à ne pas insérer les doigts à travers la grille.
4. Tournez le bouton dans le sens contraire des aiguilles d’une montre pour éteindre le ventilateur.
VITESSE
Tournez le bouton de contrôle de vitesse (9) pour régler la vitesse de ventilation sur la position RAPIDE ”3”, MOYENNE “2” ou
LENTE “1”. Tournez le bouton dans le sens contraire des aiguilles d’une montre pour arrêter la ventilation.
OSCILLATION
Pour activer l’oscillation, poussez le bouton de commande de l’oscillation vers le bas (8). Relevez le bouton de commande de
l’oscillation (9) pour arrêter l’oscillation.
Manual_Oscillor_2020.indd 7Manual_Oscillor_2020.indd 7 15/12/20 08:1715/12/20 08:17

8
NLFR PLEN SVDE
NETTOYAGE ET ENTRETIEN
Éteindred’abordl’appareiletdébrancherlachedelaprise.
• Nettoyer le boîtier avec un chiffon humide, un aspirateur ou une brosse.
• Ne pas utiliser de produits nettoyants abrasifs ou caustiques.
• Nepasutiliserdeproduitsnettoyantsinammablescommel’essenceoul’alcool.
• Ne jamais plonger l’appareil dans l’eau.
• L’entrée et la sortie d’air doivent être nettoyées régulièrement avec un aspirateur.
• Si l’appareil n’est pas utilisé pendant une période prolongée, il doit être protégé contre la poussière et la saleté.
GARANTIE
Cet appareil EWT®est assorti d’une garantie de (2) ans à compter de la date d’achat sous les conditions d’utilisation normales.
Lagarantienes’appliquepasauxdommagesdusdirectementouindirectementàuneutilisationabusive,àlanégligence,à
uneutilisationnonconforme,auxaccidents,réparationsnonconformesoumodicationsainsiqu’àundéfautd’entretien.
Veuillez conserver votre bon de caisse/ facture comme preuve de votre achat.
Les accessoires de cet appareil sont des consommables et leur garantie est limitée à un (1) mois.
EXCLUSIONS DE GARANTIE
• Modications,démontagesouintégrationàuneautremachineouàunmontagelarendantxeousemi-xe,
• Usure normale des pièces,
• Détérioration suite à une mauvaise utilisation,
• Non-respect de la notice d’emploi ou des consignes d’entretien et de sécurité,
• Dommagesrésultantd’unentretiendéfectueux,dedéfautd’entretien,
• Dommagesoccasionnésparlesélémentsextérieurs(foudre…),
• Utilisation anormale de la machine,
• Entreposage dans de mauvaises conditions,
• Chocs,
• Immersion de l’appareil,
• UtilisationdepiècesouaccessoiresnonagréésparGlenDimplexFrance,
• Délai de garantie dépassé
MISE AU REBUT
Conformément à la directive européenne 2012/19/EU concernant les déchets d’équipements électriques et
électroniques (DEEE), ce matériel comporte l’indication poubelle barrée qui indique que le produit ne doit pas être
jeté dans les ordures ménagères.
Il doit être remis à un point de collecte approprié pour le traitement, la valorisation, le recyclage des déchets d’EEE
(se renseigner à la mairie de son domicile) ou rapporté chez un distributeur sur le principe de « 1 pour 1 gratuit » (la
reprise par le distributeur ne donne pas droit à rémunération ni remise).
Avec ce geste pour l’environnement, vous, consommateur ou utilisateur, apportez une contribution à la préservation des
ressources naturelles et à la protection de la santé humaine.
PRÉCISIONS SUR L’UTILISATION DES PILES
Jeterunepileusagéedanslanatureoulesorduresménagèrespollueetempêchelarécupérationdematériauxvalorisables.
Il est donc important de limiter sa consommation de piles et de respecter les consignes suivantes :
1. Privilégier les piles alcalines (qui durent plus longtemps que les piles salines) et lorsque c’est possible, les piles
rechargeables
2. Déposerlespilesetaccumulateursusagésdanslesconteneursspéciquesdisposéschezlescommerçants.Ainsi,les
métauxserontvalorisésetnepolluerontpasl’environnementcarilscontiennentdesmétauxlourdsdangereuxpourla
santé et l’environnement (principalement du cadmium et du nickel)
Lorsque la pile arrive en n de vie, la remplacer par une pile CR2025 3V.
Modèle
Description
Débit d’air maximal
Puissance absorbée
Valeur de service
Consommation d’électricité en mode veille
Niveau de puissance acoustique
Vitesse maximale de l’air
Norme de mesure de la valeur de service
INFORMATIONS RELATIVES À L’ÉCOCONCEPTION DES VENTILATEURS
Informations requises pour les ventilateurs, conformément au règlement (UE) No 206/2012 portant application de la directive
2009/125/EC
climatiseurs et ventilateurs.
Manual_Oscillor_2020.indd 8Manual_Oscillor_2020.indd 8 15/12/20 08:1715/12/20 08:17

9
NLFR PLEN SVDE
est assorti d’une garantie de (2) ans à compter de la date d’achat sous les conditions d’utilisation normales.
négligence,à
d’entretien.
Conformément à la directive européenne 2012/19/EU concernant les déchets d’équipements électriques et
électroniques (DEEE), ce matériel comporte l’indication poubelle barrée qui indique que le produit ne doit pas être
Il doit être remis à un point de collecte approprié pour le traitement, la valorisation, le recyclage des déchets d’EEE
(se renseigner à la mairie de son domicile) ou rapporté chez un distributeur sur le principe de « 1 pour 1 gratuit » (la
Avec ce geste pour l’environnement, vous, consommateur ou utilisateur, apportez une contribution à la préservation des
valorisables.
Privilégier les piles alcalines (qui durent plus longtemps que les piles salines) et lorsque c’est possible, les piles
Ainsi,les
pourla
Modèle OSCILLOR50
Description Symbole Valeur Unité
Débit d’air maximal F 109.30 m3/min
Puissance absorbée P 69.1 W
Valeur de service SV 1.58 (m3/min)/W
Consommation d’électricité en mode veille PSB 0,00 W
Niveau de puissance acoustique LWA 64,2 dB(A)
Vitesse maximale de l’air c 3,73 mètres/sec
Norme de mesure de la valeur de service IEC 60879:1986 (corr.1992)
INFORMATIONS RELATIVES À L’ÉCOCONCEPTION DES VENTILATEURS
Informations requises pour les ventilateurs, conformément au règlement (UE) No 206/2012 portant application de la directive
2009/125/EC du Parlement européen et du Conseil en ce qui concerne les exigences d’écoconception applicables aux
climatiseurs et ventilateurs.
Manual_Oscillor_2020.indd 9Manual_Oscillor_2020.indd 9 15/12/20 08:1715/12/20 08:17

10
NLFR PLEN SVDE
Wichtig: lesen sie diese anweisun-
gen vor der benutzung aufmerksam
und bewahren sie sie für späteres
nachschlagen auf.
• GEFAHR! Platzieren Sie das Gerät
niemals unter einer Wasserquel-
le (Regen, Wasserhahn etc.). Ein
elektrischer Schlag könnte die Fol-
ge sein.
• ACHTUNG - VERWENDEN SIE DIE-
SES GERÄT NIEMALS IN EINEM
FEUCHTEN RAUM WIE EINEM BA-
DEZIMMER ODER IN DER NÄHE
EINES WASCHBECKENS, EINER
BADEWANNE, EINER DUSCHE, EI-
NES SCHWIMMBECKENS ETC.
• Dieses Gerät ist ausschließlich für
eine private und sachgemäße Nut-
zung konstruiert. Eine nicht sach-
gemäße Nutzung ist nicht gestat-
tet und kann gefährlich sein.
• Dieses Gerät kann von Kindern
über 8 Jahren, von Personen, de-
ren körperliche oder geistige Un-
versehrtheit oder deren Wahrneh-
mungsfähigkeit eingeschränkt ist,
sowie von Personen mit mangeln-
den Kenntnissen oder Erfahrung
benutzt werden. Dies gilt nur unter
der Voraussetzung, dass sie beauf-
sichtigt werden oder dass sie eine
Einweisung in die sichere Nutzung
des Geräts und die damit verbun-
denen Gefahren erhalten haben.
Kinder dürfen mit dem Gerät nicht
spielen. Reinigung und Wartung
dürfen ohne Beaufsichtigung nicht
von Kindern durchgeführt werden.
• Kinder unter 3 Jahren sollten sich
ohne Beaufsichtigung nicht in der
Nähe des Geräts aufhalten. Kin-
der von 3 bis 8 Jahren sollten das
Gerät nur ein- oder ausschalten
dürfen, wenn es in der dafür vor-
gesehenen Betriebsposition mon-
tiert wurde. Dies gilt nur unter der
Voraussetzung, dass sie beauf-
sichtigt werden oder dass sie eine
Einweisung in die sichere Nutzung
des Geräts und die damit verbun-
denen Gefahren erhalten haben.
Kinder von 3 bis 8 Jahren dürfen
das Gerät nicht an eine Steckdose
anschließen, benutzen bzw. reini-
gen oder das Gerät warten.
• WARNUNG: Um eine Gefährdung
durch versehentliches Zurückset-
zen der Thermoschutzschaltung
zu vermeiden, darf dieses Gerät
nicht über ein externes Schalt-
gerät, wie beispielsweise einen
Timer, mit Strom versorgt oder an
einen Stromkreis angeschlossen
werden, der regelmäßig durch den
Energieversorger ein- und ausge-
schaltet wird.
• Verwenden Sie kein beschädigtes
Gerät. Überprüfen Sie regelmäßig,
ob das Gerät und sein Netzkabel
SICHERHEITSANWEISUNGEN
beschädigt sind. Wenn das elekt
rische Kabel beschädigt ist, muss
es vom Hersteller, von einem zer
tizierten
deren
werden, um alle Risiken zu vermei
den.
• Betreiben Sie das Gerät nur mit
der auf dem Typenschild angege
benen Spannung.
• Schließen Sie das Gerät nur an
eine elektrische Anlage an, die die
geltenden Vorschriften erfüllt und
über einen Stromkreisschutz ver
fügt. Stellen Sie sicher, dass die
maximale
te am Schutzschalter die Strom
stärke des Schutzschalters (16 A)
nicht überschreitet.
• Ist das Netzkabel beschädigt,
muss es vom Hersteller, dessen
Servicepartner oder ähnlich quali
zierten
werden, um eine Gefährdung zu
vermeiden.
• Verwenden Sie zum Anschließen
des Geräts keine Mehrfachsteck
dosen, Verlängerungsschnüre
oder Adapter, da dies zu Überhit
zung und Bränden führen kann.
• Trennen Sie aus Sicherheitsgrün
den das Gerät vom Stromnetz,
wenn es nicht verwendet wird oder
Sie sich für längere Zeit entfernen
werden.
• Ziehen Sie dabei niemals am Ver
sorgungskabel, sondern direkt am
Manual_Oscillor_2020.indd 10Manual_Oscillor_2020.indd 10 15/12/20 08:1715/12/20 08:17

11
NLFR PLEN SVDE
Kinder dürfen mit dem Gerät nicht
spielen. Reinigung und Wartung
dürfen ohne Beaufsichtigung nicht
von Kindern durchgeführt werden.
Kinder unter 3 Jahren sollten sich
ohne Beaufsichtigung nicht in der
Nähe des Geräts aufhalten. Kin-
der von 3 bis 8 Jahren sollten das
Gerät nur ein- oder ausschalten
dürfen, wenn es in der dafür vor-
gesehenen Betriebsposition mon-
tiert wurde. Dies gilt nur unter der
Voraussetzung, dass sie beauf-
sichtigt werden oder dass sie eine
Einweisung in die sichere Nutzung
des Geräts und die damit verbun-
denen Gefahren erhalten haben.
Kinder von 3 bis 8 Jahren dürfen
das Gerät nicht an eine Steckdose
anschließen, benutzen bzw. reini-
: Um eine Gefährdung
durch versehentliches Zurückset-
zen der Thermoschutzschaltung
zu vermeiden, darf dieses Gerät
Schalt-
gerät, wie beispielsweise einen
Timer, mit Strom versorgt oder an
einen Stromkreis angeschlossen
werden, der regelmäßig durch den
Energieversorger ein- und ausge-
Verwenden Sie kein beschädigtes
Gerät. Überprüfen Sie regelmäßig,
ob das Gerät und sein Netzkabel
beschädigt sind. Wenn das elekt-
rische Kabel beschädigt ist, muss
es vom Hersteller, von einem zer-
tiziertenTechnikerodereineran-
derenqualiziertenPersonersetzt
werden, um alle Risiken zu vermei-
den.
• Betreiben Sie das Gerät nur mit
der auf dem Typenschild angege-
benen Spannung.
• Schließen Sie das Gerät nur an
eine elektrische Anlage an, die die
geltenden Vorschriften erfüllt und
über einen Stromkreisschutz ver-
fügt. Stellen Sie sicher, dass die
maximaleStromstärkealler Gerä-
te am Schutzschalter die Strom-
stärke des Schutzschalters (16 A)
nicht überschreitet.
• Ist das Netzkabel beschädigt,
muss es vom Hersteller, dessen
Servicepartner oder ähnlich quali-
zierten Personen ausgetauscht
werden, um eine Gefährdung zu
vermeiden.
• Verwenden Sie zum Anschließen
des Geräts keine Mehrfachsteck-
dosen, Verlängerungsschnüre
oder Adapter, da dies zu Überhit-
zung und Bränden führen kann.
• Trennen Sie aus Sicherheitsgrün-
den das Gerät vom Stromnetz,
wenn es nicht verwendet wird oder
Sie sich für längere Zeit entfernen
werden.
• Ziehen Sie dabei niemals am Ver-
sorgungskabel, sondern direkt am
Stecker.
• Verwenden Sie das Gerät nicht,
wenn das Versorgungskabel sich
daraufoderdarunterbendet.Der
Stecker muss nach der Installation
zugänglich sein.
• Ziehen Sie niemals am Versor-
gungskabel, um das Gerät zu be-
wegen. Achten Sie beim Umstellen
des Geräts stets darauf, dass das
Versorgungskabel nicht blockiert
wird. Wickeln Sie das Versorgungs-
kabel nie um das Gerät.
• Achten Sie darauf, dass das Ver-
sorgungskabel keine Stolperge-
fahr darstellt.
• Bedecken Sie das Stromkabel
NICHT mit einem Teppich, einer
Decke ...
• Die Steckdose muss jederzeit zu-
gänglich sein, damit der Netzste-
cker so schnell wie möglich gezo-
gen werden kann.
• Trennen Sie das Gerät vom Strom-
netz, wenn es nicht in Gebrauch
ist und bevor Sie es bewegen oder
umstellen.
• Um das Gerät vom Stromnetz zu
trennen, ziehen Sie nicht am Netz-
kabel, sondern greifen den Stecker
an der Steckdose und ziehen vor-
sichtig daran.
• Halten Sie stets den Stecker fest,
wenn Sie das Gerät anschließen
oder vom Stromnetz trennen. Zie-
hen Sie niemals am Kabel. Sie ris-
kieren einen elektrischen Schlag
Manual_Oscillor_2020.indd 11Manual_Oscillor_2020.indd 11 15/12/20 08:1715/12/20 08:17

12
NLFR PLEN SVDE
und Beschädigungen.
• Schalten Sie das Gerät aus, bevor
Sie den Netzstecker ziehen.
• Platzieren Sie das Gerät nicht di-
rekt unter einer Wandsteckdose
oder einer Anschlussdose.
• Das Gerät muss an einem trocke-
nen Ort, fernab von Feuchtigkeits-
quellen und bei einer Temperatur
zwischen 15°C und 25°C gelagert
werden.
• Tauchen Sie das Gerät niemals in
Wasser und stellen Sie es niemals
auf Wasser oder eine andere Flüs-
sigkeit. Ziehen Sie sofort den Netz-
stecker, wenn das Gerät feucht
oder nass wird.
• Verwenden Sie das Gerät nicht mit
nassen oder feuchten Händen.
• Verwenden Sie das Gerät nicht
draußen (da es nicht speziell für
eine Verwendung im Freien konst-
ruiert wurde).
• Lassen Sie das laufende Gerät
nicht unbeaufsichtigt.
• Stellen Sie keine Gegenstände auf
das Gerät.
• Setzen Sie sich nicht auf das Ge-
rät.
• Um das Risiko einer Beschädi-
gung oder einer gefährlichen Si-
tuation zu vermeiden, verwenden
Sie das Gerät nicht bzw. stellen Sie
es nicht in der Nähe von Hitze, of-
fener Flamme, Kochgeräten oder
Heizquellen auf.
• Verwenden Sie das Gerät stets in
senkrechter Position.
• Beachten Sie das Risiko von Be-
schädigungen durch die scharfen
Kanten am Gerät.
• Stellen Sie sicher, dass Möbel, Vor-
hänge und sonstige brennbare Ge-
genstände mindestens einen (1)
Meter vom Gerät entfernt sind.
• Ziehen Sie vor einer Reinigung des
Geräts stets den Netzstecker.
• WARNUNG: Decken Sie das Ge-
rät nicht ab. Legen Sie keine Klei-
dungsstücke oder sonstige Texti-
lien auf das Gerät und behindern
Sie nicht die Luftzirkulation.
• Die Luftein- und -austrittsöffnun-
gen dürfen NICHT ABGEDECKT
oder in irgendeiner Weise blockiert
werden.
• Stecken Sie KEINE Gegenstände
durch den Lüfterschutz (Finger,
Stift, Werkzeug...)
• Verwenden Sie das Gerät niemals,
wenn die Lüfterschutzhauben
nicht entsprechend der Montage-
anleitung montiert sind.
• Entfernen Sie NICHT den Lüfter-
haubenschutz zur Reinigung.
• Platzieren Sie den Lufteinlass
NICHT in der Nähe von Wänden
oder Vorhängen (1 m). Eine Behin-
derung des Luftstroms kann den
Wirkungsgrad des Gerätes beein-
trächtigen.
TECHNISCHE SPEZIFIKATION
Modell
Leistung
Anzahl Geschwindigkeiten
Oszillation
Neigung verstellbar
Schalter für die Oszillation
Anzahl der Blätter
Material der Blätter
Material des Gitters
Durchmesser des Gitters
Gitter zerlegbar
Griff
Spannung
Frequenz
Maße des Produkts (BxTxH)
Gewicht des Produkts
BEDIENUNGSANLEITUNG
VOR DEM ERSTEN GEBRAUCH DES GERÄTS
1. Lesen Sie bitte diese Anweisungen aufmerksam, bevor Sie das Gerät nutzen, und bewahren Sie sie für späteres
Nachschlagen auf.
2. Stellen Sie sicher, dass die Spannung Ihres lokalen Stromnetzes mit der auf dem Gerät angegebenen übereinstimmt.
3. Entfernen Sie vor der ersten Verwendung die Folien und Aufkleber des Herstellers vom Gerät.
4. Stellen
ZUSAMMENBAU
1. Bringen Sie den Halter in eine senkrechte Position. Befestigen Sie den Motor (7) mithilfe der Halterschraube (12) am
Halter (11).
2. Lösen Sie die Abdeckkappe des Propellers (2) durch Drehen im Uhrzeigersinn. Lösen Sie die Sicherheitsmutter (4) durch
Drehen gegen den Uhrzeigersinn von der Welle des Motors (6).
3. Befestigen Sie das Hintergitter (5) an der Welle des Motors (6), wobei die 3 Löcher genau auf die 3 Nippel vorn am Motor
treffen müssen. Befestigen Sie das Hintergitter mithilfe der Sicherheitsmutter (4) durch Drehen im Uhrzeigersinn.
4. Befestigen Sie den Propeller des Ventilators (3) an der Welle des Motors (6). Drehen Sie die Abdeckkappe des Propellers
(2) gegen den Uhrzeigersinn fest. (Wichtig: Stellen Sie sicher, dass die Abdeckkappe des Propellers (2) ausreichend fest
an der Welle des Motors (6) sitzt.)
5. Lösen Sie die Schraube (14) unten am Gitter.
6. Bauen Sie das Vordergitter (1) und das Hintergitter (5) zusammen, wobei der Haken (15) oben platziert werden
muss. Ziehen Sie das Ganze mithilfe der Drücker rund um das Gitter fest und platzieren Sie zu Ihrer Sicherheit die
Befestigungsschraube (14) unten am Gitter. Stellen Sie sicher, dass alles fest sitzt.
BEDIENUNGSANLEITUNG
1. Schließen Sie das Gerät an die Netzsteckdose an.
2. Aktivieren
Uhrzeigersinn drehen. Über diesen Knopf und seine
Geschwindigkeit einstellen.
3. Heben Sie zur Regelung der Richtung des Luftstroms (nach oben oder unten) die Motoreinheit oder das Hintergitter an
oder senken Sie es ab. Achten Sie darauf, nicht die Finger durch das Gitter zu stecken.
4. Drehen Sie den Knopf gegen den Uhrzeigersinn, um den Ventilator auszuschalten.
GESCHWINDIGKEIT
Drehen Sie den Kontrollknopf für die Geschwindigkeit (9) zur Einstellung der Ventilationsgeschwindigkeit auf die Position
HOCH “3”, MITTEL “2” oder GERING “1”. Drehen Sie den Knopf gegen den Uhrzeigersinn, um die Ventilation anzuhalten.
OSZILLATION
Schieben Sie den Steuerungsknopf für die Oszillation (8) nach unten, um die Oszillation zu aktivieren. Schieben Sie ihn
wieder nach oben, um die Oszillation anzuhalten.
Manual_Oscillor_2020.indd 12Manual_Oscillor_2020.indd 12 15/12/20 08:1715/12/20 08:17

13
NLFR PLEN SVDE
Beachten Sie das Risiko von Be-
schädigungen durch die scharfen
Stellen Sie sicher, dass Möbel, Vor-
hänge und sonstige brennbare Ge-
genstände mindestens einen (1)
Ziehen Sie vor einer Reinigung des
: Decken Sie das Ge-
rät nicht ab. Legen Sie keine Klei-
Texti-
lien auf das Gerät und behindern
Die Luftein- und -austrittsöffnun-
ABGEDECKT
oder in irgendeiner Weise blockiert
Gegenstände
durch den Lüfterschutz (Finger,
Verwenden Sie das Gerät niemals,
wenn die Lüfterschutzhauben
nicht entsprechend der Montage-
den Lüfter-
Platzieren Sie den Lufteinlass
in der Nähe von Wänden
oder Vorhängen (1 m). Eine Behin-
derung des Luftstroms kann den
Wirkungsgrad des Gerätes beein-
TECHNISCHE SPEZIFIKATION
Modell OSCILLOR50
Leistung 90 W
Anzahl Geschwindigkeiten 3: gering, mittel, hoch
Oszillation Ja: automatisch
Neigung verstellbar Ja: manuell
Schalter für die Oszillation Ja
Anzahl der Blätter 3
Material der Blätter Transparenter Kunststoff
(leiser als Blätter aus Metall)
Material des Gitters Metall
Durchmesser des Gitters >50 cm
Gitter zerlegbar Ja: leicht zu reinigen
Griff Ja
Spannung 230 V~
Frequenz 50 HZ
Maße des Produkts (BxTxH) 55x32x60cm
Gewicht des Produkts 4,90kg
BEDIENUNGSANLEITUNG
VOR DEM ERSTEN GEBRAUCH DES GERÄTS
1. Lesen Sie bitte diese Anweisungen aufmerksam, bevor Sie das Gerät nutzen, und bewahren Sie sie für späteres
Nachschlagen auf.
2. Stellen Sie sicher, dass die Spannung Ihres lokalen Stromnetzes mit der auf dem Gerät angegebenen übereinstimmt.
3. Entfernen Sie vor der ersten Verwendung die Folien und Aufkleber des Herstellers vom Gerät.
4. StellenSiesicher,dassderSchaltersichinderPosition“OFF”bendet.
ZUSAMMENBAU
1. Bringen Sie den Halter in eine senkrechte Position. Befestigen Sie den Motor (7) mithilfe der Halterschraube (12) am
Halter (11).
2. Lösen Sie die Abdeckkappe des Propellers (2) durch Drehen im Uhrzeigersinn. Lösen Sie die Sicherheitsmutter (4) durch
Drehen gegen den Uhrzeigersinn von der Welle des Motors (6).
3. Befestigen Sie das Hintergitter (5) an der Welle des Motors (6), wobei die 3 Löcher genau auf die 3 Nippel vorn am Motor
treffen müssen. Befestigen Sie das Hintergitter mithilfe der Sicherheitsmutter (4) durch Drehen im Uhrzeigersinn.
4. Befestigen Sie den Propeller des Ventilators (3) an der Welle des Motors (6). Drehen Sie die Abdeckkappe des Propellers
(2) gegen den Uhrzeigersinn fest. (Wichtig: Stellen Sie sicher, dass die Abdeckkappe des Propellers (2) ausreichend fest
an der Welle des Motors (6) sitzt.)
5. Lösen Sie die Schraube (14) unten am Gitter.
6. Bauen Sie das Vordergitter (1) und das Hintergitter (5) zusammen, wobei der Haken (15) oben platziert werden
muss. Ziehen Sie das Ganze mithilfe der Drücker rund um das Gitter fest und platzieren Sie zu Ihrer Sicherheit die
Befestigungsschraube (14) unten am Gitter. Stellen Sie sicher, dass alles fest sitzt.
BEDIENUNGSANLEITUNG
1. Schließen Sie das Gerät an die Netzsteckdose an.
2. AktivierenSiedenVentilator,indemSiedenhintenbendlichenKontrollknopffürdieGeschwindigkeit(9)im
Uhrzeigersinn drehen. Über diesen Knopf und seine Positionen HOCH “3”, MITTEL “2” und GERING “1” lässt sich die
Geschwindigkeit einstellen.
3. Heben Sie zur Regelung der Richtung des Luftstroms (nach oben oder unten) die Motoreinheit oder das Hintergitter an
oder senken Sie es ab. Achten Sie darauf, nicht die Finger durch das Gitter zu stecken.
4. Drehen Sie den Knopf gegen den Uhrzeigersinn, um den Ventilator auszuschalten.
GESCHWINDIGKEIT
Drehen Sie den Kontrollknopf für die Geschwindigkeit (9) zur Einstellung der Ventilationsgeschwindigkeit auf die Position
HOCH “3”, MITTEL “2” oder GERING “1”. Drehen Sie den Knopf gegen den Uhrzeigersinn, um die Ventilation anzuhalten.
OSZILLATION
Schieben Sie den Steuerungsknopf für die Oszillation (8) nach unten, um die Oszillation zu aktivieren. Schieben Sie ihn
wieder nach oben, um die Oszillation anzuhalten.
Manual_Oscillor_2020.indd 13Manual_Oscillor_2020.indd 13 15/12/20 08:1715/12/20 08:17

14
NLFR PLEN SVDE
REINIGUNG UND PFLEGE
• Vor der Reinigung das Gerät stets vom Stromnetz trennen.
• ReinigenSiedieOberächedesGerätsmiteinemweichenTuchohneWasser.
• WenndasGerätsehrschmutzigist:ReinigenSieseineOberächemiteinemfeuchtenTuch(fügenSieeventuellein
nicht ätzendes Reinigungsmittel hinzu).
• Verwenden Sie kein ätzendes Reinigungsmittel, ätzendes Lösungsmittel oder chemisches Produkt.
• Verwenden Sie zur Reinigung des Geräts keinen scheuernden Schwamm, kein scheuerndes Putzkissen und keine harte
Bürste.
• Tauchen Sie das Gehäuse nicht ins Wasser.
• Vermeiden Sie, dass der Motor oder sonstige elektrische Bauteile mit Wasser in Kontakt kommen.
• Verpacken Sie das Gerät sorgfältig, wenn es für längere Zeit nicht verwendet wird. Lagern Sie es an einem kühlen,
belüfteten Ort, wo es vor Staub geschützt ist.
DIESES GERÄT IST AUSSCHLIESSLICH ZUR NUTZUNG IN WOHNRÄUMEN GEDACHT
GARANTIE
Für dieses EWT®-Gerät besteht eine Garantie von zwei (2) Jahren ab Kaufdatum bei normalen Nutzungsbedingungen.
Die Garantie gilt nicht für Schäden, die direkt oder indirekt auf missbräuchliche Nutzung, Nachlässigkeit, unsachgemäße
Nutzung,Unfälle,nichtkonformeReparaturenoderModikationenoderauffalschePegezurückzuführensind.Bewahren
Sie bitte Ihren Kassenzettel/Ihre Rechnung als Kaufbeleg auf. Die Zubehörteile für dieses Gerät sind Verschleißteile, für die
nur einen (1) Monat lang Garantie besteht.
Die Zubehörteile für dieses Gerät sind Verschleißteile, für die nur einen (1) Monat lang Garantie besteht.
AUSSCHLÜSSE VON DER GARANTIE
• Veränderungen, Zerlegung oder permanenter/temporärer Einbau in eine andere Maschine oder Konstruktion,
• Normale Abnutzung der Teile,
• Beschädigung durch unsachgemäße Nutzung,
• NichteinhaltungderBestimmungeninderBedienungsanleitung,denPege-unddenSicherheitshinweisen,
• SchädenaufgrundvonfalscherodermangelnderPege,
• Schäden durch äußere Einwirkung (z. B. Blitze),
• Verwendung des Geräts für nicht vorgesehene Zwecke,
• Falsche Lagerung,
• Stöße,
• Tauchen des Geräts ins Wasser
• VerwendungvonTeilenoderZubehör,dasnichtvonGlenDimplexFrancezugelassenwurde,
• Abgelaufene Garantie
ENTSORGUNG
Ressourcen und menschliche Gesundheit zu schützen.
HINWEISE ZUR NUTZUNG DER BATTERIEN
Wird eine benutzte Batterie im Freien oder mit dem Hausmüll entsorgt, wird die Umwelt verschmutzt und es ist keine
Aufbereitung der Wertstoffe möglich. Deshalb ist es wichtig, möglichst wenig Batterien zu verbrauchen und die folgenden
Anweisungen zu beachten:
1. Wählen
Batterien
2. Entsorgen Sie gebrauchte Batterien und Akkus in den dafür vorgesehenen Behältern in Geschäften. So können die Metalle
aufbereitet werden und die enthaltenen für Gesundheit und Umwelt gefährlichen Schwermetalle (vor allem Cadmium und
Nickel) gelangen nicht in die Umwelt
ERSETZEN SIE LEERE BATTERIEN DURCH BATTERIEN VOM TYP CR2032 3V.
INFORMATIONEN ZUR UMWELTFREUNDLICHKEIT DER VENTILATOREN
Pichtinformationen
EC des europäischen Parlaments und Rates bzgl. der Anforderungen an die Umweltfreundlichkeit von Klimageräten und
Ventilatoren.
Modell
Beschreibung
Maximale Luftdurchussmenge
Leistungsaufnahme
Serviceverhältnis
Stromverbrauch im Ruhemodus
Schallleistungspegel
Maximale Luftgeschwindigkeit
Messnorm für das Serviceverhältnis
Manual_Oscillor_2020.indd 14Manual_Oscillor_2020.indd 14 15/12/20 08:1715/12/20 08:17

15
NLFR PLEN SVDE
ein
Verwenden Sie zur Reinigung des Geräts keinen scheuernden Schwamm, kein scheuerndes Putzkissen und keine harte
Die Garantie gilt nicht für Schäden, die direkt oder indirekt auf missbräuchliche Nutzung, Nachlässigkeit, unsachgemäße
Bewahren
Sie bitte Ihren Kassenzettel/Ihre Rechnung als Kaufbeleg auf. Die Zubehörteile für dieses Gerät sind Verschleißteile, für die
ENTSORGUNG
Gemäß der Richtlinie 2012/19/EU über Elektro- und Elektronik-Altgeräte trägt dieses Gerät das Symbol der
durchgestrichenen Mülltonne, das darauf hinweist, dass das Produkt nicht in den Hausmüll gehört.
Es muss zu einem geeigneten Sammelplatz für die Verarbeitung, die Verwertung und das Recycling von
Elektro- und Elektronik-Altgeräten (informieren Sie sich bei Ihrer Gemeinde) oder zu einem Händler gebracht
werden, der es zurücknimmt, wobei kein Anspruch auf Erstattung oder Rabatt besteht.
Auf diese Weise denken Sie, der Verbraucher oder Benutzer, an die Umwelt und tragen dazu bei, natürliche
Ressourcen und menschliche Gesundheit zu schützen.
HINWEISE ZUR NUTZUNG DER BATTERIEN
Wird eine benutzte Batterie im Freien oder mit dem Hausmüll entsorgt, wird die Umwelt verschmutzt und es ist keine
Aufbereitung der Wertstoffe möglich. Deshalb ist es wichtig, möglichst wenig Batterien zu verbrauchen und die folgenden
Anweisungen zu beachten:
1. WählenSieAlkalibatterien(dielängeralsZink-Kohle-Batterienhalten)undverwendenSie,wennmöglich,wiederauadbare
Batterien
2. Entsorgen Sie gebrauchte Batterien und Akkus in den dafür vorgesehenen Behältern in Geschäften. So können die Metalle
aufbereitet werden und die enthaltenen für Gesundheit und Umwelt gefährlichen Schwermetalle (vor allem Cadmium und
Nickel) gelangen nicht in die Umwelt
ERSETZEN SIE LEERE BATTERIEN DURCH BATTERIEN VOM TYP CR2032 3V.
INFORMATIONEN ZUR UMWELTFREUNDLICHKEIT DER VENTILATOREN
PichtinformationenzudenVentilatorengemäßderEU-VerordnungNo206/2012unterAnwendungderRichtlinie2009/125/
EC des europäischen Parlaments und Rates bzgl. der Anforderungen an die Umweltfreundlichkeit von Klimageräten und
Ventilatoren.
Modell OSCILLOR50
Beschreibung Symbol Wert Einheit
Maximale Luftdurchussmenge F 109.30 m3/min
Leistungsaufnahme P 69.1 W
Serviceverhältnis SV 1.58 (m3/min)/W
Stromverbrauch im Ruhemodus PSB 0,00 W
Schallleistungspegel LWA 64,2 dB(A)
Maximale Luftgeschwindigkeit c 3,73 Meter/Sekunde
Messnorm für das Serviceverhältnis IEC 60879:1986 (corr.1992)
Manual_Oscillor_2020.indd 15Manual_Oscillor_2020.indd 15 15/12/20 08:1715/12/20 08:17

NLFR PLEN SVDE
16
Important: these instructions
should be read carefully before use
and retained for future reference.
• DANGER! Never place the appli-
ance beneath a source of water
(rain, tap…), risk of electric shock.
• WARNING – NEVER USE THIS AP-
PLIANCE IN A DAMP ROOM SUCH
AS A BATHROOM OR CLOSE TO A
SINK/BASIN, BATHTUB, SHOW-
ER, SWIMMING POOL, ETC...
• Use appliance only for intended
household use as described in
this manual. Any other use not
recommended by the manufactur-
ermaycauseariskofre,electric
shock or injury.
• This appliance can be used by
children aged 8 or over, by people
with reduced physical, sensorial
or mental capacities or by people
who lack experience and knowl-
edge of such equipment as long as
they are supervised or have been
given instructions for safe use of
the appliance and understand the
potential dangers involved. Chil-
dren must not have access to or
play with the appliance.
• Children of less than 3 years
should be kept away unless con-
tinuously supervised. Children
shall not be allowed to clean the
appliance with no supervision.
• Children aged from 3 years and
less than 8 years shall only switch
on/off the appliance provided that
it has beenplaced or installed in
its intended normal operating po-
sition and they have been given
supervision or instruction con-
cerning use of the appliance in a
safe way and understand the haz-
ards involved.
• Children aged from 3 years and
less than 8 years shall not plug in,
regulate and clean the appliance
or perform user maintenance.
• Very young children/babies
should not be allowed near or with-
in reach of the appliance. There
is danger as the openings in the
enclosure are not small enough
to prevent small ngers getting
in or caught and the area around
the fan head vertical swivel point
could also catch or trap ngers,
please consider your child’s and
your safety.
• WARNING: In order to avoid any
uncontrolled restart of the thermal
circuit breaker, electricity to this
appliance must not be supplied
viaanexternalswitchsuchasa
timer or a remote-control system
or connected to a circuit which is
regularly switched on and off by
the electricity supplier.
• Do not use a damaged appliance.
SAFETY ADVICE
Check regularly that the appli
ance and its power cable are not
damaged. If the electrical cable is
damaged, it must be replaced by
the
technician
person in order to avoid all risks.
• Operate the appliance only at the
voltage
bel.
• Only connect the appliance to an
electrical supply, which complies
with all applicable standards and
has a delayed circuit breaker.
Check
of all of the appliances connect
ed to this power supply does not
exceed
the circuit breaker (16A).
•A
carry out repairs to electrical ap
pliances. Incorrectly carried out
repair work can cause major risks
for users.
•Do
sion lead or adaptor when plug
ging the appliance in as there is
a potential risk of overheating and
re.
• For safety reasons, unplug the ap
pliance when it is not being used
and when no one will be present
to supervise it for a long period.
• Do not use the appliance if the
power cable is under the appli
ance. The plug must be accessi
ble once the appliance is installed.
Manual_Oscillor_2020.indd 16Manual_Oscillor_2020.indd 16 15/12/20 08:1715/12/20 08:17

NLFR PLEN SVDE
17
Children aged from 3 years and
less than 8 years shall only switch
on/off the appliance provided that
it has beenplaced or installed in
its intended normal operating po-
sition and they have been given
supervision or instruction con-
cerning use of the appliance in a
safe way and understand the haz-
Children aged from 3 years and
less than 8 years shall not plug in,
regulate and clean the appliance
Very young children/babies
should not be allowed near or with-
in reach of the appliance. There
is danger as the openings in the
enclosure are not small enough
getting
in or caught and the area around
the fan head vertical swivel point
ngers,
please consider your child’s and
In order to avoid any
uncontrolled restart of the thermal
circuit breaker, electricity to this
appliance must not be supplied
asa
timer or a remote-control system
or connected to a circuit which is
regularly switched on and off by
Do not use a damaged appliance.
Check regularly that the appli-
ance and its power cable are not
damaged. If the electrical cable is
damaged, it must be replaced by
the manufacturer, by a certied
technician or any other qualied
person in order to avoid all risks.
• Operate the appliance only at the
voltagespeciedontheratingla-
bel.
• Only connect the appliance to an
electrical supply, which complies
with all applicable standards and
has a delayed circuit breaker.
Check that the maximum power
of all of the appliances connect-
ed to this power supply does not
exceedthemaximumcapacityof
the circuit breaker (16A).
•A qualied professional must
carry out repairs to electrical ap-
pliances. Incorrectly carried out
repair work can cause major risks
for users.
•Donotuseamulti-socket,exten-
sion lead or adaptor when plug-
ging the appliance in as there is
a potential risk of overheating and
re.
• For safety reasons, unplug the ap-
pliance when it is not being used
and when no one will be present
to supervise it for a long period.
• Do not use the appliance if the
power cable is under the appli-
ance. The plug must be accessi-
ble once the appliance is installed.
• Never pull on the power cable to
move the appliance. Always en-
sure that the power cable is un-
constrained when you move the
appliance. Never wrap the power
cable around the appliance.
• Ensure that the cable does not
risk tripping anybody up.
• Do not cover the power cable with
a rug, carpet, blanket...
• Always hold the plug when you
plug in or unplug the appliance.
Never unplug it by pulling on
the power cable. Risk of electric
shock and damage.
• Switch the appliance off before
unplugging it.
• Never place the equipment just
belowawallplugorjunctionbox.
• The appliance must be stored in a
dry place, away from any sources
of dampness and at a tempera-
ture of between 15°C and 25°C.
• Never immerse the appliance in
water and never place it on water
or any other liquid. Unplug the ap-
pliance immediately if it becomes
damp or wet.
• Never use the appliance when you
have wet or damp hands.
• Do not use the appliance outdoors
(it is not designed for use in the
open air).
• Do not leave the appliance
switched on without supervision.
• Do not place any objects on top of
the appliance.
Manual_Oscillor_2020.indd 17Manual_Oscillor_2020.indd 17 15/12/20 08:1715/12/20 08:17

NLFR PLEN SVDE
18
• Do not sit on the appliance.
• Do not subject the appliance to
heat (radiator, oven…), to direct
sunlight or dampness.
• Always use the appliance in a ver-
tical position.
• Be careful of the potential dam-
age that can be caused by the ap-
pliance’s sharp edges.
• Always unplug the appliance be-
fore cleaning it.
• WARNING: Do not cover the appli-
ance. Do not place any materials
or clothes on the appliance or im-
pede the circulation of air around
the appliance.
• DO NOT BLOCK THE VENTILA-
TION! Regularly check that the
air intakes and outlets are not ob-
structed.
• Do not place the air intake close
to walls or curtains (1m). Obstruc-
tionoftheairowmayreducethe
appliance’seciency.
• Do not put any objects through
the protective fan guard (nger,
pen, tool…)
• DO NOT attempt to repair or adjust
any electrical or mechanical func-
tions on this unit. Doing so will
void your warranty. The inside of
the unit contains no user service-
able parts. All servicing should be
performedbyqualiedpersonnel
only.
• WARNING: To reduce the risk of
reor electricshock, donot use
this appliance with any solid-state
speed control device.
• WARNING: To avoid danger of suf-
focation please remove all pack-
aging materials particularly plas-
tic and EPS and keep these away
from vulnerable people, children
and babies.
• WARNING: To avoid the risk of
accidental strangulation from
the supply cord all children and
vulnerable people must be su-
pervised when near the product
whether it is working or not.
• Do not drop any objects into the
openings. Do not insert any ob-
jects into the openings.
• Do not unplug the appliance by
pulling on the power cable.
• Do not place the appliance on an
unstable surface such as a bed or
a sofa. The appliance may tip over
and block the air intake or outlet.
SPECIFICATIONS
Model
Power
Number of speeds
Oscillation
Tilt adjustment
Oscillation switch
Number of blades
Blade material
Grill material
Grill diameter
Removeable grill
Handle
Voltage
Frequency
Product dimensions (LxDxH)
Product weight
INSTRUCTIONS OF USE
BEFORE USING APPLIANCE FOR THE FIRST TIME
1. Please read these instructions carefully before using the appliance and keep them for future use.
2. Check that the voltage of your local electricity network complies with the one which appears on the appliance.
3. Before
ASSEMBLY
1. Place the bracket into vertical position. Attach the motor (7) to the bracket (11) using the mounting screw (12).
2. Unscrew the blade centre cap (2) by turning it in a clockwise direction. Unscrew the safety nut (4) of the motor shaft (6)
by turning it in an anti-clockwise direction.
3. Attach the back grill (5) to the motor shaft (6) making sure that you align the three holes with the three mounting stubs
located at the front of the motor. Attach the back grill using the safety nut (4) by turning it in a clockwise direction.
4. Attach the fan blade (3) to the motor shaft (6). Tighten the blade centre cap (2) by turning it in an anti-clockwise direc-
tion.
5. Unscrew the mounting screw (14) located on the bottom of the grill.
6. Assemble the front grill (1) and the back grill (5) by placing the hook (15) at the top. Tighten using the locking latches
located all around the grill and screw in the small mounting screw on the bottom of the grill (14) for your safety. Ensure
that all elements are correctly attached.
INSTRUCTIONS FOR USE
1. Plug the appliance into the socket.
2. Activate the fan by turning the speed control button (9) located at the back in a clockwise direction. The button also
allows you to set the speed by selecting the FAST “3”, MEDIUM “2” or SLOW “1” positions.
3. In
that
4. Turn the button in an anti-clockwise direction to switch the fan off.
SPEED
Turn the speed control button (9) to set the fan speed to the FAST “3”, MEDIUM “2” or SLOW “1”. Turn the button in an
anti-clockwise direction to stop the fan.
OSCILLATION
In order to activate the oscillation function, push the oscillation control button downwards (8). Push the oscillation control
button (9) upwards again to stop oscillation.
Manual_Oscillor_2020.indd 18Manual_Oscillor_2020.indd 18 15/12/20 08:1715/12/20 08:17

NLFR PLEN SVDE
19
this appliance with any solid-state
To avoid danger of suf-
focation please remove all pack-
aging materials particularly plas-
tic and EPS and keep these away
from vulnerable people, children
To avoid the risk of
accidental strangulation from
the supply cord all children and
vulnerable people must be su-
pervised when near the product
Do not drop any objects into the
openings. Do not insert any ob-
Do not unplug the appliance by
Do not place the appliance on an
unstable surface such as a bed or
a sofa. The appliance may tip over
and block the air intake or outlet.
SPECIFICATIONS
Model OSCILLOR50
Power 90W
Number of speeds 3: slow, medium, fast
Oscillation Yes: automatic
Tilt adjustment Yes: manual
Oscillation switch Yes
Number of blades 3
Blade material Transparent plastic
(quieter than metal blades)
Grill material Metal
Grill diameter >50 cm
Removeable grill Yes: easy to clean
Handle Yes
Voltage 220-240V~
Frequency 50HZ
Product dimensions (LxDxH) 55x32x60cm
Product weight 4,90 kg
INSTRUCTIONS OF USE
BEFORE USING APPLIANCE FOR THE FIRST TIME
1. Please read these instructions carefully before using the appliance and keep them for future use.
2. Check that the voltage of your local electricity network complies with the one which appears on the appliance.
3. Beforeusingtheapplianceforthersttime,removetheappliance’sprotectivelmsorstickers.
ASSEMBLY
1. Place the bracket into vertical position. Attach the motor (7) to the bracket (11) using the mounting screw (12).
2. Unscrew the blade centre cap (2) by turning it in a clockwise direction. Unscrew the safety nut (4) of the motor shaft (6)
by turning it in an anti-clockwise direction.
3. Attach the back grill (5) to the motor shaft (6) making sure that you align the three holes with the three mounting stubs
located at the front of the motor. Attach the back grill using the safety nut (4) by turning it in a clockwise direction.
4. Attach the fan blade (3) to the motor shaft (6). Tighten the blade centre cap (2) by turning it in an anti-clockwise direc-
tion.(Important:makesurethatthebladecentrecap(2)issucientlytightenedtothesurfaceofthemotorshaft(6).
5. Unscrew the mounting screw (14) located on the bottom of the grill.
6. Assemble the front grill (1) and the back grill (5) by placing the hook (15) at the top. Tighten using the locking latches
located all around the grill and screw in the small mounting screw on the bottom of the grill (14) for your safety. Ensure
that all elements are correctly attached.
INSTRUCTIONS FOR USE
1. Plug the appliance into the socket.
2. Activate the fan by turning the speed control button (9) located at the back in a clockwise direction. The button also
allows you to set the speed by selecting the FAST “3”, MEDIUM “2” or SLOW “1” positions.
3. Inordertosetthedirectionoftheairowupwardsordownwards,liftorlowerthemotorunitorthebackgrill.Makesure
thatyourngersdonotgothroughthegrill.
4. Turn the button in an anti-clockwise direction to switch the fan off.
SPEED
Turn the speed control button (9) to set the fan speed to the FAST “3”, MEDIUM “2” or SLOW “1”. Turn the button in an
anti-clockwise direction to stop the fan.
OSCILLATION
In order to activate the oscillation function, push the oscillation control button downwards (8). Push the oscillation control
button (9) upwards again to stop oscillation.
Manual_Oscillor_2020.indd 19Manual_Oscillor_2020.indd 19 15/12/20 08:1715/12/20 08:17

NLFR PLEN SVDE
20
CLEANING AND MAINTENANCE
• Always unplug the appliance before cleaning it.
• Clean the surface of the appliance using a soft cloth, do not use any water.
• If the appliance is very dirty, clean the surface using a damp cloth (add a non-corrosive cleaning product if required.
• Do not use corrosive detergents, corrosive solvents or chemical products.
• Do not use an abrasive sponge, scouring pad or hard brush to clean the appliance.
• Do not immerse the main body of the appliance into water.
• Ensure that the motor and the other electrical components do not come into contact with water.
• If the appliance is not to be used for a long period, pack it away carefully. Store it in a dry and ventilated area where it
will not be affected by dust.
• Clean the outer grill using a non-corrosive detergent and a soft brush.
THIS APPLIANCE IS SOLELY DESIGNED FOR DOMESTIC USE
WARRANTY
This EWT®appliance comes with a two- (2) year warranty which begins on the date of purchase and only applies to use
under normal conditions. The warranty does not apply to damage incurred as a direct or indirect result of inappropriate use,
negligence, improper use, accidents, improper repairs or lack of maintenance. Please keep your receipt/invoice as proof of
purchase.
The accessories which come with this are consumables and the warranty pertaining to them is limited to one (1) month.
EXCLUSIONS FROM WARRANTY
• Modications,disassemblyorintegrationintoanothermachineorassemblymakingtheappliancexedorsemi-xed,
• Normal wear and tear of parts,
• Deterioration following incorrect use,
• Failure to respect the instructions manual or the maintenance and safety instructions,
• Damage arising from faulty maintenance or lack of maintenance,
• Damagecausedbyexteriorfactors(lightning…),
• Abnormal use of the machine,
• Storage in poor/inappropriate conditions,
• Impacts,
• Immersion of the appliance
• UseofpartsoraccessorieswhicharenotapprovedandcertiedbyGlenDimplexConsumerAppliance,
• Expiryofwarranty.
RECYCLING
In compliance with European Directive 2012/19/EU regarding electrical and electronic equipment (WEEE), this
equipment is marked with the crossed-out dustbin symbol which indicates that that the product should not be
disposed of with household waste.
It should be delivered to an appropriate collection point for processing, valuation, recycling of EEE waste (obtain
information from your local town or city hall) or returned to a distributor on a “1 for 1 free” basis (recovery by the
distributor does not entitle you to any payment or discount).
By taking this action in favour of the environment, you, as a consumer or user, will be making a contribution to the preserva-
tion of natural resources and the protection of human health.
INFORMATION ABOUT USING BATTERIES
Disposing of a used battery into the environment or along with household waste is a source of pollution and prevents recovery
of materials which are of value and can be reused. It is therefore important to restrict your consumption of batteries and to
respect the following instructions:
1. Favour alkaline batteries (which last longer than saline ones) and, whenever possible, rechargeable batteries.
2. Place
ies contain can thus be valued and reused and they will not pollute the environment as they contain heavy metals which
are dangerous both to health and the environment (mainly cadmium and nickel)
WHEN THE BATTERY IS WORN OUT, REPLACE IT WITH A CR2025 3V BATTERY.
INFORMATION RELATING TO ECO-DESIGN OF FANS
Information required for fans, in compliance with regulation (EU) No
European Parliament and Council concerning the eco-design requirements applicable to air conditioners and fans.
Model
Description
Maximum fan ow rate
Power consumption
Service value
Consumption of electricity in standby mode
Sound power level
Maximum air velocity
Measurement standard of service value
Manual_Oscillor_2020.indd 20Manual_Oscillor_2020.indd 20 15/12/20 08:1715/12/20 08:17
Table of contents
Languages:
Other EWT Fan manuals
Popular Fan manuals by other brands

Vent-Axia
Vent-Axia Kinetic Advance White installation instructions

SPT
SPT SF-1670M instructions

Ruck Ventilatoren
Ruck Ventilatoren EM 100L E2 01 Assembly instruction

Vents
Vents Boost 315 user manual

S&P
S&P PCD80XH Installation, operation and maintenance manual

ICE AIR
ICE AIR FCHC Operating and maintenance manual