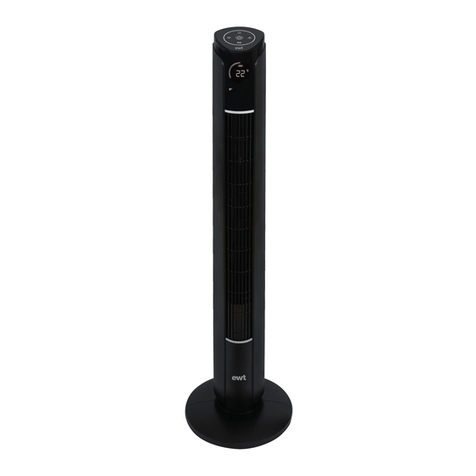
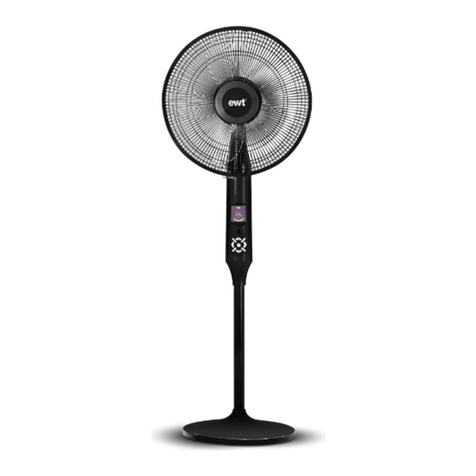
EWT VENTILEC User manual

www.ewt-france.com
MANUEL D’UTILISATION / USER MANUAL / GEBRUIKSHANDLEIDING
FR EN NL
VENTILEC
MODEL
FR | Merci d’avoir acheté le ventilateur sur pied, VENTILEC
EWT®. Vous pouvez être sûr qu’avec EWT®, vous avez acquis
un produit de haute qualité conçu pour un fonctionnement
optimal. POUR VOTRE SÉCURITÉ : LIRE ATTENTIVEMENT ET
COMPRENDRE TOUTES LES INSTRUCTIONS
EN | Thank you for purchasing this this pedestal fan, VENTILEC
EWT®. You can be sure that with EWT®, you have bought a top-
quality product which is designed for optimal performance.
FOR YOUR SAFETY: PLEASE READ CAREFULLY AND ENSURE
THAT YOU UNDERSTAND ALL INSTRUCTIONS
NL | Bedankt dat u de ventilator te voet, VENTILEC van EWT®
heeft gekocht. U kunt er zeker van zijn dat u met EWT®een
kwaliteitsproduct hebt aangeschaft, speciaal ontworpen voor
een optimale werking. VOOR UW VEILIGHEID: ZORG DAT U
ALLE AANWIJZINGEN AANDACHTIG LEEST EN BEGRIJPT
Ventilec.indd 1 28/11/18 15:30

FR EN NL
www.ewt-france.com www.ewt-france.com
2
1. Socle
2. Pied du ventilateur
3. Grandécroudexation
4. Câble électrique
5. Couvercle arrière
6. Point de pivot
7. Protection arrière du moteur
8. Protection avant du moteur
9. Grille arrière
10. Ceinture de la grille
11. Pales
12. Ecrou de sécurité de la grille
arrière
13. Capuchon avant de l’hélice
14. Disque décoratif
15. Grille frontale
16. Couvercle avant
17. Ecrand’achageLED
18. Capteur de la télécommande
19. Panneau de contrôle
1. Latch
2. Fan stand
3. Large clamping nut
4. Electrical cable
5. Back cover
6. Pivot / Oscillation point
7. Back motor protector
8. Front motor protector
9. Back fan guard
10. Fan guard belt
11. Blades
12. Back fan guard safety nut
13. Blades safety cap
14. Decorative circle
15. Front fan guard
16. Front cover
17. LED screen
18. Remote control sensor
19. Control panel
1. Voetstuk
2. Voet van de ventilator
3. Grote bevestigingsmoer
4. Stroomsnoer
5. Achterste deksel
6. Spil- / draaipunt
7. Achterste motorafscherming
8. Voorste motorafscherming
9. Achterste rooster
10. Ring van het rooster
11. Schoepen
12. Veiligheidsmoer van het
achterste rooster
13. Propellerdop
14. Decoratieve ring
15. Voorste rooster
16. Voorste deksel
17. LED-scherm
18. Ontvanger van de
afstandsbediening
19. Bedieningspaneel
EN NLFR
FR VUE ÉCLATÉE / EN COMPOSITION OF YOUR UNIT / NL SAMENSTELLING VAN UW TOESTEL
CONSIGNES DE SÉCURITÉ
Cher Client,
Merci de lire attentivement les
instructions avant d’utiliser cet
appareil, une utilisation incor-
recte risquant de l’endommager.
Soyez particulièrement attentif
aux consignes de sécurité. Si vous
conez cet appareil à un autre utili-
sateur, remettez-lui ce manuel. Cet
appareil répond aux prescriptions
en matière de sécurité concernant
les appareils électriques. Une uti-
lisation non conforme peut cepen-
dant provoquer des dommages aux
personnes et aux biens. Lisez at-
tentivement la totalité du présent
mode d’emploi avant la mise en
service de l’appareil. Conservez le
mode d’emploi, le certicat de ga-
rantie et le reçu, ainsi que, dans la
mesure du possible, l’emballage.
• Cet appareil est conçu exclusive-
ment pour une utilisation privée
et pour l’usage prévu. Les utilisa-
tions autres que celles prévues
ne sont pas autorisées et peuvent
être dangereuses.
• DANGER ! Ne placez jamais l’ap-
pareil sous une source d’eau
(pluie, robinet…), risque de choc
électrique.
• ATTENTION – N’UTILISEZ JA-
MAIS CET APPAREIL DANS
UNE PIECE HUMIDE TELLE QUE
Ventilec.indd 2 28/11/18 15:30

FR EN NL
www.ewt-france.com www.ewt-france.com
3
FR VUE ÉCLATÉE / EN COMPOSITION OF YOUR UNIT / NL SAMENSTELLING VAN UW TOESTEL
CONSIGNES DE SÉCURITÉ
Cher Client,
Merci de lire attentivement les
instructions avant d’utiliser cet
appareil, une utilisation incor-
recte risquant de l’endommager.
Soyez particulièrement attentif
aux consignes de sécurité. Si vous
conez cet appareil à un autre utili-
sateur, remettez-lui ce manuel. Cet
appareil répond aux prescriptions
en matière de sécurité concernant
les appareils électriques. Une uti-
lisation non conforme peut cepen-
dant provoquer des dommages aux
personnes et aux biens. Lisez at-
tentivement la totalité du présent
mode d’emploi avant la mise en
service de l’appareil. Conservez le
mode d’emploi, le certicat de ga-
rantie et le reçu, ainsi que, dans la
mesure du possible, l’emballage.
• Cetappareilestconçuexclusive-
ment pour une utilisation privée
et pour l’usage prévu. Les utilisa-
tions autres que celles prévues
ne sont pas autorisées et peuvent
être dangereuses.
• DANGER ! Ne placez jamais l’ap-
pareil sous une source d’eau
(pluie, robinet…), risque de choc
électrique.
• ATTENTION – N’UTILISEZ JA-
MAIS CET APPAREIL DANS
UNE PIECE HUMIDE TELLE QUE
SALLE DE BAIN OU À PROXIMITÉ
D’UN LAVABO, D’UNE BAIGNOIRE,
D’UNE DOUCHE, D’UNE PISCINE,
ETC.
• Cet appareil peut être utilisé par
des enfants à partir de 8 ans,
par des personnes aux capaci-
tés physiques, sensorielles ou
mentales réduites ou manquant
d’expérience et de connais-
sances à condition qu’elles aient
été placées sous surveillance ou
qu’elles aient reçu des instruc-
tions concernant l’utilisation de
l’appareil en toute sécurité et
qu’elles comprennent les dangers
encourus.
• Les enfants ne doivent pas avoir
accès, ni jouer avec l’appareil.
• Cet appareil ne peut être nettoyé
ou utilisé par des enfants sans
supervision. Tenir l’appareil hors
de portée des enfants de moins
de trois ans ou maintenir une sur-
veillance constante.
• Les enfants âgés de 3 à 8 ans
peuvent allumer/éteindre l’appa-
reil sous réserve qu’il ait été pla-
cé ou installé dans une position
d’utilisation normale, uniquement
sous la supervision d’un adulte et
après avoir reçu des instructions
concernant l’utilisation sûre de
l’appareil et compris les risques
encourus. Les enfants âgés de 3 à
8 ans ne peuvent brancher, régler
Ventilec.indd 3 28/11/18 15:30

FR EN NL FR EN NL
www.ewt-france.com www.ewt-france.com
4
et nettoyer l’appareil ni effectuer
d’opérations de maintenance.
• ATTENTION : An d’éviter tout
danger dû au réarmement in-
tempestif du coupe-circuit ther-
mique, cet appareil ne doit pas
être alimenté par l’intermédiaire
d’uninterrupteurexterne,comme
une minuterie, un programma-
teur, un système de commande
à distance ou être connecté à un
circuit qui est régulièrement mis
sous tension et hors tension par
le fournisseur d’électricité.
• N’utilisez pas un appareil endom-
magé.Vériezrégulièrementque
l’appareil et le cordon d’alimen-
tation ne soient pas abîmés. Si
le cordon électrique est endom-
magé, il doit être remplacé par le
fabricant, par un technicien agréé
ou toute personne qualiée an
d’éviter tout danger.
• Branchez l’appareil sur le courant
alternatif de 230 volts.
• Branchez l’appareil uniquement
sur une installation électrique
conformeauxnormesenvigueur
avec une protection de circuit
temporisée.Vériezquel’intensi-
témaximaledetouslesappareils
se trouvant sur ce disjoncteur ne
puisse dépasser l’intensité du
disjoncteur (16A).
• Les réparations sur les appareils
électriques doivent être effec-
tuées uniquement par un profes-
sionnel qualié. Une réparation
non conforme peut entraîner des
risques importants pour l’utilisa-
teur.
• Ne pas utiliser de multiprises,
de rallonge, d’adaptateur pour le
branchement de l’appareil, risque
de surchauffe et d’incendie.
• Par mesure de sécurité, débran-
cher l’appareil lorsqu’il n’est pas
utilisé et avant toute absence
prolongée.
• Ne jamais tirer sur le cordon d’ali-
mentation, mais sur la prise elle-
même pour le débrancher.
• Ne pas utiliser l’appareil si le
cordon d’alimentation se trouve
sous/sur l’appareil. La prise doit
être accessible après l’installa-
tion.
• Ne tirez jamais sur le cordon d’ali-
mentation pour déplacer l’appa-
reil. Veillez toujours à ce que le
cordon d’alimentation soit libre
en cas de changement d’empla-
cement. N’enroulez jamais le cor-
don d’alimentation autour de l’ap-
pareil.
• Veillez à ce que le cordon d’ali-
mentation ne présente pas de
risque de faire trébucher.
• Ne pas recouvrir le cordon d’ali-
mentation par un tapis, moquette,
couverture.
• Toujours tenir la prise lorsque
vous branchez ou débranchez
l’appareil. Ne débranchez jamais
en tirant sur le cordon. Risque de
choc électrique et de dommage.
• Arrêtez d’abord l’appareil avant de
retirer la prise secteur.
• Ne pas placer l’appareil juste en
dessous d’une prise murale ou
d’un boîtier de connexion.
• L’appareil doit être stocké dans un
endroit sec, à l’abri de l’humidité
et dont la température est com-
prise entre 15°C et 25°C.
• N’immergez ou ne poser jamais
l’appareil dans l’eau ou tout autre
liquide. Débranchez immédiate-
ment la prise secteur si l’appareil
se retrouve mouillé ou humide.
• N’utilisez pas l’appareil avec les
mains mouillées ou humides.
• N’utilisez pas l’appareil en exté-
rieur (il n’est pas conçu pour une
utilisation en plein air).
• Ne laissez pas l’appareil en
marche sans surveillance.
• Ne pas poser d’objets sur le des-
sus de l’appareil.
• Ne pas s’assoir sur l’appareil.
• Ne soumettez pas l’appareil à
la chaleur (radiateur, four…), au
rayonnement solaire direct ou à
l’humidité.
• Toujours utiliser l’appareil vertica-
lement.
• Faites attention aux risques de
dommages que présentent les
Ventilec.indd 4 28/11/18 15:30

FR EN NL FR EN NL
www.ewt-france.com www.ewt-france.com
5
tuées uniquement par un profes-
sionnel qualié. Une réparation
non conforme peut entraîner des
risques importants pour l’utilisa-
teur.
• Ne pas utiliser de multiprises,
de rallonge, d’adaptateur pour le
branchement de l’appareil, risque
de surchauffe et d’incendie.
• Par mesure de sécurité, débran-
cher l’appareil lorsqu’il n’est pas
utilisé et avant toute absence
prolongée.
• Ne jamais tirer sur le cordon d’ali-
mentation, mais sur la prise elle-
même pour le débrancher.
• Ne pas utiliser l’appareil si le
cordon d’alimentation se trouve
sous/sur l’appareil. La prise doit
être accessible après l’installa-
tion.
• Ne tirez jamais sur le cordon d’ali-
mentation pour déplacer l’appa-
reil. Veillez toujours à ce que le
cordon d’alimentation soit libre
en cas de changement d’empla-
cement. N’enroulez jamais le cor-
don d’alimentation autour de l’ap-
pareil.
• Veillez à ce que le cordon d’ali-
mentation ne présente pas de
risque de faire trébucher.
• Ne pas recouvrir le cordon d’ali-
mentation par un tapis, moquette,
couverture.
• Toujours tenir la prise lorsque
vous branchez ou débranchez
l’appareil. Ne débranchez jamais
en tirant sur le cordon. Risque de
choc électrique et de dommage.
• Arrêtez d’abord l’appareil avant de
retirer la prise secteur.
• Ne pas placer l’appareil juste en
dessous d’une prise murale ou
d’unboîtierdeconnexion.
• L’appareil doit être stocké dans un
endroit sec, à l’abri de l’humidité
et dont la température est com-
prise entre 15°C et 25°C.
• N’immergez ou ne poser jamais
l’appareil dans l’eau ou tout autre
liquide. Débranchez immédiate-
ment la prise secteur si l’appareil
se retrouve mouillé ou humide.
• N’utilisez pas l’appareil avec les
mains mouillées ou humides.
• N’utilisez pas l’appareil en exté-
rieur (il n’est pas conçu pour une
utilisation en plein air).
• Ne laissez pas l’appareil en
marche sans surveillance.
• Ne pas poser d’objets sur le des-
sus de l’appareil.
• Ne pas s’assoir sur l’appareil.
• Ne soumettez pas l’appareil à
la chaleur (radiateur, four…), au
rayonnement solaire direct ou à
l’humidité.
• Toujours utiliser l’appareil vertica-
lement.
• Faites attention aux risques de
dommages que présentent les
arêtes vives de l’appareil.
• S’assurer que les meubles, les
rideaux ou les autres matériaux
combustibles sont positionnés à
plus d’un (1) mètre de l’appareil.
• Avant de nettoyer l’appareil, tou-
jours débrancher la prise secteur.
• AVERTISSEMENT : Ne pas couvrir
l’appareil. Ne pas placer de maté-
riauxoudevêtementssurl’appa-
reil ou entraver la circulation d’air
autour de l’appareil.
• NE PAS BLOQUER LA VENTI-
LATION ! Vériez régulièrement
que les entrées et sorties d’air ne
soient pas obstruées.
• Ne rien introduire à travers la grille
de protection (doigt, stylo, outil…)
• Ne jamais utiliser l’appareil si les
grilles de protections ne sont pas
installées conformément à la no-
tice.
• Ne pas démonter la grille de pro-
tection pour le nettoyage.
• Ne pas placer l’arrivée d’air de
l’appareilàproximitédemursou
derideaux(1m).L’obstructiondu
passage de l’air risquant de ré-
duiresonecacité.
Ventilec.indd 5 28/11/18 15:30

FR EN NL FR EN NL
www.ewt-france.com www.ewt-france.com
6
CARACTÉRISTIQUES
Modèle VENTILEC
Nombre de vitesses 3 – Lente, Moyenne, Rapide
Modes préprogrammés Oui – Normal, Naturel, Nuit
Oscillation Oui
Inclinaison réglable Oui : manuelle
Minuterie Oui : 1 – 2 – 4 – 8H
Achagedigital Oui–écranLED
Télécommande Oui
Nombre de pales 5
Puissance 50W
Tension 220 - 240 V~
Fréquence 50 HZ
Dimensionsproduit(LxPxH) L45xP40xH130
Poids produit 7.2kg
ASSEMBLAGE
Étape 1
Dans un premier temps, placez le
socle (1) sur un sol plat et insérez au
centre le pied du ventilateur (2).
Sécurisez en vissant fermement la vis
en L sur le dessous du socle (1).
Étape 2
Placez l’ensemble du moteur (4-8) sur
le dessus du pied du ventilateur (2) et
vissez fermement le grand écrou de
xation(3).
Étape 3
Attachez la grille arrière (9) au moteur
en alignant les trous de la grille à la
protection avant du moteur (8).
Sécurisezenxantfermementl’écrou
de sécurité de la grille arrière (12).
Étape 4
Placez ensuite les pales (11) du
ventilateur et sécurisez-les avec le
capuchon avant de l’hélice (13) en
tournant dans le sens contraire des
aiguilles d’une montre.
Étape 5
Fixez la grille avant (15) à la grille
arrière (9). Pour cela, pressez de
vos deux main les deux grilles
ensemble sur tout le tour an de les
clipser correctement en alignant
bien la ceinture de la grille (10). Puis,
sécurisez le tout en vissant le fermoir
situé sur la grille avant (15).
Étape 6
Une fois que l’appareil est
correctement assemblé, utilisez-le en
suivant les instructions d’utilisation
ci-après.
INSTRUCTIONS D’UTILISATION
A. Marche / Arrêt
B. Contrôle de la minuterie
C. Contrôle de la vitesse de ventilation
D. Contrôle des modes de ventilation
E. Contrôle de la vitesse de ventilation
F. Contrôle de la minuterie
G. Contrôle des modes de ventilation
H. Marche / Arrêt
I. Indicateur « Minuterie »
J. Indicateur « Mode de ventilation »
K. Indicateur « Vitesse de ventilation »
1. Veuillez lire attentivement ces instructions avant
d’utiliser l’appareil et conservez-les pour une
consultation ultérieure.
2. Vériez si la tension de votre réseau électrique local
correspond à celle qui gure sur l’appareil.
3. Avant la première utilisation, retirez les lms ou
autocollants protecteurs de l’appareil.
Bouton de mise en marche et arrêt de l’appareil
Après avoir branché l’appareil, appuyez sur le bouton pour
allumer l’appareil.
Appuyez une seconde fois pour l’éteindre.
Lors de la première mise en marche de l’appareil, l’appareil
sera réglé par défaut sur le mode Normal de ventilation, avec
une vitesse moyenne et sans minuterie.
Cela sera indiqué par les indicateurs lumineux situé sur
l’écran d’achage LED (17).
Lors des prochaines mises en marche sans débranchement
du câble électrique, l’appareil démarrera sur une vitesse
de ventilation moyenne puis enchaînera sur la vitesse de
ventilation sélectionnée lors de la dernière utilisation.
Bouton de contrôle des vitesses
La vitesse de ventilation sera ajustée en appuyant sur
le bouton A chaque pression de ce bouton, la vitesse
changera de la façon suivant : Lente ÆMoyenne Æ
Rapide. Une pression sur le bouton en vitesse rapide, fera
reprendre le cycle à partir de la vitesse lente.
L’écran d’achage LED fera apparaître par un indicateur
lumineux la vitesse de ventilation sélectionnée.
Ventilec.indd 6 28/11/18 15:30

FR EN NL FR EN NL
www.ewt-france.com www.ewt-france.com
7
Étape 6
Une fois que l’appareil est
correctement assemblé, utilisez-le en
suivant les instructions d’utilisation
ci-après.
INSTRUCTIONS D’UTILISATION
A. Marche / Arrêt
B. Contrôle de la minuterie
C. Contrôle de la vitesse de ventilation
D. Contrôle des modes de ventilation
E. Contrôle de la vitesse de ventilation
F. Contrôle de la minuterie
G. Contrôle des modes de ventilation
H. Marche / Arrêt
I. Indicateur « Minuterie »
J. Indicateur « Mode de ventilation »
K. Indicateur « Vitesse de ventilation »
1. Veuillez lire attentivement ces instructions avant
d’utiliser l’appareil et conservez-les pour une
consultation ultérieure.
2. Vériez si la tension de votre réseau électrique local
correspondàcellequiguresurl’appareil.
3. Avant la première utilisation, retirez les lms ou
autocollants protecteurs de l’appareil.
Bouton de mise en marche et arrêt de l’appareil
Après avoir branché l’appareil, appuyez sur le bouton pour
allumer l’appareil.
Appuyez une seconde fois pour l’éteindre.
Lors de la première mise en marche de l’appareil, l’appareil
sera réglé par défaut sur le mode Normal de ventilation, avec
une vitesse moyenne et sans minuterie.
Cela sera indiqué par les indicateurs lumineux situé sur
l’écrand’achageLED(17).
Lors des prochaines mises en marche sans débranchement
du câble électrique, l’appareil démarrera sur une vitesse
de ventilation moyenne puis enchaînera sur la vitesse de
ventilation sélectionnée lors de la dernière utilisation.
Bouton de contrôle des vitesses
La vitesse de ventilation sera ajustée en appuyant sur
le bouton A chaque pression de ce bouton, la vitesse
changera de la façon suivant : Lente ÆMoyenne Æ
Rapide. Une pression sur le bouton en vitesse rapide, fera
reprendre le cycle à partir de la vitesse lente.
L’écran d’achage LED fera apparaître par un indicateur
lumineuxlavitessedeventilationsélectionnée.
Bouton de contrôle de la minuterie
Lors de la mise en marche de l’appareil, le mode par défaut
de ventilation n’enclenche pas la minuterie.
La minuterie est activée en appuyant sur le bouton , elle
peut être réglée sur un arrêt différé au bout de : 1H, 2H, 4H
ou 8H. L’indicateur lumineux sur l’écran d’achage LED
s’allumera en fonction du temps sélectionné.
A chaque pression sur le bouton , l’appareil sélectionnera
le temps dans l’ordre suivant :
1H Æ2H Æ4H Æ8H ÆArrêt de la minuterie.
Les heures ne s’accumulent pas.
Bouton de contrôle des modes de ventilation
Lors de la première mise en marche de l’appareil, le mode
de ventilation sera réglé par défaut sur le mode Normal de
la ventilation.
Le mode de ventilation se règle en appuyant sur le bouton
A chaque pression de ce bouton, l’appareil sélectionnera
le mode de ventilation dans l’ordre suivant : Mode
Normal ÆMode Naturel ÆMode Nuit.
Lorsque l’appareil est en mode Nuit, appuyez sur le
bouton pour revenir au mode Normal .
Mode Normal :
Lorsquecemodeestactivé,l’indicateurlumineux sera
allumésurl’écrand’achageLED.
En fonction de la vitesse sélectionnée – lente, moyenne,
rapide – la vitesse de ventilation restera constante et sans
interruption.
Mode Naturel :
Lorsque ce mode est sélectionné, l’indicateur lumineux
seraallumésurl’écrand’achageLED.
Lorsque ce mode est sélectionné en vitesse Rapide, la
vitesse de ventilation alternera de manière aléatoire entre
vitesse Rapide, Moyenne et Lente.
Lorsque que ce mode est sélectionné en vitesse Moyenne,
la vitesse de ventilation alternera de manière aléatoire entre
vitesse Rapide, Moyenne et Lente.
Lorsque ce mode est sélectionné en vitesse Lente, la vitesse
de ventilation alternera de manière aléatoire entre vitesse
Moyenne et Lente.
Mode Nuit :
Lorsquece mode estactivé,l’indicateur lumineux sera
allumésurl’écrand’achageLED.
Mode nuit sélectionné en vitesse Rapide :
30 minutes en vitesse Rapide en mode Naturel Æ30 minutes
en vitesse Moyenne en mode Naturel ÆVitesse Lente en
mode Naturel
Mode nuit sélectionné en vitesse Moyenne :
30 minutes en vitesse Moyenne en mode Naturel ÆVitesse
Lente en mode Naturel
Mode nuit sélectionné en vitesse Lente :
Vitesse Lente en mode Naturel
Ventilec.indd 7 28/11/18 15:30

FR EN NL FR EN NL
www.ewt-france.com www.ewt-france.com
8
TÉLÉCOMMANDE
A. Marche / Arrêt
B. Contrôle de la minuterie
C. Contrôle de la vitesse de ventilation
D. Contrôle des modes de ventilation
TIRER
Installation de la pille
PRESSER
1. Lors de l’insertion ou l’enlèvement de la pile, veuillez vous
référer au schéma ci-dessous. Soyez vigilant à l’indication
situé sur le couvercle concernant le positionnement du
symbole positif et négatif de la pile.
2. Retirez le couvercle de protection de la pile de votre
télécommande et placez dedans la pile 3V CR2032.
3. Pendant l’utilisation de la télécommande, pointez toujours
en direction du capteur de la télécommande. Tout obstacle
sur la trajectoire peut gêner le bon fonctionnement de la
télécommande.
4. Evitez de faire tomber la télécommande.
5. Les piles contiennent des matériaux dangereux pour
l’environnement.Lorsdeladéposedel’appareilauxdéchets,
les piles doivent être enlevées de la télécommande et
déposées dans un lieu adapté.
NETTOYAGE ET ENTRETIEN
• Avant le nettoyage, toujours débrancher l’appareil du secteur.
• Nettoyer la surface de l’appareil à l’aide d’un chiffon doux,
sans utiliser d’eau.
• Si l’appareil est très sale, nettoyez la surface de l’appareil à
l’aide d’un chiffon humide (ajoutez éventuellement un produit
nettoyant non corrosif).
• Ne pas utiliser de détergent corrosif, de solvant corrosif ou de
produit chimique.
• Ne pas utiliser d’éponge abrasive, de tampon à récurer ou de
brosse dure pour nettoyer l’appareil.
• Ne pas immerger le corps principal dans l’eau.
• Éviter que le moteur ou les autres composants élec¬triques
ne soient en contact avec de l’eau.
• Si l’appareil n’est pas utilisé pendant une longue période,
emballer-le soigneusement. Entreposer-le dans un endroit sec
et aéré, à l’abri de la poussière.
• Pouréviterquel’accumulationexcessivedepoussièresurle
ltren’altèrelefonctionnementdelasouerie,effectuerun
nettoyage mensuel.
• Nettoyerlagrilleextérieureàl’aided’undétergentnoncorrosif
et d’une brosse douce.
CET APPAREIL EST CONÇU UNIQUEMENT POUR UN USAGE
DOMESTIQUE
GARANTIE
Cet appareil EWT®est assorti d’une garantie de (2) ans à
compter de la date d’achat sous les conditions d’utilisation
normales.Lagarantienes’appliquepasauxdommagesdus
directement ou indirectement à une utilisation abusive, à la
négligence, à une utilisation non conforme, aux accidents,
réparations non conformes ou modications ainsi qu’à un
défaut d’entretien. Veuillez conserver votre bon de caisse/
facture comme preuve de votre achat.
Les accessoires de cet appareil sont des consommables et
leur garantie est limitée à un (1) mois.
EXCLUSIONS DE GARANTIE
•Modications, démontages
ou intégration à une autre
machineouàunmontagelarendantxeousemi-xe,
• Usure normale des pièces,
• Détérioration suite à une mauvaise utilisation,
• Non-respect de la notice d’emploi ou des consignes d’entretien
et de sécurité,
• Dommages résultant d’un entretien défectueux, de défaut
d’entretien,
• Dommages occasionnés par les éléments extérieurs
(foudre…),
• Utilisation anormale de la machine,
• Entreposage dans de mauvaises conditions,
• Chocs,
• Immersion de l’appareil
• Utilisation de pièces ou accessoires non agréés par Glen
DimplexFrance,
• Délai de garantie dép
assé
MISE AU REBUT
Conformément à la directive européenne 2012/19/
EU concernant les déchets d’équipements
électriques et électroniques (DEEE), ce matériel
comporte l’indication poubelle barrée qui indique
que le produit ne doit pas être jeté dans les ordures
ménagères.
Il doit être remis à un point de collecte approprié pour le
traitement, la valorisation, le recyclage des déchets d’EEE (se
renseigner à la mairie de son domicile) ou rapporté chez un
distributeur sur le principe de « 1 pour 1 gratuit » (la reprise
par le distributeur ne donne pas droit à rémunération ni
remise).
Avec ce geste pour l’environnement, vous, consommateur ou
utilisateur, apportez une contribution à la préservation des
ressources naturelles et à la protection de la santé humaine.
PRÉCISIONS SUR L’UTILISATION DES PILES
Jeter une pile usagée dans la nature ou les ordures ménagères
pollue et empêche la récupération de matériaux valorisables.
Il est donc important de limiter sa consommation de piles et
de respecter les consignes suivantes :
1.
Privilégier les piles alcalines (qui durent plus longtemps
que les piles salines) et lorsque c’est possible, les piles
rechargeables
2. Dépos
er les piles et accumulateurs usagés dans les
conteneurs spéciques disposés chez les commerçants.
Ainsi, les métaux seront valorisés et ne pollueront
pas l’environnement car ils contiennent des métaux
lourds dangereux pour la santé et l’environnement
(principalement du cadmium et du nickel)
Lorsque la pile arrive en n de vie, la remplacer par une pile
3V CR2032.
Ventilec.indd 8 28/11/18 15:30

FR EN NL FR EN NL
www.ewt-france.com www.ewt-france.com
9
NETTOYAGE ET ENTRETIEN
• Avant le nettoyage, toujours débrancher l’appareil du secteur.
• Nettoyer la surface de l’appareil à l’aide d’un chiffon doux,
sans utiliser d’eau.
• Si l’appareil est très sale, nettoyez la surface de l’appareil à
l’aide d’un chiffon humide (ajoutez éventuellement un produit
nettoyant non corrosif).
• Ne pas utiliser de détergent corrosif, de solvant corrosif ou de
produit chimique.
• Ne pas utiliser d’éponge abrasive, de tampon à récurer ou de
brosse dure pour nettoyer l’appareil.
• Ne pas immerger le corps principal dans l’eau.
• Éviter que le moteur ou les autres composants élec¬triques
ne soient en contact avec de l’eau.
• Si l’appareil n’est pas utilisé pendant une longue période,
emballer-le soigneusement. Entreposer-le dans un endroit sec
et aéré, à l’abri de la poussière.
• Pour éviter que l’accumulation excessive de poussière sur le
ltre n’altère le fonctionnement de la souerie, effectuer un
nettoyage mensuel.
• Nettoyer la grille extérieure à l’aide d’un détergent non corrosif
et d’une brosse douce.
CET APPAREIL EST CONÇU UNIQUEMENT POUR UN USAGE
DOMESTIQUE
GARANTIE
Cet appareil EWT®est assorti d’une garantie de (2) ans à
compter de la date d’achat sous les conditions d’utilisation
normales. La garantie ne s’applique pas aux dommages dus
directement ou indirectement à une utilisation abusive, à la
négligence, à une utilisation non conforme, aux accidents,
réparations non conformes ou modications ainsi qu’à un
défaut d’entretien. Veuillez conserver votre bon de caisse/
facture comme preuve de votre achat.
Les accessoires de cet appareil sont des consommables et
leur garantie est limitée à un (1) mois.
EXCLUSIONS DE GARANTIE
•Modications, démontages
ou intégration à une autre
machine ou à un montage la rendant xe ou semi-xe,
• Usure normale des pièces,
• Détérioration suite à une mauvaise utilisation,
• Non-respect de la notice d’emploi ou des consignes d’entretien
et de sécurité,
• Dommages résultant d’un entretien défectueux, de défaut
d’entretien,
• Dommages occasionnés par les éléments extérieurs
(foudre…),
• Utilisation anormale de la machine,
• Entreposage dans de mauvaises conditions,
• Chocs,
• Immersion de l’appareil
• Utilisation de pièces ou accessoires non agréés par Glen
Dimplex France,
• Délai de garantie dép
assé
MISE AU REBUT
Conformément à la directive européenne 2012/19/
EU concernant les déchets d’équipements
électriques et électroniques (DEEE), ce matériel
comporte l’indication poubelle barrée qui indique
que le produit ne doit pas être jeté dans les ordures
ménagères.
Il doit être remis à un point de collecte approprié pour le
traitement, la valorisation, le recyclage des déchets d’EEE (se
renseigner à la mairie de son domicile) ou rapporté chez un
distributeur sur le principe de « 1 pour 1 gratuit » (la reprise
par le distributeur ne donne pas droit à rémunération ni
remise).
Avec ce geste pour l’environnement, vous, consommateur ou
utilisateur, apportez une contribution à la préservation des
ressources naturelles et à la protection de la santé humaine.
PRÉCISIONS SUR L’UTILISATION DES PILES
Jeter une pile usagée dans la nature ou les ordures ménagères
pollueetempêchelarécupérationdematériauxvalorisables.
Il est donc important de limiter sa consommation de piles et
de respecter les consignes suivantes :
1.
Privilégier les piles alcalines (qui durent plus longtemps
que les piles salines) et lorsque c’est possible, les piles
rechargeables
2. Dépos
er les piles et accumulateurs usagés dans les
conteneursspéciquesdisposéschezlescommerçants.
Ainsi, les métaux seront valorisés et ne pollueront
pas l’environnement car ils contiennent des métaux
lourds dangereux pour la santé et l’environnement
(principalement du cadmium et du nickel)
Lorsque la pile arrive en n de vie, la remplacer par une pile
3V CR2032.
INFORMATIONS RELATIVES À L’ÉCOCONCEPTION DES
VENTILATEURS
Informations requises pour les ventilateurs, conformément
au règlement (UE) N° 206/2012 portant application de
la directive 2009/125/CE du Parlement européen et du
Conseil en ce qui concerne les exigences d’écoconception
applicablesauxclimatiseursetventilateurs.
Modèle VENTILEC
Description Symbole Valeur Unité
Débitd’airmaximal F 45.4 m3/min
Puissance absorbée P 44.6 W
Valeur de service SV 1 (m3/
min)/W
Consommation
d’électricité en mode
veille
PSB 0.2 W
Consommation
électrique saisonnière Q 14,5 kWh/a
Niveau de puissance
acoustique LWA 61 dB(A)
Vitessemaximalede
l’air c 2.7 mètres/
sec
Norme de mesure de la
valeur de service
(EU) No 206/2012 + (EU)
2016/2282
EN 50564:2011
IEC 60879:1986
EN 60704-1:2010+A11:2012
EN 60704-2-7:1998
Ventilec.indd 9 28/11/18 15:30

FR EN NL
www.ewt-france.com www.ewt-france.com
10
SAFETY ADVICE
Dear Customer,
Please read the instructions
carefully before using this
appliance, incorrect usage may
damage it. Please pay particular
attention to the safety instructions.
If you entrust use of this appliance
to people, please provide them with
themanual.Thisappliancecomplies
with safety standards for electrical
equipment. Incorrect use can,
however, cause damage to people
and to property. Please read all of
these instructions carefully before
using the appliance for the rst
time. Please keep the instructions,
the guarantee certicate and, as far
as possible, the packaging.
• This appliance is only designed
for private use and for the
purposes, it is intended for. Other
uses than the ones it is intended
for are not authorized and may
be dangerous.
• WARNING – NEVER USE THIS
APPLIANCE IN A DAMP ROOM
SUCH AS A BATHROOM OR
CLOSE TO A SINK/BASIN,
BATHTUB, SHOWER, SWIMMING
POOL, ETC.
• DANGER! Never place the
appliance beneath a source of
water (rain, tap…), risk of electric
shock.
• This appliance can be used by
children aged 8 or over, by people
with reduced physical, sensorial
or mental capacities or by
peoplewholackexperienceand
knowledge of such equipment
as long as they are supervised
or have been given instructions
for safe use of the appliance and
understand the potential dangers
involved.
• Children must not have access
to or play with the appliance.
• Children of less than 3 years
should be kept away unless
continuously supervised.
• Children aged from 3 years and
less than 8 years shall only
switch on/off the appliance
provided that it has been placed
or installed in its intended
normal operating position and
they have been given supervision
or instruction concerning use of
the appliance in a safe way and
understand the hazards involved.
Children aged from 3 years and
less than 8 years shall not plug in,
regulate and clean the appliance
or perform user maintenance.
• WARNING: In order to avoid any
uncontrolledrestartofthethermal
circuit breaker, electricity to this
appliance must not be supplied
viaanexternalswitchsuchasa
timer or a remote-control system
or connected to a circuit which is
regularly switched on and off by
the electricity supplier.
• Do not use a damaged
appliance. Regularly check that
the appliance and its power
cable are not damaged. If the
electrical cable is damaged,
the manufacturer, by a certied
technician or any other qualied
person in order to avoid all risks,
must replace it.
• Connect the appliance to a 230-
volt alternating current power
supply.
• Only connect the appliance to an
electrical supply, which complies
with all applicable standards and
has a delayed circuit breaker.
Check that the maximum power
of all of the appliances connected
to this power supply does not
exceed the maximum capacity of
the circuit breaker (16A).
• A qualied professional must
carry out repairs to electrical
appliances. Incorrectly carried
out repair work can cause major
risks for users.
• Do not use a multi-socket,
extension lead or adaptor when
plugging the appliance in as there
is a potential risk of overheating
and re.
• For safety reasons, unplug the
Ventilec.indd 10 28/11/18 15:30

NL FR EN NL
www.ewt-france.com www.ewt-france.com
11
• This appliance can be used by
children aged 8 or over, by people
with reduced physical, sensorial
or mental capacities or by
people who lack experience and
knowledge of such equipment
as long as they are supervised
or have been given instructions
for safe use of the appliance and
understand the potential dangers
involved.
• Children must not have access
to or play with the appliance.
• Children of less than 3 years
should be kept away unless
continuously supervised.
• Children aged from 3 years and
less than 8 years shall only
switch on/off the appliance
provided that it has been placed
or installed in its intended
normal operating position and
they have been given supervision
or instruction concerning use of
the appliance in a safe way and
understand the hazards involved.
Children aged from 3 years and
less than 8 years shall not plug in,
regulate and clean the appliance
or perform user maintenance.
• WARNING: In order to avoid any
uncontrolledrestartofthethermal
circuit breaker, electricity to this
appliance must not be supplied
via an external switch such as a
timer or a remote-control system
or connected to a circuit which is
regularly switched on and off by
the electricity supplier.
• Do not use a damaged
appliance. Regularly check that
the appliance and its power
cable are not damaged. If the
electrical cable is damaged,
the manufacturer, by a certied
technicianoranyotherqualied
person in order to avoid all risks,
must replace it.
• Connect the appliance to a 230-
volt alternating current power
supply.
• Only connect the appliance to an
electrical supply, which complies
with all applicable standards and
has a delayed circuit breaker.
Checkthatthemaximumpower
of all of the appliances connected
to this power supply does not
exceedthemaximumcapacityof
the circuit breaker (16A).
• A qualied professional must
carry out repairs to electrical
appliances. Incorrectly carried
out repair work can cause major
risks for users.
• Do not use a multi-socket,
extension lead or adaptor when
plugging the appliance in as there
is a potential risk of overheating
andre.
• For safety reasons, unplug the
appliance when it is not being
used and when no one will be
present to supervise it for a long
period.
• Never pull on the cable – unplug
the appliance by pulling on the
plug itself.
• Do not use the appliance if
the power cable is under the
appliance. The plug must be
accessible once the appliance is
installed.
• Never pull on the power cable
to move the appliance. Always
ensure that the power cable is
unconstrained when you move
the appliance. Never wrap
the power cable around the
appliance.
• Ensure that the cable does not
risk tripping anybody up.
• Do not cover the power cable
with a rug, carpet, blanket.
• Always hold the plug when you
plug in or unplug the appliance.
Never unplug it by pulling on
the power cable. Risk of electric
shock and damage.
• Switch the appliance off before
unplugging it.
• Never place the equipment just
belowawallplugorjunctionbox.
• The appliance must be stored
in a dry place, away from any
sources of dampness and at a
Ventilec.indd 11 28/11/18 15:30

FR EN NL
www.ewt-france.com www.ewt-france.com
12
temperature of between 15°C
and 25°C.
• Never immerse the appliance
in water and never place it on
water or any other liquid. Unplug
the appliance immediately if it
becomes damp or wet.
• Never use the appliance when
you have wet or damp hands.
• Donot usetheappliance outdoors
(it is not designed for use in the
open air).
• Do not leave the appliance
switched on without supervision.
• Do not place any objects on top
of the appliance.
• Do not sit on the appliance.
• Do not subject the appliance to
heat (radiator, oven…), to direct
sunlight or dampness.
• Always use the appliance in a
vertical position.
• Be careful of the potential
damage that can be caused by
the appliance’s sharp edges.
• Ensure that furniture, curtains or
other combustible materials are
placed more than one (1) meter
from the appliance.
• Always unplug the appliance
before cleaning it.
• WARNING: Do not cover the
appliance. Do not place any
materials or clothes on the
appliance or impede the
circulation of air around the
appliance.
• DO NOT BLOCK THE
VENTILATION! Regularly check
that the air intakes and outlets
are not obstructed.
• Do not put any objects through
the protective grill (nger, pen,
tool…)
• Never use the appliance if the
protective grills are not tted in
compliance with the assembly
instructions.
• Do not remove the protective grill
for cleaning.
• Do not place the air intake
close to walls or curtains (1m).
Obstruction of the air ow may
reducetheappliance’seciency.
SPECIFICATIONS
Model VENTILEC
Number of speed 3 – Low, Medium, High
Pre-programmed modes Yes – Normal, Natural, Sleep
Oscillation Yes
Tilt adjustement Yes : manual
Timer Yes : 1 – 2 – 4 – 8H
Digital display Yes – LED screen
Remote control Yes
Number of blades 5
Power 50W
Voltage 220 - 240 V~
Frequency 50 HZ
Product dimensions (LxWxH) L45 x W40 x H130
Product weight 7.2kg
ASSEMBLY
Step 1
Firstly, place the latch (1) onto a
level area of oor, and insert it into
the centre of the fan stand (2).
Step 2
Secure by rmly screwing the
L-screw onto the top of the latch
(1).
Step 3
Place the whole of the motor (4-8)
on the top of the fan stand (2) and
screw the clamping nut (3) rmly
into place.
Step 4
Attach the back fan guard (9) to
the motor, lining up the holes in the
guard with the front motor protector
(8).Secure it by rmly tightening the
back fan guard safety nut (12).
Ventilec.indd 12 28/11/18 15:30

NL FR EN NL
www.ewt-france.com www.ewt-france.com
13
circulation of air around the
appliance.
• DO NOT BLOCK THE
VENTILATION! Regularly check
that the air intakes and outlets
are not obstructed.
• Do not put any objects through
the protective grill (nger, pen,
tool…)
• Never use the appliance if the
protective grills are not tted in
compliance with the assembly
instructions.
• Do not remove the protective grill
for cleaning.
• Do not place the air intake
close to walls or curtains (1m).
Obstruction of the air ow may
reduce the appliance’s eciency.
SPECIFICATIONS
Model VENTILEC
Number of speed 3 – Low, Medium, High
Pre-programmed modes Yes – Normal, Natural, Sleep
Oscillation Yes
Tilt adjustement Yes : manual
Timer Yes : 1 – 2 – 4 – 8H
Digital display Yes – LED screen
Remote control Yes
Number of blades 5
Power 50W
Voltage 220 - 240 V~
Frequency 50 HZ
Productdimensions(LxWxH) L45xW40xH130
Product weight 7.2kg
ASSEMBLY
Step 1
Firstly, place the latch (1) onto a
levelareaofoor,andinsertitinto
the centre of the fan stand (2).
Step 2
Secure by rmly screwing the
L-screw onto the top of the latch
(1).
Step 3
Place the whole of the motor (4-8)
on the top of the fan stand (2) and
screw the clamping nut (3) rmly
into place.
Step 4
Attach the back fan guard (9) to
the motor, lining up the holes in the
guard with the front motor protector
(8).Secureitbyrmlytighteningthe
back fan guard safety nut (12).
Step 5
Then put the fan blades (11) into
place and attach them using the
blades safety cap (13), turning it
anticlockwise.
Attach the front fan guard (15) to
the back fan guard (9). To do so, use
both hands to press the two guards
together and ensure that they are
fully clipped together and lined up
with the fan guard belt (10). Then
attach it all together by tightening
the clasp located on the front fan
guard (15).
Step 6
Once the appliance has been
correctly assembled, use it by
following the instructions set out
below.
INSTRUCTION FOR USE
1. Please read these instructions carefully before using the
appliance and keep them in case of future use.
2. Make sure that the voltage of your local electricity network
corresponds to the one which appears on the appliance.
3. Before using it for the rst time, remove the appliance’s
protective tabs and stickers.
Place your appliance on a at oor and plug the appliance
into the electrical supply (220-240V, 50Hz) using the electrical
cable.
A. Appliance On/Off
B. Timer control
C. Speed control
D. Ventilation mode control
Ventilec.indd 13 28/11/18 15:30

FR EN NL
www.ewt-france.com www.ewt-france.com
14
E. Speed control
F. Timer control
G. Ventilation mode control
H. Appliance On/off
I. « Timer » indicator
J. « Ventilation mode » indicator
K. « Speed » indicator
Appliance On/Off (A)
After plugging the appliance in, press the button to switch
the appliance on.
Press it a second time to switch the appliance off.
Whenyouusetheapplianceforthersttime,itwillbe set
by default to operate in Normal ventilation mode on medium
speed and without use of the timer function.
This will be shown by the indicator lights located on the LED
display screen (17).
Whenyounext usethe applianceandaslong asyouhave
not unplugged the electrical cable, the appliance will begin
functioning on medium ventilation speed and will then
switch to the ventilation speed selected the previous time
the appliance was used.
Speed control
Ventilation speed can be adjusted by pressing the button.
Every time you press this button, the speed of the appliance
changes as follows: SlowÆMediumÆFast. Pressing
the button while the appliance is set to fast speed will
begin the cycle again starting with low speed.
A light indicator on the LED display screen will indicate the
ventilation speed selected.
Timer control
When the appliance is switched on, the default mode does
not trigger use of the timer.
The timer is activated by pressing the button which can
be set to stop the appliance from operating after: 1H, 2H, 4H
or 8H. The corresponding indicator light on the LED display
screen will light up according to the time selected.
Every time you press the button, the appliance will select
the time in the following order:
1H Æ2H Æ4H Æ8H ÆTimer off.
The hours indicated do not accrue.
Ventilation mode control
When you switch the appliance on for the rst time, the
ventilation mode will be set to Normal by default.
The ventilation mode can be set by pressing the button.
Every time you press this button, the appliance will select the
ventilation mode in the following order: Normal Mode Æ
Natural Mode ÆNight Mode.
When the appliance is set to Night Mode, press the
button to return to Normal Mode.
Normal Mode :
When this mode is activated, the light indicator will light
up on the LED display screen.
Depending on the speed selected – slow, medium, fast –
ventilation speed will not vary and will continue uninterrupted.
Natural Mode:
When this mode is selected, the light indicator will light up
on the LED display screen.
When this mode is selected on Fast speed, ventilation speed
will alternate randomly between Fast, Medium and Slow
speeds.
When this mode is selected on Medium speed, ventilation
speed will randomly alternate between Fast, Medium and
Slow speeds.
When this mode is selected on Slow speed, ventilation speed
will alternate randomly between Medium and Slow speeds.
Sleep Mode:
When this mode is activated, the light indicator will light
up on the LED display screen.
Sleep Mode selected on Fast speed:
30 minutes on Fast speed in Natural mode Æ30 minutes
on Medium speed in Natural mode ÆSlow speed in Natural
mode
Sleep Mode selected on Medium speed:
30 minutes on Medium speed in Natural Mode ÆSlow speed
in Natural mode
Sleep Mode selected on Slow speed:
Slow speed in Natural mode
TELECOMMANDE
A. Mise en marche / à l’arrêt de l’appareil
B. Contrôle de la minuterie
C. Contrôle de la vitesse de ventilation
D. Contrôle du mode de ventilation
OPEN
PUSH
1. When inserting or removing the battery, please consult the
diagram below. Ensure that the battery is correctly inserted
with regard to its positive and negative symbols.
2. Remove the protective cover from the battery compartment
on your remote control and place the 3V CR2032 battery
inside the compartment.
3. When using the remote control, always point it towards
the sensor on the appliance. Any obstacles in the way may
prevent the remote control from functioning correctly
Ventilec.indd 14 28/11/18 15:30

NL FR EN NL
www.ewt-france.com www.ewt-france.com
15
switch to the ventilation speed selected the previous time
the appliance was used.
Speed control
Ventilation speed can be adjusted by pressing the button.
Every time you press this button, the speed of the appliance
changes as follows: SlowÆMediumÆFast. Pressing
the button while the appliance is set to fast speed will
begin the cycle again starting with low speed.
A light indicator on the LED display screen will indicate the
ventilation speed selected.
Timer control
When the appliance is switched on, the default mode does
not trigger use of the timer.
The timer is activated by pressing the button which can
be set to stop the appliance from operating after: 1H, 2H, 4H
or 8H. The corresponding indicator light on the LED display
screen will light up according to the time selected.
Every time you press the button, the appliance will select
the time in the following order:
1H Æ2H Æ4H Æ8H ÆTimer off.
The hours indicated do not accrue.
Ventilation mode control
When you switch the appliance on for the rst time, the
ventilation mode will be set to Normal by default.
The ventilation mode can be set by pressing the button.
Every time you press this button, the appliance will select the
ventilation mode in the following order: Normal Mode Æ
Natural Mode ÆNight Mode.
When the appliance is set to Night Mode, press the
button to return to Normal Mode.
Normal Mode :
When this mode is activated, the light indicator will light
up on the LED display screen.
Depending on the speed selected – slow, medium, fast –
ventilation speed will not vary and will continue uninterrupted.
Natural Mode:
When this mode is selected, the light indicator will light up
on the LED display screen.
When this mode is selected on Fast speed, ventilation speed
will alternate randomly between Fast, Medium and Slow
speeds.
When this mode is selected on Medium speed, ventilation
speed will randomly alternate between Fast, Medium and
Slow speeds.
When this mode is selected on Slow speed, ventilation speed
will alternate randomly between Medium and Slow speeds.
Sleep Mode:
When this mode is activated, the light indicator will light
up on the LED display screen.
Sleep Mode selected on Fast speed:
30 minutes on Fast speed in Natural mode Æ30 minutes
on Medium speed in Natural mode ÆSlow speed in Natural
mode
Sleep Mode selected on Medium speed:
30 minutes on Medium speed in Natural Mode ÆSlow speed
in Natural mode
Sleep Mode selected on Slow speed:
Slow speed in Natural mode
REMOTE CONTROL
A. On/Off
B. Timer
C. Speed
D. Mode
OPEN
PUSH
1. When inserting or removing the battery, please consult the
diagram below. Ensure that the battery is correctly inserted
with regard to its positive and negative symbols.
2. Remove the protective cover from the battery compartment
on your remote control and place the 3V CR2032 battery
inside the compartment.
3. When using the remote control, always point it towards
the sensor on the appliance. Any obstacles in the way may
prevent the remote control from functioning correctly
4. Do not drop the remote control or cause it to fall to the
ground.
5. Batteries contain substances which are dangerous to
the environment. When you dispose of the appliance, the
batteries must be removed from the remote control and
disposed of in the appropriate place.
CLEANING AND MAINTENANCE
• Always unplug the appliance before cleaning it.
• Clean the surface of the appliance using a soft cloth, do not
use any water.
• If the appliance is very dirty, clean the surface using a damp
cloth (add a non-corrosive cleaning product if required.
• Do not use corrosive detergents, corrosive solvents or
chemical products.
• Do not use an abrasive sponge, scouring pad or hard brush to
clean the appliance.
• Do not immerse the main body of the appliance into water.
• Ensure that the motor and the other electrical components do
not come into contact with water.
• If the appliance is not to be used for a long period, pack it
away carefully. Store it in a dry and ventilated area where it will
not be affected by dust.
• Inorderto avoidanexcessivebuild-upofdustaffectingthe
blower, clean the appliance on a monthly basis.
THIS APPLIANCE IS SOLELY DESIGNED FOR DOMESTIC USE
WARRANTY
This EWT®appliance comes with a two- (2) year warranty
which begins on the date of purchase and only applies to
use under normal conditions. The warranty does not apply to
damage incurred as a direct or indirect result of inappropriate
use, negligence, improper use, accidents, improper repairs or
lack of maintenance. Please keep your receipt/invoice as
proof of purchase.
The accessories which come with this are consumables and
the warranty pertaining to them is limited to one (1) month.
EXCLUSIONS FROM WARRANTY
• M
odications, disassembly or integration into another
machine or assembly making the appliance xed or semi-
xed,
• Normal wear and tear of parts,
• Deterioration following incorrect use,
• Failure to respect the instructions manual or the maintenance
and safety instructions,
• Damage arising from faulty maintenance or lack of
maintenance,
• Damagecausedbyexteriorfactors(lightning…),
• Abnormal use of the machine,
• Storage in poor/inappropriate conditions,
• Impacts,
• Immersion of the appliance
• Use of parts or accessories which are not approved and
certiedbyGlenDimplexConsumerAppliance,
• Expiryofwarranty.
Ventilec.indd 15 28/11/18 15:30

www.ewt-france.com
FR EN NL
www.ewt-france.com
16
RECYCLING
In compliance with European Directive 2012/19/
EU regarding electrical and electronic equipment
(WEEE), this equipment is marked with the
crossed-out dustbin symbol which indicates that
that the product should not be disposed of with household
waste.
It should be delivered to an appropriate collection point
for processing, valuation, recycling of EEE waste (obtain
information from your local town or city hall) or returned
to a distributor on a “1 for 1 free” basis (recovery by the
distributor does not entitle you to any payment or discount).
By taking this action in favour of the environment, you, as
a consumer or user, will be making a contribution to the
preservation of natural resources and the protection of
human health.
INFORMATION ABOUT USING BATTERIES
Disposing of a used battery into the environment or along
with household waste is a source of pollution and prevents
recovery of materials which are of value and can be reused.
It is therefore important to restrict your consumption of
batteries and to respect the following instructions:
1. Favour alkaline
batteries (which last longer than saline ones)
and, whenever possible, rechargeable batteries.
2.Place usedbatteriesand storagebatteriesin thespecied
containers which can be found in shops. The metals the
batteries contain can thus be valued and reused and they will
not pollute the environment as they contain heavy metals
which are dangerous both to health and the environment
(ma
inly cadmium and nickel)
WHEN THE BATTERY IS WORN OUT, REPLACE IT WITH A
CR2032 3V BATTERY.
INFORMATION RELATING TO ECO-DESIGN OF FANS
Information required for fans, in compliance with regulation
(EU) N° 206/2012 in application of Directive 2009/125/CE by
the European Parliament and Council concerning the eco-
design requirements applicable to air conditioners and fans.
Model VENTILEC
Description Symbol Value Unit
Maximumfanowrate F 45.4 m3/min
Power consumption P 44.6 W
Service value SV 1 (m3/
min)/W
Consumption of
electricity in standby
mode
PSB 0.2 W
Seasonal power
consumption Q 14,5 kWh/a
Sound power level LWA 61 dB(A)
Maximumairvelocity c 2.7 meters/
sec
Measurement standard
of service value
(EU) No 206/2012 + (EU)
2016/2282
EN 50564:2011
IEC 60879:1986
EN 60704-1:2010+A11:2012
EN 60704-2-7:1998
VEILIGHEIDSVOORSCHRIFTEN
Geachte klant,
Gelieve de aanwijzingen aandach-
tig te lezen voordat u dit toestel
gebruikt, aangezien foutief gebruik
een risico van schade inhoudt.
Houd in het bijzonder rekening met
de veiligheidsvoorschriften. Als u
dit toestel door iemand anders laat
gebruiken, bezorg hem dan ook
deze handleiding. Dit toestel vol-
doet aan de voorschriften inzake
veiligheid van elektrische appara-
tuur. Afwijkend gebruik kan echter
lichamelijke en materiële schade
veroorzaken. Lees deze volledige
handleiding aandachtig voordat u
het toestel in gebruik neemt. Be-
waar deze handleiding, het garan-
tiebewijs, de kassabon en voor zo-
ver mogelijk ook de verpakking.
• Dit toestel is uitsluitend ontworpen
voor het bedoelde gebruik door
particulieren. Ander gebruik dan
voorzien is niet toegestaan en kan
gevaarlijk zijn.
• GEVAAR! Zet het toestel nooit on-
der een bron van water (regen,
kraan, enz.), risico van elektrocutie.
• AANDACHT – GEBRUIK DIT TOE-
STEL NOOIT IN EEN VOCHTIGE
RUIMTE ZOALS EEN BADKAMER
OF IN DE BUURT VAN EEN WASTA-
FEL, EEN BAD, EEN DOUCHE, EEN
ZWEMBAD, ENZ.
Ventilec.indd 16 28/11/18 15:30

FR EN NL
www.ewt-france.com
17
NL
www.ewt-france.com
INFORMATION RELATING TO ECO-DESIGN OF FANS
Information required for fans, in compliance with regulation
(EU) N° 206/2012 in application of Directive 2009/125/CE by
the European Parliament and Council concerning the eco-
design requirements applicable to air conditioners and fans.
Model VENTILEC
Description Symbol Value Unit
Maximum fan ow rate F 45.4 m3/min
Power consumption P 44.6 W
Service value SV 1 (m3/
min)/W
Consumption of
electricity in standby
mode
PSB 0.2 W
Seasonal power
consumption Q 14,5 kWh/a
Sound power level LWA 61 dB(A)
Maximum air velocity c 2.7 meters/
sec
Measurement standard
of service value
(EU) No 206/2012 + (EU)
2016/2282
EN 50564:2011
IEC 60879:1986
EN 60704-1:2010+A11:2012
EN 60704-2-7:1998
VEILIGHEIDSVOORSCHRIFTEN
Geachte klant,
Gelieve de aanwijzingen aandach-
tig te lezen voordat u dit toestel
gebruikt, aangezien foutief gebruik
een risico van schade inhoudt.
Houd in het bijzonder rekening met
de veiligheidsvoorschriften. Als u
dit toestel door iemand anders laat
gebruiken, bezorg hem dan ook
deze handleiding. Dit toestel vol-
doet aan de voorschriften inzake
veiligheid van elektrische appara-
tuur. Afwijkend gebruik kan echter
lichamelijke en materiële schade
veroorzaken. Lees deze volledige
handleiding aandachtig voordat u
het toestel in gebruik neemt. Be-
waar deze handleiding, het garan-
tiebewijs, de kassabon en voor zo-
ver mogelijk ook de verpakking.
• Dit toestel is uitsluitend ontworpen
voor het bedoelde gebruik door
particulieren. Ander gebruik dan
voorzien is niet toegestaan en kan
gevaarlijk zijn.
• GEVAAR! Zet het toestel nooit on-
der een bron van water (regen,
kraan, enz.), risico van elektrocutie.
• AANDACHT – GEBRUIK DIT TOE-
STEL NOOIT IN EEN VOCHTIGE
RUIMTE ZOALS EEN BADKAMER
OF IN DE BUURT VAN EEN WASTA-
FEL, EEN BAD, EEN DOUCHE, EEN
ZWEMBAD, ENZ.
• Dit toestel mag worden gebruikt
door kinderen vanaf 8 jaar, door
personen met verminderde licha-
melijke, zintuiglijke of geestelijke
vermogens of zonder ervaring en
kennis, op voorwaarde dat ze on-
der toezicht staan of aanwijzingen
hebben gekregen over het veilige
gebruik van het toestel en de geva-
ren die het inhoudt.
• Kinderen mogen geen toegang
hebben tot noch spelen met het
toestel.
• Reiniging en onderhoud door de
gebruiker mogen niet worden uit-
gevoerd door kinderen zonder toe-
zicht. Kinderen jonger dan 3 jaar
moeten uit de buurt worden gehou-
den tenzij ze onder permanent toe-
zicht staan.
• Kinderen van 3 tot 8 jaar mogen
het toestel enkel aan/uit zetten op
voorwaarde dat het is geplaatst of
geïnstalleerd in de bedoelde norma-
le gebruikspositie en ze onder toe-
zicht staan of instructies hebben
gekregen met betrekking tot het
veilige gebruik van het toestel en
de overeenkomstige risico’s begrij-
pen. Kinderen van 3 tot 8 jaar mo-
gen de stekker van het toestel niet
in het stopcontact steken, noch het
toestel bedienen of schoonmaken
noch er gebruikersonderhoud aan
uitvoeren.
• AANDACHT: Om enig gevaar we-
Ventilec.indd 17 28/11/18 15:30
FR EN NL
www.ewt-france.com www.ewt-france.com
18
gens de ongewenste inschakeling
van de thermische zekering te
voorkomen, mag dit toestel nooit
worden gevoed via een externe
schakelaar, zoals een timer, een pro-
grammeerinrichting, een afstands-
bedieningssysteem, noch worden
aangesloten op een stroomkring
waarvan de spanning regelmatig
wordt in- en uitgeschakeld door de
stroomleverancier.
• Gebruik het toestel niet als het be-
schadigd is. Controleer regelmatig
dat het toestel en het stroomsnoer
niet beschadigd zijn. Als het
stroomsnoer beschadigd is, moet
het door de fabrikant, een erkende
specialist of een andere bevoegde
persoon worden vervangen om elk
gevaar te voorkomen.
• Sluit het toestel aan op 230 Volt
wisselstroom.
• Sluit het toestel enkel aan op een
elektrische installatie die voldoet
aan de geldende voorschriften en
met een stroomkringbeveiliging.
Controleerdatdemaximuminten-
siteit van de toestellen die op deze
stroomonderbreker zijn aangeslo-
ten de intensiteit van de stroomon-
derbreker niet kan overschrijden
(16A).
• Elektrische toestellen mogen enkel
door een bevoegde professional
worden gerepareerd. Een gebrek-
kige reparatie kan aanzienlijke risi-
co’s met zich meebrengen voor de
gebruiker.
• Gebruik geen verdeelstekkers, ver-
lengkabels of adapters om het toe-
stel aan te sluiten, risico van over-
verhitting en brand.
• Trek als veiligheidsmaatregel de
stekker van het toestel uit het stop-
contact wanneer het niet wordt
gebruikt en bij langdurige afwezig-
heid.
• Trek nooit aan het snoer maar aan
de stekker zelf om deze uit het
stopcontact te trekken.
• Gebruik het toestel niet als het
stroomsnoer zich onder/op het
toestel bevindt. De stekker moet
toegankelijk zijn na installatie.
• Trek nooit aan het stroomsnoer
om het toestel te verplaatsen. Zorg
steeds dat het stroomsnoer niet
blijft vastzitten wanneer u het toe-
stel van plaats verandert. Rol het
stroomsnoer niet op rond het toe-
stel.
• Zorg dat het stroomsnoer geen risi-
co van struikelen vormt.
• Leg het stroomsnoer niet onder
een mat, tapijt, afdekking, enz.
• Houd steeds de stekker vast om
het toestel in te steken of uit te
trekken. Trek nooit aan het snoer
om de stekker uit het stopcontact
te trekken. Risico van elektrocutie
en schade.
• Zet het toestel altijd uit voordat
u de stekker uit het stopcontact
trekt.
• Plaats het toestel niet net onder
een stopcontact of een aansluit-
doos.
• Het toestel moet op een droge
plaatsworden bewaard,beschermd
tegen vocht en bij een temperatuur
tussen 15°C en 25°C.
• Houd het toestel nooit onder wa-
ter of andere vloeistoffen. Koppel
het toestel onmiddellijk los van het
elektriciteitsnet als het vochtig of
nat is.
• Gebruik het toestel niet met natte
of vochtige handen.
• Gebruik het toestel niet buiten (het
is niet ontworpen voor gebruik in
de openlucht).
• Laat het toestel niet aan staan zon-
der toezicht.
• Zet geen voorwerpen op het toe-
stel.
• Ga niet op het toestel zitten.
• Stel het toestel niet bloot aan
warmte (radiator, oven, enz.), direct
zonlicht of vocht.
• Gebruik het toestel steeds rechtop-
staand.
• Let op de risico’s van schade van
scherpe randen van het toestel.
• Zorg dat meubels, gordijnen of an-
dere brandbare materialen zich op
minstens één (1) meter afstand
van het toestel bevinden.
• Trek voordat u het toestel reinigt
Ventilec.indd 18 28/11/18 15:30
NL FR EN NL
www.ewt-france.com www.ewt-france.com
19
co’s met zich meebrengen voor de
gebruiker.
• Gebruik geen verdeelstekkers, ver-
lengkabels of adapters om het toe-
stel aan te sluiten, risico van over-
verhitting en brand.
• Trek als veiligheidsmaatregel de
stekker van het toestel uit het stop-
contact wanneer het niet wordt
gebruikt en bij langdurige afwezig-
heid.
• Trek nooit aan het snoer maar aan
de stekker zelf om deze uit het
stopcontact te trekken.
• Gebruik het toestel niet als het
stroomsnoer zich onder/op het
toestel bevindt. De stekker moet
toegankelijk zijn na installatie.
• Trek nooit aan het stroomsnoer
om het toestel te verplaatsen. Zorg
steeds dat het stroomsnoer niet
blijft vastzitten wanneer u het toe-
stel van plaats verandert. Rol het
stroomsnoer niet op rond het toe-
stel.
• Zorg dat het stroomsnoer geen risi-
co van struikelen vormt.
• Leg het stroomsnoer niet onder
een mat, tapijt, afdekking, enz.
• Houd steeds de stekker vast om
het toestel in te steken of uit te
trekken. Trek nooit aan het snoer
om de stekker uit het stopcontact
te trekken. Risico van elektrocutie
en schade.
• Zet het toestel altijd uit voordat
u de stekker uit het stopcontact
trekt.
• Plaats het toestel niet net onder
een stopcontact of een aansluit-
doos.
• Het toestel moet op een droge
plaatsworden bewaard,beschermd
tegen vocht en bij een temperatuur
tussen 15°C en 25°C.
• Houd het toestel nooit onder wa-
ter of andere vloeistoffen. Koppel
het toestel onmiddellijk los van het
elektriciteitsnet als het vochtig of
nat is.
• Gebruik het toestel niet met natte
of vochtige handen.
• Gebruik het toestel niet buiten (het
is niet ontworpen voor gebruik in
de openlucht).
• Laat het toestel niet aan staan zon-
der toezicht.
• Zet geen voorwerpen op het toe-
stel.
• Ga niet op het toestel zitten.
• Stel het toestel niet bloot aan
warmte (radiator, oven, enz.), direct
zonlicht of vocht.
• Gebruik het toestel steeds rechtop-
staand.
• Let op de risico’s van schade van
scherpe randen van het toestel.
• Zorg dat meubels, gordijnen of an-
dere brandbare materialen zich op
minstens één (1) meter afstand
van het toestel bevinden.
• Trek voordat u het toestel reinigt
steeds de stekker uit het stopcon-
tact.
•WAARSCHUWING: Dek het toestel
nooit af. Leg geen materialen of
kleren op het toestel en belemmer
de luchtcirculatie rondom het toe-
stel niet.
•VERSTOP DE VENTILATIE NIET!
Controleer regelmatig dat de in- en
uitlaten voor de beluchting niet zijn
verstopt.
• Steek niets door het bescher-
mingsrooster (vingers, balpen, ge-
reedschap, enz.).
• Gebruik het toestel nooit als de be-
schermingsroosters niet zijn geïn-
stalleerd volgens de gebruiksaan-
wijzingen.
• Verwijder het beschermingsroos-
ter niet voor reiniging.
• Plaats de inlaat van de lucht van
het toestel nooit in de buurt van
muren of gordijnen (1m). Verstop-
ping van de luchtdoorlaat kan de
eciëntieervanverminderen.
Ventilec.indd 19 28/11/18 15:30
FR EN NL
www.ewt-france.com www.ewt-france.com
20
SPECIFICATIONS
Model VENTILEC
Snelheid 3 – Langzaam, medium, snel
Standen Ja – Normaal, natuurlijk, nacht,
Draaien Ja
Kantelen Ja : handmatig
Timer Ja : 1 – 2 – 4 – 8uur
Digitale technologie Ja – LED-scherm
Afstandsbediening Ja
Aantal schoepen 5
Vermogen 50W
Spanning 220 - 240 V~
Frequentie 50 HZ
Productafmetingen(HxDxB) H130xD40xB45
Productgewicht 7.2kg
MONTAGE
Stap 1
Plaats eerst het voetstuk (1) op een
effen ondergrond en steek er de
ventilatorvoet (2) in. Zet vast door
de L-vormige schroef onderaan het
voetstuk (1) stevig vast te draaien.
Stap 2
Plaats het motorgeheel (4-8) op de
ventilatorvoet (2) en draai de grote
bevestigingsmoer stevig (3) stevig
vast.
Stap 3
Bevestig het achterste rooster
(9) op de motor door de gaatjes
van het rooster over de voorste
motorafscherming (8) te plaatsen.
Zet vast door de veiligheidsmoer van
het achterste rooster (12) stevig vast
te draaien.
Stap 4
Plaats vervolgens de schoepen (11)
van de ventilator en zet vast met
de voorste propellerdop (13) door
tegen de richting van de wijzers in te
draaien.
Stap 5
Bevestig het voorste rooster (15)
op het achterste rooster (9). Druk
hiervoor met twee handen de twee
roosters over de volledige omtrek
tegen elkaar zodat ze goed in elkaar
klikken en de ring van het rooster
(10) mooi samenvalt. Zet vervolgens
het geheel vast door middel van de
sluithaak op het voorste rooster (15).
Stap 6
Gebruik het toestel wanneer het
eenmaal correct is gemonteerd
volgens de onderstaande
gebruiksaanwijzingen.
AAN/UIT ZETTEN
A. Start toestel / stop toestel
B. Timer
C. Instelling ventilatiesnelheid
D. Instelling ventilatiestand
E. Instelling ventilatiesnelheid
F. Timer
G. Instelling ventilatiestand
H. Start toestel / stop toestel
I. Controlelampje « Timer »
J. Controlelampje « Ventilatiestand »
K. Controlelampje « Ventilatiesnelheid »
1. Gelieve deze aanwijzingen aandachtig te lezen voordat u
het toestel gebruikt en bewaar ze voor raadpleging in de
toekomst.
2. Controleer dat de spanning van uw plaatselijke elektriciteit-
snet overeenstemt met de vermelde waarde op het toestel.
3. Verwijder vóór het eerste gebruik alle folies of zelfklevers
van het toestel. Plaats uw toestel op een effen oppervlak
en steek de stekker van het stroomsnoer in een
stopcontact (220-240V, 50Hz).
Ventilec.indd 20 28/11/18 15:30
Table of contents
Languages:
Other EWT Fan manuals

EWT
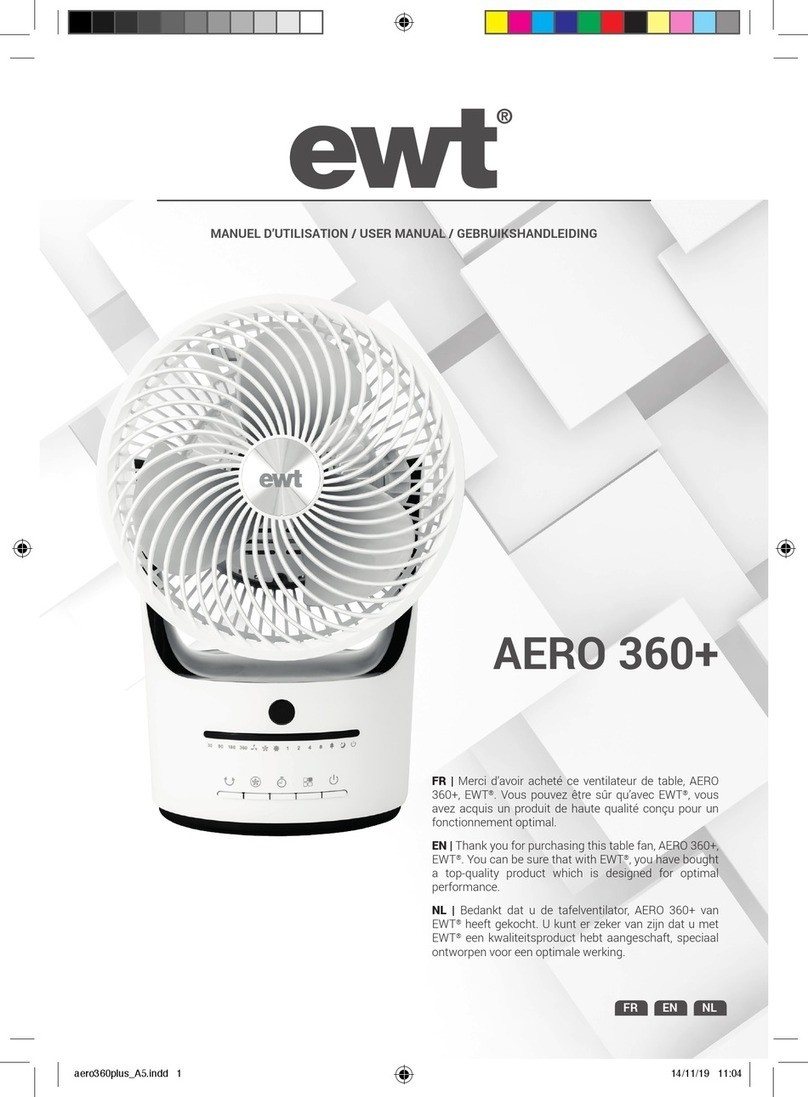
EWT AERO 360+ User manual

EWT
EWT TURNADO 360 REVOLUTION User manual

EWT
EWT ZEPHYR CARBON User manual

EWT
EWT OSCILLOR50 User manual

EWT
EWT WOODAIRF User manual

EWT
EWT PARTN'AIR User manual

EWT
EWT OSCILLOR 40W User manual

EWT
EWT WOODAIRS User manual

EWT
EWT OSCILLOR 40 CHROME User manual

EWT
EWT WOODAIRS User manual