Fein AWBP 10 Setup guide

AWBP 10
Repair instructions
C-SC_CSSM
Version 1.0
2015-05-22
All rights reserved by FEIN, especially in case of industrial rights registration.
FEIN retains all rights of disposal, such as copying and circulation.
Page 1of 35

AWBP 10
Contents
C-SC_CSSM
Version 1.0
2015-05-22
All rights reserved by FEIN, especially in case of industrial rights registration.
FEIN retains all rights of disposal, such as copying and circulation.
Page 2of 35
1. Models described
2. Technical data
3. Notes and requirements
4. Tools required
5. Lubricants and auxiliary substances required
6. Removal
7. Fitting
8. Troubleshooting
9. Connection diagram

AWBP 10
1. Models described
C-SC_CSSM
Version 1.0
2015-05-22
All rights reserved by FEIN, especially in case of industrial rights registration.
FEIN retains all rights of disposal, such as copying and circulation.
Page 3of 35
These repair instructions describe how to repair the following models:
Model Order number
AWBP 10 7 105 04 00 94 0

AWBP 10
2. Technical data
C-SC_CSSM
Version 1.0
2015-05-22
All rights reserved by FEIN, especially in case of industrial rights registration.
FEIN retains all rights of disposal, such as copying and circulation.
Page 4of 35
Technical data
All the technical data can be found in the operating instructions for the model.
Test data
Up-to-date test data for all models can be found on the FEIN Extranet (Customer Service →Repair Guides).
Lubricants
The lubricants and container sizes available from FEIN can be found on the FEIN Extranet (Customer Service →Repair Guides).
Lists of spare parts
Lists of spare parts and exploded views are available online at www.fein.com

AWBP 10
3. Notes and requirements
C-SC_CSSM
Version 1.0
2015-05-22
All rights reserved by FEIN, especially in case of industrial rights registration.
FEIN retains all rights of disposal, such as copying and circulation.
Page 5of 35
Please note
These instructions are only intended for persons with suitable technical training. It is assumed that the reader has mechanical and
electrical training.
Only use original FEIN spare parts.
Provisions
Please note that power tools may only be repaired, maintained and checked by a trained electrician, as improper repair can result in
serious risks to the user.
The provisions set out in DIN VDE 0701-0702 should be observed after repairs.
The relevant accident prevention regulations of the employer’s liability insurance associations are to be observed when
commissioning.
The German Equipment and Product Safety Act [ProdSG] applies for correct use.
Outside Germany, the regulations applicable in the relevant country must be observed.

AWBP 10
4. Tools required
C-SC_CSSM
Version 1.0
2015-05-22
All rights reserved by FEIN, especially in case of industrial rights registration.
FEIN retains all rights of disposal, such as copying and circulation.
Page 6of 35
Standard tools Special tools
Extraction tool Drawing-off socket cap 6 41 04 150 00 8
Drill chuck key Chuck cone, dia. 16 mm 6 41 07 016 00 1
Arbor press Chuck cone, dia. 19 mm 6 41 07 019 00 7
Punch Dia. 4 mm; Dia. 5 mm Chuck cone, dia. 22 mm 6 41 07 022 00 0
Sleeve Inner dia. 16 mm
Inner dia. ~20 mm Chuck cone, dia. 26 mm 6 41 07 026 00 0
Inner dia. 12 mm
Inner dia. ~16 mm
Inner dia. 10 mm
Inner dia. 26 mm
Inner dia. 11 mm
Inner dia. 26 mm
Inner dia. 9 mm
Inner dia. 22 mm
Inner dia. 12 mm
Inner dia. 15 mm
Inner dia. 16 mm
Inner dia. ~25 mm

AWBP 10
4. Tools required
C-SC_CSSM
Version 1.0
2015-05-22
All rights reserved by FEIN, especially in case of industrial rights registration.
FEIN retains all rights of disposal, such as copying and circulation.
Page 7of 35
Standard tools
Sleeve
Inner dia. 5 mm
Inner dia. ~15 mm
Inner dia. 13 mm
Inner dia. 25 mm
Inner dia. 16 mm
Inner dia. ~20 mm
Hex key 6 mm
Plastic hammer
Circlip pliers
Torx T15; T20
Cylinder head screw M8x60

AWBP 10
5. Lubricants and auxiliary substances required
C-SC_CSSM
Version 1.0
2015-05-22
All rights reserved by FEIN, especially in case of industrial rights registration.
FEIN retains all rights of disposal, such as copying and circulation.
Page 8of 35
Lubricants
Grease 0 40 101 0100 4 25 g Housing
AWBP 10
6. Removal
C-SC_CSSM
Version 1.0
2015-05-22
All rights reserved by FEIN, especially in case of industrial rights registration.
FEIN retains all rights of disposal, such as copying and circulation.
Page 9of 35
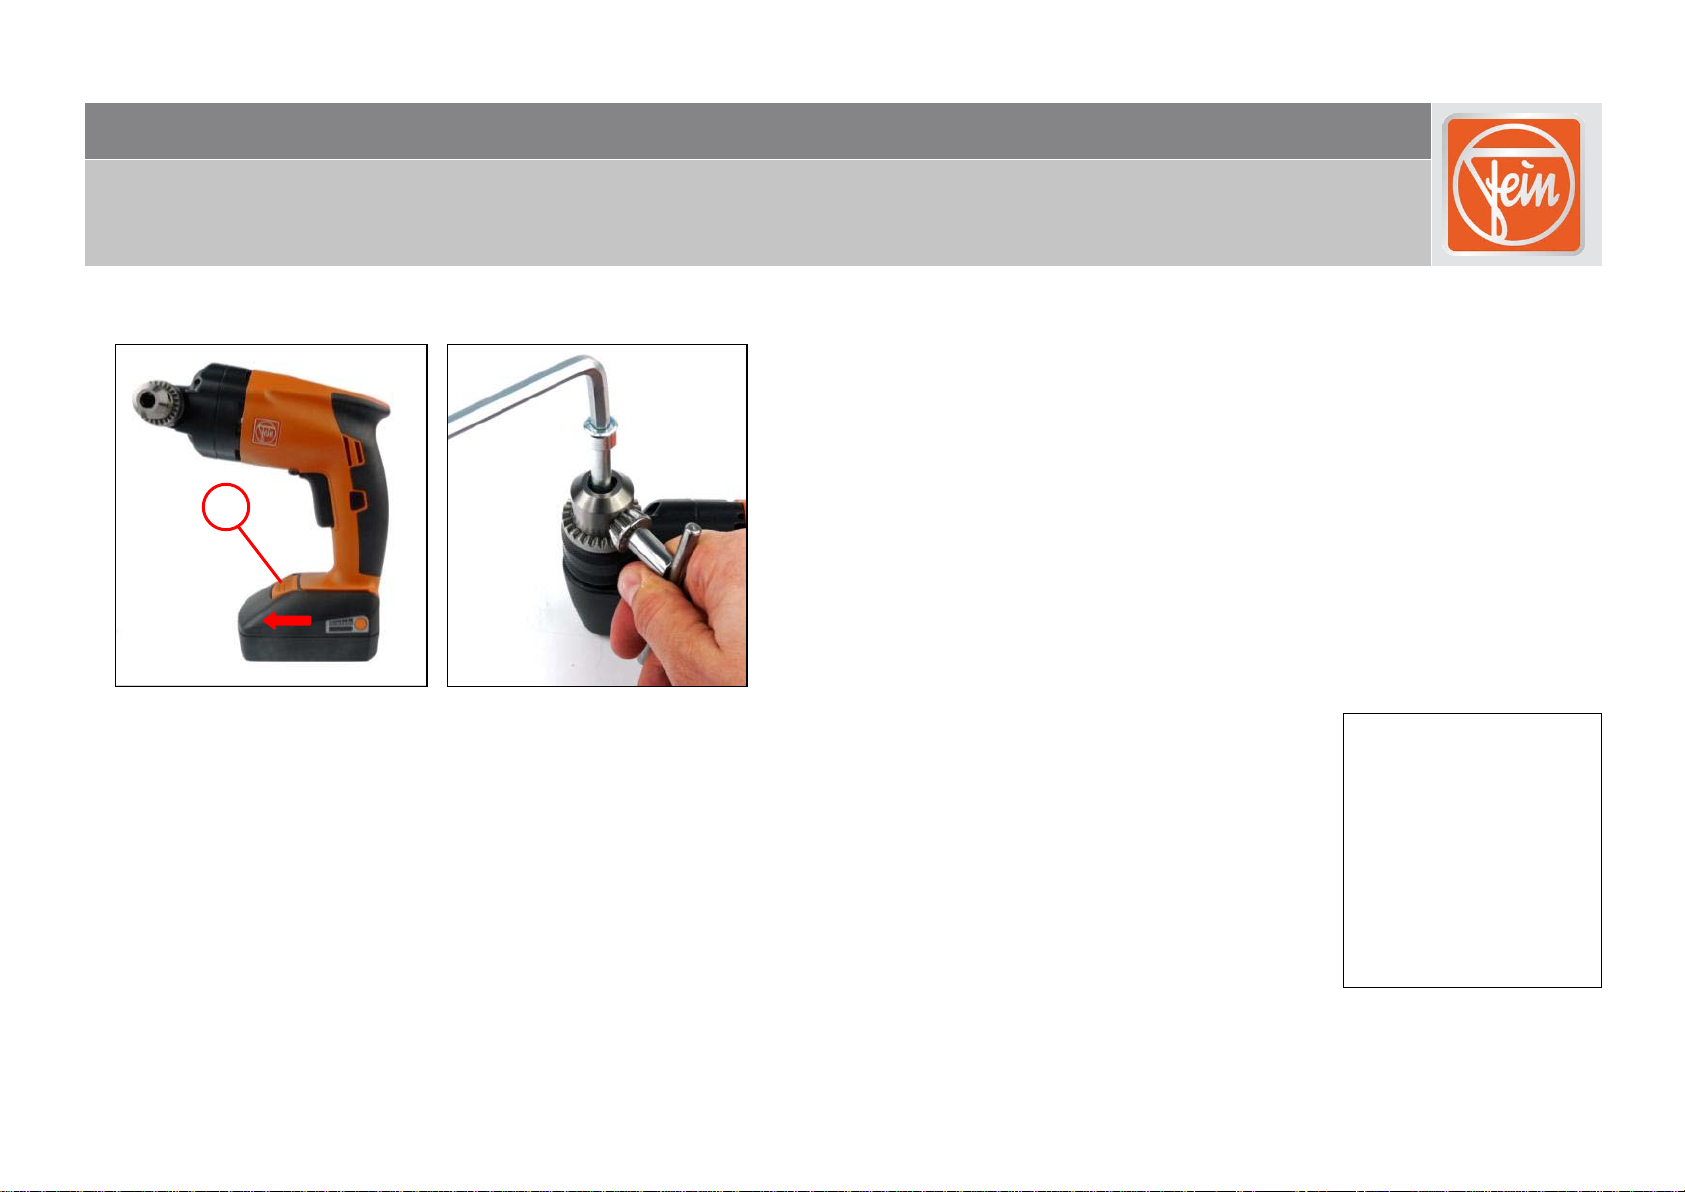
Removing the battery and key-type drill chuck
1. Press the catch (1) and pull the battery off the tool.
2. Remove the key-type drill chuck (2). Tools:
- 6 mm hex key
- M8x60 cylinder head
screw
- Drill chuck key
1
AWBP 10
6. Removal
C-SC_CSSM
Version 1.0
2015-05-22
All rights reserved by FEIN, especially in case of industrial rights registration.
FEIN retains all rights of disposal, such as copying and circulation.
Page 10 of 35
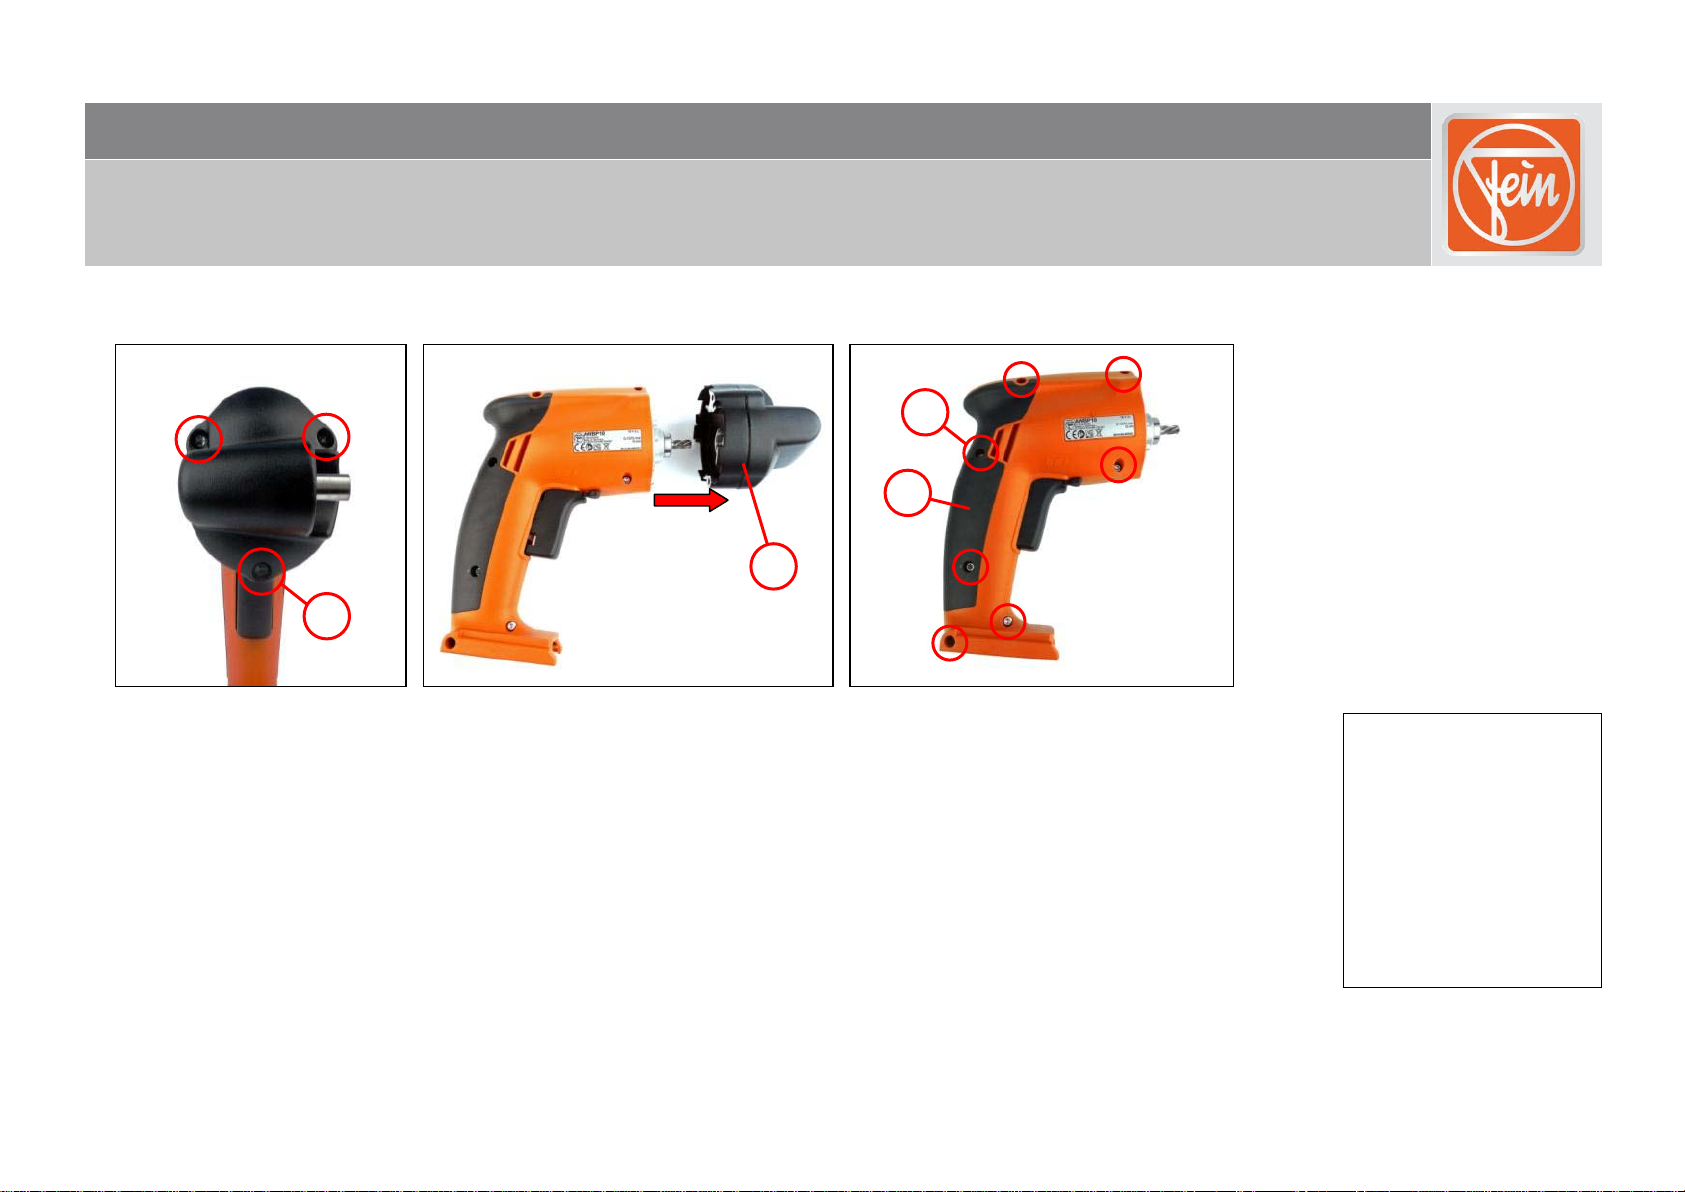
Removing the motor housing
1. Unscrew the three screws (1).
2. Remove the gearbox housing (2).
3. Unscrew the seven screws (3).
4. Open the upper part of the motor housing (4).
Tools:
- Torx T20; T15
1
3
4
2
Table of contents
Other Fein Power Tools manuals

Fein
Fein GRIT GXE Series User manual

Fein
Fein ABLS18-1.6E User manual

Fein
Fein FSC1.6X User manual

Fein
Fein SCT5-40X User manual

Fein
Fein ASg 636 User manual

Fein
Fein BLS1.6X User manual

Fein
Fein WSG8-115 User manual

Fein
Fein AFSC18Q User manual

Fein
Fein ASse 636II-28bT Kinetik Setup guide

Fein
Fein MSxe 636 II User manual

Fein
Fein 7 230 26 Setup guide

Fein
Fein GSZ4-280EL User manual

Fein
Fein MOtlx 6-25 User manual

Fein
Fein FMM350QSL User manual

Fein
Fein ASW 14-30-PC Setup guide

Fein
Fein AMM700 1.7Q AS User manual

Fein
Fein BSS 2.0 E Setup guide

Fein
Fein BLs 1.6 User manual

Fein
Fein BLK1.3TE Setup guide

Fein
Fein AFMM 18 QSL User manual


