manuals.online logo
Brands
  1. Home
  2. •
  3. Brands
  4. •
  5. Festo
  6. •
  7. Control Unit
  8. •
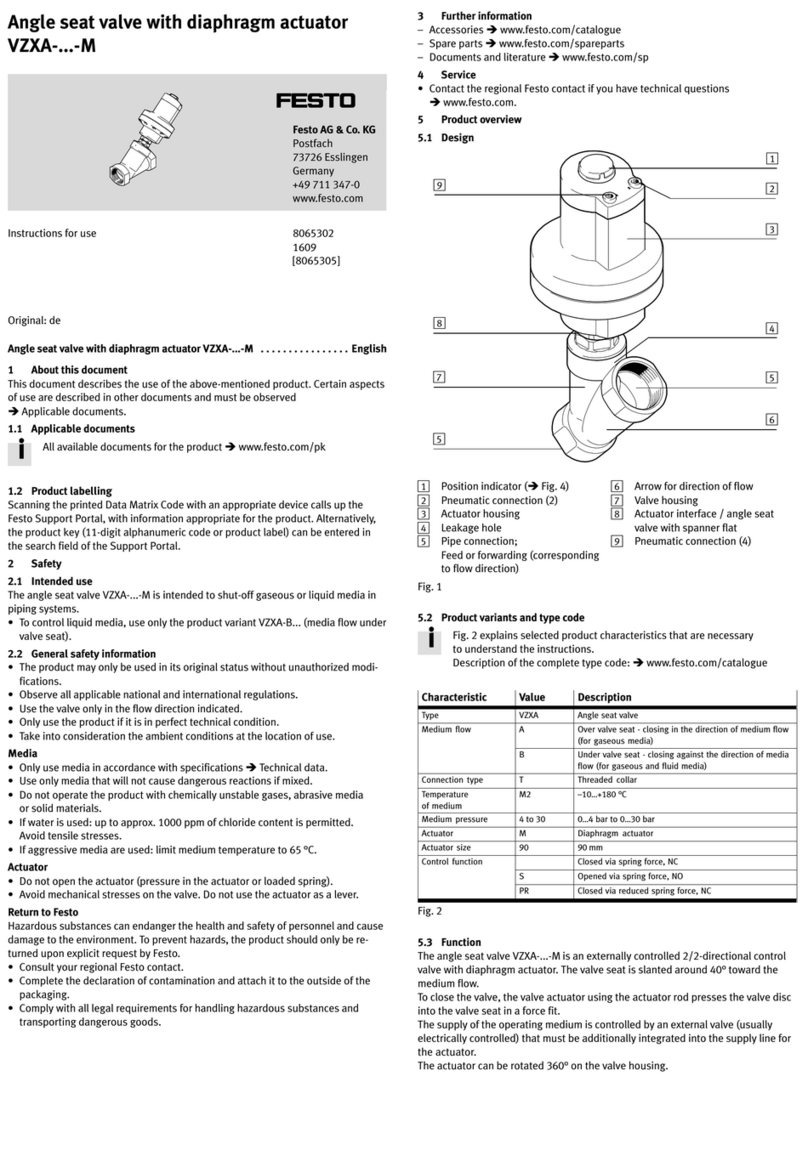
  9. Festo VACC-S13-11-K4-1-EX4A User manual

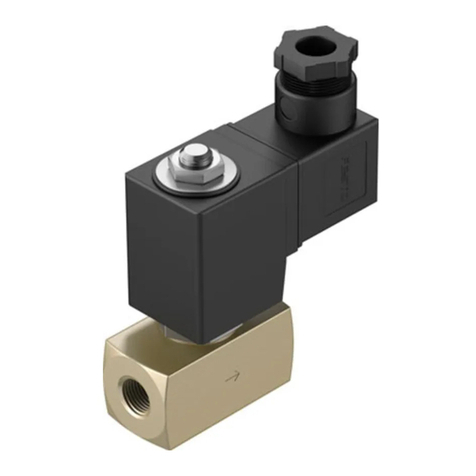
Festo VACC-S13-11-K4-1-EX4A User manual

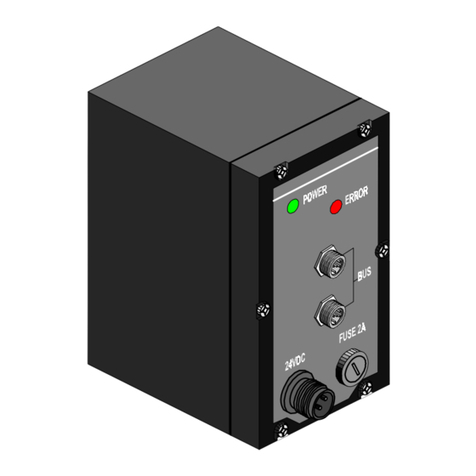
Solenoid Coil
VACC-S13-11-K4-1-EX4A
II 2G Ex ia IIC T6, T5 Gb
II 2D Ex ia IIIC T80°C, T95°C IP64 Db
Festo AG & Co. KG
Ruiter Straße 82
73734 Esslingen
Deutschland
+49 711 347-0
www.festo.com
Operating conditions EX
(Original instructions)
8070989
1702c
[8070991]
Solenoid coil VACC-S13-11-K4-1-EX4A English............................
All available documents for the product èwww.festo.com/pk
Note
Technical data for the product can have different values in other documents.
During operation in an explosive atmosphere, the technical data of this
document always has priority.
1 Certified solenoid coils
Voltage Type Part no.
14 … 32 V DC VACC-S13-11-K4-1-EX4A 562896
Fig. 1
2 Function
When switching on the voltage, the solenoid is energised and the valve is actuated.
A built-in current pulse generator permits operation on low-power electric
networks.
3 Application
 The solenoid coil is intended to be used to actuate Festo valves.
 Operate the solenoid valve with compressed air only.
 The device is not intended to be used with other fluids.
 The solenoid coils can be used in combination with the specified solenoid valves
in zones 1 and 2 for potentially explosive gas atmospheres and in zones 21
and22 for potentially explosive dust atmospheres.
Note
Label X: special conditions
 Only use specified solenoid valves.
 The range of application is dependent on the ambient temperature.
 The device must be connected to a certified Ex ia IIC or Ex ib IIC power circuit.
 Protect the housing from mechanical impact > 4 years.
 Protect the device from electrostatic discharge.
 Protect the filling compound from mechanical impact energy.
4 Transport and storage
 Observe the following storage conditions: short storage times in cool, dry,
shaded and corrosion-resistant locations.
5 Requirements for product use
 Comply with all applicable national and international regulations.
Note
Installation and commissioning should only be carried out by qualified electrical
specialists.
6 Mounting
7
6
1
2
3
8
5
4
1Port 12 (only for external pilot air
supply)
2Ribbed disc
3Vent screw/retaining nut
4Cable fitting
(with cap nut)
5Cover, terminal housing
6Solenoid coil
7Armature guide tube
8Solenoid valve
Fig. 1
6.1 Mechanical
1. Tighten vent screw. Twisting the solenoid coil is no longer possible
(tightening torque 4…6 Nm).
2. Open cover of terminal housing.
3. Connect electrical cables to the terminals. Observe polarity (tightening
torque2…3 Nm).
4. Close the cover of the terminal housing
(tightening torque: 0.6…0.7 Nm).
5. With external pilot air supply, use connection 12.
6. Seal unused openings with blanking plugs or slot covers.
Note
The surface coating of the solenoid valves is electrically non-conductive.
 Include the device in the system’s potential equalisation.
6.2 Pneumatic
1. Mount connecting cables and fittings properly. Before commissioning, remove
residue, such as chips, rust and water.
2. Depressurise the compressed air lines.
3. Use only fittings with cylindrical threaded lugs and sealing rings or cutting rings.
4. Do not use PTFE or hemp fibres on the threads.
5. Insert all sealing rings supplied with the NAMUR mounting kit between solenoid
valve and drive or mounting plate.
6. If port 1 with control signal < 2 bar, then supply auxiliary energy > 2 bar to
port 12.
7. Do not use anti-friction coating or lubricant.
8. The dew point of the compressed air must lie below the specified lowest operat
ing temperature of the system.
9. Use filter adapter NPFV-AF-G14-G14-MF or
NPFV-AF-G14-N14-MF.
10.Use exhaust protection VABD-D3-SN-G14.
6.3 Electrical system
1. Only use an unsheathed cable with an external diameter of 7 … 13 mm for the
installed cable fitting M20 x 1.5.
2. Any polarity is acceptable.
3. To avoid the ingress of water, tighten fitting and locking ring with a spanner until
sufficient sealing force has been attained.
4. Use cable strain relief.
Electrical connection diagram
VACC-S13-11-K4-1-EX4A
Fig. 2
Block circuit diagram
II (2) G [Ex ib Gb] IIC
II (2) D [Ex ib Db] IIIC
+–
DC
I
7 Commissioning
 Observe the specifications on the product labelling.
 Do not commission the solenoid coil until after mounting.
Warning
The discharge of electrostatically charged parts can lead to ignitable sparks.
 Prevent electrostatic discharge by taking appropriate installation and cleaning
measures.
 Include the device in the system’s potential equalisation. The surface coating
of the solenoid valves is electrically non-conductive.
 Prevent processes that are charge generating.
Note
Escaping exhaust air can swirl up dust and create an explosive dust atmosphere.
Note
Dimension the intrinsically safe circuit, taking account of the permissible elec
trical limit values èTechnical data
Note
For sheathed cables, observe the following:
 Cut off the outer jacket of the cable and the sheathing at the same level.
 Connect the sheathing at the other end to the potential equalisation.
8 Operation
 Observe the operating conditions.
 Comply with permissible limit values èTechnical data.
 Draw in operating medium outside potentially explosive areas.
9 Dismounting
1. Switch off the power supply.
2. Open the cover of the terminal housing.
3. Disconnect electrical cables from terminals.
4. Close cover of terminal housing.
5. Loosen the retaining nut. Remove solenoid coil.
Note
When loosening the cap nut, prevent the cable connector from working loose.
10 Maintenance and care
Note
The discharge of electrostatically charged parts can lead to ignitable sparks.
Ifused in group IIC:
 Only clean the device with a damp cloth.
 Changes or repairs to the solenoid coil are not permitted.
 The device is maintenance-free.
11 Certifications
Region/country Certificate no.
Europe BVS 15 ATEX E 030 X
Brazil TÜV 12.1949
China GYJ111105
Fig. 2
12 Technical data
Operating conditions
Power supply only from certified intrinsically safe circuits Ex ia IIC or ib IIC
Electrical limit values
Max. input voltage UiV 32
Max. input current IimA  200
Max. power PiW 1.2
Effective inner inductance LiHL0
Effective inner capacitance CinF L0
Resistance R20 Ω 865
Nominal voltage UNV DC 14 … 32
Nominal current INmA 16 … 35
Nominal power PNmW 220 … 1100
Pulling current mA 15
Holding current mA 4
Drop-off current mA 2
Duty cycle 100 % (continuous operation)
Degree of protection IP64 in accordance with EN60529
Overvoltage category III in accordance with EN 60664-1
Connecting cable
Conductor cross-section mm20.75 … 1.5
Cable diameter mm 7 … 13
Cable entry thread M20 x 1.5
Temperature class at surface temperature Ta
–30 ≤ Ta ≤ +50 °C T6, T80°C
–30 ≤ Ta ≤ +65 °C T5, T95 °C
Storage temperature °C –30 … +80
Relative humidity 95 % (non-condensing)
Mounting Individual mounting
Mounting position Any
Sealing compound points to the valve body
Materials
Housing Polyamide 6
Sealing compound Polyurethane
Fig. 3

Other Festo Control Unit manuals

Festo CPX-4AE-4AA-H User manual

Festo

Festo CPX-4AE-4AA-H User manual

Festo VOFA-L26-T32C-M-G14-1C1 Series User manual

Festo

Festo VOFA-L26-T32C-M-G14-1C1 Series User manual

Festo DRRD-PS1 Series User manual

Festo

Festo DRRD-PS1 Series User manual

Festo PREL-186 User manual

Festo

Festo PREL-186 User manual

Festo CPX-E-EP User manual

Festo

Festo CPX-E-EP User manual

Festo VPCB T22Series User manual

Festo

Festo VPCB T22Series User manual

Festo VIA 03-FB Series Parts list manual

Festo

Festo VIA 03-FB Series Parts list manual

Festo CP-FB11-E Parts list manual

Festo

Festo CP-FB11-E Parts list manual

Festo CMGA-E1-CO User manual

Festo

Festo CMGA-E1-CO User manual

Festo CP-E16 Series User manual

Festo

Festo CP-E16 Series User manual

Festo MH1 Series Parts list manual

Festo

Festo MH1 Series Parts list manual

Festo NAW VDMA-02 Series User manual

Festo

Festo NAW VDMA-02 Series User manual

Festo CPX-CM-HPP Operating and installation instructions

Festo

Festo CPX-CM-HPP Operating and installation instructions

Festo MPPES-...-010 Series User manual

Festo

Festo MPPES-...-010 Series User manual

Festo SPC200-COM-PDP User manual

Festo

Festo SPC200-COM-PDP User manual

Festo VZXA-C/W-M-V4 Series User manual

Festo

Festo VZXA-C/W-M-V4 Series User manual

Festo CPX-FB13 Parts list manual

Festo

Festo CPX-FB13 Parts list manual

Festo CPV..-DI01 series User manual

Festo

Festo CPV..-DI01 series User manual

Festo DSM Series User manual

Festo

Festo DSM Series User manual

Festo MS6-SV-...-C series User manual

Festo

Festo MS6-SV-...-C series User manual

Festo CPX-2AE Series Parts list manual

Festo

Festo CPX-2AE Series Parts list manual

Festo SMH-AE1 M12 Series User manual

Festo

Festo SMH-AE1 M12 Series User manual

Festo CPA VI Series User manual

Festo

Festo CPA VI Series User manual

Festo SLG-Z Series User manual

Festo

Festo SLG-Z Series User manual

Popular Control Unit manuals by other brands

Rockford Fosgate iPod Interface Module Installation & operation

Rockford Fosgate

Rockford Fosgate iPod Interface Module Installation & operation

Bradley Navigator S59-4007 installation manual

Bradley

Bradley Navigator S59-4007 installation manual

RF-Star RF-BM-ND04C manual

RF-Star

RF-Star RF-BM-ND04C manual

UNICORECOMM UM960 user manual

UNICORECOMM

UNICORECOMM UM960 user manual

Bender ATICS UMA710-2-63-ISO manual

Bender

Bender ATICS UMA710-2-63-ISO manual

ION Damper Control Installation and start-up instructions

ION

ION Damper Control Installation and start-up instructions

Televes T.OX 563822 Quick installation guide

Televes

Televes T.OX 563822 Quick installation guide

Sollae Systems CSE-M73G user manual

Sollae Systems

Sollae Systems CSE-M73G user manual

Girard Systems 98GCK-32B manual

Girard Systems

Girard Systems 98GCK-32B manual

BFT PERSEO-CBE Installation and user manual

BFT

BFT PERSEO-CBE Installation and user manual

Alfalaval 5309 instruction manual

Alfalaval

Alfalaval 5309 instruction manual

Spirax Sarco MkII Safety and Operation

Spirax Sarco

Spirax Sarco MkII Safety and Operation

Alfalaval SB instruction manual

Alfalaval

Alfalaval SB instruction manual

GST C-9302C quick start guide

GST

GST C-9302C quick start guide

Tellur TLL331501 installation guide

Tellur

Tellur TLL331501 installation guide

i-MO i3C Lite user manual

i-MO

i-MO i3C Lite user manual

pizzato CS ME-01 Series operating instructions

pizzato

pizzato CS ME-01 Series operating instructions

ECU Master GPStoCAN V2 manual

ECU Master

ECU Master GPStoCAN V2 manual

manuals.online logo
manuals.online logoBrands
  • About & Mission
  • Contact us
  • Privacy Policy
  • Terms and Conditions

Copyright 2025 Manuals.Online. All Rights Reserved.