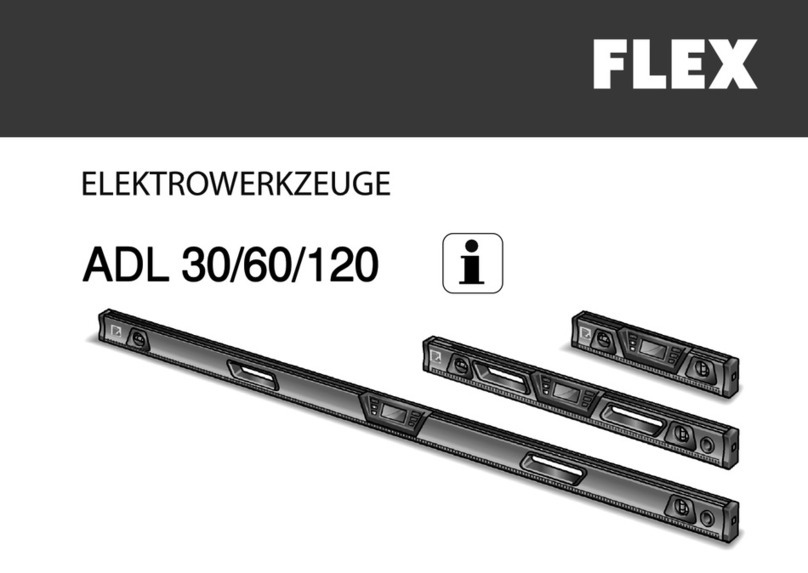
Flex ADL 60-P User manual

ADL 60-P
ADL 120-P

2
Originalbetriebsanleitung . . . . . . . . . . . . . . . . . . . . . . . . . . . . . . . 3
Original operating instructions . . . . . . . . . . . . . . . . . . . . . . . . . . . 10
Notice d’instructions d’origine . . . . . . . . . . . . . . . . . . . . . . . . . . . 17
Istruzioni per l’uso originali . . . . . . . . . . . . . . . . . . . . . . . . . . . . . . 25
Instrucciones de funcionamiento originales . . . . . . . . . . . . . . . . . 33
Instruções de serviço originais . . . . . . . . . . . . . . . . . . . . . . . . . . . 41
Originele gebruiksaanwijzing . . . . . . . . . . . . . . . . . . . . . . . . . . . . 49
Originale driftsvejledning . . . . . . . . . . . . . . . . . . . . . . . . . . . . . . . 57
Originale driftsanvisningen . . . . . . . . . . . . . . . . . . . . . . . . . . . . . . 64
Originalbruksanvisning . . . . . . . . . . . . . . . . . . . . . . . . . . . . . . . . . 71
Alkuperäinen käyttöohjekirja . . . . . . . . . . . . . . . . . . . . . . . . . . . . 78
Αυθεντικές οδηγίες χειρισμού . . . . . . . . . . . . . . . . . . . . . . . . . . . . 85
Instrukcja oryginalna . . . . . . . . . . . . . . . . . . . . . . . . . . . . . . . . . . 93
Eredeti üzemeltetési útmutató . . . . . . . . . . . . . . . . . . . . . . . . . . . 101
Originální návod k obsluze . . . . . . . . . . . . . . . . . . . . . . . . . . . . . . 108
Originálny návod na obsluhu . . . . . . . . . . . . . . . . . . . . . . . . . . . . 115
Originaalkasutusjuhend . . . . . . . . . . . . . . . . . . . . . . . . . . . . . . . . 122
Originali naudojimo instrukcija . . . . . . . . . . . . . . . . . . . . . . . . . . . 129
Lietošanas pamācības oriģināls . . . . . . . . . . . . . . . . . . . . . . . . . 136
Оригинальная инструкция по эксплуатации . . . . . . . . . . . . . . . 144
. . . . . . . . . . . . . . . . . . . . . . . . . . . . . . . . . . . . . . . . . . . . . . . . . . 152

ADL 60-P / ADL 120-P
3
Inhalt
Symbole am Gerät ............................................ 3
Zu Ihrer Sicherheit ........................................... 3
Auf einen Blick ................................................. 4
Bedienfeld ........................................................ 5
Technische Daten ........................................... 6
Gebrauchsanleitung ........................................ 6
Messgenauigkeit prüfen .................................. 7
Kalibrieren ........................................................ 7
Wartung und Pflege ........................................ 8
Entsorgungshinweise ...................................... 9
Haftungsausschluss ........................................ 9
Symbole am Gerät
Zu Ihrer Sicherheit
Bestimmungsgemäße Verwendung
Dieses Messwerkzeug ist bestimmt für den
gewerblichen Einsatz in Industrie und Handwerk.
Die digitale Wasserwaage ist bestimmt zum
Messen und Übertragen von Neigungen und
Winkeln im Innen- und Außenbereich.
Sicherheitshinweise
WARNUNG!
Lesen Sie alle Sicherheitshinweise und
Anweisungen, um gefahrlos und sicher
mit dem Messwerkzeug arbeiten zu können.
Bewahren Sie alle Sicherheitshinweise und
Anweisungen für die Zukunft auf.
Lassen Sie das Messwerkzeug von
qualifiziertem Fachpersonal und nur mit
Original-Ersatzteilen reparieren.
Damit wird sichergestellt, dass die
Sicherheit des Messwerkzeuges erhalten
bleibt.
Vor Inbetriebnahme
Bedienungsanleitung lesen!

4
ADL 60-P / ADL 120-P
Auf einen Blick
1 Endkappe
2 Vertikal-Libelle
3 Bohrung zum Aufhängen
4 Grifföffnungen
5 Horizontal-Libelle
6 Bedienfeld
7 Display oben
8 Gurtführung
9 Magnete
10 Batteriefach

ADL 60-P / ADL 120-P
5
Bedienfeld
11 Kalibrierungs-Taste
Für senkrechte und waagerechte
Auflageflächen.
12 Ein/Aus-Taste
Zum Ein- und Ausschalten. Zum Aus-
schalten ca. 3 Sekunden gedrückt halten.
13 Display-Bedienfeld
14 Speicher-Taste
Speichert den aktuell angezeigten
Messwert (9 Speicherplätze).
Achtung: Beim Abspeichern eines weiteren
Wertes werden die bisherigen
9 Messungen gelöscht.
15 Referenz-Taste
Zum Übertragen von Winkeln. Die Anzeige
springt auf 0.0° und im Display blinkt REF.
Zum Löschen des Referenzwertes die
Wasserwaage ausschalten.
16 Signal-Taste
Schaltet den Signalton aus und ein.
Wenn der Neigungswinkel auf 0°, 45°, 90°
oder dem letzten Speicherwert steht, wird
dies akustisch signalisiert. Hinweis: Bei
aktiviertem Winkel-Referenzwert (13) wird
dieser zum Nullpunkt der Signalisierung.
17 Maßeinheiten-Taste
Schaltet nacheinander die Maßeinheiten
um: °, in/ft, %. Nach dem Einschalten
ist immer die Anzeige in ° aktiv.
18 Beleuchtungs-Taste
Schaltet die Beleuchtung ein und aus.
19 Display oben

6
ADL 60-P / ADL 120-P
Technische Daten Gebrauchsanleitung
VORSICHT!
Wenn das Gerät aus großer Kälte in eine
wärmere Umgebung gebracht wird oder
umgekehrt, sollten Sie das Gerät vor dem
Gebrauch akklimatisieren lassen.
Die wichtigsten Bedienschritte werden auf den
Bildseiten am Ende dieser Anleitung erklärt.
Siehe ab Seite 152.
Batterien einlegen/wechseln ........................152
Gerät ein- und ausschalten ..........................154
Maßeinheit einstellen ....................................156
Automatisches Drehen der Anzeige ............158
Signalton ein- und ausschalten ....................160
Referenzwinkel einstellen .............................162
Verwendung des Messwertspeichers ..........164
Beleuchtung ein-/ausschalten ......................166
Prüfung der Genauigkeit ..............................168
Kalibrierung vornehmen ...............................170
Digitale Wasserwaage ADL 60-P / ADL 120-P
Anzeige (Digital) 0°.... 90°
Genauigkeit (Digital) =0°/90°
>0°...<90° ± 0,05°
± 0,1°
Genauigkeit (Libelle)
± 0,5 mm/m
Stromversorgung 2x1,5V
LR6/AA
Betriebsdauer 100 h
Länge ADL 60-P
ADL 120-P 600 mm
1200 mm
Gewicht (mit
Batterien) ADL 60-P
ADL 120-P 0,8 kg
1,2 kg
Schutzklasse IP65

ADL 60-P / ADL 120-P
7
Messgenauigkeit prüfen
Siehe auch ab Seite 168.
Genauigkeit des Messwerkzeugs prüfen
vor jedem Arbeitsbeginn,
nach starken Temperaturänderungen
nach starken Stößen.
Vor dem Messen von Winkeln bis 45° die
Genauigkeit an einer waagerechten Fläche
(~0°) überprüfen, vor dem Messen von Winkeln
über 45° an einer senkrechten Fläche (~90°).
Das Messwerkzeug einschalten und auf
die waagerechte bzw. senkrechte Fläche
legen. 10 s warten und den Messwert
notieren.
Messwerkzeug drehen (wie im Bild
dargestellt) um 180° um die senk-rechte
Achse. 10 s warten und den zweiten
Messwert notieren.
HINWEIS
Kalibrieren Sie das Messwerkzeug nur, wenn
die Differenz beider Messwerte größer als
0,1° ist!
Kalibrieren Sie das Messwerkzeug in der Lage
(senkrecht bzw. waagerecht), in der die
Differenz der Messwerte festgestellt wurde.
Kalibrieren
Senkrechte Auflageflächen
Siehe auch ab Seite 170, Bild A.
Auflagefläche auf einer möglichst
senkrechten Fläche positionieren.
Die Fläche darf nicht mehr als 5° von der
Senkrechten abweichen. Ist die
Abweichung größer, wird die Kalibrierung
mit der Anzeige „---“ abgebrochen.
Messwerkzeug einschalten und so auf die
senkrechte Fläche legen, dass die Libelle
2 nach oben zeigt und das Display 7 zu
Ihnen gerichtet ist. Warten Sie 4 s!
Waagerechte Auflageflächen
Siehe auch ab Seite 170, Bild B.
Auflagefläche auf einer geraden,
möglichst waagerechten Fläche
positionieren. Die Fläche darf nicht mehr
als 5° von der Waagerechten abweichen.
Ist die Abweichung größer, wird die
Kalibrierung mit der Anzeige „---“
abgebrochen.
Messwerkzeug einschalten und so auf die
waagerechte Fläche legen, dass die
Libelle 1 nach oben zeigt und das Display 7
zu Ihnen gerichtet ist. Warten Sie 4 s!

8
ADL 60-P / ADL 120-P
Arbeitsschritte für beide Varianten:
1. Für ca. 3 s die Kalibrierungstaste „Cal“- a
drücken, bis kurz „CAL1“ im Display
erscheint.
2. Die Kalibrierungstaste „Cal“- a erneut
drücken.
„CALI1“ wird blinkend durchlaufen, bis
nach einem Piepton „CAL2“ im Display
angezeigt wird.
3. Das Messwerkzeug um 180° um die
senkrechte Achse drehen, sodass die
Libelle weiterhin nach oben zeigt, das
Display 7 sich jedoch auf der von Ihnen
abgewandten Seite befindet.
4. Warten Sie 4 s! Die Kalibrierungstaste
„Cal“- a erneut drücken.
„CALI2“ wird blinkend durchlaufen, bis
nach einem Piepton „CAL3“ im Display
angezeigt wird.
5. Das Messwerkzeug um 180° um die
waagrechte Achse drehen, sodass die
Libelle nach unten zeigt, das Display 7
sich jedoch auf der von Ihnen
zugewandten Seite befindet.
6. Warten Sie 4 s! Die Kalibrierungstaste
„Cal“- a erneut drücken.
„CALl3“ wird blinkend durchlaufen, bis
nach einem Piepton „CAL4“ im Display
angezeigt wird.
7. Das Messwerkzeug um 180° um die
senkrechte Achse drehen, sodass die
Libelle weiterhin nach unten zeigt, das
Display 7 sich jedoch auf der von Ihnen
abgewandten Seite befindet.
8. Die Kalibrierungstaste „Cal“- a erneut
drücken. Danach erscheint „SUCC“ im
Display.
Das Messwerkzeug ist nun für diese
Auflagefläche neu kalibriert.
HINWEIS
Wird das Messwerkzeug bei den Schritten 3, 5
und 7 nicht um die in den Bildern dargestellte
Achse gedreht, kann die Kalibrierung nicht
abgeschlossen werden.
(„SUCC“ erscheint nicht im Display.)
Wartung und Pflege
Folgende Hinweise beachten:
Messwerkzeug vorsichtig behandeln und
vor Stößen, Vibrationen, extremen
Temperaturen schützen.
Messwerkzeug bei Nichtgebrauch in
Schutztasche aufbewahren.
Bei längerem Nichtgebrauch Batterien/
Akkus aus dem Messwerkzeug entfernen.

ADL 60-P / ADL 120-P
9
Verbrauchte Batterien/Akkus umgehend
ersetzen.
Lassen Sie das Messwerkzeug von
qualifiziertem Fachpersonal und nur mit
Original-Ersatzteilen reparieren.
Damit wird sichergestellt, dass die Sicherheit
des Messwerkzeuges erhalten bleibt.
Entsorgungshinweise
Nur für EU-Länder:
Werfen Sie Elektrowerkzeuge nicht in
den Hausmüll!
Gemäß Europäischer Richtlinie
2012/19/EU über Elektro- und Elektronik-
Altgeräte und Umsetzung in nationales Recht
müssen verbrauchte Elektrowerkzeuge getrennt
gesammelt und einer umweltgerechten
Wiederverwertung zugeführt werden.
Rohstoffrückgewinnung statt
Müllentsorgung.
Gerät, Zubehör und Verpackung sollten einer
umweltgerechten Wiederverwertung zugeführt
werden. Zum sortenreinen Recycling sind
Kunststoffteile gekennzeichnet.
WARNUNG!
Akkus/Batterien nicht in den Hausmüll,
ins Feuer oder ins Wasser werfen.
Ausgediente Akkus nicht öffnen.
Nur für EU-Länder:
Gemäß Richtlinie 2006/66/EG müssen defekte
oder verbrauchte Akkus/Batterien recycelt
werden.

HINWEIS
Über Entsorgungsmöglichkeiten beim
Fachhändler informieren!
Haftungsausschluss
Der Hersteller und sein Vertreter haften nicht
für Schäden und entgangenen Gewinn durch
Unterbrechung des Geschäftsbetriebes, die
durch das Produkt oder die nicht mögliche
Verwendung des Produktes verursacht
wurden.
Der Hersteller und sein Vertreter haften nicht
für Schäden, die durch unsachgemäße
Verwendung oder in Verbindung mit Produkten
anderer Hersteller verursacht wurden.

10
ADL 60-P / ADL 120-P
Contents
Symbols on the power tool..........................10
For your safety .......................................... 10
Overview ................................................... 11
Control panel ............................................. 12
Technical specifications ............................ 13
Instructions for use .................................... 13
Checking measurement precision ............. 14
Calibration ................................................. 14
Maintenance and care .............................. 15
Disposal information ................................. 16
Exemption from liability ............................. 16
Symbols on the power tool
For your safety
Intended use
This measuring instrument is designed
for commercial use in industry and trade.
The digital spirit level is designed for measu-
ring and transferring gradients and angles
indoors and outdoors.
Safety instructions
WARNING!
Read all safety instructions and other instruc-
tions to be able to work safely and securely
with the measuring instrument. Keep all safety
instructions and other instructions in a safe
place for the future.
Have the measuring instrument repaired
by qualified technicians and with original
spare parts only.
This ensures that the safety of the
measuring instrument is maintained.
Before switching on the power tool,
read the operating manual!

ADL 60-P / ADL 120-P
11
Overview
1 End cap
2 Vertical bubble tube
3 Hook hole
4 Handle openings
5 Horizontal bubble tube
6 Control panel
7 Display up
8 Belt guide
9 Magnets
10 Battery compartment

12
ADL 60-P / ADL 120-P
Control panel
11 Calibration button
For vertical and horizontal contact surfaces.
12 On/Off button
Switches the power tool on and off.
To switch off the measuring instrument, hold
down the button for approx. 3 seconds.
13 Display control panel
14 Save button
Saves the currently displayed measured
value (9 storage locations).
Attention: When another value is saved,
the previous 9 measurements are deleted.
15 Reference button
For transferring angles. The display jumps
to 0.0° and REF flashes on the display.
To delete the reference value, switch off
the spirit level.
16 Signal button
Switches the acoustic signal off and on.
If the angle of inclination is on 0°, 45°, 90°
or the last saved value, this is signalled
acoustically. Note: When the angle
reference value (13) is activated, this
becomes the signalling zero point.
17 Unit of measurement button
Switches the units of measurement
in succession: °, in/ft, %. When the
measuring instrument has been switched
on, the display in ° is always active.
18 Light button
Switches the light on and off.
19 Display up

ADL 60-P / ADL 120-P
13
Technical specifications
–
Instructions for use
CAUTION!
If the device is brought from a very cold
to a warmer environment or vice versa,
you should allow the device to acclimatise
before using it.
The most important operating steps are
explained at the end of these instructions
on the illustrated pages.
See from page 152.
Inserting/changing batteries .................... 152
Switching the device on and off .............. 154
Setting unit of measurement ................... 156
Automatic rotation of display ................... 158
Switching acoustic signal on and off ....... 160
Setting reference angle ........................... 162
Using measured value memory .............. 164
Switching light on/offn ............................. 166
Checking precision .................................. 168
Calibrating the measuring instrument ..... 170
Digital spirit level ADL 60-P / ADL 120-P
Display (digital) 0°.... 90°
Precision (digital) =0°/90°
>0°...<90° ± 0.05°
± 0.1°
Precision (bubble tube) ± 0.5 mm/m
Power supply 2x1.5V
LR6/AA
Operating duration 100 h
Automatic switch-off 300 s
Length ADL 60-P
ADL 120-P 600 mm
1200 mm
Weight (with
batteries) ADL 60-P
ADL 120-P 0.8 kg
1.2 kg
Protection class IP65

14
ADL 60-P / ADL 120-P
Checking measurement
precision
See also from page 168.
Check precision of the measuring instrument
before starting work,
after large temperature changes
after violent impacts.
Before measuring angles up to 45°, check
the precision on a horizontal surface (~0°),
before measuring angles over 45°, vertical
surface (~90°).
Switch on the measuring tool and place it
on a horizontal or vertical surface.
Wait 10 seconds and make a note of the
measured value.
Rotate the measuring tool (as shown in
the picture) 180° about the vertical axis.
Wait 10 seconds and make a note of the
second measured value.
NOTE
The measuring tool only needs to be calibrated if
the difference between both measured values is
greater than 0.1°!
Calibrate the measuring tool in the position
(vertical or horizontal) that the difference of the
measured values was determined in.
Calibration
Vertical contact surfaces
See also from page 170, figure A.
Place the contact surface on a surface
that is as vertical as possible. The surface
must not deviate more than 5° from the
vertical. If the deviation is greater, the
calibration will be aborted and the display
will show "---".
Switch on the measuring tool and place it
on the vertical surface in such a way that
the spirit level 2 points upwards and the
display 7 is pointing towards you.
Wait for 4 seconds!
Horizontal contact surfaces
See also from page 170, figure B.
Position the contact surface on an even
surface that is as horizontal as possible.
The surface must not deviate more than
5° from the horizontal. If the deviation is
greater, the calibration will be aborted and
the display will show "---".
Switch on the measuring tool and place it
on the horizontal surface in such a way
that the spirit level 1 points upwards and
the display 7 is pointing towards you.
Wait for 4 seconds!

ADL 60-P / ADL 120-P
15
Worksteps for both versions:
1. Press the calibration button "Cal"- a for
approx. 3 sec. until "CAL1" appears
briefly in the display.
2. Press the calibration button "Cal"- a
again.
"CALI1" will flash until "CAL2" is shown
in the display with an audible tone.
3. Turn the measuring tool 180° about the
vertical axis so that the spirit level is still
pointing upwards but the display 7 is on
the opposite side to you.
4. Wait for 4 seconds. Press the
calibration button "Cal"- a again.
"CALI2" will flash until "CAL3" is shown
in the display with an audible tone.
5. Turn the measuring tool 180° about the
horizontal axis so that the spirit level is
pointing downwards but the display 7 is
on the side facing you.
6. Wait for 4 seconds. Press the
calibration button "Cal"- a again.
"CALl3" will flash until "CAL4" is shown
in the display with an audible tone.
7. Turn the measuring tool 180° about the
vertical axis so that the spirit level is still
pointing downwards but the display 7 is
on the opposite side to you.
8. Press the calibration button "Cal"- a
again. "SUCC" then appears in the
display.
The measuring tool is now recalibrated for this
contact surface.
NOTE
If the measuring tool is not rotated about the
axis shown in the figures for steps 3, 5 and 7,
the calibration cannot be completed.
("SUCC" does not appear in the display.)
Maintenance and care
Observe the following instructions:
Handle the measuring instrument with
care and protect it from impacts,
vibrations and extreme temperatures.
When the measuring instrument is not
in use, keep it in the protective pouch.
If not used for a prolonged period, take the
batteries out of the measuring instrument.
Replace used batteries immediately.
Have the measuring instrument repaired
by qualified technicians and with original
spare parts only.
This ensures that the safety of the measu-
ring instrument is maintained.

16
ADL 60-P / ADL 120-P
Disposal information
EU countries only:
Do not throw electric power tools
into the household waste!
In accordance with the European Directive
2012/19/EU on Waste Electrical and
Electronic Equipment and transposition
into national law used electric power tools
must be collected separately and recycled
in an environmentally friendly manner.
Recycling raw materials instead
of waste disposal.
Device, accessories and packaging should
be recycled in an environmentally friendly
manner. Plastic parts are identified for
recycling according to material type.
WARNING!
Do not throw accumulators/batteries into
the household waste, fire or water.
Do not open disused batteries.
EU countries only:
In accordance with Directive 2006/66/EC
defective or used batteries must be recycled.
NOTE
Please ask your dealer about disposal
options!
Exemption from liability
The manufacturer and his representative are
not liable for any damage and lost profit due to
interruption in business caused by the product
or by an unusable product.
The manufacturer and his representative are
not liable for any damage which was caused
by improper use of the power tool or by use
of the power tool with products from other
manufacturers.

ADL 60-P / ADL 120-P
17
Table des matières
Symboles apposés sur l’appareil ............... 17
Pour votre sécurité ................................... 17
Vue d’ensemble ....................................... 18
Bandeau de commande ........................... 19
Données techniques ................................ 20
Notice d’utilisation .................................... 20
Vérifier la précision de mesure ................. 21
Calibrer ..................................................... 21
Maintenance et nettoyage ........................ 23
Consignes pour la mise au rebut ............. 23
Exclusion de responsabilité ...................... 24
Symboles apposés sur
l’appareil
Pour votre sécurité
Conformité d’utilisation
Cet outil de mesure est destiné aux appli-
cations professionnelles dans l’industrie
et l’artisanat. Le niveau à bulle numérique
sert à mesurer et reporter des inclinaisons
et angles à l’intérieur et à l’extérieur.
Consigne de sécurité
AVERTISSEMENT !
Veuillez lire toutes les consignes de sécurité et
instructions afin de travailler sans risque et de
manière sûre avec l’outil de mesure. Veuillez
conserver toutes les consignes de sécurité et
instructions dans un endroit sûr pour pouvoir les
reconsulter ultérieurement.
Ne faites réparer cet outil de mesure que
par du personnel spécialisé et qualifié,
lequel utilisera exclusivement des pièces
de rechange d’origine.
Ceci garantit que l’outil de mesure
demeure sûr à l’usage.
Avant la mise en service, veuillez
lire la notice d’instructions !

18
ADL 60-P / ADL 120-P
Vue d’ensemble
1 Embout
2 Niveau à bulle vertical
3 Perçage pour le suspendre
4 Poignées
5 Niveau à bulle horizontal
6 Bandeau de commande
7 Afficheur supérieur
8 Guide de sangle
9Aimants
10 Compartiment à batterie

ADL 60-P / ADL 120-P
19
Bandeau de commande
11 Touche d'étalonnage
Pour surfaces d'appui verticales et
horizontales.
12 Touche Marche / Arrêt
Pour allumer et éteindre l’appareil.
Appuyez env. 3 secondes pour éteindre.
13 Panneau de commande de l'afficheur
14 Touche d’enregistrement
Enregistre la valeur de mesure actuelle-
ment affichée (9 emplacements mémoire).
Attention : Lors de la mémorisation d’une
valeur supplémentaire, les 9 mesures
jusqu’à présent réalisées s’effacent.
15 Touche de référence
Pour reporter des angles L’affichage saute
sur 0.0° et sur l’écran la mention REF
clignote. Pour effacer la valeur de réfé-
rence, éteignez le niveau à bulle.
16 Touche de signal
Éteint et allume le signal sonore.
Lorsque l’angle d’inclinaison se trouve
sur 0°, 45°, 90° ou sur la dernière valeur
enregistrée, une alarme sonore le signale.
Remarque : Lorsque la valeur (13) de réfé-
rence d’angle est activée, cette valeur
devient le point zéro de la signalisation.
17 Touche des unités de mesure
Commute successivement les unités
de mesure : °, in/ft, %. Après l’allumage,
c’est toujours l’affichage en ° qui est actif.
18 Touche d'éclairage
Active et désactive l'éclairage.
19 Afficheur supérieur

20
ADL 60-P / ADL 120-P
Données techniques Notice d’utilisation
PRUDENCE !
Si l’appareil est amené d’un lieu très froid dans
un environnement plus chaud, ou inversement,
laissez-lui le temps de s’acclimater avant de
l’utiliser.
Les principales manips sont expliquées sur les
pages illustrées situées à la fin de cette notice.
Voir à partir de la page 152.
Mise en place / Changement des piles .....152
Allumer et éteindre l’appareil ..................... 154
Régler l’unité de mesure ...........................156
Rotation automatique de l'affichage .......... 158
Activer et désactiver le signal sonore ........160
Régler l’angle de référence .......................162
Utilisation de la mémoire de valeur mesurée 164
Activation/désactivation de l'éclairage .......166
Vérification de la précision ........................168
Effectuer une calibration ........................... 170
Niveau à bulle numérique
ADL 60-P / ADL 120-P
Affichage
(numérique) 0°.... 90°
Précision
(numérique) =0°/90°
>0°...<90° ± 0,05°
± 0,1°
Précision (niveau à bulle) ±0,5 mm/m
Alimentation électrique 2x1,5V
LR6/AA
Autonomie de fonctionnement 100 h
Longueur ADL 60-P
ADL 120-P 600 mm
1200 mm
Poids (batteries
incluses) ADL 60-P
ADL 120-P 0,8 kg
1,2 kg
Classe de protection IP65
This manual suits for next models
1
Table of contents
Languages:
Other Flex Laser Level manuals