manuals.online logo
Brands
  1. Home
  2. •
  3. Brands
  4. •
  5. Front Runner
  6. •
  7. Automobile Accessories
  8. •
  9. Front Runner PBTH001 User manual

Front Runner PBTH001 User manual

ENG
PBTH001_REV_A00 © 2023 FRONT RUNNER VEHICLE OUTFITTERS
1
Don’t be a hero and muscle through this installation without reading these fitting instructions first! Improper installation of this gear may void certain
aspects of your warranty.
Before you begin, take a moment and open all your Front Runner Rack Kit boxes and gather the assembly instructions for the various components.
A complete kit will contain:
1. Front Runner Mounting System specific to your vehicle
2. Front Runner Rack Tray or Load Bar Slats
This document will guide you through the assembly of the Mounting System and assist you in fitting the Rack tray or Load Bars to your specific vehicle.
Please refer to the next page for a list of all the components, quantities and tools required.
PBTH001
READ ME FIRST
START HERE!
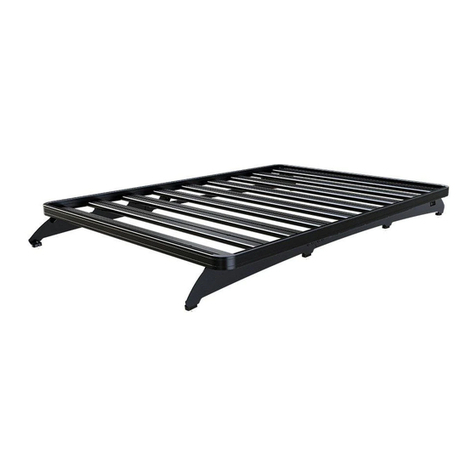
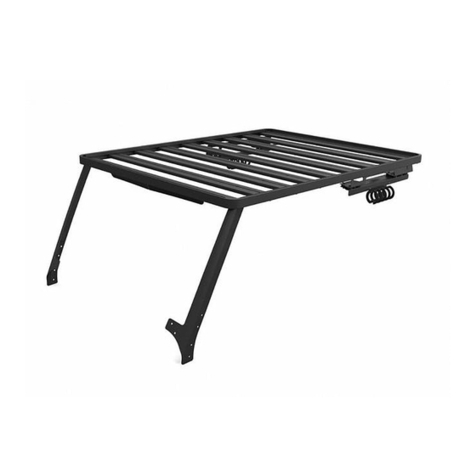
front runner Toyota Hilux Revo Pro Bed Rack
Mounting System
IMPORTANT WARNING!
IT IS CRITICAL THAT ALL FRONT RUNNER PRODUCTS BE PROPERLY AND SECURELY ASSEMBLED AND ATTACHED TO YOUR VEHICLE. IMPROPER ATTACHMENT COULD
RESULT IN AN AUTOMOBILE ACCIDENT, AND COULD CAUSE SERIOUS BODILY INJURY OR DEATH. YOU ARE RESPONSIBLE FOR ASSEMBLING AND SECURING ALL FRONT
RUNNER PRODUCTS TO YOUR VEHICLE, CHECKING THE ATTACHMENTS PRIOR TO USE, AND PERIODICALLY INSPECTING THE PRODUCTS FOR ADJUSTMENT, WEAR AND
DAMAGE. THEREFORE, YOU MUST READ AND UNDERSTAND ALL OF THE INSTRUCTIONS AND PRECAUTIONS SUPPLIED WITH YOUR FRONT RUNNER PRODUCT PRIOR TO
INSTALLATION OR USE. IF YOU DO NOT UNDERSTAND ALL OF THE INSTRUCTIONS AND CAUTIONS, OR IF YOU HAVE NO MECHANICAL EXPERIENCE AND ARE NOT THOROUGHLY
FAMILIAR WITH THE INSTALLATION PROCEDURES, YOU SHOULD HAVE THE PRODUCT INSTALLED BY A PROFESSIONAL INSTALLER OR OTHER QUALIFIED PERSONNEL.
NOTE: Front Runner will not be responsible for any damage caused by the failure to install the product according to these instructions.
Please call us if you have any questions about the installation of this product.
PBTH001_REV_A00 © 2023 FRONT RUNNER VEHICLE OUTFITTERS
2
TOOLS NEEDED
CHECK ONLINE FOR LATEST FITMENT GUIDE WWW.FRONTRUNNEROUTFITTERS.COM
GET ORGANIZED
1
IN THE BOX PBTH001
1 2 X FRONT MOUNTING BRACKET LH & RH
2 2 X REAR MOUNTING BRACKET LH & RH
3 8 X MOUNTING BRACKET GUSSET
4 4 X 10mm SPACER SMALL
5 4 X 10MM SPACER LARGE
5mm
6 16 X M8 X 20 BUTTON HEAD SCREW
7 8 X M8 X 16 BUTTON HEAD SCREW
8 28 X M8 NYLOC NUT
9 16 X M8 x 19 x 2 SS FLAT WASHER
10 12 X M8 X 35 HEX BOLT
11 36 X M8 NUT CAP
2
1
3
4
5
6
7
8
9
10
11
13mm
13mm
9mm
4mm
PBTH001_REV_A00 © 2023 FRONT RUNNER VEHICLE OUTFITTERS
3
TOOLS NEEDED
CHECK ONLINE FOR LATEST FITMENT GUIDE WWW.FRONTRUNNEROUTFITTERS.COM
GET ORGANIZED
1
IN THE BOX PBRA001
1 4 X PRO BED RACK LEG
2 2 X PRO BED RACK REAR BRACE
3 2 X PRO BED RACK RH REAR WING BRACKET
4 2 X PRO BED RACK TOP TRUSS
5 1 X PRO BED RACK RH FRONT DIAGONAL BRACE
2
6 1 X PRO BED RACK LH FRONT DIAGONAL BRACE
7 12 X M6 x 16 BUTTON HEAD SCREW
8 24 X M6 NYLOC NUT
9 22 X M6 NUT CAP
10 16 X M8 x 20 BUTTON HEAD SCREW
11 16 X M8 x 19 x 2 FLAT WASHER
12 16 X M8 NYLOC NUT
13 16 X M8 NUT CAP
IN THE BOX PBRA001
14 6 X M6 x 12 BUTTON HEAD SCREW
15 2 X FRONT HORIZONTAL BRACE
16 1 X FRONT CENTER BRACE
17 4 X M6 x 20 BUTTON HEAD SCREW
18 9 X M6 x 12 x 1 FLAT WASHER
19 24 X M6 x 25 THREAD FORMING SCREW
20 1 X T30 6" TORX BIT
1
3
4
5
6 7
8
9
10
11
12
13
14
15
16
17
18 19
20
FRONT
Oil or
Anti Seize
Torx
T30
5mm
4mm
13mm
10mm
PBTH001_REV_A00 © 2023 FRONT RUNNER VEHICLE OUTFITTERS
4
TOOLS NEEDED
CHECK ONLINE FOR THE LATEST FITMENT GUIDE WWW.FRONTRUNNEROUTFITTERS.COM
GET ORGANIZED1
IN THE BOX PBAL_1450
1 2 X TOP EXTRUSION
2 1 X TOP MIDDLE EXTRUSION
3 2 X BOTTOM EXTRUSION
4 2 X 1450mm PSA STRIP PE60
Friend
33
33
32
31
31
34
34
© 2023 FRONT RUNNER VEHICLE OUTFITTERS
5
PBTH001_REV_A00
FIT AND SECURE
2
2.1
2.2
2.3
Remove the factory fitted bolts in the side of
the load bin holding the anker hook.
Loosly assemble the Front Mount Brackets
(item 1) using the M8x35 Hex Bolt and M8 x
19 x 2 flat washer (Item 9 & 10) in the bottom
two holes in the bracket. DO NOT TIGHTEN.
Using a marking pen, mark the top hole.
Remove the bracket from the load bin and
drill the hole marked with a 4mm as a pilot
hole open the hole to a 9mm. Do this on the
left and right side.
Do not refit the bracket at this stage.
Remove the factory fitted bolts in the side of
the load bin holding the anker hook.
Loosly assemble the Rear Mount Brackets
(item 2) using the M8x35 Hex Bolt and M8 x
19 x 2 flat washer (Item 9 & 10) in the bottom
two holes in the bracket.DO NOT TIGHTEN.
Using a marking pen, mark the top hole.
Remove the bracket from the load bin and
drill the hole marked with a 4mm as a pilot
hole open the hole to a 9mm. Do this on the
left and right side.
Do not refit the bracket at this stage.
Assemble the Pro Bed Leg (Item 1) on page
3 and the Front Mounting Bracket (Item 1)
to using M8 x 20 Button head bolts and M8
nyloc nuts (Item 6 & 8) as shown and M8
x 16 Button head bolts and M8 nyloc nuts
(Item 7 & 8).
Do this on the Left and Right Side.
DO NOT TIGHTEN.
310
39
31
35
38
34
39
32
35
310
39
34
39
38
6
7
8
3
1
1
© 2023 FRONT RUNNER VEHICLE OUTFITTERS
6
PBTH001_REV_A00
FIT AND SECURE
2
2.4
2.5
2.6
Assemble the Front diagonal and Horizontal
Brace parts as shown (Item 4, 5 & 6) to the
legs fitted in 2.2 using the M8 x 20 Button
head bolts M8 x 19 x 2 flat washer and M8
nyloc nuts (Item 10 , 11 & 12).
DO NOT FULLY TIGHTEN.
Use the M6 x 20 Button Head bolts M6 x 12 x
1 Flat Washer and M6 Nyloc Nut (Item 8,17 &
18) to fit the Front Center Brace to th LH and
RH Front Horizontal Braces (Item 16).
DO NOT FULLY TIGHTEN.
With the help of a friend lift the Pro bed rack
on to the load bin and loosely fit the M8 x 35
and M8 x 19 x 2 Flat washer into the OEM
mounting points together with the 10mm
large spacer (Item 5,9 & 10).DO NOT FULLY
TIGHTEN.
Insert the M8 x 35 Hex bolt and M8 x 19 x 2
Flat washer into the top hole in the bracket
and place the 10mm small spacer behind the
lip of the load bin.Use the M8 x 19 x 2 Flat
washer and M8 Nyloc Nut to secure in place.
do this on both sides.
Fully Tighten all the M8 x 35 Hex Bolts.
LH RH
TOP EXTRUSION
13mm
Tightening Torque:
M8 : 15-20Nm / 11.06 ft lb - 14.75 ft lb
316
36
35
317
310
37
318
38
311
312
313
34
Slide the front leg and truss assembly
backward to allow access for securing the
extrusions.
Using the supplied 6" T30 torx bit and a
cordless driver assemble the extrusion using
the M6x25 thread forming screws (Item
19).Use a slow and constant speed when
using the cordless driver.
Take note of extrusion orientation !
Use a little anti seize or oil on screw
threads before inserting. Note these are
Thread Forming Screws.
Tightening Torque 6-10Nm / 18.4 ft lbs
Torx
T30
Cordless
Drill
Oil or
Anti Seize
8
4
5
9
10
13mm
5mm
© 2023 FRONT RUNNER VEHICLE OUTFITTERS
7
PBTH001_REV_A00
FIT AND SECURE
2
2.7
2.8
2.9
Loosly assemble the Rear Mount Brackets
(item 2) using the M8x35 Hex Bolt and M8 x
19 x 2 flat washer (Item 9 & 10) in the bottom
two holes in the bracket.DO NOT TIGHTEN.
Insert the M8 x 35 Hex bolt and M8 x 19 x 2
Flat washer into the top hole in the bracket
and place the 10mm small spacer behind the
lip of the load bin.Use the M8 x 19 x 2 Flat
washer and M8 Nyloc Nut to secure in place.
do this on both sides.
Fit the Rear Brace (Item 2) using the M6x12
button head screws and M6 Nyloc nuts (Item
14 & 8).
Fully tighten and place M6 Nut caps (Item 9)
on the M6 Nyloc Nuts.
Loosely assemble the rear top truss using
the M8x20 Button head screws, M8x19x2
Flat washer and M8 Nyloc Nuts (Item
10,11&12).Fully tighten the M8 Button Heads
and place M8 Nut Caps on the M8 Nyloc Nuts
(Item 13).
7
13mm
5mm
Tightening Torque:
M8 : 15-20Nm / 11.06 ft lb - 14.75 ft lb
13mm
5mm
Tightening Torque:
M6 : 8-10Nm / 5.9 ft lb - 7.38 ft lb
32
35
310
39
34
39
38
10mm
4mm
3
8
9
14
© 2023 FRONT RUNNER VEHICLE OUTFITTERS
8
PBTH001_REV_A00
FIT AND SECURE
2
2.10
2.11
2.12
Pull the front leg / truss / extrusion assembly
toward the rear legs. Attach the rear leg
assembly to the Extrusions using the M6x25
thread forming screws (Item 19) and a
cordless driver.The front assembly will be
pulled back into its final position while fully
tightening these screws.
Using clamps and a spirit level clamp the
spirit level to the inside of the Front Center
Brace and Tighten the M6x20 Button head
screws and M6 Nyloc Nuts fitted in 2.3.
Place M6 Nut caps on the M6 Nyloc Nuts.
13mm
Assemble the Rear Wing Brackets (Item 3)
using the M6x12 Button head screws and M6
Nyloc Nuts (Item 14 & 8).
Place the M6 Nut caps (Item 9) over the nyloc
nuts.
Use a little anti seize or oil on screw
threads before inserting. Note these are
Thread Forming Screws.
Tightening Torque 6-10Nm / 18.4 ft lbs
Torx
T30
Cordless
Drill
Oil or
Anti Seize
Tightening Torque:
M8 : 15-20Nm / 11.06 ft lb - 14.75 ft lb
4mm
10mm
COMPLETION
6
6.1
Congratulations! You did it. Take a step back and admire your work!
INSTALL OTHER VEHICLE AND RACK ACCESSORIES
7
Now's the time to visit your favorite Front Runner dealer in person or online.
IMPORTANT!
Be sure to tag us. We love to see our gear in action! #FrontRunnerOutfitters #BornToRoam
Share your adventures on:
FRONT RUNNER RACK KITS OFTEN HAVE A HIGHER LOAD RATING THAN THE VEHICLES THEY ARE MOUNTED TO. PLEASE REFER TO YOUR SPECIFIC VEHICLE MANUFACTURER
FOR A RECOMMENDED ROOF RATING. FRONT RUNNER CANNOT BE RESPONSIBLE FOR IMPROPER LOADING BEYOND THE VEHICLE MANUFACTURER'S STATED LOAD CAPACITY.
© 2023 FRONT RUNNER VEHICLE OUTFITTERS
9
PBTH001 _REV_A00
4
FIT AND SECURE
2
2.13
Fully tighten all the bolts and nuts and place
nut caps where needed.
13mm

Other Front Runner Automobile Accessories manuals
Front Runner FSLI023 User manual

Front Runner

Front Runner FSLI023 User manual

Front Runner BRONCO TBRA040 User manual

Front Runner

Front Runner BRONCO TBRA040 User manual

Front Runner SSLD001 User manual

Front Runner

Front Runner SSLD001 User manual

Front Runner SLIMLINE II User manual

Front Runner

Front Runner SLIMLINE II User manual

Front Runner Easy-Out User manual

Front Runner

Front Runner Easy-Out User manual

Front Runner SSDS105 User manual

Front Runner

Front Runner SSDS105 User manual

Front Runner LAVT003 User manual

Front Runner

Front Runner LAVT003 User manual
Front Runner Slimline II FATF005 User manual

Front Runner

Front Runner Slimline II FATF005 User manual

Front Runner SSDR005 User manual

Front Runner

Front Runner SSDR005 User manual

Front Runner FATF006 User manual

Front Runner

Front Runner FATF006 User manual

Front Runner Slimline II KRKS007T User manual

Front Runner

Front Runner Slimline II KRKS007T User manual

Front Runner SLIMLINE II User manual

Front Runner

Front Runner SLIMLINE II User manual

Front Runner RRAC201 User manual

Front Runner

Front Runner RRAC201 User manual

Front Runner JADA014 User manual

Front Runner

Front Runner JADA014 User manual

Front Runner SHOWER ARM MKII User manual

Front Runner

Front Runner SHOWER ARM MKII User manual

Front Runner LALD009 User manual

Front Runner

Front Runner LALD009 User manual

Front Runner FAJK010 Manual

Front Runner

Front Runner FAJK010 Manual

Front Runner RRAC269 User manual

Front Runner

Front Runner RRAC269 User manual

Front Runner Pro Bike Carrier User manual

Front Runner

Front Runner Pro Bike Carrier User manual

Front Runner RRAC120 User manual

Front Runner

Front Runner RRAC120 User manual

Front Runner SSDR010 User manual

Front Runner

Front Runner SSDR010 User manual

Front Runner TRFD001 User manual

Front Runner

Front Runner TRFD001 User manual

Front Runner SLIMLINE II Assembly instructions
Front Runner

Front Runner SLIMLINE II Assembly instructions

Front Runner TRCA009 User manual

Front Runner

Front Runner TRCA009 User manual

Popular Automobile Accessories manuals by other brands

Thule Sprint XT 569 instructions

Thule

Thule Sprint XT 569 instructions

DVB FBTT1-01 installation manual

DVB

DVB FBTT1-01 installation manual

WeatherTech MudFlap installation instructions

WeatherTech

WeatherTech MudFlap installation instructions

Mazda PROTEGE 5 quick start guide

Mazda

Mazda PROTEGE 5 quick start guide

Lexus DTC B2796 manual

Lexus

Lexus DTC B2796 manual

RTR 1992-7001-01 installation instructions

RTR

RTR 1992-7001-01 installation instructions

Crux ACPBM-77X manual

Crux

Crux ACPBM-77X manual

Prestolite Performance Mallory 29212 installation instructions

Prestolite Performance

Prestolite Performance Mallory 29212 installation instructions

Kuda 041375 Installation instruction

Kuda

Kuda 041375 Installation instruction

Compass DOLPHIN 4 manual

Compass

Compass DOLPHIN 4 manual

Tessera4x4 SOT-ROLL Series installation manual

Tessera4x4

Tessera4x4 SOT-ROLL Series installation manual

Pittsburgh 93980 Assembly and operating instructions

Pittsburgh

Pittsburgh 93980 Assembly and operating instructions

Monster iCar PowerPlug Dual USB 700 user guide

Monster

Monster iCar PowerPlug Dual USB 700 user guide

Steinhof M-019 FITTING AND OPERATION MANUAL

Steinhof

Steinhof M-019 FITTING AND OPERATION MANUAL

CALIMA 46069 operating instructions

CALIMA

CALIMA 46069 operating instructions

Thule 599XT user manual

Thule

Thule 599XT user manual

Whispbar K340W Fitting Instructions for Basic Carrier

Whispbar

Whispbar K340W Fitting Instructions for Basic Carrier

Gentex STDHL3 manual

Gentex

Gentex STDHL3 manual

manuals.online logo
manuals.online logoBrands
  • About & Mission
  • Contact us
  • Privacy Policy
  • Terms and Conditions

Copyright 2025 Manuals.Online. All Rights Reserved.