3
Installation and maintenance
1.
First charge the device fully when it is switched off! Make
sure that the solar panel has sufficient sunlight.
2.
Choose a suitable and sunny place taking into account
point 6 of these instructions.
3.
Insert the device as deep as possible into the ground, but
at least to ¾ of the aluminum skewer. If the ground is too
firm, you can dig a hole in advance. If you have done this,
make sure that you fill the hole with earth after inserting
the device and press it down firmly. The looser the earth,
the less the vibrations are conducted.
4.
To start, press the switch on the underside of the housing.
The device is now ready for use.
5.
Check the function of the device at regular intervals. If the
device no longer functions normally, it may be necessary
to change the battery (see point 4) or the device does not
receive sufficient sunlight.
4 Replacement of the rechargeable battery
1.
Remove the transparent housing cover.
2.
Carefully take off the solar panel from the rechargeable
battery which is underneath. When doing so, make sure
that the cable connection between the solar panel and the
circuit board which is underneath the rechargeable battery,
is left intact and is not damaged.
3.
Remove the old rechargeable battery from its fitting.
4.
Insert a new rechargeable battery size Mignon (AA) and
type Ni-MH with 1.2 V and 50 mA. When doing so, mind
the correct polarity as shown on the bottom inside the bat-
tery fitting.
5.
Carefully place the solar panel back on the rechargeable
battery.
6.
Reattach the transparent casing cover to the casing body.
Warning: risk of explosion if
batteries are inserted incor-
rectly
5
Specifications
•
Power supply:
1 rechargeable battery, size Mignon (AA), type Ni-MH,
1.
2
V
,
50
mA
(included
);
can
be
replaced
if
necessar
y
•
Casing:
weather-proof, Stable aluminium stake
•
Effective area:
approx. 700 m², depending on condition of soil
•
Frequency range:
approx. 400 Hz ± 50 Hz
•
Operation:
On
/
Off switch
•
Electricity supply:
Polycrystalline solar cells
•
Interval:
approx. 2 sec on, approx. 2 sec off (break interval)
•
Voltage reserve:
up to 7 days without exposure to light
•
Readiness for operation:
immediate operating and charg-
ing function, even at low incidence of light
6
Notes on operation
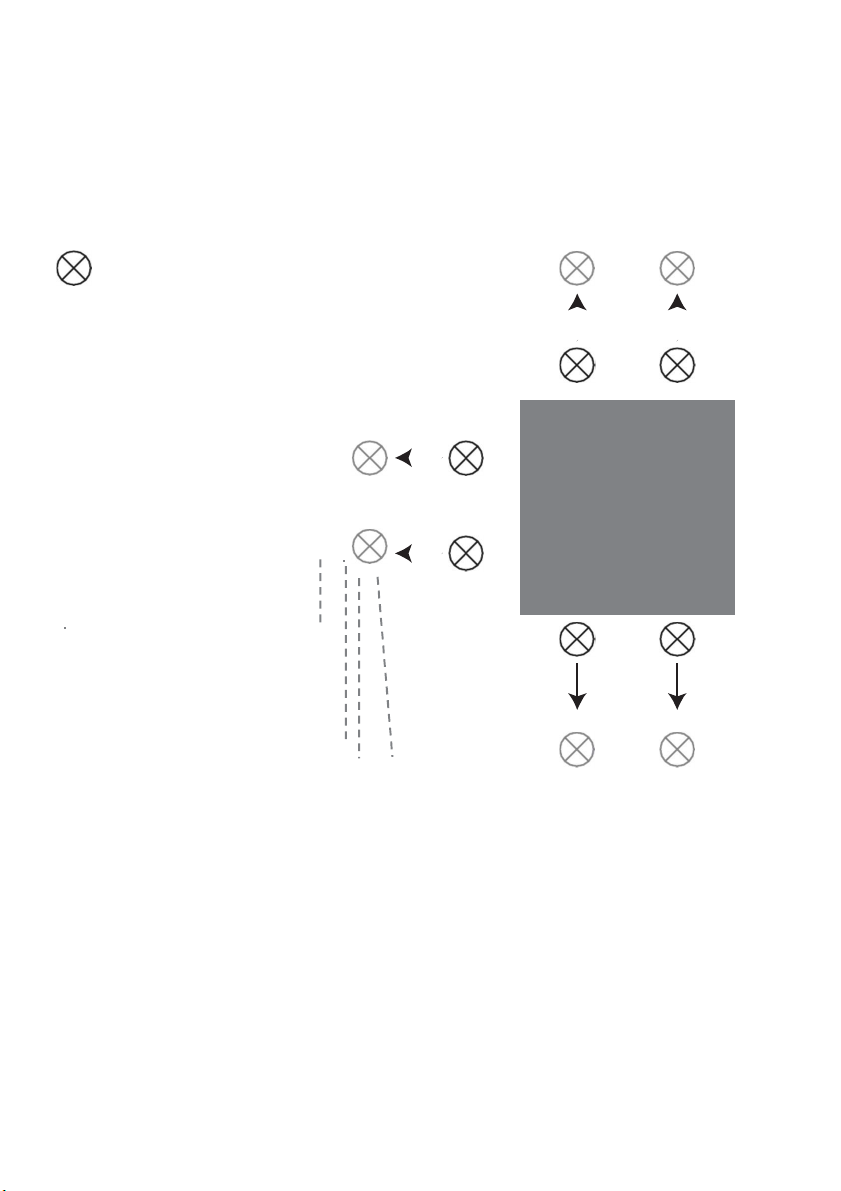
To successfully and permanently repel a mole or vole from
your garden, there are a few instructions for use that have to
be observed: The mole should not be ‘encircled’ by the mole
repellent. To avoid this, start from the house and move away
from the house wall to repel the mole. To do this, place one or
preferably several mole repellents in the ground near to the
house wall – and, most importantly, before the first molehill.
Never bore directly into a molehill.
R
eposition
the
devic
e
e
very
2
–
3
weeks
near
er
t
o
the
bounda
-
ry
of
the
garden
(
a
w
ay
from
the
house).
The
time
should
c
oin
-
cide
with
the
‘
movement
’
of
the
molehills.
If
the
molehills
ar
e
still
in
the
same
position
after 4
weeks,
ple
ase
check
whether
the
devic
e
is
actually
oper
ational.
If
this
is
the
case,
switch
off
the
devic
e
f
or
1
–
2
days
and
then
turn
it
on
again.
The
diff
ering
lengths
of time tak
en
t
o
repel
the
animal
can
have
diverse
r
e
asons:
e.g
.
the
mole
is
mor
e
r
esistant
or
the
soil
c
ontains
mor
e
sand,
tur
f
or
clay.
The
Gardigo
mole
r
epellent
system
has
an
integrated
on/
off
switch
–
this
is
impor
tant
t
o
note
when
pur
chasing
a
solar
oper
ated
mole
r
epellent
sys
-
tem.
The
devic
e
should
be
switched
off
at
regular
inter
vals
t
o
av
oid
the
animals
getting
used
t
o
the
sound!
Shortly after setting up the device you might find more
molehills than before in the garden, this shouldn’t discour-
age you, it’s quite normal. The mole and its friends from the
neighbouring gardens notice a change in their environment
and want to find out where the change is coming from. In the
long run the sound will be too annoying, and they will start
searching for a quieter place.
Important:
Make sure that the lawn around the solar panel
is cut short so that the solar panel is not covered. If the
device is not used for a longer period of time, please ensure
that the switch is set to “OFF”. In this way you can be sure
that the batteries do not discharge.
Note:
the response of each animal to our devices may
vary. The development of our devices, methods and
application tips are based on experience, testing and
feedback from our custom- ers. Therefore the devices
are successful in most cases.
7
General information
•
The CE conformity has been declared. All documents are at
our office and can be viewed.
•
For safety and conformity reasons it is not permitted to
rebuild or modify the device and/or use it in any other way
than described above.
•
As Gardigo has no control of the correct of appropri-
ate installation and use of the device the warranty can
only be applied to a fully equipped device in prime
condition. We assume neither warranty nor liabili-
7