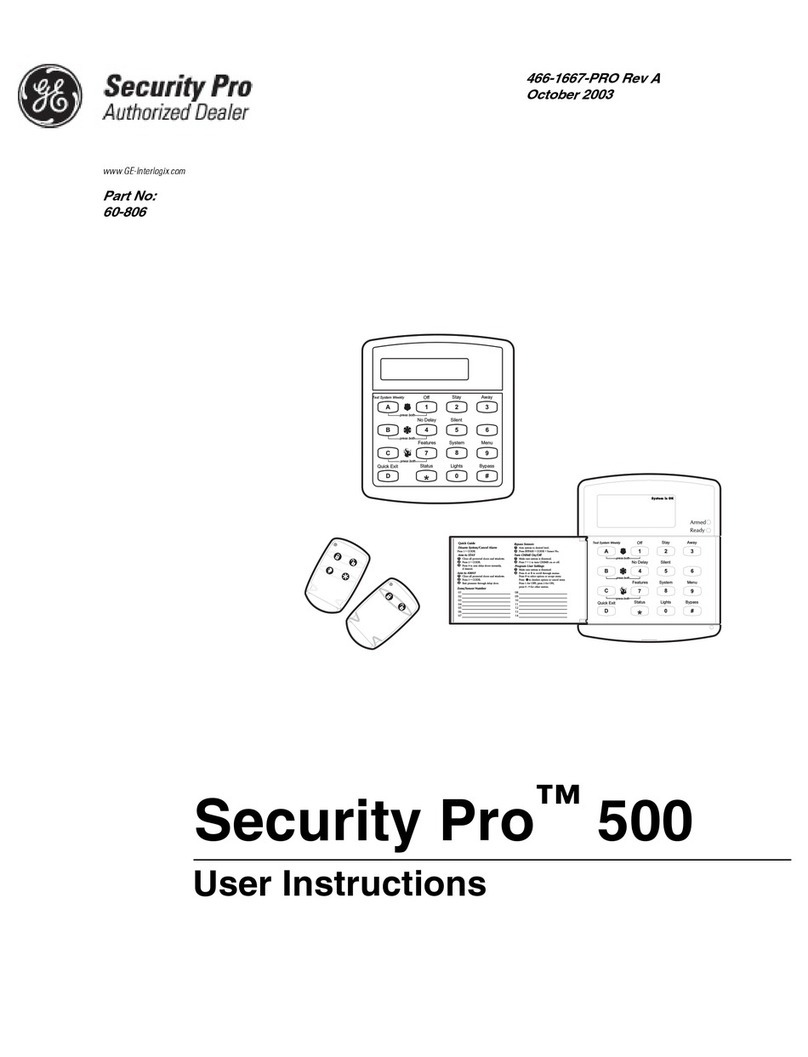
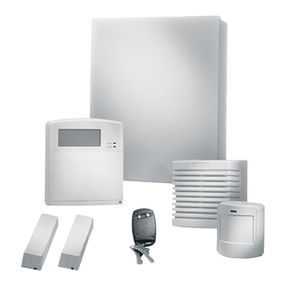
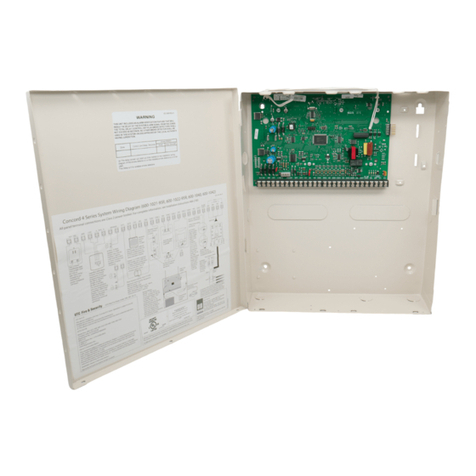
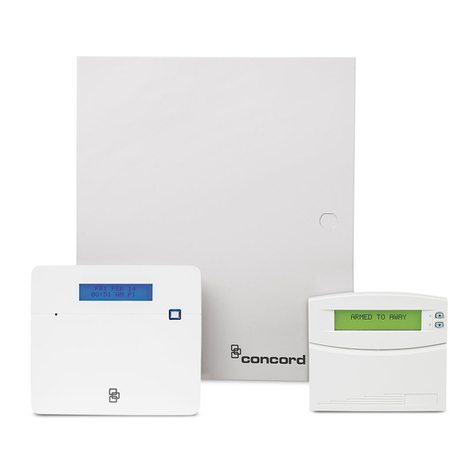
GE NX-10 User guide

GE
Security
NX-10 Alarm System
Installers Manual
1060789

Copyright Copyright © 2009, GE Security B.V. All rights reserved.
This document may not be copied or otherwise reproduced, in whole or in part, except as
specifically permitted under US and international copyright law, without the prior written
consent from GE.
Document number/revision: 1060789 June 2009
Disclaimer THE INFORMATION IN THIS DOCUMENT IS SUBJECT TO CHANGE WITHOUT NOTICE.
GE ASSUMES NO RESPONSIBILITY FOR INACCURACIES OR OMISSIONS AND
SPECIFICALLY DISCLAIMS ANY LIABILITIES, LOSSES, OR RISKS, PERSONAL OR
OTHERWISE, INCURRED AS A CONSEQUENCE, DIRECTLY OR INDIRECTLY, OF THE
USE OR APPLICATION OF ANY OF THE CONTENTS OF THIS DOCUMENT. FOR THE
LATEST DOCUMENTATION, CONTACT YOUR LOCAL SUPPLIER OR VISIT US ONLINE
AT WWW.GESECURITY.EU.
This publication may contain examples of screen captures and reports used in daily
operations. Examples may include fictitious names of individuals and companies. Any
similarity to names and addresses of actual businesses or persons is entirely coincidental.
Trademarks and patents GE and the GE monogram are registered trademarks of General Electric.
NX-10 product and logo are registered trademarks of GE Security.
Other trade names used in this document may be trademarks or registered trademarks of the
manufacturers or vendors of the respective products.
Software license
agreement GE software supplied with GE products is proprietary and furnished under license and can
be used or copied only in accordance with the license terms.
THE ENCLOSED PROGRAM IS FURNISHED SUBJECT TO THE TERMS AND CONDI-
TIONS OF THIS AGREEMENT. RETENTION OF THE PROGRAM FOR MORE THAN 30
DAYS, OPENING OF THE SEALED WRAPPER, IF ANY, SURROUNDING THE
PROGRAM, OR USE OF THE PROGRAM IN ANY MANNER WILL BE CONSIDERED
ACCEPTANCE OF THE AGREEMENT TERMS. IF THESE TERMS ARE NOT ACCEPT-
ABLE, RETURN THE UNUSED PROGRAM AND ANY ACCOMPANYING DOCUMENTA-
TION TO GE FOR A FULL REFUND OF THE LICENSE FEE PAID. (FOR INFORMATION
REGARDING THE RETURN OF PROGRAMS ENCODED OR INCORPORATED WITHIN
EQUIPMENT, CONTACT THE NEAREST GE SALES OFFICE.)
Intended use Use this product only for the purpose it was designed for; refer to the data sheet and user
documentation. For the latest product information, contact your local supplier or visit us
online at www.gesecurity.eu.
European directives
The European directive “Waste Electrical and Electronic Equipment” (WEEE) aims to
minimise the impact of electrical and electronic equipment waste on the environment and
human health. To conform with this directive, electrical equipment marked with this symbol
must not be disposed of in European public disposal systems. European users of electrical
equipment must now return end-of-life equipment for disposal. Further information can be
found on the following website: www.recyclethis.info.
European representative for manufacture (EMC):
GE Security B.V., Kelvinstraat 7, 6003 DH Weert, The Netherlands.
Regulatory

NX-10 Installers manual
3
Table of Contents
Preface ................................................................................................................................................................ 9
Safety terms and symbols.............................................................................................................................................. 9
References............................................................................................................................................................................. 9
Section A Installing and programming a basic system...........................................................................10
Chapter A1 Introducing the NX-10 system ................................................................................................11
NX-10 diagram ..................................................................................................................................................................11
NX-10 technical specifications...................................................................................................................................13
NX-10 system.....................................................................................................................................................................14
Parts of the system..........................................................................................................................................................14
Keypads ................................................................................................................................................................................18
Wireless keypad..................................................................................................................................................18
LCD icons ...............................................................................................................................................................21
Chapter A2 Installation guidelines ..............................................................................................................23
Mains power connection ..............................................................................................................................................23
Mounting ..............................................................................................................................................................................23
Wiring guidelines..............................................................................................................................................................23
Defaulting the panel .......................................................................................................................................................24
Chapter A3 Installing a basic system..........................................................................................................25
Installing the NX-10.........................................................................................................................................................25
Small polycarbonate housing ......................................................................................................................25
Installing the keypad.......................................................................................................................................................26
Mounting the wireless keypad.....................................................................................................................26
Mounting the wired keypad ..........................................................................................................................27
Keypad learning-in procedure.....................................................................................................................28
Installing the wireless sirens .......................................................................................................................................29
Installing the wireless sensors ...................................................................................................................................35
Mounting the sensors ......................................................................................................................................35
Sensor learning-in procedure ......................................................................................................................35
Chapter A4 Programming guidelines..........................................................................................................36
Getting started...................................................................................................................................................................36
Country codes......................................................................................................................................................36
Powering up the system .................................................................................................................................37
Entering programming mode.......................................................................................................................37
Changing the user interface language....................................................................................................37
Navigating the menus....................................................................................................................................................38
Quick User Menu ................................................................................................................................................38

Selecting a menu option...............................................................................................................................................38
Changing a menu option..............................................................................................................................................38
Changing selection list entries.....................................................................................................................38
Changing binary entries.................................................................................................................................39
Changing numeric entries.............................................................................................................................39
Changing phone numbers and phone prefixes...................................................................................39
Exiting the menu system..............................................................................................................................................40
Editing text ..........................................................................................................................................................................40
Overview................................................................................................................................................................40
Example..................................................................................................................................................................41
Word library..........................................................................................................................................................41
Guidelines for location-based programming .....................................................................................................42
Selecting the module to program..............................................................................................................42
Programming a location ................................................................................................................................42
Exiting the program mode ............................................................................................................................43
Chapter A5 Setting up a communicator .................................................................................................... 44
Reporting .............................................................................................................................................................................44
Reporting to one phone number................................................................................................................44
Backup reporting ...............................................................................................................................................44
Dual reporting .....................................................................................................................................................45
Split reporting......................................................................................................................................................46
Section B Programming the system............................................................................................................ 46
Chapter B1 Selecting the programming mode ......................................................................................... 47
Chapter B2 Programming the control panel............................................................................................. 48
Overview ..............................................................................................................................................................................48
Programming inputs.......................................................................................................................................................48
Defining a zone...................................................................................................................................................50
Copying zone settings .....................................................................................................................................51
Editing a zone type............................................................................................................................................51
Setting swinger count......................................................................................................................................52
Programming outputs ...................................................................................................................................................52
Configuring an output.....................................................................................................................................53
Configuring the internal siren......................................................................................................................54
Programming the keypad sounder...........................................................................................................54
Assigning codes................................................................................................................................................................54
Setting up the installer code.........................................................................................................................55
Setting communication options................................................................................................................................56
Defining communication with a central station .................................................................................57
Defining communication with upload/download software ..........................................................58
Configuring the system autotest................................................................................................................58
Enabling reporting.............................................................................................................................................59

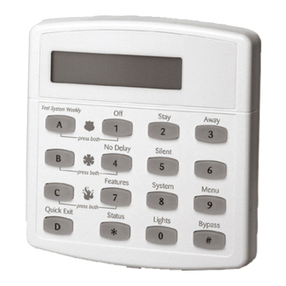
NX-10 Installers manual
5
Configuring partitions ....................................................................................................................................................60
Setting timers.......................................................................................................................................................60
Configuring a partition ....................................................................................................................................60
Configuring the system .................................................................................................................................................61
Setting timers.......................................................................................................................................................62
Configuring system features ........................................................................................................................62
Setting arm schedules ...................................................................................................................................................63
Setting up schedules ........................................................................................................................................63
Glossary ................................................................................................................................................................................64
Control panel programming locations...................................................................................................................86
Telephone number 1 ........................................................................................................................................86
Reporting events to phone number 1 ......................................................................................................87
Telephone number 2 ........................................................................................................................................88
Reporting events to phone number 2 ......................................................................................................90
Telephone number 3 ........................................................................................................................................91
Reporting events to phone number 3 ......................................................................................................92
Special formats ...................................................................................................................................................93
Download parameters.....................................................................................................................................93
Feature and report selections (for partition 1)......................................................................................94
Entry/Exit timers .................................................................................................................................................95
Zone configurations and partition selection.........................................................................................96
General options................................................................................................................................................100
Programming the outputs ..........................................................................................................................104
Setup for auto-test, auto-arm and opening/closing times.........................................................105
Communicator codes for slow speed formats only........................................................................107
Programming partition parameters.......................................................................................................114
Programming zone configuration groups...........................................................................................116
NX-10 location-programming worksheets .......................................................................................................130
Chapter B3 Programming the NX-1048 keypad......................................................................................143
Overview............................................................................................................................................................................143
Configuring the NX-1048 keypad features .......................................................................................................145
General options................................................................................................................................................145
Programming the function keys ..............................................................................................................145
Setting up the tamper switch....................................................................................................................147
Battery replacement......................................................................................................................................148
Master mode.....................................................................................................................................................151
Assigning X-10 devices.................................................................................................................................151
Copying keypad settings .............................................................................................................................151
Configuring keypad text...............................................................................................................................152
Setting installer messages..........................................................................................................................152
Setting the keypad partition and keypad number ..........................................................................153

Setting the exit buzzer options................................................................................................................. 153
Glossary............................................................................................................................................................................. 154
Technical specifications............................................................................................................................................. 159
Chapter B4 Programming the other keypads ......................................................................................... 161
Chapter B5 Setting up the RF receivers ................................................................................................... 161
Programming the RF system................................................................................................................................... 162
Defaulting the wireless modules............................................................................................................. 163
Programming the wireless detectors.................................................................................................... 163
Learning-in additional wireless keypads............................................................................................. 164
Deleting wireless keypads.......................................................................................................................... 165
Learning-in IO modules ............................................................................................................................... 166
Learning-in wireless sirens......................................................................................................................... 166
Configuring receiver features................................................................................................................... 167
Configuring IO modules............................................................................................................................... 167
Setting supervision windows..................................................................................................................... 169
Testing wireless sensors.............................................................................................................................. 170
Disabling wireless sensors ......................................................................................................................... 171
Glossary............................................................................................................................................................................. 171
Programming locations for the RF receivers ................................................................................................... 176
Chapter B6 Setting up the GSM/GPRS module (NX-7002) ..................................................................... 180
Overview ........................................................................................................................................................................... 180
Enrolling the GSM/GPRS module............................................................................................................................ 180
Enrolling the SIM card on the GSM network.......................................................................................181
Enrolling the SIM card on the GPRS network..................................................................................... 181
Inserting a SIM card....................................................................................................................................... 182
Testing the RSSI value .................................................................................................................................. 183
Testing the GSM or GPRS connection.................................................................................................... 183
Programming the GSM/GPRS module (NX-7002)........................................................................................... 185
Programmable options................................................................................................................................ 186
Reporting .......................................................................................................................................................................... 186
Overview............................................................................................................................................................. 186
Report methods............................................................................................................................................... 188
Report controllers........................................................................................................................................... 188
Primary and secondary reporting........................................................................................................... 188
GSM/GPRS module as backup (SMS / GPRS)...................................................................................... 189
GSM/GPRS module as backup (audio reporting).............................................................................. 189
Setting up polling............................................................................................................................................ 191
Upload/download........................................................................................................................................... 191
Reporting summary....................................................................................................................................... 192
Using the GSM/GPRS module.................................................................................................................................. 196
Obtaining the GSM/GPRS module status............................................................................................. 196

NX-10 Installers manual
7
Troubleshooting...............................................................................................................................................197
Autotest ...............................................................................................................................................................197
Reporting protocols and formats ..........................................................................................................................197
Reporting fixed codes in SIA and Contact ID .....................................................................................197
Special Reports.................................................................................................................................................199
SMS SIA reporting message format .......................................................................................................199
SMS Contact ID reporting............................................................................................................................201
HomeText control ...........................................................................................................................................201
Receiving SMS messages from a security system...........................................................................204
HomeText reporting.......................................................................................................................................204
Glossary .............................................................................................................................................................................205
GSM/GPRS module location-based programming worksheets ..............................................................213
Chapter B7 Enrolling modules....................................................................................................................223
Enrolling the system modules .................................................................................................................................223
Defaulting the modules..............................................................................................................................................223
Glossary .............................................................................................................................................................................224
Chapter B8 Reading the event log.............................................................................................................225
Overview............................................................................................................................................................................225
Event log events.............................................................................................................................................................226
Glossary .............................................................................................................................................................................230
Chapter B9 NX-586E .....................................................................................................................................231
Overview............................................................................................................................................................................231
Connecting the NX-586E direct connect module...........................................................................................231
Connecting the NX-586E to a PC.............................................................................................................231
Connecting the NX-586E to a PC and a panel...................................................................................232
Connecting the NX-586E to a panel.......................................................................................................233
Programming the NX-586E direct connect module......................................................................................233
Enabling memory transfer using the keypad ....................................................................................233
Panel to PC memory transfer using DL900 software.....................................................................234
Writing data from the DL900 software to the NX-586E................................................................234
Reading data from the NX-586E to the DL900 software .............................................................234
Location programming for the NX-586E..............................................................................................235
Glossary .............................................................................................................................................................................235
Technical Specifications.............................................................................................................................................236
Chapter B10 Programming with the DL900 software............................................................................237
Other methods of programming............................................................................................................................237
Connecting the panel to the computer...............................................................................................................237
Connecting using a serial port..................................................................................................................237
Connecting using a modem.......................................................................................................................238
Programming with upload/download software.............................................................................................238

Programming tasks ....................................................................................................................................... 239
Chapter B11 Updating firmware ...............................................................................................................242
Overview ........................................................................................................................................................................... 242
Update procedure ........................................................................................................................................................ 242
Section C References ................................................................................................................................... 244
Appendix 1: Reporting fixed codes in Contact ID or SIA ............................................................................. 245
Appendix 2: Overview of module numbers....................................................................................................... 248
NX-1701E door swipe modules................................................................................................................ 249
Keypads............................................................................................................................................................... 249
Appendix 3: Communicator formats.................................................................................................................... 250
Appendix 4: Service messages ............................................................................................................................... 251
Appendix 5: Tasks summary.................................................................................................................................... 253
Appendix 6: Word library........................................................................................................................................... 254
Index................................................................................................................................................................ 255

NX-10 Installers manual
9
Preface
This is the NX-10 Installers manual. This document includes an overview of the product and detailed
instructions explaining:
• how to install and configure the components of your NX-10 system; and
• how to program the system.
To use this document effectively, you should have the following minimum qualifications:
• a basic knowledge of alarm systems and components; and
• a basic knowledge of electrical wiring and low-voltage electrical connections.
Read these instructions and all ancillary documentation entirely before installing or operating this
product.
Note: A qualified installer, complying with all applicable codes, should perform whatever hardware installation is
required.
Safety terms and symbols
These terms may appear in this manual:
CAUTION: Cautions identify conditions or practices that may result in damage to the equipment or other property.
WARNING: Warnings identify conditions or practices that could result in equipment damage or serious personal injury.
References
For more information, refer to the following:
NX-10 Menu Structure
This menu structure provides a map of the NX-10 menu options, including those for all the additional
modules.
NX Expander Installation Guide
This manual contains detailed information about additional modules and their installation.

Section A Installing and
programming a basic
system

NX-10 Installers manual
11
Chapter A1 Introducing the NX-10 system
NX-10 diagram
Figure 1. NX-10 board diagram
1 Transformer
CGSM Antenna Connector
2 NetworX Bus (internal) DGSM Modem (for status LEDs
descri
p
tion, see
p
a
g
e 183)
3 NetworX Bus (internal) EAudio Tap
4 Outputs (see Figure 2) FRF microprocessor
5 Front Box Tamper GSIM Card Holder
6 Inputs (see Figure 2) HJumper (front box tamper is bypassed if
closed)
7 Telephone connections (see Figure 2) IMini USB connection
8 Antenna
JGSM microprocessor
9 Antenna
KPanel microprocessor
A External Box Tamper LFlash/DL900 jumper
BVVMIQ Connector MNetworX Bus (internal)

Figure 2. NX-10 inputs and outputs
DATA Connect to Data terminal of keypad
and expanders COM Power (-)
POS (+) Connect to Positive (+) terminal of
keypad and expanders AUX PWR+ Power (+)
COM Connect to negative (-) terminal of
keypad and expanders AUX PWR+ Power (+)
BELL+ Internal bell positive 1 Zone 1
BELL- Internal bell negative COM Common (-) for zone 1 and zone 2
AUX PWR+ Power (+) 2 Zone 2
Relay 1 NC Relay 1 (normally closed) Earth Ground
Relay 1 NO Relay 1 (normally open) T1 House Telephone Tip
Relay 1 C Relay 1 (common) T Telephone Tip
Relay 2 NC Relay 2 (normally closed) R Telephone Ring
Relay 2 NO Relay 2 (normally open) R1 House Telephone Ring
Relay 2 C Relay 2 (common)
POS
DATA
COM
BELL+
BELL-
AUX PW +R
AUX PW +R
1
2
RLY2 NO
RLY2 NC
RLY2 C
COM
COM
RLY1 NC
AUX PW +R
RLY1 NO
RLY1 C
Earth
T1
T
R
R1

NX-10 Installers manual
13
NX-10 technical specifications
Mains power specifications
Mains input voltage, small housing 230 V ~ (+10% / - 15%) / 50 Hz / 25 VA
Mains input voltage, large housing 230 V ~ (+10% / - 15%) / 50 Hz / 40 VA
Current, typical system, 25 VA transformer 0.12 A ~ / 50 Hz / 25 VA
Current, typical system, 40 VA transformer 0.20 A ~ / 50 Hz / 40 VA
Board input voltage 16.5 V ~ / 50 Hz
Power supply specifications
Output voltage 13.8 V ±2%
Maximum total current, 25 VA (40 VA) 1.4 A (2.0 A =) ± 5%
Maximum auxiliary output current (AUX PWR+) 1.0 A ± 5%, fused, auto-restoring
Maximum expansion bus output current (POS (+)) 1.0 A ± 5%, fused, auto-restoring
Typical main board current consumption 90 mA ± 5%, EOL resistors applied
Battery type and maximum capacity, small housing Lead/Acid, 12 V nominal, 7.2 Ah
Battery type and maximum capacity, large housing Lead/Acid, 12 V nominal, 2 x 7.2 Ah = 14.4 Ah
EN/INCERT battery charge time, 7.2 Ah (14.4 Ah) 72 hours, at 200 mA (400 mA) charge current
EN/INCERT battery stand-by time, 7.2 Ah (14.4 Ah) 12 hours, at 550 mA (1.1 A) total system load
General feature specifications
Available access code sizes 4 digits or 6 digits
End of line resistor 3.3 KOhm, 2% 0.25 W
Built-in Siren Driver 2 tone (Temporal and Yelp)
Number of relay outputs, and NC/NO rating 2 relays, 1/1 A at 13.8 V ± 10%
Indoor siren (wired) output rating 1 A at 13.8 V ± 10%
Environmental Operating
temperature
-10° C to +55 °C
Humidity Max 95% non condensing
Shipping Weight 1.7 kg
Fuses
Mains fuse, 25 VA (40 VA) 315 mA (630 mA) T 250V 20x5

NX-10 system
NX-10
Number of wireless zones 48
Number of onboard hardwired zones 2
Maximum number of hardwired zones 42
Maximum number of zones 48 zones
(if 2 hardwired zones are used, than there are 46 wireless zones left to use)
Number of partitions 4
Maximum number of wireless outputs 8 (including sirens)
Outputs on board 2 open collector, 1 internal siren
Maximum number of RF output modules 4 (including sirens)
Report formats Contact ID, Ademco 4/2 Express, Siren Tone, Vocal, Radionics extended fast with parity,
Ademco/Silent Knight Slow, Silent Knight 4+2 fast, Sescoa/Franklin Fast, SIA, XSIA and
custom formats
Maximum number of wireless keypads 4
Support for Proximity Reader Yes
RF Dual Transceiver Internal, built-in
GPRS module Internal, built-in (in NX-10-GSM-EUR and NX-10-GSM-LB-EUR panels only)
Parts of the system
Table 1. System modules
Part number Description Purpose
NX-1048-R-W Wireless Menu
LCD Keypad
Used for programming and using the system. Wireless and
wired keypads can be used.
NX-1048-W Menu LCD Keypad
(wired)

NX-10 Installers manual
15
Part number Description Purpose
NX-1701E Door swipe
module
Proximity card reader/door control module. You can program it
to control access in any or all partitions.
NX-320-I Auxiliary power
module
Provides additional power for modules attached to a panel.
NX-507E/NX-
508E
Output expander
module
Expands the number of outputs available on the system.
NX-534E Audio (listen-in)
module
Two-way audio (listen-in) communicator that allows the
situation on the premises to be monitored.
NX-535 Voice module Allows events to be reported using voice messages.
NX-586E Direct connect
module
Used as:
1. A direct connect interface between the panel and PC.
2. A storage device, when connected only to the PC. You can
also read/write from 1 of the 4 locations via the DL900
downloader.
3. A storage device, connected only to the panel. You can
read/write from 1 of the 4 locations on the NX-10.
NX-590E TCP/IP Module Dual microprocessor-controlled Internet/Intranet interface.
NX-7002
GPRS module Allows events to be reported via a GSM network or a GPRS
network. The GPRS module is a part of the main panel board,
so it does not require a separate installation procedure. It is
available on the NX-10-GSM-EUR and NX-10-GSM-LB-EUR
panels only (not on the NX-10-EUR and NX-10-LB-EUR panels.)

Table 2. Wireless equipment
Part Number Part Description Purpose
TX-7001-05-1 INDOOR SIREN, 868 MHz
GEN2
This full wireless indoor siren offers you
wireless communication and wireless
operation by batteries with a typical
sound output of 108dB.
TX-7201-05-1 OUTDOOR SIREN, 868
MHz GEN2
This full wireless outdoor siren offers you
wireless communication and wireless
operation by batteries with a typical
sound output of 125dB.
BS7201
Spare battery pack for
the TX-7201-05-1 siren.
The 14 Ah lithium battery pack for the
outdoor wireless siren.
TX-6211-03-1
SMOKE DETECTOR, 868
MHz GEN2
The smoke sensor is a wireless, battery
operated photo-electric smoke sensor. It
incorporates a built-in sounder for alarm
alerts, a visual status LED and a
transmitter.
TX-1211-03-1
TX-1211-03-3
LONGLIFE DWS, 868 MHz
GEN2
This wireless universal transmitter
protects anything that opens and closes
such as doors, windows and cabinets.
Moreover, there is an extra terminal that
allows to connect an additional wired
detector. The Long-Life version
distinguishes itself by allowing two
batteries to be used and reduce the need
for maintenance.

NX-10 Installers manual
17
TX-4131-03-2
4 BUTTON KEYFOB, 868
MHz GEN2
The 4-button keyfob is a portable
wireless device allowing you to arm or
disarm the system without having to
memorise access codes or race to beat
entry or exit delays. It offers two
additional programmable buttons, which
can be used to turn lights on and off
before entering the premises, or any
other function defined in the system. It
can also be programmed to send a panic
alarm by pressing the Lock and Unlock
buttons simultaneously, or to send a
medical alarm by pressing the Light and
Star buttons simultaneously.
TX-2211-03-1
Mirror PIR, 868 MHz
GEN2
This motion detector uses mirror
technology to cover up to 16 metres. It
has a rich feature set including standard
'4D' or bi-curtain processing providing
improved detection and false alarm
immunity.
TX-2411-03-1
DUAL MOTION SENSOR
PIR/MW, 868 MHz GEN2
This dual motion detector combines
mirror technology and microwave to
provide you with excellent false alarm
immunity on a range of up to 12 metres.
It also features GE's patented Range
Controlled Radar technology.
TX-1011-03-1
TX-1011-03-3
SLIMLINE DWS, 868 MHz
GEN2
This wireless universal transmitter
protects anything that opens and closes
such as doors, windows and cabinets.
Moreover, there is an extra terminal that
allows to connect an additional wired
detector.
TX-8001-05-1 IO-MODULE, 868 MHz
GEN2
The IO-module allows you to link a wired
application to your wireless security
system using two open collector outputs
and a supervised external power input.

Keypads
Wireless keypad
The wireless LCD keypad allows you to program the NX-10 system using a menu structure. There is
also an option to use the wired keypad with the same functionality.
Figure 3. Keypad.
The LCD features the white backlight to allow keypad operation in the dark. Illumination level is as
low as possible to save energy. LCD backlight turns ON gradually when the user hits the first key,
and turns OFF gradually 30 seconds after the last key operation. The status light (logo) in the top left
corner indicates the current partition status.
In the single-partition mode:
• logo is red when the partition is armed in any mode,
• logo is green when the partition is disarmed.
In the master (multi-partition) mode:
• logo is red when any partition is armed in any mode,
• logo is green when all the partitions are disarmed.

NX-10 Installers manual
19
The NX-10 keypad has the following key layout out-of-the-box:
Figure 4. Default keypad layout.
F1 F2 F3 F4 F5 F6 F7 F8
The four top-row keys with the blank keycaps can be replaced by the installer, as they are supplied
with the keypad for this purpose. Figure 3 shows the keypad with the optional function keycaps
placed in their default positions (factory setting). Optional keycaps available for assigning to the four
programmable keys are:
Keycap symbol Name Default factory setting
PANIC F1
FIRE F2
MEDICAL F8
NIGHT MODE F7
CANCEL Not assigned
Note: The function keycaps can be placed randomly over the four available positions. Actual function activation is
accomplished through a menu option during installation.
For more information about programming function keys F1 to F8, see Programming the function
keys on page 145.
Table 3. Key functions
Arm Away Press to arm the system.
Note: Exact behavior of this key depends on the system settings configured by the
installer. For more information, see the Master Keypad, and the Quick Arm menu
option descriptions in the glossary.
Arm Stay Press to arm the system in Stay mode.
Note: For this mode to work correctly, interior zones must be set. You can also
configure this key to toggle the Stay/Instant mode of the armed partition. For more
information on this button behavior, see the Master Keypad, Instant Stay Toggle, and
the Quick Arm menu option description in the glossary.
When in the menu:

Press to scroll to the start of the LCD message.
Disarm When in master mode:
Press to disarm the system.
Note: The Disarm key works in the master mode only, after the user code and the
partition number have been entered.
When in the menu:
Press to scroll to the end of the LCD message.
Bypass Press to select a zone to bypass.
The Enter Zone No. prompt displays. Type the zone number and press OK. Repeat this
action for subsequent zones you want to bypass. To remove a zone from the
bypassed zone set, enter its number again. To partially arm the system with the
selected zones bypassed, enter the user code. Disarming the system clears the
bypassed zone set.
Night Mode Press to arm the system in Night mode.
Note: For this mode to work correctly, entry guard zones must be set. Also, see notes
below.
Chime Press to toggle the Chime mode on and off. A chime is often used as an indication on
a shop door. There is a beep on chime activation and no beep on deactivation. For
more information, see the Chime menu option description.
No Press No to:
•Cancel a change to the menu selection or
•Navigate to a higher level in the menu structure or
•Cancel a sequence when entering numeric data.
Note: Press NO key to clear any incorrectly entered user code or other information.
OK Press OK to:
•Activate the menu or
•Accept selection changes or
•Move forward in the menu structure or
•Complete a sequence when entering numeric data.
Hash When editing text and phone numbers:
•Press # F4 to move to the first character or digit.
•Press # F5 to move to the last character or digit.
•Press #¾to delete a part of the string starting from the current cursor position to
the last character or digit.
•This button also allows to enter other special characters (see Changing phone
numbers and phone prefixes on page 39).
Navigation
keys
Press the navigation keys to scroll through menu lists and options.
When in master mode or not in a menu:
•Press ½to display bypassed zones.
•Press ¾to display problem zones.
When editing text and telephone numbers:
•Press ½to overwrite or insert text.
•Press ¾to delete text.
Notes: F1, F2, F7, and F8 function keys can be programmed by the installer. F7 function key is programmed to Night
Mode by default. Function keys behave differently, depending on the settings configured by the installer, for
example, see descriptions for the Quick Arm, Instant Stay Toggle and Master Keypad menu options.
NO
OK
#
*
Other manuals for NX-10
2
Table of contents
Other GE Security System manuals
Popular Security System manuals by other brands

DSC
DSC PC 5010 quick guide

LG
LG iCAM4000 quick start guide

Skyros
Skyros VideoNet 9.1 installation manual

Texecom
Texecom Ricochet Impaq Contact-W user manual

AEI Security & Communications
AEI Security & Communications 3400 Installation & operation manual

AVS Electronics
AVS Electronics TS85 V LED Plus GENERAL MANUAL FOR INSTALLATION

Omega
Omega MAX-EDP Operation manual

Kidde
Kidde P4010ACSCOAQ-WF user guide

Swann
Swann DVRx-2500 Setup guide

alsident
alsident SYSTEM10 Mounting and instruction manual

Visonic
Visonic PowerMaster-10 G2 Quick user guide

Pittway
Pittway SYSTEM SENSOR SPECTRAlert SC2415W Installation and maintenance instructions