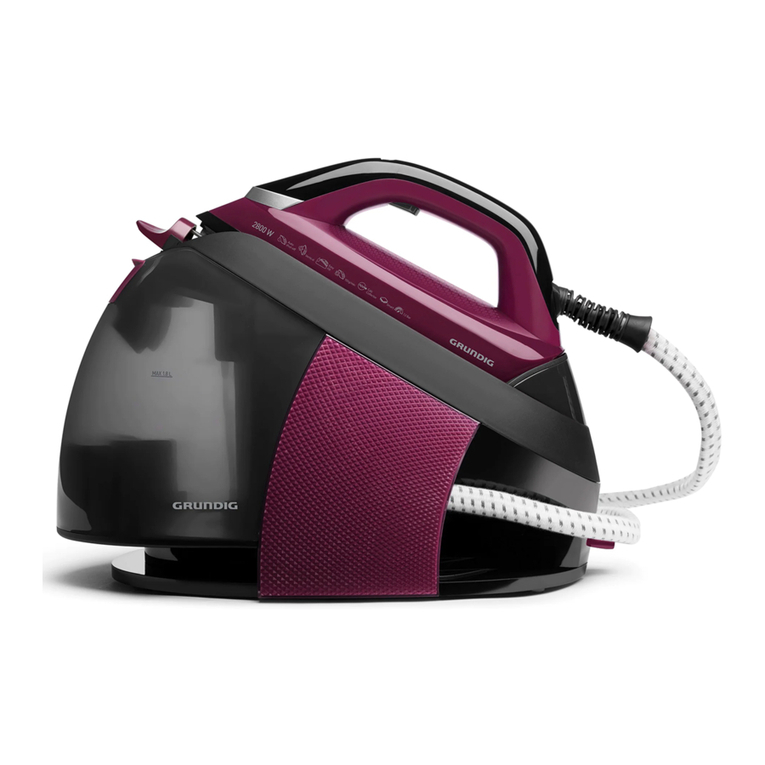
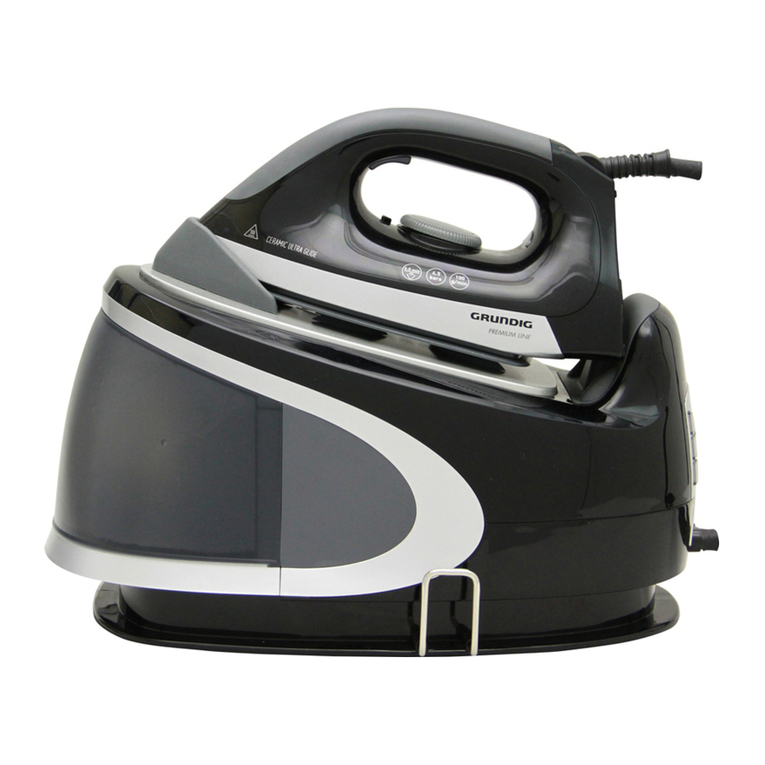
Grundig SIS 8250 User manual

STEAM IRON STATION
SIS 8250
DE EN


3
______________________________________________
power
H
G
F
E
D
C
B
A
I
J
K
L
M
N
O
P
Q
R
S
T
U
V
W
X
Y

14 ENGLISH
SAFETY _____________________________________
Please read this instruction manual thoroughly
prior to using this appliance! Follow all safety
instructions in order to avoid damages due to
improper use!
Keep the instruction manual for future reference.
Should this appliance be given to a third party,
then this instruction manual must also be handed
over.
7 Use this appliance for its intended purpose.
7 Use this appliance indoors only. Do not use it
in the bathroom or outside.
7 No liability is accepted for damages resulting
from incorrect usage or improper handling of
the appliance.
7 Do not leave this appliance unattended while
it is in use. Extreme caution is advised when
being used near children and persons who
are restricted in their physical, sensory or
mental abilities.
7 The appliance should not be used by the fol-
lowing persons, including children: those with
limited physical, sensory or mental capabili-
ties or those with a lack of experience and
knowledge. This does not apply to the latter
if they were instructed in the use of the appli-
ance or if they use it under the supervision of
a person responsible for their safety. Children
should always be supervised to ensure that
they do not play with the appliance.
7 Do not place this appliance on hotplates
(gas, electric / coal stoves, etc.). Keep this ap-
pliance away from all hot surfaces.
7 Do not open the outer casing under any cir-
cumstance. No liability is accepted for dam-
ages caused by improper use.
7 Our GRUNDIG Household Appliances meet
all the applicable safety standards; thus if
the appliance or power cord is damaged, it
must be repaired or replaced by the dealer, a
service centre or a similarly qualified and au-
thorized service person to avoid any danger.
Faulty or unqualified repair work may cause
danger and risk to the user.
7 Never use this appliance with damp or wet
hands.
7 Only use the original accessories or those that
are recommended by the manufacturer.
7 Danger of suffocation! Keep all packaging
materials away from children.
7 Remove all packaging materials, labels and
protective foil and dispose of them according
to the applicable legal regulations.
7 Clean all parts prior to usage.
7 This appliance is intended for domestic use
only.
7 Make sure that your local power supply cor-
responds to the information on the rating plate.
The only way to disconnect the appliance from
the power supply is to pull the power plug out
of the power outlet.
7 For additional protection, this appliance
should be connected to a household residual
current device with a rating of no more than
30 mA. Consult your electrician for advice.
7 Dry off the appliance and all accessories prior
to connecting it to a power supply and prior to
attaching the accessories.
7 Make sure you do not accidentally trip on the
power cable when the appliance is in use.
7 Position the appliance in such a way that the
power plug is always accessible.
7 Never touch the power plug with damp or wet
hands.
7 Unplug the appliance before each cleaning
and when the device is not in use.
7 Avoid damages to the power cable by not
squeezing, bending or rubbing it on sharp
edges. Keep the power cable away from hot
surfaces and open flames.
7 Do not pull on the power cable to disconnect
the appliance from the power supply and do
not wrap the power cable around the appli-
ance; use the cable storage holder provided.

15
ENGLISH
SAFETY _____________________________________
7 Do not use this appliance with an extension
cord.
7 Do not submerge the appliance, the power
cable or the power plug in water or in any
other liquid.
7 Only clean this device with a slightly damp
cloth.
7 Always keep hair, clothing and other objects
away from the appliance while it is in use in
order to prevent injury and damages.
7 Warning - Danger of Burns! Do not touch the
hot soleplate. Do not lean over the iron while
it is in use. Heat will rise from the device dur-
ing usage! Only touch the iron by the handle.
7 Only use the iron with the steam iron station
connected.
7 If this appliance falls, if water leaks or other
defects occur, it must be inspected and re-
paired by an authorised specialist.
7 Do not use this appliance until the defect has
been repaired.
7 Do not iron over zippers, metal buttons or
other metal parts, as this could damage the
soleplate.
7 To ensure safe operation of the appliance, do
not modify the safety features in any way.
7 When walking away or leaving the appliance
unattended only for a short time, make sure
that the iron is always placed on the storage
base and switched it off.
7 An unattended, hot iron can result in burn
injuries!
7 Never point the hot soleplate towards people,
animals or electrical devices whilst steam is
being emitted.
7 The water drain in the bottom of the steam
ironing station must always be tightly sealed
when the iron is in use.
7 After use, always let the iron cool down com-
pletely in a location out of reach of children
and persons who are restricted in their physi-
cal, sensory or mental abilities. Wait until the
appliance has completely cooled down be-
fore storing it away.
7 The iron must not be left unattended while it is
connected to the mains supply.
7 The plug must be removed from the socket-
outlet before the water reservoir is filled with
water.
7 The iron must be used and rested on a stable
surface.
7 When placing the iron on its stand, ensure
that the surface on which the stand is placed
is stable.

16 ENGLISH
OVERVIEW __________________________________
Dear customer,
Congratulations on the purchase of your new
GRUNDIG Steam Ironing Station SIS 8250.
Please read the following user notes carefully to
ensure full enjoyment of your quality GRUNDIG
product for many years to come.
A responsible approach!
GRUNDIG focusses on contractu-
ally agreed social working condi-
tions with fair wages for both
internal employees and suppliers.
We also attach great importance
to the efficient use of raw materi-
als with continuous waste reduction of several
tonnes of plastic every year. Furthermore, all our
accessories are available for at least 5 years.
For a future worth living.
For a good reason. Grundig.
Special features
The Grundig steam ironing station is equipped
with a 1.7 litre water tank, thereby enabling a
long steam and ironing phase before the iron
must be refilled with water.
Control and parts
See the figure on page 3.
A Cable storage holder with clamping bracket
B Power cable with power plug
C Removable water tank
D Soleplate
E Thermally insulated storage base
F Water filling opening with lid
G Temperature control dial
H Steam jet button
I Handle
J Steam hose
K Temperature indicator light
L Control panel
M Steam ironing station
N Power indicator
O Water filling indicator
P Steam button LOW
Q Steam button MEDIUM
R Steam button HIGH
S On/off switch
T Descaling indicator
U Non-slip rubber foot
V Handle for water tank
W Water drainage screw
X Rubber lid
Y Key for the water drainage screw

17
ENGLISH
OPERATION _________________________________
Preparation
1 Remove all packaging materials, labels and
protective foil and dispose of them according
to the applicable legal regulations.
2 Clean the outer parts of the appliance as de-
scribed in the section “Cleaning and care“.
3 Place the appliance on an even, stable, dry
and non-slip surface.
4 Place the iron onto the storage base E.
Notes
7 During first use, a slight odour may occur as
a result of manufacturing residues being burnt
off. This is harmless and will only last for a
short time. Ensure for sufficient ventilation.
7 Never immerse the steam ironing station in
water or any other liquid. Do not fill in the
steam ironing station with vinegar, descaling
agents, starch, perfume or ironing aids.
7 When ironing for the first time, use an old,
clean cloth so that manufacturing residues
can be removed from the soleplate D.
Dry Ironing
1 Place the appliance on an even, dry and non-
slip surface. The non-slip feet U ensure the sta-
bility of the appliance.
2 The water tank C must remain empty during
the dry ironing process; otherwise steam pres-
sure could build up.
3 Insert the power plug B into the wall socket.
4 Push the on/off switch S to switch on the
steam ironing station.
– The power indicator N lights up red and the
blue steam button indicator light blinks on
LOW P.
5 Depending on the type of fabric, turn the tem-
perature control dial G to one of the following
settings:
Nylon, setting 1 •
Silk setting 1 •
Wool setting 2 ••
Cotton setting 3 •••
Linen setting 3 •••
Caution
7 Always read the care label on your garment
before setting the temperature.
– The temperature indicator light K lights up
blue. The blue temperature indicator light K
remains on while the iron is heating up. As
soon as the iron reaches the set temperature,
the temperature indicator light goes off. The
temperature indicator light will go on and
off during usage to indicate that the set tem-
perature is being regulated.
6 The ironing process can begin. Do not press
the steam jet button during dry ironing.
Caution
7 When taking a break from ironing, always
place the iron back onto the storage base
E. The tip of the soleplate D must always be
placed on the surface of the storage base.

18 ENGLISH
OPERATION _________________________________
7 After the ironing process is complete, place the
iron onto the storage base.
8 Press and hold down the on/off switch of the
steam ironing station for a few seconds to
switch the steam ironing station off. Set the tem-
perature control dial to MIN and disconnect
the plug from the power outlet.
– The red power indicator light N and the
blue steam button indicator light LOW P go
off.
9 Let the appliance cool down in a location that
is safely out of reach of children.
Filling in the water tank
1 Grab the handle V underneath the water tank
and pull the water tank out of the steam iron.
2 Open the lid of the water filling opening F
and fill the water tank with tap water or distilled
water up to the MAX marking. The maximum
capacity is 1.7 litres.
3 Close the lid of the water filling opening and
push the water tank completely into the steam
ironing station. Make sure that it clicks into
place properly and is secured to the housing of
the steam ironing station.
Caution
7 Do not move or shake the steam ironing sta-
tion when the water tank is being filled. Water
might spill out from the opening of the water
tank.
4 Press the steam jet button briefly to reset the
iron. After about 10 seconds the iron will be
ready for steam ironing.
Notes
7 When the water tank is empty, air enters into
the pump causing a louder ‘pumping’ sound.
This is quite normal.
7 If your tap water is very hard it is recom-
mended to mix the tap water with distilled
water on a 50:50 ratio, or use distilled water
only.
Steam ironing
1 Place the appliance on an even, dry and non-
slip surface. The non-slip feet U ensure the sta-
bility of the appliance.
2 Fill the water tank as described in the section
“Filling in the water tank”.
3 Insert the power plug B into the wall socket.
4 Push the on/off switch S to switch on the
steam ironing station.
– The power indicator N lights up red and the
blue steam button indicator light blinks on
LOW P.
5 Adjust the temperature control dial G to the
desired temperature.
– The temperature indicator light K lights up
blue. The blue temperature indicator light K
remains on while the iron is heating up. As
soon as the iron reaches the set temperature,
the temperature indicator light goes off. The
temperature indicator light will go on and
off during usage to indicate that the set tem-
perature is being regulated.
Note
7 Steam ironing is only possible at higher tem-
perature settings between •• and MAX.
6 The water in the water tank heats up within 3
minutes. As soon as the temperature indicator
light goes off and the control indicator in the
steam button remains lit, the steam iron is ready
to use. Hold the iron in horizontal position on
the garments and press the steam jet button H.
Continue to move the iron when ironing.
Caution
7 Never direct the steam at people or pets.
Notes
7 When the steam ironing station is switched on
it will produce a 'pumping' sound. This is nor-
mal and indicates that water is being pumped
from the water tank into the steam ironing
station.

19
ENGLISH
OPERATION _________________________________
7 Select a higher steam level with the steam but-
tons MEDIUM Q or HIGH R.
– The corresponding control indicator in the
steam button blinks as soon as it is selected.
After approx. 2 minutes the control indicator
will remain lit, indicating that the appliance
is ready for steam ironing.
8 When there is insufficient water left in the
water tank C the steam generation stops and
the water filling indicator O lights up, followed
by an audible beep. The control indicator in
the selected steam button goes off. Place the
iron onto the storage base and refill the water
tank (see section Filling in the water tank).
9 After ironing process is complete, place the
iron onto the storage base.
10 Press and hold down the on/off switch of the
steam ironing station for a few seconds to
switch the steam ironing station off. Set the
temperature control dial to MIN and discon-
nect the plug from the power outlet.
11 Let the appliance cool down in a location
that is safely out of reach of children.
Caution
7 Never touch the hot soleplate with bare
hands. Danger of Burns!
Notes
7 If the steam function has not been used for
some time the water condensed in the steam
hose transforms into water. When restarting
the steam ironing station again, it could cause
spluttering of the unit and water droplets at
the soleplate. In order to avoid these droplets
falling onto your garments we recommend
using an old clean cloth in the beginning.
Press the steam jet button until the droplets dis-
appear and normal steam will be produced.
7 If dirt particles escape from the soleplate,
clean the steam ironing station according
to the instructions in section “Cleaning and
care”.
7 The steam ironing station will automatically
switch off if no button or any other control
element has been activated for a period of
10 minutes.
Vertical steam ironing
Note
7 Vertical steam ironing can be applied to
hanging curtains or clothes (suits, jackets and
coats).
Caution
7 Never direct the steam at people or pets.
1 The steam ironing station has three steam set-
tings: low, mid and high. Please refer to section
“Steam ironing”.
2 When the control indicator in the selected
steam button remains lit, it indicates that the ap-
pliance is ready for steam ironing.
3 Hold the iron in vertical position on the gar-
ments or curtains and press the steam jet
button H. Continue to move the iron when iron-
ing.

20 ENGLISH
INFORMATION ______________________________
Tips for ironing
7 Prior to ironing, always check the garment
label to ensure the correct tempearture is set
on the iron.
7 Since the iron heats up much quicker than it
cools down, synthetic textiles, silk or similar
fabrics should be ironed using lower tempera-
ture settings first.
7 If the garment is made of combined types of
fabric, always begin with the lowest tempera-
ture setting first.
7 Silk and other textiles that tend to shine should
be ironed inside out. Velvet and other types of
fabric that shine should be ironed with very lit-
tle pressure and only in one direction. Always
keep moving the iron while ironing.
7 Do not use the steam function when ironing
coloured silk. This could cause stains.
7 Garments made of 100% pure wool can
be ironed using steam. Set the temperature
control dial preferably to the MAX setting and
lay a dry towel between the garment and the
iron.
7 Ironing wool garments can cause them to
'shine'. It is therefore recommended to iron
such garments inside out.
Caution
7 Never iron on metal parts, such as zippers,
rivets, or metal buttons as they could damage
the soleplate. Always iron around these metal
parts.
Cleaning and care
Caution
7 Do not under any circumstance use petrol,
solvents, abrasive cleaners, or hard brushes to
clean this appliance.
7 Do not touch the hot soleplate with bare hands
directly after ironing. Danger of Burns!
7 Remove limescale and other mineral deposits
from the steam ironing station when the descal-
ing indicator lights up.
7 Never hold the steam ironing station under
running water and never submerge it in water
or any other liquid.
7 Never clean the soleplate with chemicals, steel
wool, wood or other abrasive cleaning agents.
1 Prior to each cleaning, turn the appliance off
and disconnect the power plug from the power
outlet.
2 Let the steam iron cool down completely.
3 Use a slightly damp cloth to clean the exterior
of the iron. Then dry it off thoroughly.
4 Wipe deposits off the soleplate with a slightly
damp cloth or if necessary, with a mild, non-
abrasive liquid cleaner.

21
ENGLISH
INFORMATION ______________________________
Descaling
Note
7 To maintain efficiency and extend the operat-
ing life of your steam ironing station and to
avoid scale particles on your garments, this
unit is equipped with a "Descaling" warning
indicator light T. This light flashes on the
control panel L after about 100 minutes of
operating time.
7 When the descaling indicator T lights up,
you can continue using your iron normally
but you need to remember to descale the unit
before using it the next time.
Caution
7 Do not use any descaling products! These
could damage the appliance.
7 Before descaling or emptying the unit, the
iron must cool down for more than 2 hours in
order to avoid the risk of burns.
1 Place the cooled down steam iron on an even
surface.
2 Remove water tank from the steam station.
3 Turn the steam ironing station on its side.
Pull the rubber lid X on the water drainage
screw W.
4 Remove the key Y located underneath the
steam ironing station and open the water
drainage screw with it.
Y XW
5 Fill the steam station with ca. 0.5 L clean water
through opened water drainage screw.
6 Screw in the water drainage again.
7 Hold and shake the steam station at least 1
min.
8 Screw out water drainage and shake the steam
station while water drains out into the sink.
9 Let the water drain out into a sink completely.
10 Screw in the water drainage screw again
and tighten it.
11 Push the rubber lid onto the water drai nage
screw.
12 Assemble the water tank. If the warning light
remains lit, repeat the above procedure.
Storage
If you will not be using the steam iron for a long
period of time, please store it away carefully.
7 Make sure that the iron is disconnected from
the power supply and completely dry when
storing it away.
7 Empty the water tank.
7 Open the water drainage screw and let the
remaining water drain out of the iron. Screw in
the water drainage screw again and tighten it.
7 To store away the steam ironing station, wind
the steam hose J and the power cable
around the cable storage holder A and se-
cure them with the clamping bracket.
7 Please try to store the steam iron and the at-
tachments in their original packaging.
7 Store it in a cool, dry place.
7 Make sure the appliance is always kept out of
the reach of children.

22 ENGLISH
INFORMATION ______________________________
Environmental note
This product is manufactured from high-quality
parts and materials which can be reused and
recycled.
Therefore, do not dispose the
product with normal household
waste at the end of its service life.
Take it to a collection point for the
recycling of electrical and electronic
equipment. This is indicated by this
symbol on the product, in the operating manual
and on the packaging.
Please find the closest collection points operated
by your local authority.
Help protect the environment by recycling used
products.
Technical data
This product conforms to the European
directives 2004/108/EC, 2006/95/EC
and 2009/125/EC.
Power supply: 220-240V~ 50Hz
Power consumption: 2000-2400W
Steam pressure: 4.5 bar
Steam quantity: 100g/min.
Water tank capacity: 1.7 litres
When the steam ironing station has come to the
end of its service life, please completely disable
the appliance by pulling the plug out of the
power outlet and cutting through the cord.
Subject to change without prior notice!

www.grundig.com
720119083400 12/30
AUSGUTEMGRUND
Other manuals for SIS 8250
1
Table of contents
Other Grundig Iron manuals

Grundig
Grundig SIS 9450 User manual

Grundig
Grundig SI 4550 User manual

Grundig
Grundig SIS 7040 User manual

Grundig
Grundig SI 5340 User manual

Grundig
Grundig SIS 8250 User manual

Grundig
Grundig SX 8570 User manual

Grundig
Grundig SI 4550 User manual

Grundig
Grundig SIS 9870 User manual

Grundig
Grundig SI 7450 User manual

Grundig
Grundig SX 7470 User manual

Grundig
Grundig SIS 7040 User manual

Grundig
Grundig SIS 8670 User manual

Grundig
Grundig SI 3350 User manual

Grundig
Grundig SIS 9870 User manual

Grundig
Grundig SI 4550 User manual

Grundig
Grundig SIS 6170 User manual

Grundig
Grundig SI 4850 User manual

Grundig
Grundig SIS 9870 User manual

Grundig
Grundig SIS 8670 User manual