manuals.online logo
Brands
  1. Home
  2. •
  3. Brands
  4. •
  5. HEIDENHAIN
  6. •
  7. Media Converter
  8. •
  9. HEIDENHAIN LC 2x1 User manual

HEIDENHAIN LC 2x1 User manual

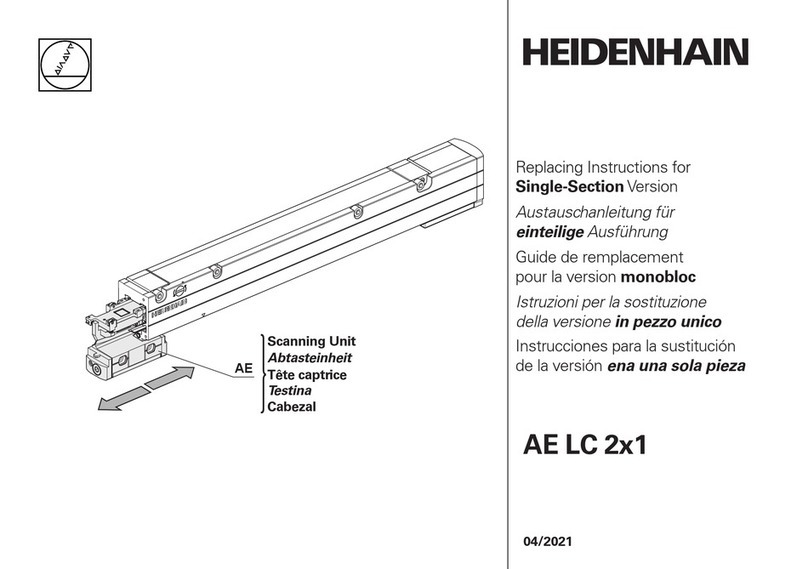
AE LC 2x1
04/2021
AE Instrucciones para la sustitución
de la versión multisección
Cabezal
Istruzioni per la sostituzione
della versione modulare
Testina
Guide de remplacement
pour la version multibloc
Tête captrice
Austauschanleitung für
mehrteilige Ausführung
Abtasteinheit
Replacing Instructions for
Multi-Section Version
Scanning Unit
AE
2
Indice
Página
3Indicaciones
4Advertencias
6Suministro
8Desmontaje AE
12 Información general
13 Desmontaje de los labios
16 Instrucciones de limpieza
17 Información general
18 Montaje AE
24 Alinear el cabezal
26 Trabajos finales
Indice
Pagina
3Avvertenze
4Avvertenze
6Standard di formitura
8Smontaggio AE
12 Informazioni generali
13 Smontaggio guarnizioni
16 Instruzioni per la pulizia
17 Informazioni generali
18 Montaggio AE
24 Allineamento AE
26 Operazioni finali
Sommaire
Page
3Remarques
4Avertissementes
6Contenu de la fourniture
8Démontage AE
12 Informations générales
13 Démontagedes lèvres d’étanchéité
16 Instructions de nettoyage
17 Informations générales
18 Montage AE
24 Alignement AE
26 Opérations finales
Inhalt
Seite
3Hinweise
4Warnhinweise
6Lieferumfang
8Demontage AE
12 Allgemeine Hinweise
13 Demontage Dichtlippen
16 Reinigungshinweise
17 Allgemeine Hinweise
18 Montage AE
24 Ausrichten AE
26 Abschließende Arbeiten
Contents Page
3Notes
4Warnings
6Items supplied
8Removing AE
12 General Information
13 Removing the Sealing Lips
16 Cleaning Instructions
17 General Information
18 Mounting AE
24 Aligning the Scanning Unit
26 Final steps
3
Indicaciones
Atención: Para no dañar el sistema de medida en el desmontaje, montaje y en este proceso, debe
asegurarse el cabezal con el bloqueo de transporte suministrado de fábrica.
Avvertenze
Attenzione: per evitare di danneggiare il sistema di misura, la testina dovrebbe essere fissata con il
supporto per il montaggio, contenuto nello standard di fornitura, allo smontaggio, montaggio e l’utilizzo.
Remarques
Attention : Pour ne pas endommager le système de mesure, il est recommandé de sécuriser la tête captrice
lors de son démontage, montage et déplacement à l’aide de la sécurité de transport incluse dans la livraison.
Hinweise
Achtung: Um das Messgerät nicht zu beschädigen, sollte die Abtasteinheit bei Demontage, Montage und
beim Verfahren mit derTransportsicherung aus dem Lieferumfang gesichert werden.
Notes
Caution: To avoid damage to the encoder, use the included shipping brace to secure the scanning unit
during disassembly, mounting and moving.
4
Advertencias
Avvertenze
Avertissements
Warnhinweise
Achtung:
– Die Montage und Inbetriebnahme ist von einer qualifizierten Fachkraft unter Beachtung der örtlichen Sicherheitsvorschriften vorzunehmen.
– Die Steckverbindung darf nur spannungsfrei verbunden oder gelöst werden.
– Alle Montageflächen müssen gratfrei und sauber sein.
– Der direkte Kontakt von Flüssigkeiten mit Messgerät und Steckverbinder ist zu vermeiden!
– Die Schrauben sind entsprechend der Montageanleitung mit dem angegebenen Anzugsdrehmoment festzuschrauben und gegen unbeabsichtigtes Lösen
zu sichern.
– Anzugsmomente der Befestigungsschrauben nur gültig für Anbau auf Stahl!
– Abtasteinheit nur im eingebauten Zustand in Betrieb nehmen. Andernfalls kann die Abtasteinheit beschädigt werden und es kann gefährliche optische
Strahlung austreten.
Warnings
Note:
– Mounting and commissioning is to be conducted by a qualified specialist under compliance with local safety regulations.
– Do not engage or disengage any connections while under power.
– All mounting surfaces must be clean and free of burrs.
– Avoid direct contact of fluids with the encoder and connector!
–The screws must be tightened with the specified tightening torque according to the Mounting Instructions and secured against unintentional loosening.
–The tightening torques of the mounting screws are only valid for mounting on steel!
– Scanning unit must first be installed before it is put into operation. Otherwise it could become damaged and hazardous optical radiation might be emitted.
5
Atención:
– El montaje y la puesta en marcha deben ser realizados por un especialista cualificado, observando las prescripciones locales de seguridad.
– Conectar o desconectar el conector sólo en ausencia de tensión.
– Todas las superficies de montaje no deben presentar rebabas y deben estar limpias.
– Es preciso evitar el contacto directo de los líquidos con los sistemas de medición y los conectores.
– Conforme a las instrucciones de montaje, es preciso aplicar el par de apriete indicado a los tornillos y asegurarlos para que no se suelten accidentalmente.
– ¡El par de apriete de los tornillos de fijación es sólo válido para el montaje sobre acero!
– El cabezal lector debe instalarse primero antes de ponerlo en funcionamiento. De lo contrario, podría resultar dañado y emitirse una radiación óptica
potencialmente peligrosa.
Attenzione:
– Il montaggio e la messa in funzione devono essere eseguiti da personale qualificato nel rispetto delle norme di sicurezza locali.
– I cavi posso essere collegati o scollegati solo in assenza di tensione.
–Tutte le superfici di montaggio devono essere pulite e prive di bava.
– È da evitare il contatto diretto di liquidi con encoder e connettore!
– Le viti devono essere serrate alla coppia indicata e fissate contro l’allentamento involontario secondo le istruzioni di montaggio.
– Coppie di serraggio delle viti di fissaggio valide soltanto per montaggio su acciaio!
– Attivare la testina solo quando è montata. In caso contrario, la testina può venire danneggiata e potrebbero essere emesse pericolose radiazioni ottiche.
Attention :
– Le montage et la mise en service doivent être assurés par un personnel qualifié dans le respect des consignes de sécurité locales.
– Le connecteur ne doit être connecté ou déconnecté qu’hors potentiel.
–Toutes les surfaces de montage doivent être propres et exemptes de bavures.
– Eviter le contact direct de liquide sur le système de mesure et le connecteur !
– Les vis doivent être fixées conformément aux instructions de montage, avec le couple de serrage prescrit, et doivent être sécurisées contre le risque de
détachement involontaire.
– Les couples de serrage mentionnés pour les vis de fixation ne sont valables que pour un montage sur acier !
– La tête captrice doit d’abord être installée avant d’être mise en service. Sinon, elle risquerait d’être endommagée et d’émettre un rayonnement optique
dangereux.
6
D1
ID 688807-01
S
ID 315426-02
EW
ID 316537-01
(3x)
ID 1158129-01
M
ID 212301-xx
L
ID 772141-01
KS
ID 222593-02
Ft
ID 202173-03
O(2x)
ID 316535-01
PF (3x)
ID 204207-02
D2
ID 316534-01
ID 316534-02
Cursar el pedido por separado:
Suministro
Bloqueo de transporte
Da ordinare separatamente:
Standard di formitura
Supporto per il montaggio
A commander séparément :
Contenu de la fourniture
Sécurité de transport
Separat bestellen:
Lieferumfang
Transportsicherung
Order separately:
Items supplied
Shipping brace
7
D1
D2
EW
S
O
KS
Ft
PF
M
L
Junta (Carcasa de cinta métrica)
Junta (Tapa de la carcasa)
Herramienta de engaste
Deslizadera
Pieza sujeción de labios
Etiqueta de aluminio para valores de corrección
Grasa para labios
Tapón
Protector cinta
(transporte, almacenaje)
Calibre de montaje
D1
D2
EW
S
O
KS
Ft
PF
M
L
Guarnizione (Carter nastro graduato)
Guarnizione (coperchietto laterale)
Attrezzo per inserimento nastro graduato
Cursore
Morsetto serra guarnizioni
Etichetta valori di compensazione
Lubrificante guarnizioni
Tappo
Protezione nastro
(trasporto, immagazzinaggio)
Distanziale di montaggio
Joint (boîtier du ruban de mesure)
Joints (capot du boîtier)
Outil de tension pour ruban
Curseur
Pièce de pression pour lèvres d’étanchéité
Etiquette alu pour valeurs de correction
Graisse pour lèvres d’étanchéité
Bouchon
Protection du ruban de mesure
(transport, stockage)
Gabarit de montage
D1
D2
EW
S
O
KS
Ft
PF
M
L
D1
D2
EW
S
O
KS
Ft
PF
M
L
Dichtung (Maßband-Gehäuse)
Dichtungen (Gehäusedeckel)
Einzieh-Werkzeug
Schieber
Dichtlippen-Klemmstück
Schild für Korrekturwerte
Dichtlippenfett
Stopfen
Maßbandschutz
(Transport, Lagerung)
Montagelehre
Seal (Scale-tape housing)
Seal (Remove the housing)
Scale tape puller
Slider
Sealing lip clamp
Label for compensation values
Sealing lip grease
Plug
Scale tape protection
(transport, strorage)
Mounting Gauge
D1
D2
EW
S
O
KS
Ft
PF
M
L
8
Desmontaje AE
Soltar el cable del cabezal.
Para la sustitución del cabezal, abrir por el extremo indicado.
Smontaggio AE
Staccare il cavo dalla testina.
Per sostituire la testina aprire sul lato indicato.
Démontage AE
Séparer le câble de la tête captrice.
Pour changer la tête captrice, ouvrir du côté indiqué.
Demontage AE
Kabel von Abtasteinheit lösen.
Zum Austausch der Abtasteinheit auf angegebener Seite öffnen.
Removing AE
Remove cable from scanning unit.
To exchange the scanning unit, open on the indicated side.
9
T8
3.
1.
O
2.
T10
3x
Conservar tornillos y pieza de sujeción Ode los labios.
Conservare le viti e il blocca guarnizioni O.
Garder les vis et la pièce de fixation des lèvres d’étanchéité O.
Schrauben und Dichtlippenklemmstück Oaufbewahren.
Save the screws and sealing-lip clamp O.
10
S
Hacer click en los bloqueos de transporte uno, si se requiere
puede soltarse o atornillarse el tornillo S.
Desplazar el bloqueo de transporte al cabezal.
Inserire il supporto per il montaggio, eventualmente la vite S
può essere allentata o stretta.
Far scivolare il supporto per il montaggio sulla testina.
Encliqueter les sécurités de transport.
Au besoin, il est possible de serrer/desserrer la vis S.
Faire glisser la sécurité de transport contre la tête captrice.
Transportsicherungen einklicken, bei Bedarf kann die Schraube Sgelöst oder
festgeschraubt werden.
Transportsicherung an Abtasteinheit schieben.
Click-in the shipping braces. If necessary, the screw Scan be
loosened or tightened.
Slide the shipping brace on the scanning unit.
11
Si es posible, conectar ambos bloqueos de transporte con la abrazadera.
Soltar los tornillos de sujeción del cabezal.
Extraer el cabezal con precaución.
Se possibile, collegare entrambi i supporti per il montaggiocon l’apposito
fermo. Allentare le viti di fissaggio della testina.
Estrarre con cautela la testina.
Si possible, maintenir les deux sécurités de transport ensembleà l’aide d’un
étrier. Ôter les vis de fixation de la tête captrice.
Extraire soigneusement la tête captrice.
BeideTransportsicherungen, wenn möglich, mit Bügel verbinden.
Befestigungsschrauben der Abtasteinheit lösen.
Abtasteinheit vorsichtig herausziehen.
If possible, connect both shipping braces with the clip. Loosen the mounting
screws of the scanning unit.
Carefully pull out the scanning unit.
12
Isopropanol
x
x
x
x
x
x
x
x
x
x
En caso de fuerte contaminación del interior del aparato, desmontarlo de forma completa para su limpieza.
Para estos casos se recomienda el servicio de asistencia de HEIDENHAIN. Desmontaje de los labios según páginas 13-15.
Información general
In presenza di elevata contaminazione all‘interno dello strumento di misura, è necessario smontarlo per pulirlo.
Nastro e guarnizioni devono essere smontati. Si consiglia in tal caso di rivolgersi al Servizio Assistenza HEIDENHAIN.
Quando vengono smontate le guarnizioni, fare riferimento alle pagine 13-15.
Informazioni generali
Si l’intérieur du système de mesure est fortement encrassé, il convient de le démonter pour le nettoyer.
Il est conseiller de s‘adresser au service-après vente HEIDENHAIN. Pour démonter les lèvres d’étanchéité, se reporter aux pages 13-15.
Informations générales
Bei starker Verschmutzung des Messgeräteinneren muss das Messgerät zur Reinigung komplett demontiert werden.
In diesem Fall empfehlen wir den HEIDENHAIN-Service. Bei Demontage der Dichtlippen befolgen Sie die Seiten 13-15.
Allgemeine Hinweise
If the interior of the encoder is very contaminated, the encoder must be completely dismounted for cleaning. In that case we recommend HEIDENHAIN
Service. When removing the sealing lips, comply with pages 13-15.
General Information
13
ID 631634-xx
L
/m
Desmontaje de los labios
Si los labios de sellado están deteriorados, desmontar la segunda pieza final, ver pág. 14.
Para cualquier otro trabajo más allá del desmontaje del cabezal, véase las instrucciones de montaje.
Smontaggio guarnizioni
In caso di guarnizione difettosa, smontare il secondo blocchetto terminale, vedi pagina 14.
Per tutte le attività connesse con lo smontaggio della testina, vedi istruzioni di montaggio sistema modulare.
Démontagedes lèvres d’étanchéité
Si une lèvre d’etanchéité est défectueuse, démonter le second embout, cf. page 14.
Pour tous les travaux au delà du démontage de la tête captrice, se reporter aux instructions de montage du système multiblocs.
Demontage Dichtlippen
Bei defekter Dichtlippe zweites Endstück demontieren, siehe Seite 14.
Für alle Arbeiten, die über den Ausbau der AE hinausgehen, siehe mehrteilige Montageanleitung.
Removing the Sealing Lips
ID 811085-9x (en/de)
ID 1001768-3x (fr/it)
ID 1001769-5x (es/en)
If the sealing lip is defective, dismount the second end section (see page 14).
For all jobs beyond removing the scanning unit, refer to the Mounting Instructions for the multisection version.
14
T8
1.
2.
3.
1.
2.
T10
3x
Desplazar la placa tope hacia la izquierda. Soltar el tornillo de la tapa
de la carcasa y retirar la pieza de fijación de los labios.
Retirar la tapa de la carcasa y la placa tope.
Spingere verso sinistra la piastra di arresto. Allentare la vite del coperchio
del carter e rimuovere il morsetto serra guarnizioni.
Rimuovere il coperchio del carter e la piastra di arresto.
Décaler la plaque de butée vers la gauche. Desserrer la vis de l’embout
du carter et retirer la pièce de serrage des lèvres d‘étanchéité.
Retirer l’embout du carter et la plaque de butée.
Anschlagplatte nach links schieben. Schraube am Gehäusedeckel lösen
und Dichtlippen-Klemmstück entfernen.
Gehäusedeckel und Anschlagplatte entfernen.
Slide the stop plate to the left. Loosen the screw on the housing cover
and remove the sealing lip clamp.
Remove the housing cover and stop plate.
15
Juntar los labios y extraerlos.
Ripiegare le guarnizioni ed estrarle.
Replier les lèvres d’étanchéité vers le bas et les extraire.
Dichtlippen zusammenklappen und herausziehen.
Fold the sealing lips and pull them out.
16
Isopropanol
x
x
x
x
x
x
x
x
x
x
Instrucciones de limpieza
Atención: No dañar la regla ni la escala de cristal.
Istruzioni per la pulizia
Attenzione: Non danneggiare riga e supporto di misura in vetro.
Instructions de nettoyage
Attention: Ne pas endommager la règle de mesure et la lamelle en verre.
Reinigungshinweis
Vorsicht: Maßband und Maßbandgehäuse nicht beschädigen.
Cleaning Instructions
Note: Avoid damage to the scale and the glass substrate.
17
Información general
Tolerancias de montaje, introducción de los labios y corrección lineal de errores, véase instrucciones de montaje
Informazioni generali
Tolleranze di montaggio, inserimento guarnizioni e correzione errore lineare, vedi istruzioni di montaggio
Informations générales
Tolérances de montage, insertion des lèvres d’étanchéité et correction d’erreur linéaire: Cf. Instructions de montage
Allgemeine Hinweise
Anbautoleranzen, Dichtlippen einziehen und lineare Fehlerkorrektur siehe Montageanleitung
General Information
For mounting tolerances, sealing lips and linear error compensation, see Mounting Instructions
18
Montaje AE
Hacer click en el primer bloqueo de transporte uno.
Montaggio AE
Inserire il primo supporto per il montaggio.
Montage AE
Encliqueter la première sécurité de transport.
Montage AE
ErsteTransportsicherung einklicken.
Mounting AE
Click-in the first shipping brace.
19
EH
Introducir el cabezal con ayuda de EH en el perf l de la regla e introducirla en la carcasa con el primer bloqueo de transporte hasta el
punto que el segundo bloqueo de transporte pueda ser enganchado.
Spingere la testina di scansione con il dispositivo di aiuto all‘inserimento EH nel prof lo della riga e inserire insieme al primo supporto
per il montaggio nel carter f no a che si possa inserire anche il secondo supporto.
Insérer la tête captrice, qui se trouve sur son outil d‘aide à l‘insertion EH, à l‘intérieur du profilé de la règle, puis poursuivre son insertion
dans le carter avec la première sécurité de transport jusqu‘à ce que ladeuxième sécurité de transport puisse s‘encliqueter.
Abtasteinheit aus Einführhilfe EH ins Maßstabprofil einschieben und zusammen mit der ersten Transportsicherung soweit in Gehäuse
einschieben, bis zweite Transportsicherung eingeklickt werden kann.
Slide the scanning unit from the insertion aid EH into the scale housing and, together with the fi rst shipping brace, slide it into the
housing until the second shipping brace can be clicked in.
20
Md= 1 Nm
T10
3x
Si es posible, conectar ambos bloqueos de transporte con la
abrazadera, desplazar el cabezal por la superficie de montaje y atornillarlo levemente.
Fijar la tapa de carcasa con 3 tornillos.
¡Atención! Observar la junta.
Los labios de estanqueidad deben quedar bien ajustados.
Se possibile, collegare entrambi i supporti per il montaggio con
l’apposito fermo. Far scivolare la testina sulla superficie di montaggio
e fissare senza serrate le viti. Rimuovere il supporto per il montaggio.
Fissare il coperchio del carter con 3 viti.
Attenzione: prestare attenzione alla guarnizione.
Le guarnizioni a labbro devono aderire bene.
Si possible, maintenir les deux sécurités de transport ensemble
à l’aide d’un étrier, placer la tête captrice sur la surface de
montage et visser légèrement. Retirer la sécurité de transport.
Fixer le capot du tronçon avec 3 vis.
Remarque: attention au joint d‘étanchéité.
Les lèvres d‘étanchéité doivent être positionnées correctement.
BeideTransportsicherungen, wenn möglich, mit Bügel verbinden,
Abtasteinheit leicht anschrauben.Transportsicherung entfernen.
Gehäusedeckel mit 3 Schrauben befestigen.
Achtung: auf Dichtung achten.
Die Dichtlippen sollen gut anliegen.
If possible, connect both shipping braces with the clip, then slide
the scanning unit on the mounting surface and lightly tighten the screws.
Remove the shipping brace.
Fasten the housing end cap with 3 screws.
Caution: Pay attention to the seal.
The sealing lips should fit closely.

Other manuals for LC 2x1

3

Other HEIDENHAIN Media Converter manuals

HEIDENHAIN ERN 1387 User manual

HEIDENHAIN

HEIDENHAIN ERN 1387 User manual

HEIDENHAIN TTR ERM 2404 User manual

HEIDENHAIN

HEIDENHAIN TTR ERM 2404 User manual

HEIDENHAIN AK LIC 211 User manual

HEIDENHAIN

HEIDENHAIN AK LIC 211 User manual

HEIDENHAIN LB 302 User manual

HEIDENHAIN

HEIDENHAIN LB 302 User manual

HEIDENHAIN LIDA 475 User manual

HEIDENHAIN

HEIDENHAIN LIDA 475 User manual

HEIDENHAIN SRP 5000 User manual

HEIDENHAIN

HEIDENHAIN SRP 5000 User manual

HEIDENHAIN ERN 1385 User manual

HEIDENHAIN

HEIDENHAIN ERN 1385 User manual

HEIDENHAIN LIDA 473 User manual

HEIDENHAIN

HEIDENHAIN LIDA 473 User manual

HEIDENHAIN AK ECA 4410 User manual

HEIDENHAIN

HEIDENHAIN AK ECA 4410 User manual

HEIDENHAIN EIB 749 User manual

HEIDENHAIN

HEIDENHAIN EIB 749 User manual

HEIDENHAIN ECN 1324 S User manual

HEIDENHAIN

HEIDENHAIN ECN 1324 S User manual

HEIDENHAIN LIP 571R User manual

HEIDENHAIN

HEIDENHAIN LIP 571R User manual

HEIDENHAIN ACU-RITE SENC 125 T User manual

HEIDENHAIN

HEIDENHAIN ACU-RITE SENC 125 T User manual

HEIDENHAIN LIP 481R User manual

HEIDENHAIN

HEIDENHAIN LIP 481R User manual

HEIDENHAIN ERN 1321 User manual

HEIDENHAIN

HEIDENHAIN ERN 1321 User manual

HEIDENHAIN LIF 481R User manual

HEIDENHAIN

HEIDENHAIN LIF 481R User manual

HEIDENHAIN LS 3 8 Series User manual

HEIDENHAIN

HEIDENHAIN LS 3 8 Series User manual

HEIDENHAIN MSL 41 User manual

HEIDENHAIN

HEIDENHAIN MSL 41 User manual

HEIDENHAIN ERA 7480 User manual

HEIDENHAIN

HEIDENHAIN ERA 7480 User manual

HEIDENHAIN LS 3 8 Series User manual

HEIDENHAIN

HEIDENHAIN LS 3 8 Series User manual

HEIDENHAIN ROC 425 User manual

HEIDENHAIN

HEIDENHAIN ROC 425 User manual

HEIDENHAIN LS 6 8 C Series User manual

HEIDENHAIN

HEIDENHAIN LS 6 8 C Series User manual

HEIDENHAIN EQN 1325.049 User manual

HEIDENHAIN

HEIDENHAIN EQN 1325.049 User manual

HEIDENHAIN LIC 3107 User manual

HEIDENHAIN

HEIDENHAIN LIC 3107 User manual

Popular Media Converter manuals by other brands

Black Box VSC-HDMI-SDI user manual

Black Box

Black Box VSC-HDMI-SDI user manual

A-Neuvideo ANI-HPNHN instruction manual

A-Neuvideo

A-Neuvideo ANI-HPNHN instruction manual

Blackmagicdesign ATEM Microphone Converter Installation and operation manual

Blackmagicdesign

Blackmagicdesign ATEM Microphone Converter Installation and operation manual

AL Tech DSD 4121 user manual

AL Tech

AL Tech DSD 4121 user manual

A/DA ADA-7240 user manual

A/DA

A/DA ADA-7240 user manual

Black Box Abeo Manual and installation guide

Black Box

Black Box Abeo Manual and installation guide

BZB Gear BG-4KHS user manual

BZB Gear

BZB Gear BG-4KHS user manual

HANYOUNG NUX CV300 instruction manual

HANYOUNG NUX

HANYOUNG NUX CV300 instruction manual

Black Box VS-2001-ENC user manual

Black Box

Black Box VS-2001-ENC user manual

Black Box LGC5400A user manual

Black Box

Black Box LGC5400A user manual

Contec GPIB-FL2-USB Reference manual

Contec

Contec GPIB-FL2-USB Reference manual

Global Sources HDCN0017M1 user manual

Global Sources

Global Sources HDCN0017M1 user manual

Tripp Lite P136-06N-HV-V2 quick start guide

Tripp Lite

Tripp Lite P136-06N-HV-V2 quick start guide

Black Box LGC010A-R2 manual

Black Box

Black Box LGC010A-R2 manual

Black Box LD485A-HS manual

Black Box

Black Box LD485A-HS manual

TV Logic TVK-4000SH user manual

TV Logic

TV Logic TVK-4000SH user manual

Black Box LGC010A user guide

Black Box

Black Box LGC010A user guide

Black Box AC500A manual

Black Box

Black Box AC500A manual

manuals.online logo
manuals.online logoBrands
  • About & Mission
  • Contact us
  • Privacy Policy
  • Terms and Conditions

Copyright 2025 Manuals.Online. All Rights Reserved.