Content
Content
Content
Content
1
1
1
1 CHARACTERISTICS
CHARACTERISTICS
CHARACTERISTICS
CHARACTERISTICS
............................................................................
............................................................................
............................................................................
............................................................................
1
1
1
1
2
2
2
2 Packing
Packing
Packing
Packing list
list
list
list
2-1 S
TANDARD
A
CCESSORIES
.
.....................................................................................
1
2-2 O
PTIONAL
A
CCESSORIES
.......................................................................................
2
3
3
3
3 SYSTEM
SYSTEM
SYSTEM
SYSTEM V
V
V
V IE
IE
IE
IE W
W
W
W........................................................................................
........................................................................................
........................................................................................
........................................................................................ 7
7
7
7
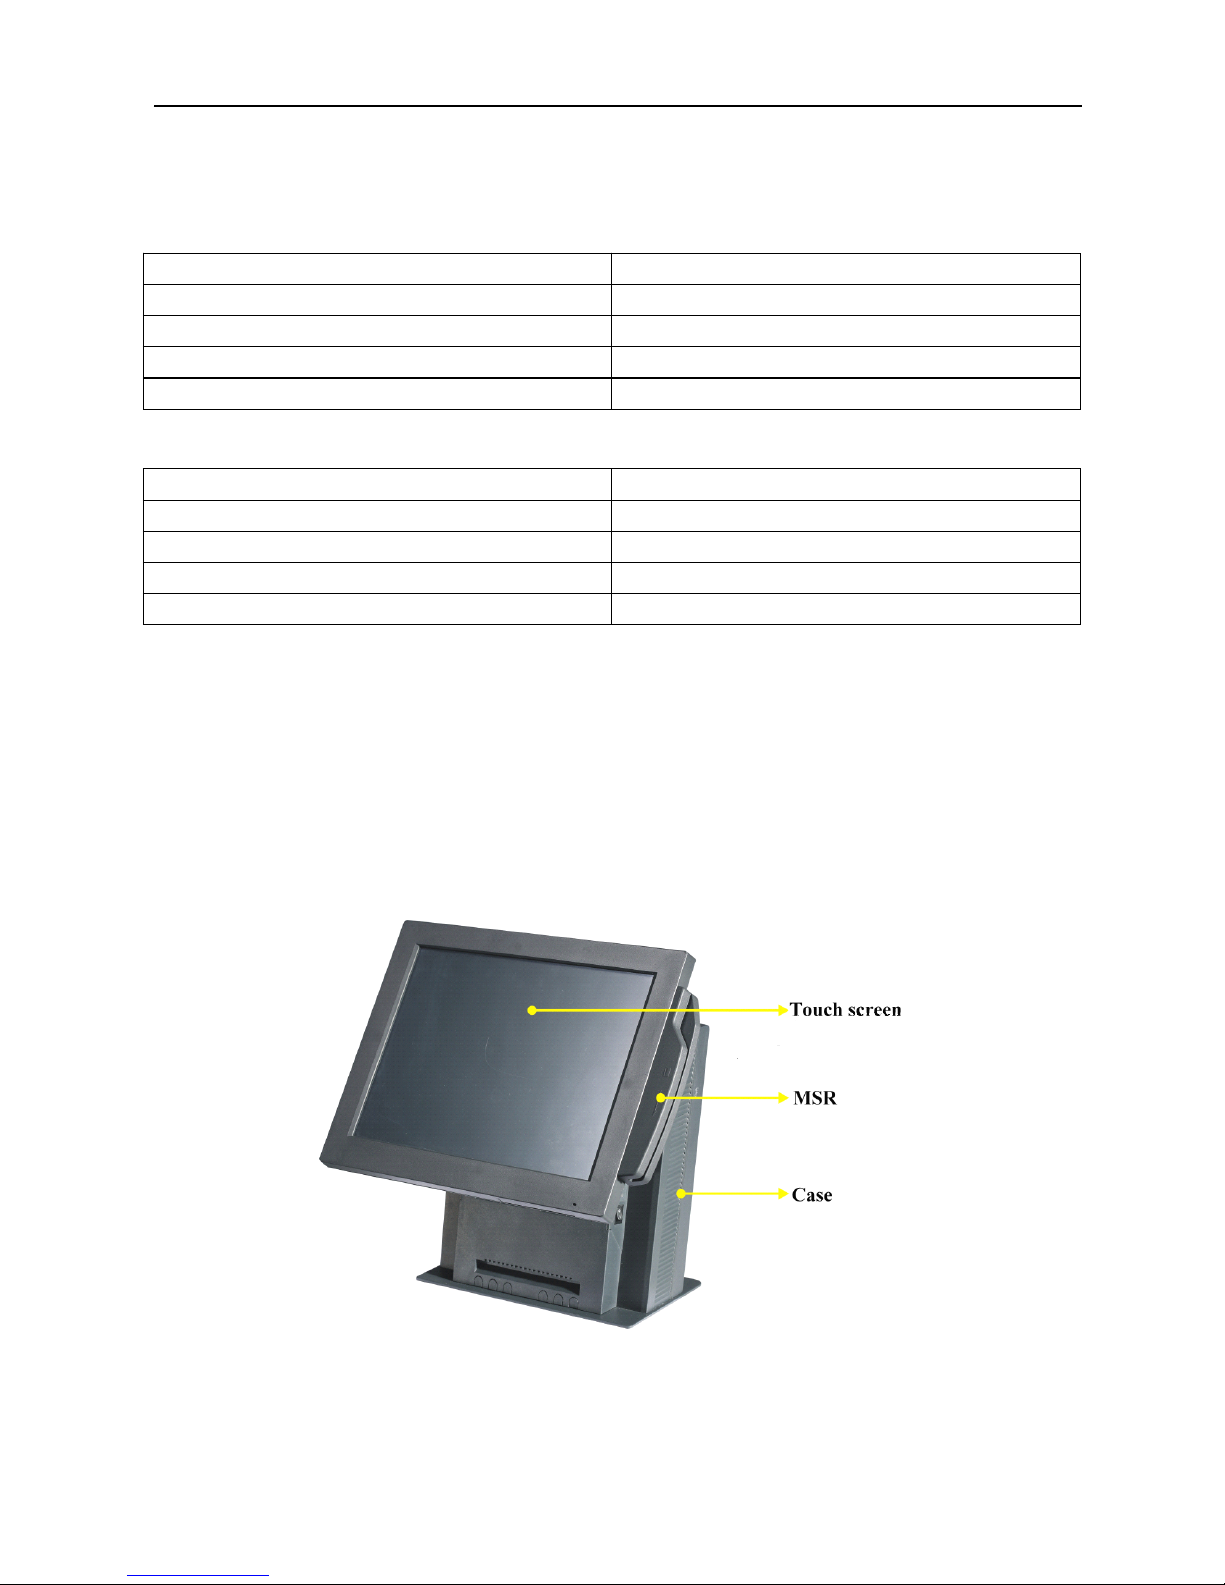
3-1 F
RONT
S
IDE AND
R
EAR
..........................................................................................
7
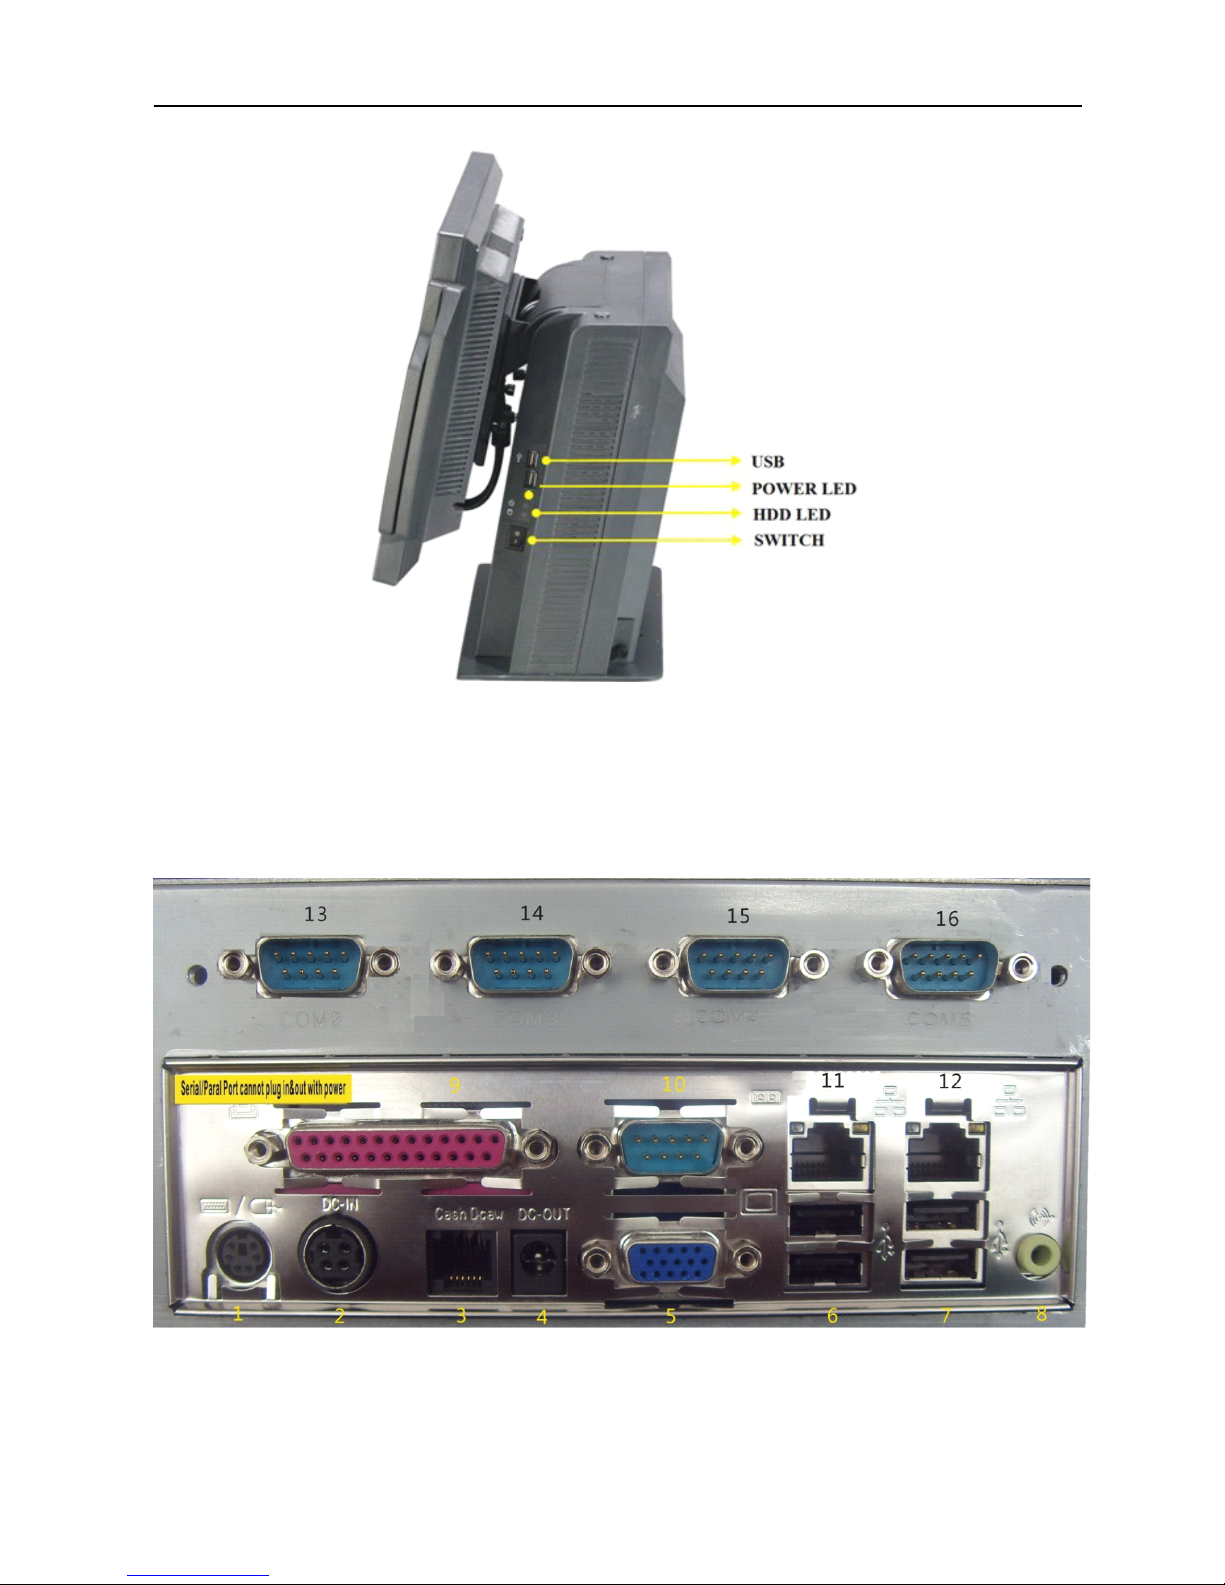
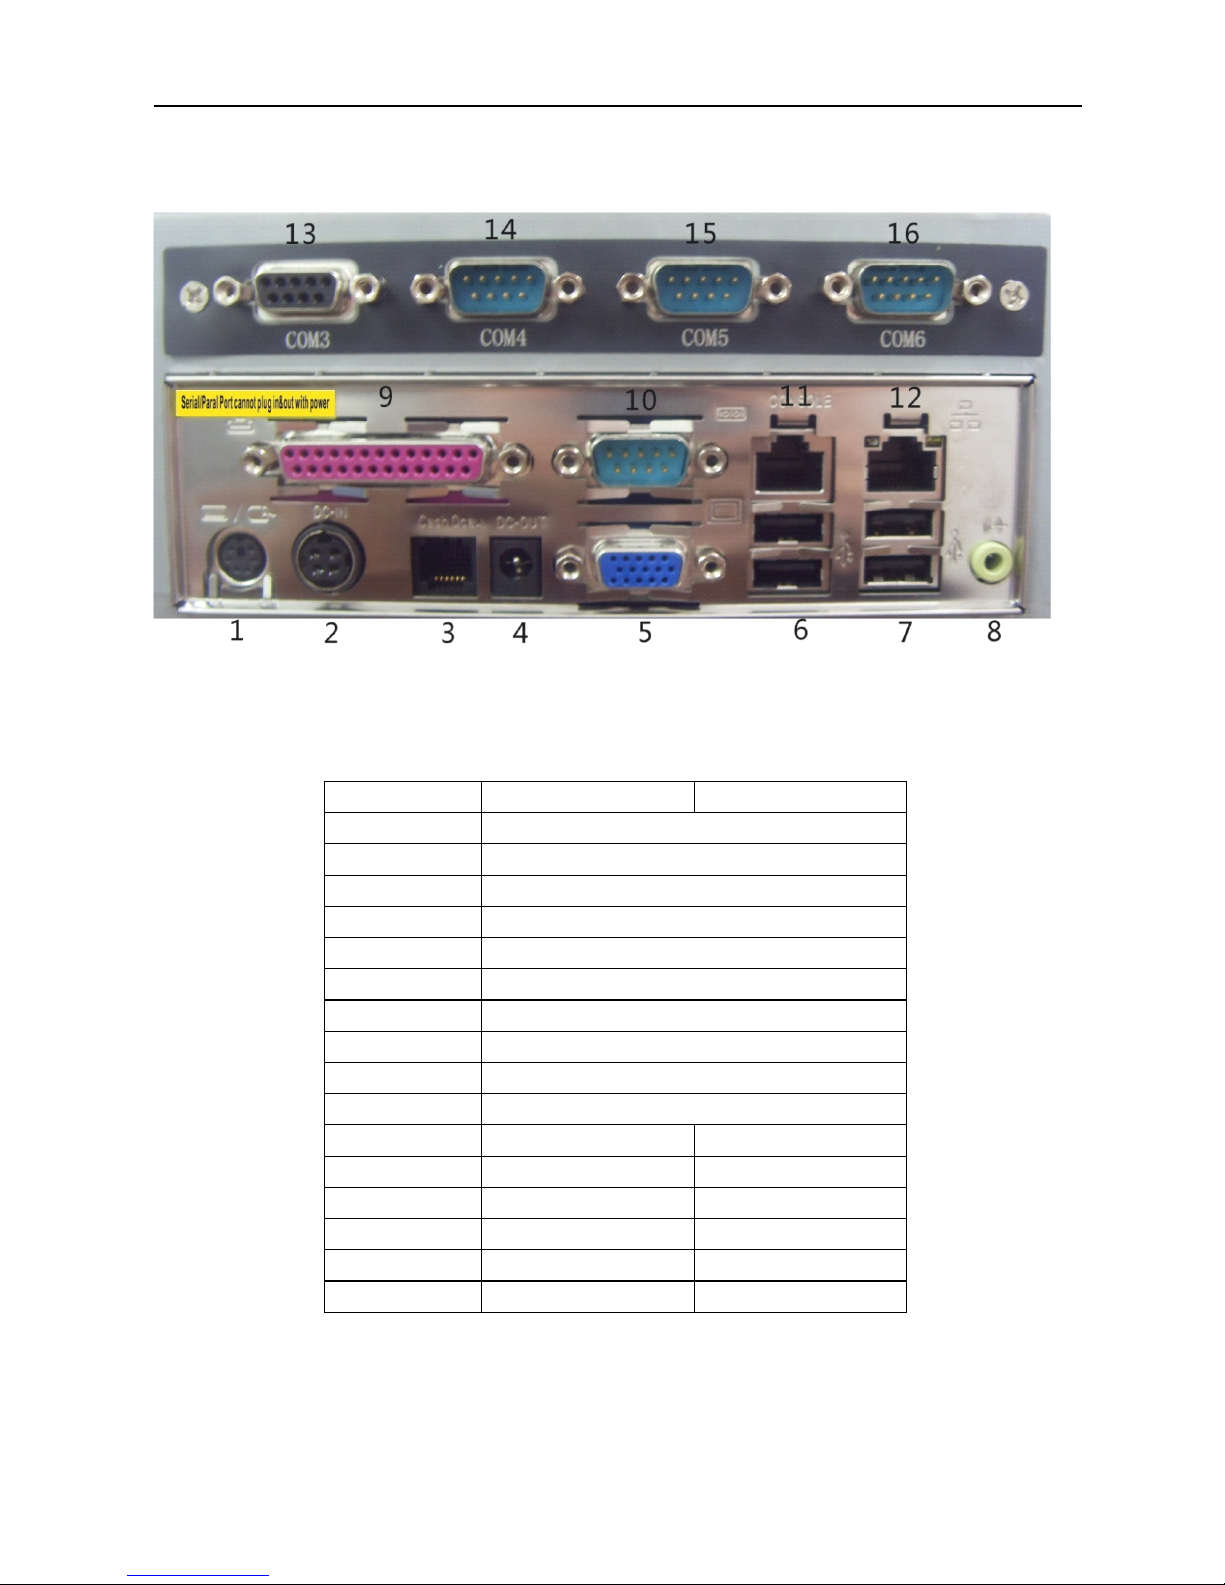
3-2 I/O P ORTS
...............................................................................................................
8
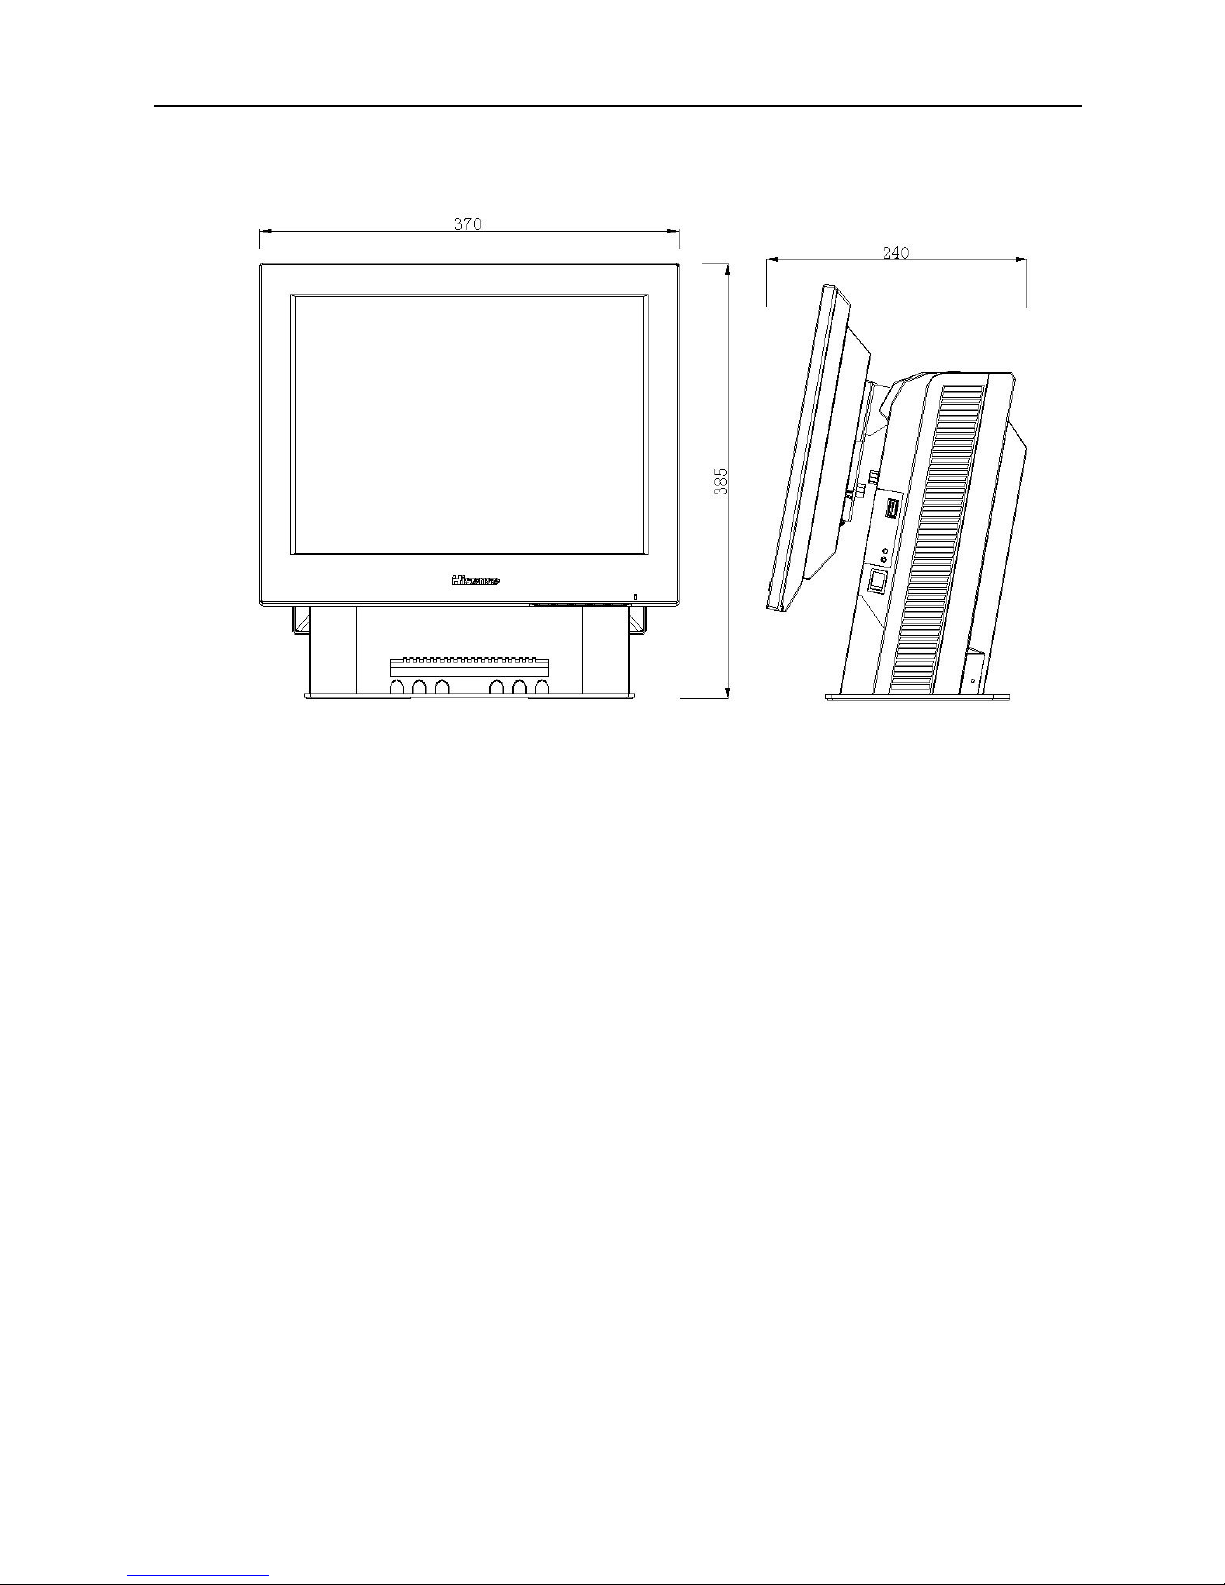
3 -3 System Dimension
4
4
4
4 SYSTEM
SYSTEM
SYSTEM
SYSTEM ASSEMBLY
ASSEMBLY
ASSEMBLY
ASSEMBLY &
&
&
& DISASSEMBLY
DISASSEMBLY
DISASSEMBLY
DISASSEMBLY
..........................................
..........................................
..........................................
..........................................
11
11
11
11
4- 1 O
PEN
T
HE
S
YSTEM
............................................................................................
11
4-2 . HDD R
EPLACEMENT
............................................................................................
12
4-3 .D
ISPLAY
R
EPLACEMENT
.......................................................................................
12
5
5
5
5Install
Install
Install
Install driver
driver
driver
driver
5-1 Driver folder
5-2 Touch Screen Driver Installation