manuals.online logo
Brands
  1. Home
  2. •
  3. Brands
  4. •
  5. Honeywell
  6. •
  7. Keypad
  8. •
  9. Honeywell LKPES8M-EN User manual

Honeywell LKPES8M-EN User manual

Place one battery in each one of the
3 battery holders (read carefully the
battery replacement instructions on
page 1 before)
BATTERY REMOVAL AND HANDLING SAFETY
WARNING Risk of fire, explosion and burns, do not
recharge, disassemble, heat above 100° C, or
incinerate the battery. While the battery can normally
be safely removed by hand, care should be used to
ensure that the battery terminals are not shorted, nor
the battery damaged, during the removal process.
Dispose of depleted batteries by complying with
applicable national and local regulations. In the event
of the battery being damaged, use personal
protective equipment to remove it immediately, and
dispose of it in a safe manner (refer to the battery
manufacturer’s specifications for such situations).
For Switzerland, Annex 2.15 of SR 814.81 applies to
the battery included with this product.
3
x
Battery
R
e
p
l
a
c
e
m
e
n
t
(CR123A)
Tag reader: identification area
Siren output
SOS keys
Audio output
System fault LED
(LED2)
System armed LED
(LED1) Tamper alarm LED
(LED3)
Intruder alarm LED
(LED4) Total set arming key Partial set arming key
Product
d
e
sc
r
i
p
t
i
on
© 2010 Honeywell International, Inc.
- 1 -
Mounting holes
M
oun
t
i
ng
T
A
G
2
4
3

- 2 -
LKPES8M-EN
- Installation
I
n
s
t
r
u
c
t
i
on
s
Wireless Audio keypad with integrated tag reader and
s
i
r
e
n
Introduction
The LKPES8M-EN is designed to control the
DOMONIAL 7/7G panel’s series. The primary
function of this fully wireless keypad is to arm and
disarm the system. This can be done either by
entering a code on the numeric keypad or by using
the integrated proximity tag reader. The LKPES8M-
EN also features an integrated siren and can be used as a remote audio
verification device between the monitoring station and the protected area.
Mounting
The keypad must be installed on its mounting bracket and is not meant to be
used outside its bracket. This bracket must be fixed on a wall and easily
accessible for the arming and disarming of the system.
Mounting steps:
1) Separate the bracket from the keypad (see drawing 4 page 1)
2) Fix the bracket on the wall using screws (see drawing 4 page 1)
3) Insert the battery keeping the polarities.
4) Put the keypad back in its bracket.
5) Depending on the regulation in force in the country, the keypad could be
secured in its bracket with the supplied screw.
R
e
g
i
s
t
e
r
i
ng
The registering is the procedure associating the keypad to the panel. This
operation requires a programming tool. The complete procedure
is described in the alarm central unit installation notice or in the programming
tool manual.
Up to 2 audio keypads can be used per installation and up to 3 keypads if the
audio functionality is disabled.
1) Connect the programming tool and start programming.
2) Go to the « Register » menu and put the panel into registration mode.
3) To register the keypad, insert the batteries or remove the keypad from its
mounting bracket to trigger a tamper fault or trigger an alert by pressing
simultaneously and keys (see page 1). Depending on the
configuration of the panel, the keypad and panel will beep to confirm the
registration.
4) Configure the keypad in the programming tool:
- Set label of the device
- Choose alert mode (1: silent, 2: beep or 3: siren)
- Choose associated set (Total, Annex or Total + Annex)
5) Get out of programming mode
IMPORTANT: The keypad must always be programmed in its final
location with a minimum radio level of 3 units on a scale of 10
Power and Maintenance
The keypad signals a battery failure at the control panel when the
battery needs to be replaced. LED2 will light on to signal locally to the end
user the battery default (see drawing 1 page 1). The keypad will continue to
operate for up to one month after this event. Replace battery with CR123A 3V
Lithium battery type only.
To replace the battery follow the procedure described bellow:
1) Remove the keypad from its mounting bracket.
2) A tamper alarm is sent to the panel. There is a 120-seconds delay
(depending on panel configuration) before transmitting the specific tamper
message to the monitoring station. If tamper is restored before the end of
the delay, no transmission will occur. (The tamper delay is only when the
system is disarmed. Tamper is immediately transmitted if the panel is
armed)
3) Remove the batteries and replace them with new batteries from the same
type
4) Put the keypad back on the bracket
To clean the
keypad,
use a dry cloth only (no
de
t
ergen
t
)
.
Programming the Keypad (Installer mode)
The keypad features 2 programming modes which allow the installer and end
user to control the keypad functionalities.
The procedure bellow explains the procedure to enter the installer
programming mode. For details on the end user’s programming mode please
refer to the user’s manual.
To enter installer’s programming mode:
1) Press simultaneously keys and more than 3 seconds
and release them.
A double beep is played and all LEDs light up.
2) Enter installer’s code
All LEDs start flashing and a long beep is played
To exit installer’s programming mode and save your
changes:
1) Press to exit programming and save your
changes
All LEDs stop flashing and a double beep is played.
Note: The system will automatically exit programming mode after
20 seconds if no keys are pressed during this period. If this occurs, you
must repeat all the steps necessary for the function you are using.
In programming mode, it is possible to:
Set arming with identification:
1. Press to select function
2. Press to activate arming with identification (code or TAG)
Set quick arming:
1. Press button to select function
2. Press to activate quick arming
Associate a TAG to a user:
1. Press a numeric key to select user’s number [ 0…9 ]
2. Present the TAG
Note: The keypad will automatically get out of programming mode if the
TAG is already registered. If the user already has a TAG, it is replaced by
the new one
.
Change a user’s code:
1. Press a numeric key to select user’s number [ 0…9 ]
2. Enter new user’s code
3. Re-enter new user’s code
Disable a user’s code (disable the code for a user and keep
the TAG only):
1. Press a numeric key to select user’s number [ 0…9 ]
2. Enter 0000 (or 000000 if 6 digits)
3. Re-Enter 0000 (or 000000 if 6 digits)
4. Press
Disable a user:
1. Press a numeric key to select user’s number [ 0…9 ]
2. Press to disable the user
Enable a user:
1. Press “0 to 9” button to select user’s number
2. Press to enable the user
Note: it is possible to set a code and/or a tag to each user. The keypad
can have up to 10 users. The keypad can also be programmed to manage
4-digit or 6-digit codes (using programming tool).
Audio Configuration
The wireless audio verification functionality is configured from the
programming tool. Please refer to the programming tool documentation to
obtain further details
To obtain applicable CE compliance Declaration of Conformity, please refer to our web site:
http://www.honeywell.com/security/emea/hscdownload
Honeywell
S
e
c
u
r
i
t
y
Honeywell Security & Communications
1198, Avenue du Docteur Maurice Donat
BP 1219
06254 MOUGINS CEDEX
Tel.: +33 (0)4 92 94 29 50
Fax: +33 (0)4 92 94 29 60
www.honeywell.com
2010 Honeywell International Inc.
Honeywell is a registered trademark of Honeywell International Inc. All other trademarks are the properties
of their respective owners. All rights reserved. 800-07354 Rev: 0A
- 3 -
S
p
e
c
i
f
i
c
a
t
i
on
s
Dimensions 150mm x 110mm x 27mm
Weight 250g (without battery)
RF Range 2000m in open field
Battery 3 x CR123A 3V Lithium Batteries
Operating voltage 3V
Battery life 4 years (typical)
Tamper Pry off and case opening tamper
Frequency: 868MHz narrow band
Radio Protocols: ALPHA
Compatibility: -7/7G Domonial panels or Lxx panel’s software release
Operating temperature: -10° to +55° C
Approval Listing
EN50131-3 Grade 2 Class II for keypad; EN50131-4 Grade 2
Class II for siren;
Supply voltage fault threshold: 2,7V
Siren Output 92dBA at 3m
LKPES8M-EN
- Installation
I
n
s
t
r
u
c
t
i
on
s
Wireless Audio keypad with integrated tag reader and
s
i
r
e
n
Typical Consumption: Transmission: 26mA (typ)
Alarm: 800 mA (max)
Standby: 40μA (typ)
-20° to +70° C
Storage temperature

Other Honeywell Keypad manuals

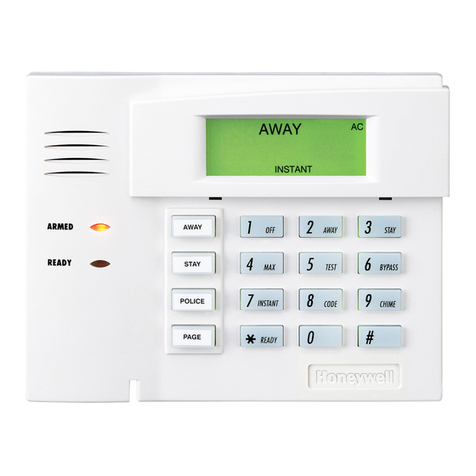
Honeywell ADEMCO 6160RF User manual

Honeywell

Honeywell ADEMCO 6160RF User manual

Honeywell 6150 - Ademco Fixed - Display Keypad Assembly instructions

Honeywell

Honeywell 6150 - Ademco Fixed - Display Keypad Assembly instructions

Honeywell GKP User manual

Honeywell

Honeywell GKP User manual

Honeywell Ademco 6460S Assembly instructions

Honeywell

Honeywell Ademco 6460S Assembly instructions

Honeywell CLB800HF User manual

Honeywell

Honeywell CLB800HF User manual

Honeywell 5828 Assembly instructions

Honeywell

Honeywell 5828 Assembly instructions

Honeywell Ademco 6151 Assembly instructions

Honeywell

Honeywell Ademco 6151 Assembly instructions

Honeywell ADEMCO 6271V User manual

Honeywell

Honeywell ADEMCO 6271V User manual

Honeywell ADEMCO 6160RF3 Assembly instructions

Honeywell

Honeywell ADEMCO 6160RF3 Assembly instructions

Honeywell ADEMCO 6162 User manual

Honeywell

Honeywell ADEMCO 6162 User manual

Honeywell EKZ017200C User manual

Honeywell

Honeywell EKZ017200C User manual

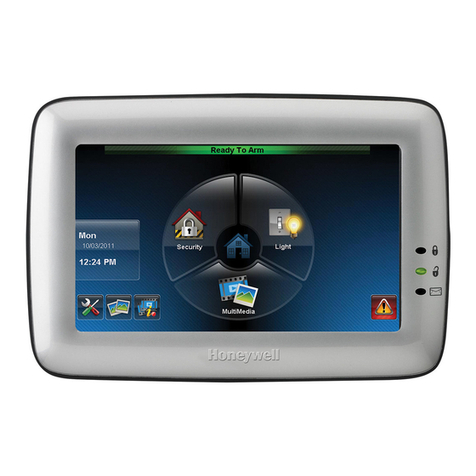
Honeywell 6280 Series User manual

Honeywell

Honeywell 6280 Series User manual

Honeywell 6160PX User manual

Honeywell

Honeywell 6160PX User manual

Honeywell 6280 Series User manual

Honeywell

Honeywell 6280 Series User manual

Honeywell ADEMCO 6150RF ADEM Assembly instructions

Honeywell

Honeywell ADEMCO 6150RF ADEM Assembly instructions

Honeywell 6280 TouchCenter User manual

Honeywell

Honeywell 6280 TouchCenter User manual

Honeywell ADEMCO 5828 Assembly instructions

Honeywell

Honeywell ADEMCO 5828 Assembly instructions

Honeywell ADEMCO 6150RF User manual

Honeywell

Honeywell ADEMCO 6150RF User manual

Honeywell ADEMCO 6162RF Assembly instructions

Honeywell

Honeywell ADEMCO 6162RF Assembly instructions

Honeywell Ademco 6160CR-2 Assembly instructions

Honeywell

Honeywell Ademco 6160CR-2 Assembly instructions

Honeywell Silent Knight 6820EVS User manual

Honeywell

Honeywell Silent Knight 6820EVS User manual

Honeywell 5828V - Ademco Wireless Talking Keypad Assembly instructions

Honeywell

Honeywell 5828V - Ademco Wireless Talking Keypad Assembly instructions

Honeywell ADEMCO 6150RF Assembly instructions

Honeywell

Honeywell ADEMCO 6150RF Assembly instructions

Honeywell 6150 - Ademco Fixed - Display Keypad Assembly instructions

Honeywell

Honeywell 6150 - Ademco Fixed - Display Keypad Assembly instructions

Popular Keypad manuals by other brands

YASKAWA JVOP-KPLCB04AxB installation manual

YASKAWA

YASKAWA JVOP-KPLCB04AxB installation manual

HEIDENHAIN 681043-01 operating instructions

HEIDENHAIN

HEIDENHAIN 681043-01 operating instructions

Velleman HAA85WP user manual

Velleman

Velleman HAA85WP user manual

Satel INT-SK manual

Satel

Satel INT-SK manual

Digiplex DGP-641 user manual

Digiplex

Digiplex DGP-641 user manual

CADDX Ranger 9050 installation manual

CADDX

CADDX Ranger 9050 installation manual

Storm AXS Strike Master manual

Storm AXS

Storm AXS Strike Master manual

Gecko in.k300 user manual

Gecko

Gecko in.k300 user manual

Samsung OfficeServ ITP-5121D Quick reference guide

Samsung

Samsung OfficeServ ITP-5121D Quick reference guide

Lumi IML Connector user manual

Lumi

Lumi IML Connector user manual

DMP Electronics 781 Installation

DMP Electronics

DMP Electronics 781 Installation

Black Nova KNX AXES user manual

Black Nova

Black Nova KNX AXES user manual

Invertek Drives OPTIPAD IP55 user guide

Invertek Drives

Invertek Drives OPTIPAD IP55 user guide

SILENTRON 5528 HT manual

SILENTRON

SILENTRON 5528 HT manual

Powercom Mini WRS7000DSI-5 user manual

Powercom

Powercom Mini WRS7000DSI-5 user manual

CDVI GALEO 4.0 - Bluetooth installation manual

CDVI

CDVI GALEO 4.0 - Bluetooth installation manual

SkyLink KN-318 user manual

SkyLink

SkyLink KN-318 user manual

Dorma AC217 installation instructions

Dorma

Dorma AC217 installation instructions

manuals.online logo
manuals.online logoBrands
  • About & Mission
  • Contact us
  • Privacy Policy
  • Terms and Conditions

Copyright 2025 Manuals.Online. All Rights Reserved.