manuals.online logo
Brands
  1. Home
  2. •
  3. Brands
  4. •
  5. hygena
  6. •
  7. Indoor Furnishing
  8. •
  9. hygena Milan User manual

hygena Milan User manual

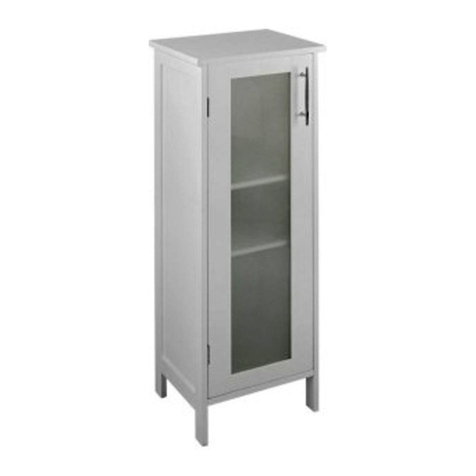
HygenaMilanshoestorage
AssemblyInstructions
Please keep for future reference
875/8770
Dimensions
Width 91.5cm
Depth 35cm
Height 114.5cm
Important
Please read these instructions fully before starting assembly
Ifyouneedhelp or have damagedor missingparts, call the CustomerHelpline: 08456400800
Issue3 08/08/14
Note: Twopeople required for assembly.
1
Note: ifrequirethenext
pagecanbecutoutandused
asreference throughout the
assembly. Keepthispagewith
theseinstructions forfuture
reference.
SafetyandCare Advice
Important Please read these instructions fully before startingassembly
Checkyouhaveall the
componentsandtoolslistedon
pages2and3.
Removeall fittingsfromthe
plastic bagsandseparatethem
intotheirgroups.
Keep childrenand animals
awayfromtheworkarea, small
partscould chokeifswallowed.
Makesureyouhaveenough
space tolayout thepartsbefore
starting.
Do notstandor put weight on
theproduct,thiscould cause
damage.
Assemble theitem ascloseto
its final position(inthesame
room)aspossible.
Assemble onasoftlevel
surface toavoiddamagingthe
unitoryour floor.
Partsoftheassemblywill be
easier with 2people.
Wedonot
recommend theuseof
powerdrill/drivers for
inserting screws, as
thiscoulddamagetheunit. Only
usehandscrewdrivers.
Disposeofall packagingcarefull
y
and responsibly.
Glass safety Take care when handling glass, please follow the advice below
Thisproductcomplieswith
BS EN14749:2005.
Ifaglasscomponent is
chipped orbroken,stop using
theproductandconsultthe
manufacturer orsupplier.
Do notsitor stand upon
horizontal glasssurface(s).
Do notusetheglass asa
choppingsurface.
Do notplace veryhotor
verycold itemsontheglass
surface(s)unless adequately
thicktable mats areused to
prevent suchitemsfrom
comingintocontactwiththe
glass.
Do notstriketheglass with
hard orpointed items.
Whencleaningglass panels
useadamp clothorleather with
washingup liquid orsoftsoap if
necessary.
Do notusewashingpowders
or anyother substances
containingabrasivessince these
substancesscratchglass.
Care andmaintenance
Onlycleanusingadamp
cloth and mild detergent,donot
usebleachorabrasivecleaners.
Fromtime totime checkthat
therearenoloosescrewsonthis
unit.
Thisproductshould notbe
discardedwith householdwaste.
Taketoyour local authority waste
disposal centre.
2
Components -Panels
Please check you have all thepanels listed below
Toppanel Basepanel
Adjustableshelfx6
1
2
3
Leftsidepanel Rightside panel
4
5Backpanelx2
6
Leftdoor
7Rightdoor
8
3
Note: Thequantitiesbelow arethecorrectamount tocompletetheassembly.Insome casesmore
fittingsmaybesuppliedthanarerequired.
Tools required
Philipsscrewdriver
Flatbladescrewdriver
Components -Fittings Ifyouhavedamagedormissingcomponents,
call the CustomerHelpline: 08456 400800
Please check you have all thefittings listed below
Metaldowel
x
4
Metalcam
x4
Wooddo
wel
x
8
A
B
C
3.5
x
14mm Screwx16
G
H
Shelfpinx24
3
x
14mm Screwx
22
D
E
4
0mmScrewx4
Footx4
F
Magnet
packagex1set
I
J
Webbingandscrewx2
K
Joiningstrip
4
Step
2
Screw1Foottothe
pre-drilled holesineach
cornerofBase
panel ,using
Screws.
AssemblyInstructions
Step
1
Place theSidePanels
&onaflat
surface, asshown.
InserttwoWood dowels
intothemiddle end
holesineachSidepanel.
LocateBasePanel
ontotheendsofSide
Panels&and
securewith 4Screws.
Step
3
Screw4Metal dowels
intothethreaded holesin
Top Panel , as
shown.
InsertWooddowels
intothemiddle holesin
Top panel.
5
E
4
5
4
E
2
Taped edge.
F
2
1
2
5
4
C
G
A
C
C
C
F
2
G
A
1
C
5
AssemblyInstructions
Step
4
FirmlypushtheTop
Panel ontotheends
ofSidepanelsand
,ensuringtheMetal
dowelsandwood
dowelsenter
correspondingholes.
Step
5
Insertthe4Metal Cams
intothe4holeson
SidePanels&so
thattheyareflush.
Note: Longer
legofthecross
ontheMetal
Camsmust face towards
end ofpanel (asshown).
Then, usingaPhilips
Screwdriver, screwall 4
Metal Cams
clockwiseuntil theyare
‘handtight’.
4
5
A
B
4
1
5
B
5
4
B
1
5
4
C
Note: Longerlegof
thecrossonthe
Metal Camsmust
face towardsend
ofpanel.
6
AssemblyInstructions
Step
6
Laytheunitonitsface.
FitBackpanelsinto
theJoiningstrip.
SecureBackPanels
intotherecess onthe
rear
edgesofPanels
,,&using
22 Screws.
Note: The
foiled sideof
Backpanel
should face downward
(asshown).
Step
7
Standtheunitupright.
ScrewMagnetic catch
tothepre-drilled holesin
theundersideofTop
panel ,using
Screws.
Note: Make
surethe
magnetic head
face outward.
Step
8
Push the2Doorhinges
intothefixed tubein
Basepanel as
shown.
Note: Make
surethe
screwsin
hingesface inward.
2
1
4
D
D
I
I
1
6
1
6
4
I
2
5
Note: Thefoiledside
ofBackpanel should
face downward.
5
6
K
6
K
I
I
1
Note: Makesurethemagnetic
head face outward.
I
2
Note: Makesurethescrews
inhingesface inward.
7
AssemblyInstructions
Step
9
Push 24ShelfPins
intoSidePanels&
atshown.
Step
10
Slidethe6Adjustable
shelvesontothe
Shelfpins .
3
H
4
5
H
4
5
3
H
8
AssemblyInstructions
Step
11
SlideHingesontothe
topedgeofDoors&
and secureby
screwingthescrews.
Note: ’Outer’
label ondoor,
must beon
outside.
Note: Make
surethe
screwsin
hingesface inwardas
shown. Makesurethere
isaplastic sleevewithin
themetal bracketbefore
screwingasshown.
Screwgentlytoprevent
theglass door from
break.
Step
12
InsertthepinofHinges
intothefixed tubeinthe
undersideofTop
panel .
Slidethebottomcorner
ofLeftside
Door
intothebottomhinges.
Securethedoorby
screwingthescrewsin
hinges.
Note: Screw
gentlyto
prevent the
glass door from break.
Repeatthisstepto
assemble Right Side
door.
8
I
I
7
7
8
I
7
8
1
1
7
8
I
Note: Makesure
thereisaplastic
sleevewithinthe
metal bracket
beforescrewing.
Screwgentlyto
prevent theglass
door from break.
9
AssemblyInstructions
Step
13
Adjustingthedoors
Note: Thisstepwill be
easier with 2people.
Note: Beforeadjusting the
doors pleasemakesurethe
cabinet isinits final position
and makesureitis level.
Loosenthescrews inthe
hinge. Pushthedoor inward
or outwards slightly, and
retightenscrews as
illustrated.
Closethedoor tocheck the
alignment, and adjustagain
ifnecessary.
Adjusttheother hinges
tomakesurethespace
aroundthedooriseven
and thetwodoorsare
lineup witheachother.
10
AssemblyInstructions
Step
14
Note: ThisStep
isforsecuring
theUnittoa
wall and shouldonlybe
attemptedby
experiencedpersons.
Youwill Need the
Following:
-Another personto
assist you
-Electric Drill (&Drill
Bits)
-Screwdriver
FixingsSupplied:
-2Webbings
-2Small Wood
Screws
-
2LargeWall Screws
-2Wall Plugs
Note: The
fixings
described are
for usewithsolid
masonrywallsonly.
Alternativefixingsshould
bepurchased ifyouhave
adifferent wall
construction.
Assemblyis complete.
Ifyouneed help or havedamagedormissingparts, call the CustomerHelp Line: 08456400800
ShawSpencer HometradingLtd. 34-38Vale Road,Bushey. WD23 2HE.
11

Other hygena Indoor Furnishing manuals
hygena Valencia User manual

hygena

hygena Valencia User manual

hygena 1664672 User manual

hygena

hygena 1664672 User manual

hygena Matrix Glass Coffee Table 610/8267 User manual

hygena

hygena Matrix Glass Coffee Table 610/8267 User manual

hygena Valencia 600mm Wall Cabinet User manual

hygena

hygena Valencia 600mm Wall Cabinet User manual

hygena 143/8585 User manual

hygena

hygena 143/8585 User manual

hygena 656/4966 User manual

hygena

hygena 656/4966 User manual

hygena Chapton 545/9223 User manual

hygena

hygena Chapton 545/9223 User manual

hygena Bergen 557/2911 User manual

hygena

hygena Bergen 557/2911 User manual

hygena Luna 448/8439 Datasheet

hygena

hygena Luna 448/8439 Datasheet

hygena 424/5407 User manual

hygena

hygena 424/5407 User manual

hygena 314/5041 User manual

hygena

hygena 314/5041 User manual

hygena HYG 724/1673 User manual

hygena

hygena HYG 724/1673 User manual

hygena 296/7378 User manual

hygena

hygena 296/7378 User manual

hygena Bergen 228/2840 User manual

hygena

hygena Bergen 228/2840 User manual

hygena Bergen SHELF PACK User manual

hygena

hygena Bergen SHELF PACK User manual

hygena Underbasin 539/9974 Datasheet

hygena

hygena Underbasin 539/9974 Datasheet

hygena Valencia User manual

hygena

hygena Valencia User manual

hygena 459/1553 User manual

hygena

hygena 459/1553 User manual

hygena 656/5831 User manual

hygena

hygena 656/5831 User manual

hygena Ivy 453/6563 User manual

hygena

hygena Ivy 453/6563 User manual

hygena Tall boy 528/9060 Datasheet

hygena

hygena Tall boy 528/9060 Datasheet

hygena Valencia 656/5824 User manual

hygena

hygena Valencia 656/5824 User manual

hygena Valencia 656/5790 User manual

hygena

hygena Valencia 656/5790 User manual
hygena 496/5110 User manual

hygena

hygena 496/5110 User manual

Popular Indoor Furnishing manuals by other brands

Regency LWMS3015 Assembly instructions

Regency

Regency LWMS3015 Assembly instructions

Furniture of America CM7751C Assembly instructions

Furniture of America

Furniture of America CM7751C Assembly instructions

Safavieh Furniture Estella CNS5731 manual

Safavieh Furniture

Safavieh Furniture Estella CNS5731 manual

PLACES OF STYLE Ovalfuss Assembly instruction

PLACES OF STYLE

PLACES OF STYLE Ovalfuss Assembly instruction

Trasman 1138 Bo1 Assembly manual

Trasman

Trasman 1138 Bo1 Assembly manual

Costway JV10856 manual

Costway

Costway JV10856 manual

moss DESIGN Caisson Credenza Assembly instructions

moss DESIGN

moss DESIGN Caisson Credenza Assembly instructions

Aquaglide FULL DECK 15.0 owner's manual

Aquaglide

Aquaglide FULL DECK 15.0 owner's manual

AREBOS AR-HE-SW30 user manual

AREBOS

AREBOS AR-HE-SW30 user manual

Till-Hilft Fulda 87005.330 Assembly instructions

Till-Hilft

Till-Hilft Fulda 87005.330 Assembly instructions

Twoey Outside 2010 quick start guide

Twoey Outside

Twoey Outside 2010 quick start guide

Hettich Easys 200 operating instructions

Hettich

Hettich Easys 200 operating instructions

The bedboss RELAX 404 Series owner's manual

The bedboss

The bedboss RELAX 404 Series owner's manual

Oeseder Möbelindustrie Bern 991 720 Assembly instructions

Oeseder Möbelindustrie

Oeseder Möbelindustrie Bern 991 720 Assembly instructions

Costway HW68469 user manual

Costway

Costway HW68469 user manual

Next ALIX A27743 Assembly instructions

Next

Next ALIX A27743 Assembly instructions

BROSA Hans Assembly guide

BROSA

BROSA Hans Assembly guide

Prodigg MINIKA PBA015T-FUR installation manual

Prodigg

Prodigg MINIKA PBA015T-FUR installation manual

manuals.online logo
manuals.online logoBrands
  • About & Mission
  • Contact us
  • Privacy Policy
  • Terms and Conditions

Copyright 2025 Manuals.Online. All Rights Reserved.