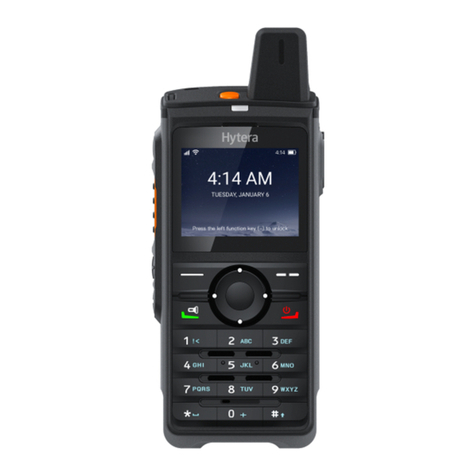
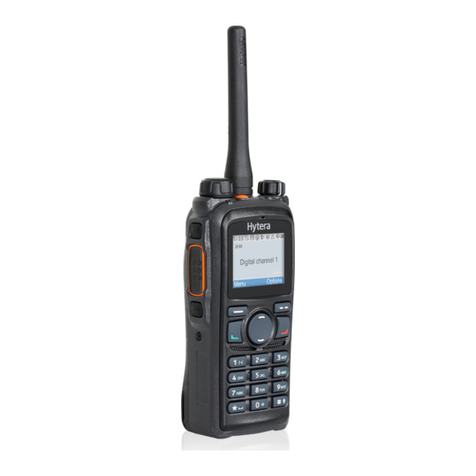
Hytera PNC380 User manual

PNC380 PoC Radio
User Manual
Hytera Communications Corporation Limited

Preface
Welcome to the world of Hytera and thank you for purchasing this product. This manual includes a description of the
functions and step-by-step procedures for use. To avoid bodily injury or property loss caused by incorrect operation,
please carefully read the Safety Information Booklet before use.
This manual is applicable to the following product:
PNC380 PoC Radio

Copyright Information
Hytera is the trademark or registered trademark of Hytera Communications Corporation Limited (the Company) in
the People's Republic of China (PRC) and/or other countries or areas. The Company retains the ownership of its
trademarks and product names. All other trademarks and/or product names that may be used in this manual are
properties of their respective owners.
The product described in this manual may include the Company's computer programs stored in memory or other
media. Laws in PRC and/or other countries or areas protect the exclusive rights of the Company with respect to its
computer programs. The purchase of this product shall not be deemed to grant, either directly or by implication, any
rights to the purchaser regarding the Company's computer programs. The Company's computer programs may not be
copied, modified, distributed, decompiled, or reverse-engineered in any manner without the prior written consent of
the Company.
Disclaimer
The Company endeavors to achieve the accuracy and completeness of this manual, but no warranty of accuracy or
reliability is given. All the specifications and designs are subject to change without notice due to continuous
technological development. No part of this manual may be copied, modified, translated, or distributed in any manner
without the prior written consent of the Company.
We do not guarantee, for any particular purpose, the accuracy, validity, timeliness, legitimacy or completeness of the
third-party products and contents involved in this manual.
If you have any suggestions or would like to receive more information, please visit our website at
http://www.hytera.com.

User Manual
Documentation Information
Contents
Documentation Information........................................................................................................................ 1
1. Before Use ................................................................................................................................................ 3
1.1 Packing List..........................................................................................................................................3
1.2 Product Layout ..................................................................................................................................... 4
1.3 (Optional) Installing the SIM Card and Micro SD Card........................................................................4
1.4 Attaching the Battery............................................................................................................................ 5
1.5 Attaching the Belt Clip..........................................................................................................................6
1.6 Attaching the Audio Accessory ............................................................................................................6
1.7 Charging the Battery ............................................................................................................................ 7
2. Basic Operations...................................................................................................................................... 8
2.1 Turning On or Off the Radio.................................................................................................................8
2.2 Restarting the Radio............................................................................................................................. 8
2.3 Adjusting the Volume ...........................................................................................................................8
2.4 Understanding the Screen.................................................................................................................... 8
2.4.1 Status Indication.........................................................................................................................8
2.4.2 Screen Operations................................................................................................................... 10
2.5 Turning On or Off the Flashlight.........................................................................................................10
2.6 Setting the Programmable Key..........................................................................................................10
2.7 Switching the Input Method................................................................................................................11
2.8 Checking the Radio Information.........................................................................................................11
3. PoC Service ............................................................................................................................................ 12
4. Phone Call (PNC380 Pro Only) ............................................................................................................. 13
4.1 Initiating a Phone Call ........................................................................................................................13
4.2 Receiving a Phone Call...................................................................................................................... 14
5. Messages (PNC380 Pro Only)............................................................................................................... 15
5.1 Sending a Message............................................................................................................................ 15
5.2 Replying a Message........................................................................................................................... 16
5.3 Forwarding or Deleting a Message.................................................................................................... 16
6. Contacts (PNC380 Pro Only)................................................................................................................. 18
6.1 Creating a Contact..............................................................................................................................18
6.2 Editing or Deleting a Contact..............................................................................................................19
7. Network and Data Sharing.................................................................................................................... 20
7.1 Mobile Network................................................................................................................................... 20
7.1.1 Checking the Data Usage........................................................................................................ 20
7.1.2 Enabling or Disabling the Data Roaming.................................................................................20
7.1.3 Selecting the Network Type..................................................................................................... 20
7.2 WLAN ................................................................................................................................................. 20

User Manual
Documentation Information
7.3 BT....................................................................................................................................................... 21
7.3.1 Pairing with a BT Device..........................................................................................................21
7.3.2 Disconnecting with a BT Device .............................................................................................. 21
7.3.3 Enabling or Disabling the BT Positioning Feature................................................................... 21
7.3.4 Modifying the BT Device Name ............................................................................................... 22
7.4
Hotspot
.............................................................................................................................................. 22
7.4.1 Enabling or Disabling the WLAN Hotspot................................................................................ 22
7.4.2 Setting up the Hotspot..............................................................................................................22
7.5 Airplane Mode ....................................................................................................................................23
7.6 NFC (PNC380 Pro Only).................................................................................................................... 23
7.7 USB ....................................................................................................................................................23
8. Settings................................................................................................................................................... 24
8.1 Radio Settings....................................................................................................................................24
8.1.1 Display...................................................................................................................................... 24
8.1.2 Sound.......................................................................................................................................25
8.1.3 Storage..................................................................................................................................... 25
8.1.4 Battery...................................................................................................................................... 26
8.2 System Settings.................................................................................................................................. 27
8.2.1 Location....................................................................................................................................27
8.2.2 Languages................................................................................................................................ 27
8.2.3 Factory Data Reset..................................................................................................................28
8.2.4 Date and Time.......................................................................................................................... 28
8.2.5 Upgrade....................................................................................................................................30
9. Camera (PNC380 Pro Only)................................................................................................................... 31
9.1 Taking a Photo................................................................................................................................... 31
9.2 Recording a Video.............................................................................................................................. 31
9.3 Viewing a Picture or Video................................................................................................................. 31
10. Gallery (PNC380 Pro Only).................................................................................................................. 32
10.1 Photos...............................................................................................................................................32
10.1.1 Viewing a Photo..................................................................................................................... 32
10.1.2 Managing a Photo..................................................................................................................32
10.2 Videos............................................................................................................................................... 32
10.2.1 Playing a Video...................................................................................................................... 32
10.2.2 Managing a Video.................................................................................................................. 33
11. Sound Recorder................................................................................................................................... 34
11.1 Recording an Audio File...................................................................................................................34
11.2 Playing an Audio File........................................................................................................................ 34
11.3 Managing an Audio File....................................................................................................................34
12. Applications.......................................................................................................................................... 35
User Manual
Documentation Information
12.1 Installing an Application.................................................................................................................... 35
12.2 Uninstalling an Application...............................................................................................................35
12.3 Forcedly Stopping an Application..................................................................................................... 35
12.4 Clearing the Data or Cache..............................................................................................................35
12.5 Setting the Access Permissions....................................................................................................... 36
13. Troubleshooting................................................................................................................................... 37
14. Care and Cleaning................................................................................................................................ 39
14.1 Product Care .................................................................................................................................... 39
14.2 Product Cleaning..............................................................................................................................39
15. Optional Accessories .......................................................................................................................... 40
16. Abbreviations ....................................................................................................................................... 41

User Manual
Documentation Information
1
Documentation Information
Instruction Conventions
Icon
Description
Indicates references that can further describe the related topics.
Indicates situations that could cause data loss or equipment damage.
Notation Conventions
Item
Description
Example
Boldface
Denotes menus, tabs, parameter names,
window names, dialogue names, and
hardware buttons.
To save the configuration, click Apply.
The Log Level Settings dialogue appears.
Press the PTT key.
" "
Denotes messages, directories, file names,
folder names, and parameter values.
The screen displays "Invalid Battery!"
Open "PDT_PSS.exe".
Go to "D:/opt/local".
In the Port text box, enter "22".
>
Directs you to access a multi-level menu.
Go to File > New.
Italic
Denotes document titles.
For details about using the DWS, refer to
Dispatch Workstation User Guide.
Courier
New
Denotes commands and their execution
results.
To set the IP address, run the following command:
vos-cmd - m name IP

User Manual
Documentation Information
2
Key Operations
Operation
Description
Short press
Press and release quickly.
Long press
Press and hold for preset time.
Press and hold
Keep the key pressed.

User Manual
Before Use
3
1. Before Use
1.1 Packing List
Please unpack carefully and check that you have received the following items. If any item is missing or damaged,
contact your dealer.
Item
Quantity (PCS)
Item
Quantity (PCS)
Radio
1
Data Cable
1
Battery
1
Battery Cover
1
Power Adapter
1
Strap
1
Belt Clip
1
Documentation Kit
1
Figures in this manual are only for reference.
Check the main unit label inside the battery compartment to ensure that the purchased product is correct.

User Manual
Before Use
4
1.2 Product Layout
1.3 (Optional) Installing the SIM Card and Micro SD
Card
1. Unlock the battery latch, and then remove the battery cover.
The battery cover is tightly fastened to ensure optimum waterproof performance. It is recommended to remove
the battery cover with tools.
2. Open the card slot covers.
3. Install the SIM card and Micro SD card.
4. Put the card slot covers back in place.

User Manual
Before Use
5
1.4 Attaching the Battery
Use the approved battery to avoid the risk of explosion.
Dispose of the used battery according to "Precautions for Disposal" in the Safety Information Booklet.
1. Insert the battery into the battery slot.
2. Press the battery cover into place.
3. Slide the battery latch to the lock position.

User Manual
Before Use
6
1.5 Attaching the Belt Clip
1.6 Attaching the Audio Accessory
Open the cover of the audio accessory connector, and then insert the audio accessory into the connector.
To ensure optimum waterproof and dustproof performance, close the cover after removing the audio accessory.

User Manual
Before Use
7
1.7 Charging the Battery
Use the approved charger to charge the battery.
Read the Safety Information Booklet before charging.
The remaining lithium-ion battery power is limited to 30% pursuant to the new lithium battery shipment
regulation approved by InternationalAir TransportAssociation (IATA).
To charge the battery, connect the radio to the USB port on the power adapter, mobile power supply, or PC with
the data cable.
During charging, check the charging status by the battery level icon or battery percentage shown on the LCD
display.
To ensure optimum waterproof and dustproof performance, close the USB port cover after charging the radio.

User Manual
Basic Operations
8
2. Basic Operations
2.1 Turning On or Off the Radio
To turn on the radio, long press for two seconds.
To turn off the radio, long press for two seconds, and then select Power off.
2.2 Restarting the Radio
Long press for two seconds, and then select Reboot.
Long press until the radio restarts.
2.3 Adjusting the Volume
To increase the volume, press the Volume + key.
To decrease the volume, press the Volume –key.
2.4 Understanding the Screen
2.4.1 Status Indication
LCD Icons
Icon
Radio Status
The battery is fully charged.
The battery is low.
The Battery Saver mode is enabled.
The battery is being charged.
The battery is abnormal.
No SIM card is installed.

User Manual
Basic Operations
9
Icon
Radio Status
/ /
The 2G/3G/4G cellular network is enabled.
The radio has registered with the mobile network.
The radio has not registered with the mobile network.
The radio is connected to the WLAN network.
The WLAN hotspot is enabled.
The radio operates in Airplane mode.
An earpiece is connected.
The radio operates in silent mode.
The BT feature is enabled.
A BT device is connected.
The GPS is positioning.
The Near Field Communication (NFC) feature is enabled (PNC380 Pro only).
The memory is out of space.
There is/are new message(s).
There is/are missed call(s).
LED Indications
LED Indicator
Radio Status
Glows green
The radio is receiving.
There is/are unread message(s) or missed call(s).
Glows red
The radio is transmitting.
Glows orange
Ready to press the PTT key to speak to an individual.
A dynamic group call is in progress.

User Manual
Basic Operations
10
2.4.2 Screen Operations
Turning On or Off the Screen
To turn off the screen, press SK.
To turn on the screen, press any key on the keypad.
Locking or Unlocking the Screen
When the screen is not in use, you can lock it to avoid unintended operations, protect privacy, and increase battery
life.
To lock the screen, p
ress SK.
If the standby time reaches the sleep time, the screen is automatically locked.
To unlock the screen, press any key on the keypad.
Setting the Lock Pattern
1. Press the Navigation key to select , and then press the OK/Menu key.
2. Press the Navigation key to select Screen lock, and then press the OK/Menu key.
3. Press the Navigation key to select None, Keypad, or Password, and then press the OK/Menu key.
With the lock pattern enabled, press any key, press the Option key, or enter the password to unlock the screen.
2.5 Turning On or Off the Flashlight
Long press .
2.6 Setting the Programmable Key
The radio provides SK as the programmable key. When you assign a specific feature to the key, you can short
press or long press this key to quickly activate the feature.
1. Press the Navigation key to select , and then press the OK/Menu key.
2. Press the Navigation key to select Programmable key, and then press the OK/Menu key.
3. Press the Navigation key to select Short press or Long press, and then press the OK/Menu key.
4. Select the feature.

User Manual
Basic Operations
11
2.7 Switching the Input Method
You can input symbols, numbers, characters, or letters through the keypad.
Press to switch the input method.
In number mode, press to enter "1". In other modes, press to input special characters.
Press to enter "*". Long press to input a blank space.
2.8 Checking the Radio Information
You can check the radio information such as status, model, and version.
1. Press the Navigation key to select , and then press the OK/Menu key.
2. Press the Navigation key to select About phone, and then press the OK/Menu key.

User Manual
PoC Service
12
3. PoC Service
The Push-to-Talk over Cellular (PoC) service provides one-to-one and one-to-many voice communications over
the wider-coverage public network.
This service is available only when you have installed the PoC application on the radio.
After the radio is connected to a WLAN or cellular network, you can initiate a call through the PoC application.
1. Press the Navigation key to select the PoC application, and then press the OK/Menu key.
2. Do either of the following:
Select a contact from the contact list or recent call list.
Enter a contact number in the dialpad.
3. Press the Option key to select a call type, and then press the OK/Menu key.
4. Speak into the microphone.
For a half-duplex voice call, press and hold the PTT key to speak, and release the PTT key after
finishing speaking.
For a full-duplex voice call, speak directly without pressing the PTT key.
If you set the standby group, you can initiate a call to the group directly.
1. Press the Navigation key to select the PoC application, and then press the OK/Menu key.
2. Press and hold the PTT key to speak, and release the PTT key after finishing speaking.
For more operations, refer to the User Manual of the PoC application.

User Manual
Phone Call (PNC380 Pro Only)
13
4. Phone Call (PNC380 Pro Only)
4.1 Initiating a Phone Call
Through Manual Dialing
1. Do either of the following:
Press the Navigation key to select , and then press the OK/Menu key.
Press .
2. Press the Navigation key to enter the tab.
3. Enter the phone number.
4. Press .
Through Call Logs
1. Do either of the following:
Press the Navigation key to select , and then press the OK/Menu key.
Press .
2. Press the Navigation key to enter the tab.
3. Press the Navigation key to select the call log.
4. Press .
Through Contacts
1. Do either of the following:
Press the Navigation key to select , and then press the OK/Menu key.
Press .
2. Press the Navigation key to enter the tab.
3. Press the Navigation key to select the contact.
4. Press .

User Manual
Phone Call (PNC380 Pro Only)
14
Through Messaging
1. Press the Navigation key to select , and then press the OK/Menu key.
2. Press the Navigation key to select the message.
3. Press .
4.2 Receiving a Phone Call
When you receive a phone call, do either of the following:
To answer the call, press .
To reject the call, press .
Other manuals for PNC380
1
Table of contents
Other Hytera Radio manuals

Hytera
Hytera PTC760 User manual

Hytera
Hytera MD62 Series User manual

Hytera
Hytera PD662 User manual

Hytera
Hytera Jupiter TETRA User manual

Hytera
Hytera HM652 User manual

Hytera
Hytera TC-518 OBR User manual

Hytera
Hytera HM782 User manual

Hytera
Hytera MD78X User manual

Hytera
Hytera MD78X User manual

Hytera
Hytera PDC760 User manual

Hytera
Hytera PD562 User manual

Hytera
Hytera HM68X User manual

Hytera
Hytera RRU3800F080 User manual

Hytera
Hytera DIGITAL MOBILE RADIO User manual

Hytera
Hytera MD780 User manual

Hytera
Hytera PD562 User manual

Hytera
Hytera Jupiter TETRA User manual

Hytera
Hytera PDC760 User manual

Hytera
Hytera MD78Xi User manual

Hytera
Hytera PDC760 User manual