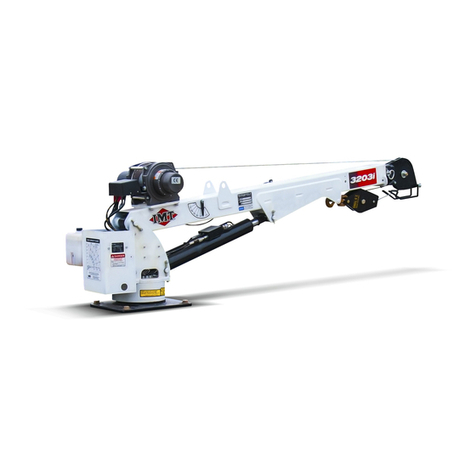
IMT 28562 User manual

99903701:24562/28562INSTALLATION:20131211 PARTS-1
IOWA MOLD TOOLING CO., INC.
BOX 189, GARNER, IA 50438-0189
641-923-3711
MANUAL PART NUMBER: 99903701
Model 24562/28562 Crane
INSTALLATION MANUAL
Iowa Mold Tooling Co., Inc. is an Oshkosh Truck Corporation company.

99903701:24562/28562INSTALLATION:20131211 PARTS-2
In addition to the information presented in this manual,
read and understand the IMT Crane Operator's Safety
Manual before operating or performing any maintenance
on your crane.
REVISIONS LIST
DATE LOCATION DESCRIPTION OF CHANGE
20050421 NEW MANUAL RELEASE
20070227
20131211 ALL PAGES ADDED 28562
COVERUPDATED OWNERSHIPSTATEMENT

PARTS-3
READ ALL INSTRUCTIONS PRIOR
TO STARTING INSTALLATION!
MATERIALS REQUIRED
•Mounting Kit (IMT # 95719252)
•Torque wrench capable of measuring from 220
to 885 ft-lb
•Grinder
•Cut-off wheel
•Band / chop saw
•Square
•Level
•Paint marker
•Welder
•Drill (for 1/2” and 5/8" drill bits)
•Sockets sized for 30 mm and 33 mm
(1-13/16" and 2")
•Shim stock (see instructions)
•Hammer
•Feeler gage
The instructions provided here for an IMT 24562 crane
apply to a mount similar to the one shown in Figure 1,
a “behind the cab mount”. This guide references a
Sterling chassis and assumes no interferences with
the crane.
NOTE
ALL APPLICABLE LEGAL HEIGHT,
LENGTH, WIDTH AND WEIGHT LIMITS ARE THE
RESPONSIBILITY OF THE INSTALLER.
Figure 1: Behind the cab crane mount
INSTALLATION STEPS
The installation procedure is broken into eight steps.
Read the procedure prior to starting work, and follow
the steps in order.
Step I. Truck Chassis Preparation
Check for fit
Check for shims
Step II. Riser Construction
Match truck frame dimensions
Shear plate on each corner
Step III. Crane Preparation
Check and fix pockets if necessary
Step IV. Crush Tube Installation
Install for a force fit
Step V. Crane Tie Rod Installation
Confirm clearances
Tighten either M30 or M33 size tie rod to the
proper torque value
Step VI. Gusset Stop Block Installation
Ensure proper fit
Weld additional stop blocks after crane is tied
down
Step VII. Final Tie Down Process
Install frame to riser bolts
Crush tube retainers
Step VIII. Marker System
Marker (Paint) system
Unique Crane Applications: Units mounted on non-
Sterling chassis may require unique handling.
Consult IMT if the unit is not compatible with these
instructions.
99903701:24562/28562INSTALLATION:20131211

PARTS-4
STEP I. TRUCK CHASSIS PREPARATION
Inspect chassis for adequate space to mount the
crane.These instructions and parts were developed
for a chassis which has no interferences (no cross
member issues, frame bolts or other equipment in the
way). The instructions are formatted using a Sterling
chassis. Other chassis types may vary significantly.
If a double frame is used, check the truck frame for
gaps in between the frame channels . Shim any truck
frame flange gaps using shim stock as necessary to
fill gaps:
i. If gap is less than 1/16", do nothing as gap
will be absorbed when tie rods are tightened.
ii. If gap is between 1/16" and 1/4”, shim.
iii.If gap is greater than 1/4”, consult IMT.
The shims are installed in relation to the crush tube
and crane tie down bolt areas. The pieces should be
about 3-1/2 inches long and about 2-1/2 inches wide
and of the thickness necessary to fill the gap. Steel
stock of 1/8, 3/16 and 1/4” in thickness is the most
commonly used. The IMT kit does not include the
shim stock since only a small percentage of the
trucks need to have the shims installed. See figure 2
for additional detail on shim locations.
Ensure no cross members will interfere with the crush
tubes and retaining bracket. Also check to assure
the tie rods will clear any frame bolts.
STEP II. RISER CONSTRUCTION
Construct the riser for the crane from 3/8" thick tube
and plate. Take special care to match the width of
the tube to the truck frame flange width. For
example, if the frame flange is 4-inches wide, the tube
should be 4-inches wide. The height of the riser tube
should be kept to 4 inches. If a 6-inch riser is used,
an internal stiffener in the tube is required.
Ensure the tubes extend beyond the width of the
crane base by at least 1/2” (more space is needed on
the compensated side to allow for stop block
installation). The width of the riser should be flush
with the outside of the truck frame. Constructing the
riser in this manner aids in the installation of the
crane by making sure no interferences exist.
Incorporate shear plates on each corner to ensure the
riser does not move on the truck frame. Ensure the
shear plates do not cause an interference with the tie
rods. Welding end caps on the tubes stiffens the
sides and prevents water from entering the tube. See
figure 3.
After the riser is constructed, mount the crane and
stop blocks to the riser (instruction steps III through
VI) prior to bolting the riser to the truck frame.
Figure 2: Areas which may require shims
Figure 3: Crane riser example
FRONT OF CRANE
INSTALL SHIMS
AS NECESSARY
BETWEEN FRAMERAILS
(TOP AND/OR BOTTOM
OF FRAME.)
END CAP
99903701:24562/28562INSTALLATION:20131211

PARTS-5
STEP III. CRANE PREPARATION
Measure the tie rod pockets on the stabilizer side of
the crane, as shown in figure 4. Use a square and a
level to make sure the pockets are level and true to 1/
16". Some grinding may be necessary to ensure the
pockets are flat.
DO NOT GRIND THE WELD ON THE CRANE
POCKET!
Measure the stabilizer side crane tie rod pockets and
make sure the stop blocks will fit. The stop block
part was designed to fit the largest gap of the tie rod
pocket so it is normal to have the part milled down to
accomplish a slight forced fit. The rear stop blocks
(P/N 60128955) are welded to the riser. Make sure the
crane fits flat on the riser and is not suspended on a
weld.
Bevel the rear top washer plate (60128019) on the
long edge on one side. Place the ground corner near
crane base for tie rod pocket weld clearance as
shown in Figure 5. Otherwise the washer plate can
sit on a weld which will cause an uneven condition as
shown in Figure 6.
Figure 5: Beveled edge on washer plate
Figure 6: Avoid excess weld
WITH THE SQUARE FLAT
AGAINST THE FRONT OF
THE FORMED PLATE,
CHECK THE GAP BETWEEN
THE SQUARE BLADE AND
MOUNT WITH A FEELER
GAUGE AND RECORD.
Figure 4: Pocket check
MAY NEED TO
BEVEL EDGE OF
WASHER PLATE TO
ALLOW PROPER
SEATING.
EXCESS WELD AT THIS
JOINT WILL PREVENT
WASHER PLATE FROM
SITTING FLAT AND
WILL CAUSE TIE ROD
TO BE SUBJECTED
TO SIDE LOADS.
TIE ROD POCKET
99903701:24562/28562INSTALLATION:20131211

PARTS-6
STEP IV. CRUSH TUBE INSTALLATION
Cut crush tube weldment (52719230) to length. Force
fit into truck frame rail (use hammer if necessary).
Custom fit each corner of the mount. If the crush tube
causes installation interference, consult IMT.
Weld retaining “L” (angle) bracket (P/N 60128035)
onto the tube. After the crane is tightened down, drill
a hole for 1/2” diameter bolt to secure the retaining
bracket as close to the frame centerline as possible.
See Figure 7 for details.
STEP V. CRANE TIE ROD INSTALLATION
Fit up the parts to center the clamp plates and make
sure the tie rods will be parallel and perpendicular to
1/8" on the truck. Once the parts are in place, check
for clearance between the tie rods, truck frame, and
riser (nominal 1/4" clearance).
Front of Crane (tilting compensator- nearest cab)
Center tie rods on the truck frame.
Tighten to 680 ft-lb ± 65 ft-lb for M30 (P/N 71411440
and P/N 71411441). Tighten tie rod nuts in
increments to ensure clamp plate and washer plates
are parallel, and both tie rods have the same load.
Use a second nut as a jam nut on both ends of the tie
rod.
Rear of Crane (farthest from cab)
Center tie rods on the truck frame.
Tighten to 850-880 ft-lb for M33 (P/N 71411439).
Tighten tie rod nuts in increments to ensure clamp
plate and washer plates are parallel, and both tie rods
have the same load. Use a second nut as a jam nut
on both ends of the tie rod.
The top washer plates are tack welded to the crane
pocket. The rear washer plates must be ground on
one edge to allow the plate to fit up next to the crane
base. Otherwise the washer plate can sit on a weld
which will cause an uneven condition.
NOTES:
1) DRIVE THE NUT ONTO THE TIE ROD FROM
THE BOTTOM TO AVOID TOP MOUNT
INTERFERENCE.
2) MAKE SURE THE SOCKET HAS ENOUGH
DEPTH TO ALLOW TWO FULL THREADS
BEYOND THE JAM NUT.
TOP
WASHER
PLATE
TIE
ROD
BOTTOM
CLAMP
PLATE
CRUSH
PLATE
(NOT
SHOWN)
TACK
WELD
LOCATIONS
Figure 7: Crush tube weldment and bracket
Crush Tube
Weldment
Figure 8: Part locations
99903701:24562/28562INSTALLATION:20131211

PARTS-7
STEP VI. GUSSET STOP BLOCK INSTALLATION
The gusset stop blocks (P/N 60128954) are welded to
the crane only. The gusset stop blocks prevent the
crane from twisting on the truck frame. On the rear
side of the crane, the gusset stop block must be
welded to the reinforced area, not the area where the
surface steps down.
Figure 9: Stop block views
STEP VII. FINAL TIE DOWN PROCESS
Drill the holes in the truck frame and bolt on the riser
after the crane tie rods have been tightened. This
requires four 5/8" diameter bolts, grade 5 to grade 8,
on each shear plate.
Drill holes for the crush tube retainers and install bolts
to hold them in place after the crane tie rods have
been tightened. Bolt to frame with 1/2” diameter bolt,
grade 5 to grade 8. See Step IV and refer to Figure 7
for additional information.
Follow the chassis manufacturer’s requirements for
hole locations, etc.
REAR STOP
BLOCK (60128955)
(INSIDE POCKET)
GUSSET STOP
BLOCK (60128954)
99903701:24562/28562INSTALLATION:20131211

PARTS-8
STEP VIII. MARKER SYSTEM
Using a paint marker, mark the nuts and rod after the tie rods are tightened so that a visual mechanism exists to
verify the rods were tightened correctly and to help aid in future visual inspections.
Also mark the clamp plate and the frame to use as a visual aid in inspecting for clamp plate movement on the truck
frame. Paint marks across the frame (Figure 10) and both sides of the clamp plate (Figure 11). If the clamp plate
has moved in any direction relative to the truck frame during use, the marks will no longer line up. This system has
measurement resolution to approximately 1/8" and provides a baseline for future comparison. If the marks degrade
or wear away, please repaint them.
While conducting the crane inspection, monitor the clamp plates for movement. If the clamp plates have moved, the
entire mount should be inspected. Possible corrective action may be necessary- consult IMT for assistance.
Figure 10: Mark painted across the frame and clamp
plate near the center of the truck frame
Figure 11: Marks painted on both sides of clamp
plates
IOWA MOLD TOOLING CO., INC.
BOX 189, GARNER, IA 50438-0189
MANUAL PART NUMBER: 99903701
99903701:24562/28562INSTALLATION:20131211
This manual suits for next models
1
Table of contents
Other IMT Construction Equipment manuals

