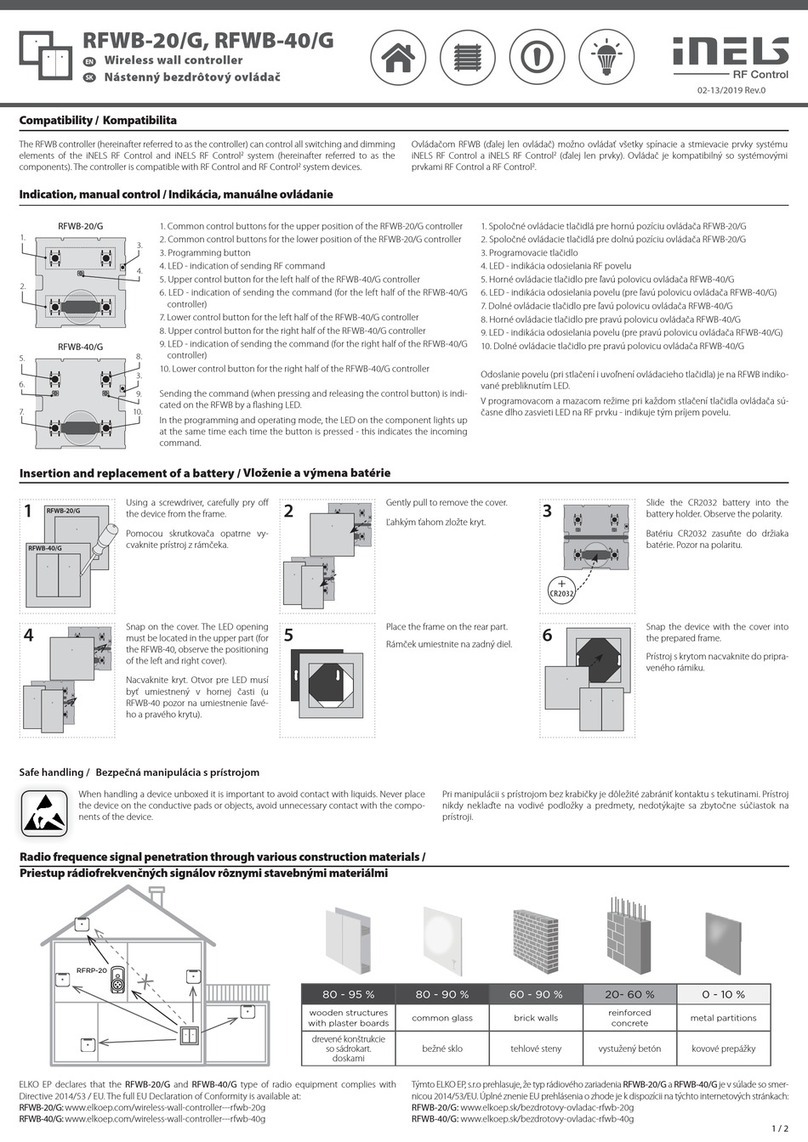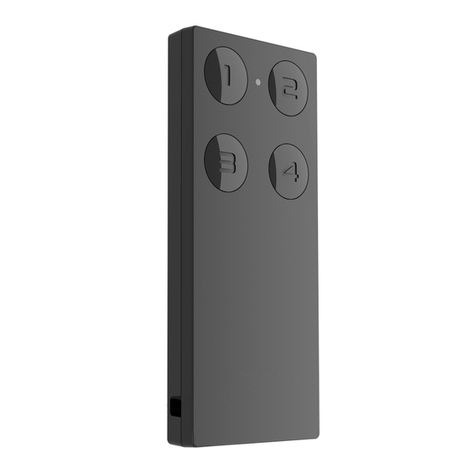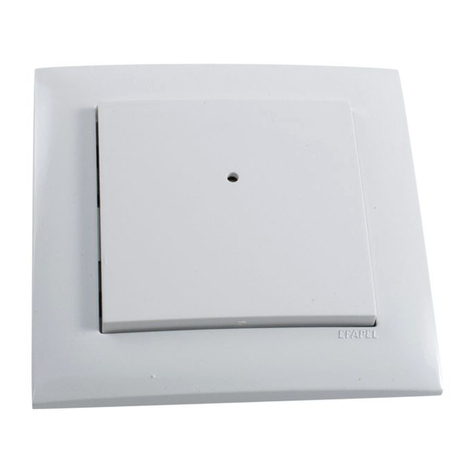
RFWB-20/G, RFWB-40/G
On-wall button controller - 2 buttons
EN
02-59/2015 Rev.3
Made in Czech Republic
RFWB-20/G RFWB-40/G
2/2
Supply voltage:
Transmission indication:
Number of buttons:
Transmitter frequency:
Signal transmission method:
Range in free space:
Other data
Operating temperature:
Operating position:
Mounting:
Protection:
Contamination degree:
Dimensions:
LOGUS90 frame - plastic:
LOGUS90 frame
- metal, glass, wood, granite:
Weight:
Related standards:
* Comes with plastic frame. No installation into multi-frames.
Instruction manual is designated for mounting and also for user of the device. It is always a part of
its packing. Installation and connection can be carried out only by a person with adequate profes-
sional qualification upon understanding this instruction manual and functions of the device, and
while observing all valid regulations. Trouble-free function of the device also depends on transpor-
tation, storing and handling. In case you notice any sign of damage, deformation, malfunction or
missing part, do not install this device and return it to its seller. It is necessary to treat this product
and its parts as electronic waste after its lifetime is terminated. Before starting installation, make
sure that all wires, connected parts or terminals are de-energized. While mounting and servicing
observe safety regulations, norms, directives and professional, and export regulations for working
with electrical devices. Do not touch parts of the device that are energized – life threat. Due to
transmissivity of RF signal, observe correct location of RF components in a building where the
installation is taking place. RF Control is designated only for mounting in interiors. Devices are
not designated for installation into exteriors and humid spaces. The must not be installed into
metal switchboards and into plastic switchboards with metal door – transmissivity of RF signal is
then impossible. RF Control is not recommended for pulleys etc. – radiofrequency signal can be
shielded by an obstruction, interfered, battery of the transceiver can get flat etc. and thus disable
remote control.
Warning
Technical parameters /
Attention:
When you instal iNELS RF Control system, you have to keep minimal distance 1 cm between each units.
Between the individual commands must be an interval of at least 1s.
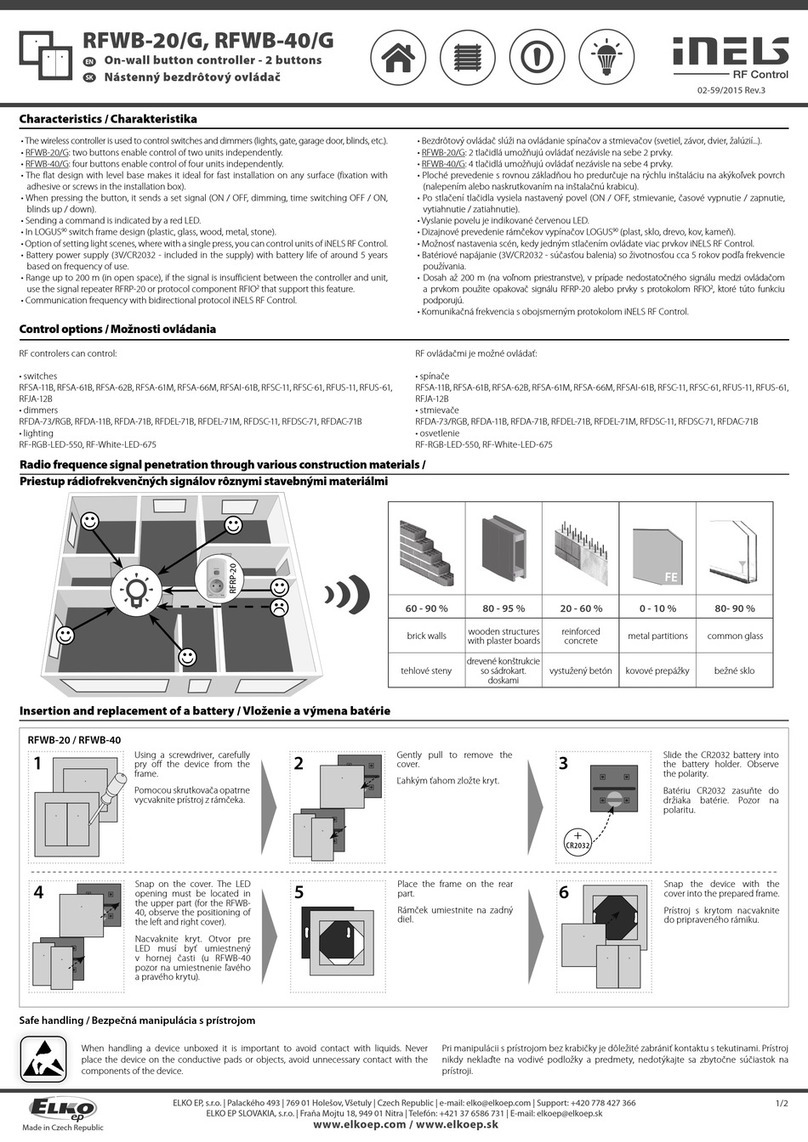
After inserting the battery, the red LED lights up continuously for 3 seconds and then for 5 seconds, the
selected controller function is indicated by flashing LED.
• triple flash - standard RFIO2operating mode
• rapid flashing - mode of compatibility with older actuators
If you do not want to change the function of the controller, you must not press any buttons during this
time
To switch between RFIO2mode and compatibility mode:
If you need to change the operating mode of the controller, after inserting the battery, when the LED is
constantly lit. press buttons 1 and 2 simultaneously and hold until the LED starts to signal the changed
mode (double flash or rapid flash).
Then the buttons must be released. The selected function mode is stored in memory and after
replacing the battery, the controller continues to operate in the same mode.
If the controller is used in RFIO2 mode, then it is necessary to instruct the controller and link to the
actuators switch to learn mode not only the actuator (according to the instructions for the actuator),
but also the controller in the following way:
Remove the battery from the controller, press some of the buttons several times to discharge the
internal capacitors and replace the battery. When the LED lights up, press button 1 and keep it pressed
until the controller starts signaling the learning mode with short flashing LEDs. Then release the button
and the button now works in RFIO2learning mode. To end the learning mode, remove the battery,
press some of the buttons several times. and then replace the battery. Now we press any button and
the controller will start again in RFIO2operating mode.
Indicators, settings
ELKO EP declares that the RFWB-20, 40 type of equipment complies with Directives 2014/30/EU, 2011/65/EU, 2015/863/EU and 2014/35/EU. The
full EU Declaration of Conformity is available at:
www.elkoep.com/wireless-wall-controller---rfwb-20g
www.elkoep.com/wireless-wall-controller---rfwb-40g
ELKO EP, s.r.o., Palackého 493, 769 01 Holešov, Všetuly, Czech Republic
Tel.: +420 573 514 211, e-mail: elko@elkoep.com, www.elkoep.com
Tlačítkový nástěnný ovladač - 2 tlačítka
CZ
ELKO
EP
,
s.r
.o.
|
Palackého
493
|
769
01
Holešov
,
V
šetuly
|
Česká
republika
|
e
-mail:
[email protected] EN Support: +420 778 427 366 | CZ Technická podpora: +420 775 444 609
www.elkoep.com
Napájecí napětí:
Indikace přenosu:
Počet tlačítek:
Frekvence:
Způsob přenosu signálu:
Dosah na volném prostranství:
Další údaje
Pracovní teplota:
Pracovní poloha:
Upevnění:
Krytí:
Stupeň znečištění:
Rozměry:
LOGUS90 rámeček - plast:
LOGUS90 rámeček
- kov, sklo, dřevo, žula:
Hmotnost:
Související normy:
3Vbattery / baterie CR 2032
red / červená LED
2 4
866 MHz, 868 MHz, 916 MHz
unidirectionally addressed message / jednosměrně adresovaná zpráva
up to / až 200 m
-10 ... +50 °C
any / libovolná
glue, screws / lepením, šroubováním
IP20
2
85 x 85 x 16 mm
94 x 94 x 16 mm
38g * 39g *
EN 60730, EN 63044, EN 300 220, EN 301 489
Návod na použití je určen pro montáž a pro uživatele zařízení. Návod je vždy součástí balení. Insta-
laci a připojení mohou provádět pouze pracovníci s příslušnou odbornou kvalifikací, při dodržení
všech platných předpisů, kteří se dokonale seznámili s tímto návodem a funkcí prvku. Bezprob-
lémová funkce prvku je také závislá na předchozím způsobu transportu, skladování a zacházení.
Pokud objevíte jakékoliv známky poškození, deformace, nefunkčnosti nebo chybějící díl tento prvek
neinstalujte a reklamujte jej u prodejce. S prvkem či jeho částmi se musí po ukončení životnosti
zacházet jako s elektronickým odpadem. Před zahájením instalace se ujistěte, že všechny vodiče,
připojené díly či svorky jsou bez napětí. Při montáži a údržbě je nutné dodržovat bezpečnostní
předpisy, normy, směrnice a odborná ustanovení pro práci s elektrickými zařízeními. Nedotýkejte se
částí prvku, které jsou pod napětím - nebezpečí ohrožení života. Z důvodu prostupnosti RF signálu
dbejte na správné umístění RF prvků v budově, kde se bude instalace provádět. RF Control je určen
pouze pro montáž do vnitřních prostor. Prvky nejsou určeny pro instalaci do venkovních a vlh-
kých prostor, nesmí být instalovány do kovových rozvaděčů a do plastových rozvaděčů s kovovými
dveřmi - znemožní se tím prostupnost radiofrekvenčního signálu. RF Control se nedoporučuje pro
ovládání přístrojů zajišťujících životní funkce nebo pro ovládání rizikových zařízení jako jsou např.
čerpadla, el. topidla bez termostatu, výtahy, kladkostroje ap. - radiofrekvenční přenos může být
zastíněn překážkou, rušen, baterie vysílače může být vybita ap. a tím může být dálkové ovládání
znemožněno.
Varování
* Se standardně dodávaným plastovým rámečkem. Neinstalujte do vícerámečků.
Technické parametry
Upozornění:
Při instalaci systému iNELS RF Control musí být dodržená minimální vzdálenost mezi jednotlivými
prvky 1 cm.
Mezi jednotlivými povely musí být rozestup minimálně 1s.
Po vložení baterie se na dobu 3 sekundy trvale rozsvítí červená LED a pak po dobu 5 sekund je
indikována zvolená funkce ovladače blikáním LED.
• dvojblik - standardní provozní režim RFIO
• rychlé blikání - režim kompatibility se staršími aktory
Pokud nechceme měnit funkci ovladače, nesmíme po tuto dobu mačkat žádná tlačítka.
Přepnutí mezi režimem RFIO a režimem kompatibility:
Pokud potřebujeme provozní režim ovladače změnit, po vložení baterie, když trvale svítí LED
stiskneme současně
tlačítko 1 a 2 a držíme dokud LED nezačne signalizovat změněný režim (dvojblik nebo rychlé
blikání). Poté je nutno tlačítka uvolnit. Zvolený režim funkce je uložen do paměti a po výměně
baterie pracuje ovladač dále ve stejném režimu.
Pokud je ovladač používán v režimu RFIO, pak pro zaučování ovladače do aktorů je nutno do
zaučovacího režimu přepnout nejen aktor (dle návodu k aktoru), ale také ovladač a to následujícím
způsobem: Z ovladače vyjmeme baterii, několikrát stiskneme některé z tlačítek, aby došlo k vybití
vnitřních kondenzátorů a vložíme baterii zpět. V okamžiku, kdy se rozsvítí LED stiskneme tlačítko
1 a držíme stisknuté, dokud ovladač nezačne signalizovat zaučovací režim krátkým blikáním
LED. Poté tlačítko uvolníme a ovladač nyní pracuje v zaučovacím režimu RFIO. Pro ukončení
zaučovacího režimu vyjmeme baterii, několikrát stiskneme některé z tlačítek a poté vložíme baterii
zpět. Nyní nemačkáme žádné tlačítko a ovladač se rozběhne opět v provozním režimu RFIO.
Indikace, nastavení
PROHLÁŠENÍ O SHODĚ
Tímto ELKO EP, s.r.o prohlašuje, že typ zařízení RFWB-20, 40 je v souladu se směrnicemi 2014/30/EU, 2011/65/EU, 2015/863/EU a 2014/35/EU.
Úplné znění EU prohlášení o shodě je k dispozici na internetových stránkách:
www.elkoep.cz/nastenny-bezdratovy-ovladac---2-tlacitka---rfwb-20g,
www.elkoep.cz/ovladac-rfwb-40g
ELKO EP, s.r.o., Palackého 493, 769 01 Holešov, Všetuly, Česká republik, Tel.: +420 573 514 211, e-mail: elko@elkoep.cz, www.elkoep.cz,
IČ: 25508717, Společnost je zapsána u Krajského soudu v Brně | Oddíl C, Vložka 28724
