5
WARNING
252148 Rev A
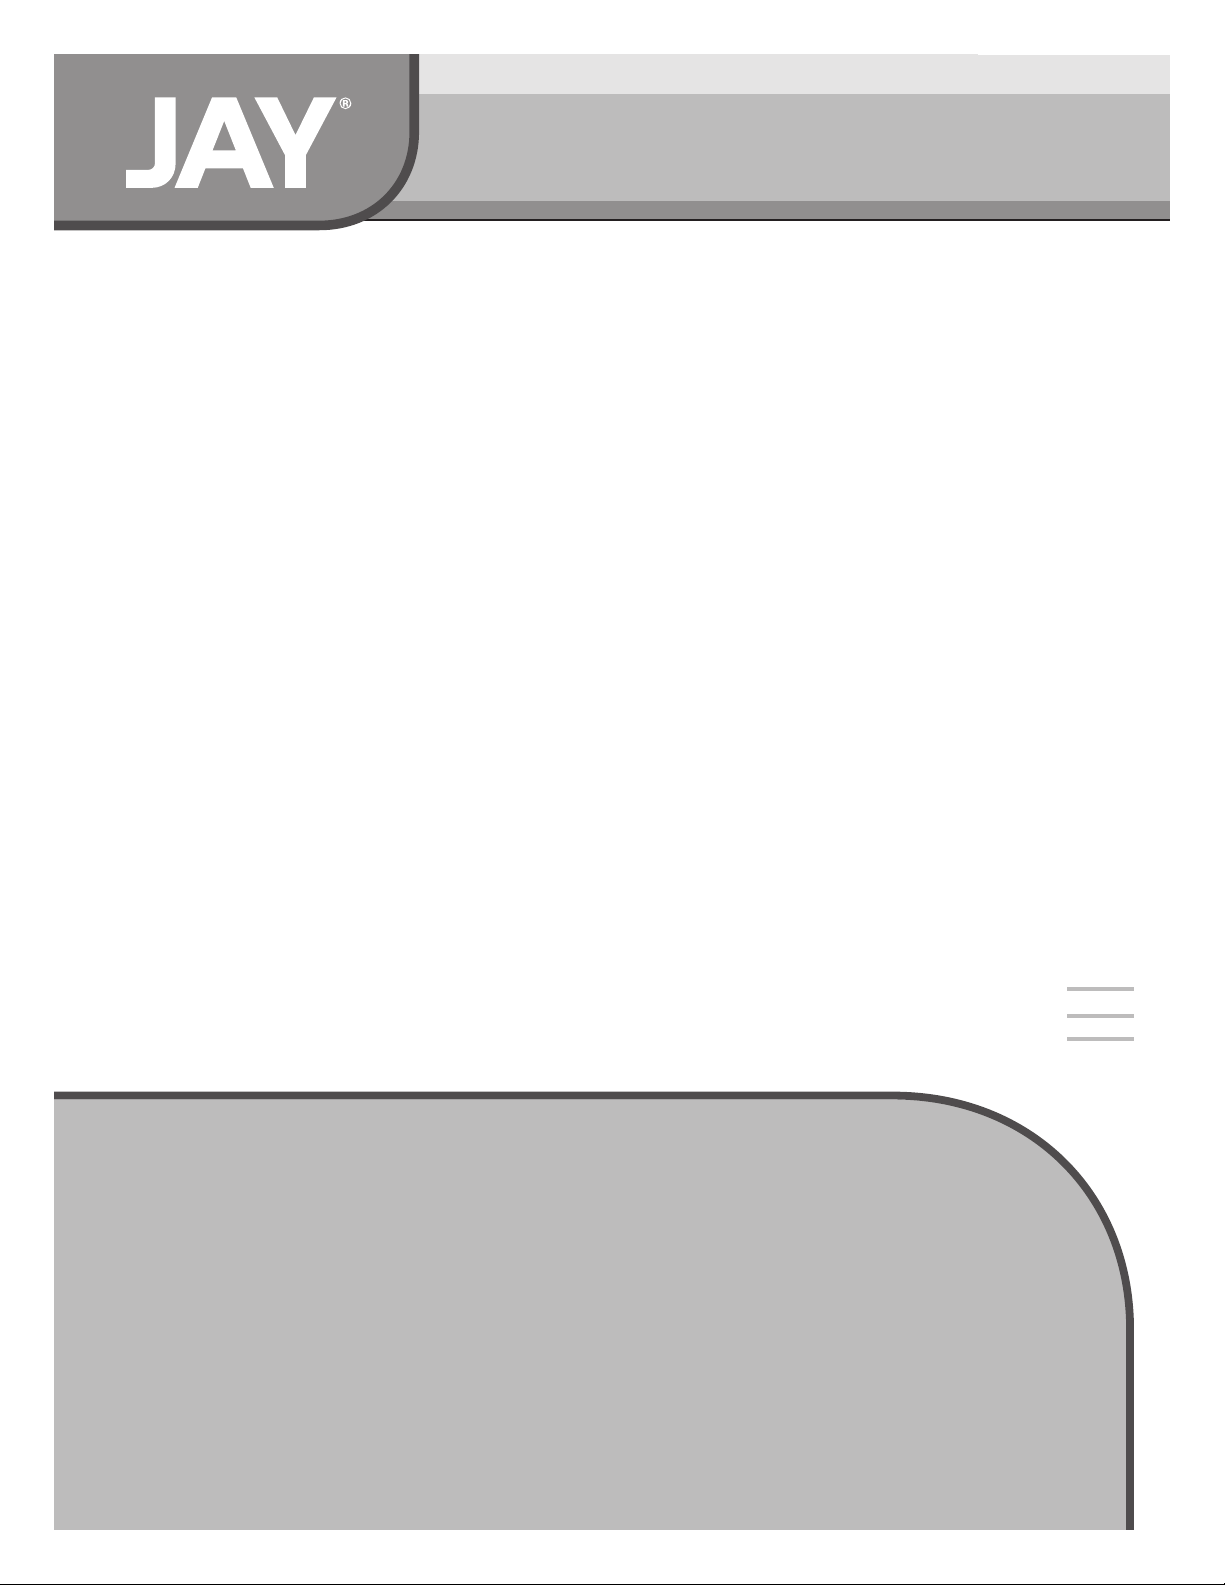
J3 PLUS BACK
III.GENERAL WARNINGS
JA
Y®
WARNING
WARNING
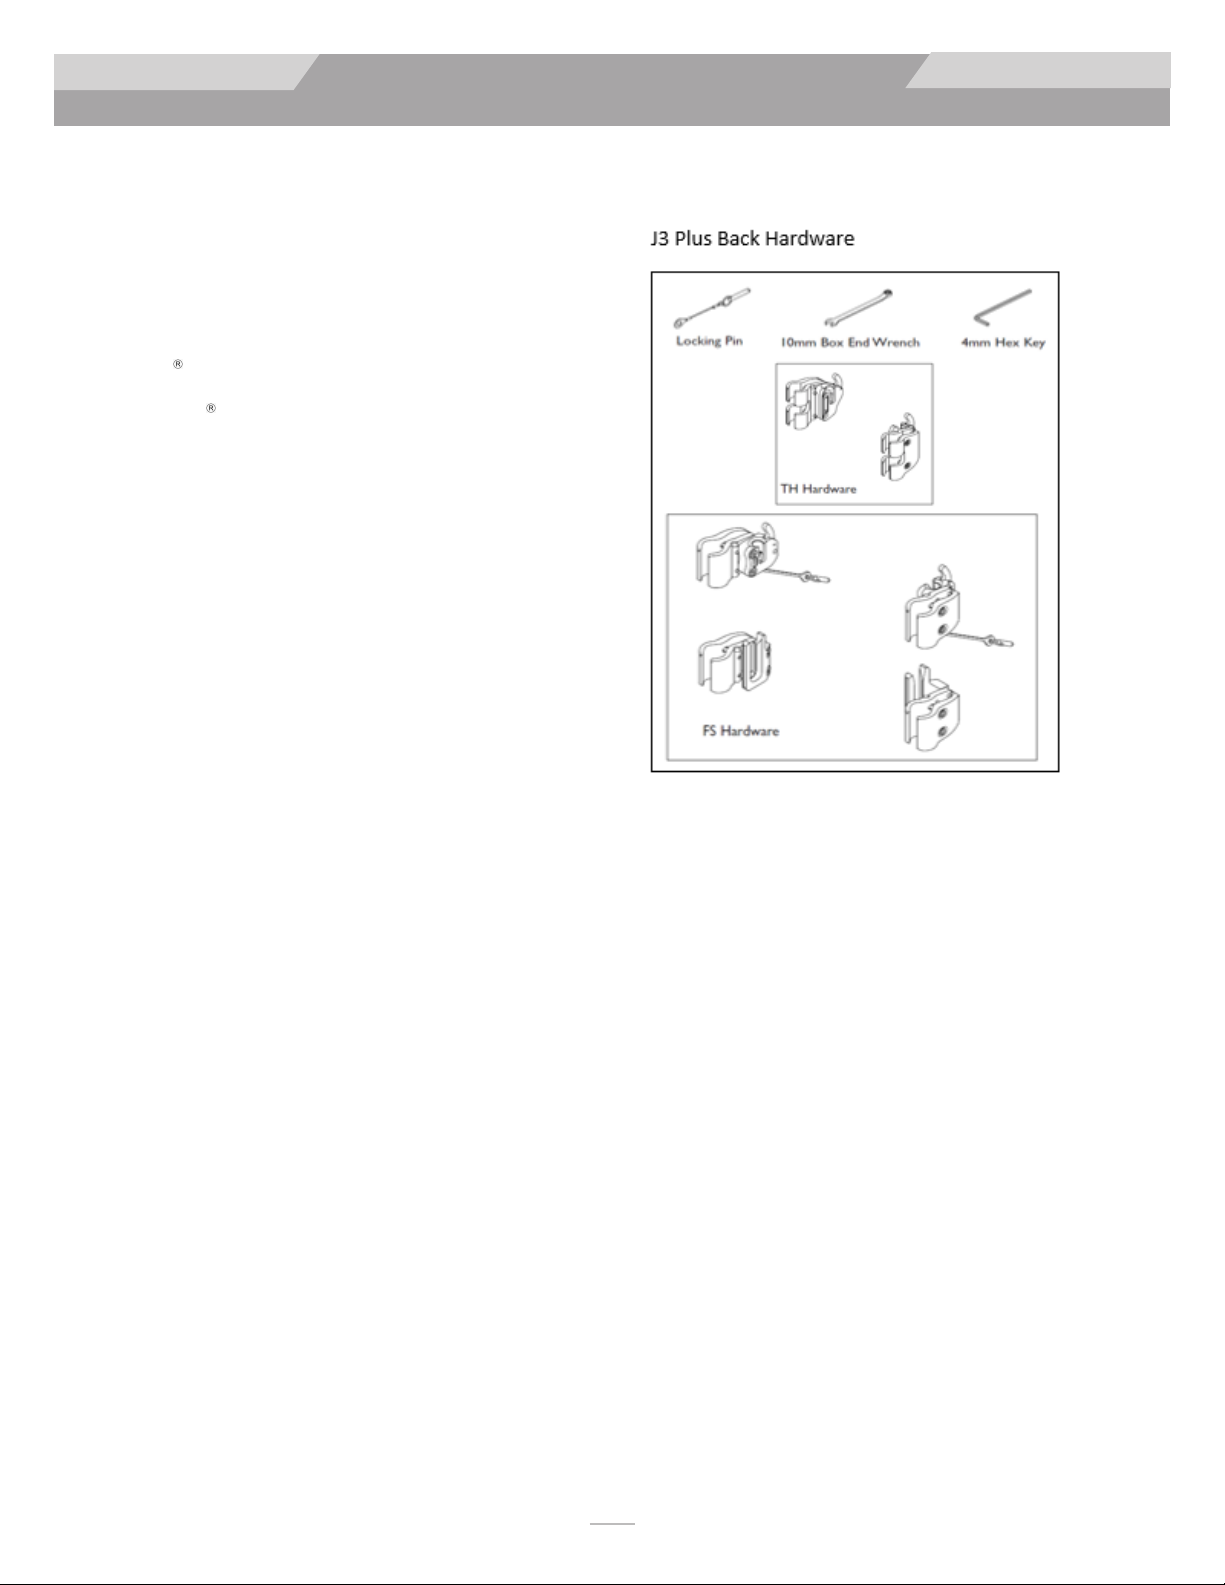
E. J3 PLUS BACK TRANSIT SAFETY
A. CENTER OF GRAVITY
Installing a back support on a wheelchair may effect the
center of gravity of the wheelchair, and may cause the
wheelchair to tip backwards potentially resulting in
injury to the user.
B. ANTI-TIPS
Anti-tip tubes can help keep your chair from tipping over
backward in normal conditions.
1. Sunrise recommends the use of anti-tip tubes.
2. ALWAYS assess the need for anti-tips or an
amputee axle adapter brackets that could be
added to the wheelchair to help increase the
stability of the wheelchair and seating system.
If you fail to heed these warnings, damage to your chair,
a fall, tip-over, or loss of control may occur and cause
severe injury to the rider or others.
C. PUSHING OR LIFTING
Do not use the J3 Plus Back to move or push the wheelchair.
WARNING
If you fail to heed these warnings, damage to your chair, a
fall, tip-over, or loss of control may occur and cause
severe injury to the rider or others.
D. COMPATIBILITY
The J3 Plus Back is designed to be compatible with most
wheelchairs with the following exception:
1. Wheelchairs that are angle adjustable with
recline or tilt, and result in a back angle
greater than 60 from the vertical.
The J3 Plus Back has been dynamically tested for use
in a motor vehicle. This system conforms with
ANSI/RESNA WC-20. If the J3 Plus Back is to be used in
a transit situation, it must be mounted to a wheelchair
that conforms to the performance requirements of ANSI/
RESNA WC-19. For rider safety, please follow all
installation, use, and maintenance instructions within this
manual as well as the transit instructions below.
1. If possible and feasible, the rider should transfer to
the Original Equipment Manufacturer vehicle seat
and use the vehicle restraints.
2. The distance between the top of the user's
shoulder and the top of the back should not exceed
6.5" (16.5 cm).
3. The wheelchair must be labeled as appropriate for
use as a seat in a motor vehicle, dynamically tested
to the performance requirements of ISO Standard
7176-19 and installed, used, and maintained
according to the manufacturer's instructions.
4. If the original wheelchair seat was replaced, the
new seat must be approved for wheelchair transit,
installed and used as indicated in the manufacturer's
instructions.
5. The Wheelchair Tiedown and Occupant Restraint
System (WTORS) should be compatible with the
specific wheelchair, used as indicated in the
manufacturer's instructions, and should comply
with the performance requirements of ISO
Standard 10542.
6. The wheelchair must be forward facing during
transport.
7. In order to reduce the potential of injury to vehicle
occupants, wheelchair-mounted accessories such as
trays and respiratory equipment should be
removed and secured separately.
8. This product is intended for use by adults up to
500 lbs. (227 kg)
9. Postural support devices such as pelvic positioning
belts, anterior trunk supports, or postural supports
such as lateral trunk supports should not be relied
on for occupant restraint in a moving vehicle unless
they are labeled as conforming to ISO Standard
16840-4.
12
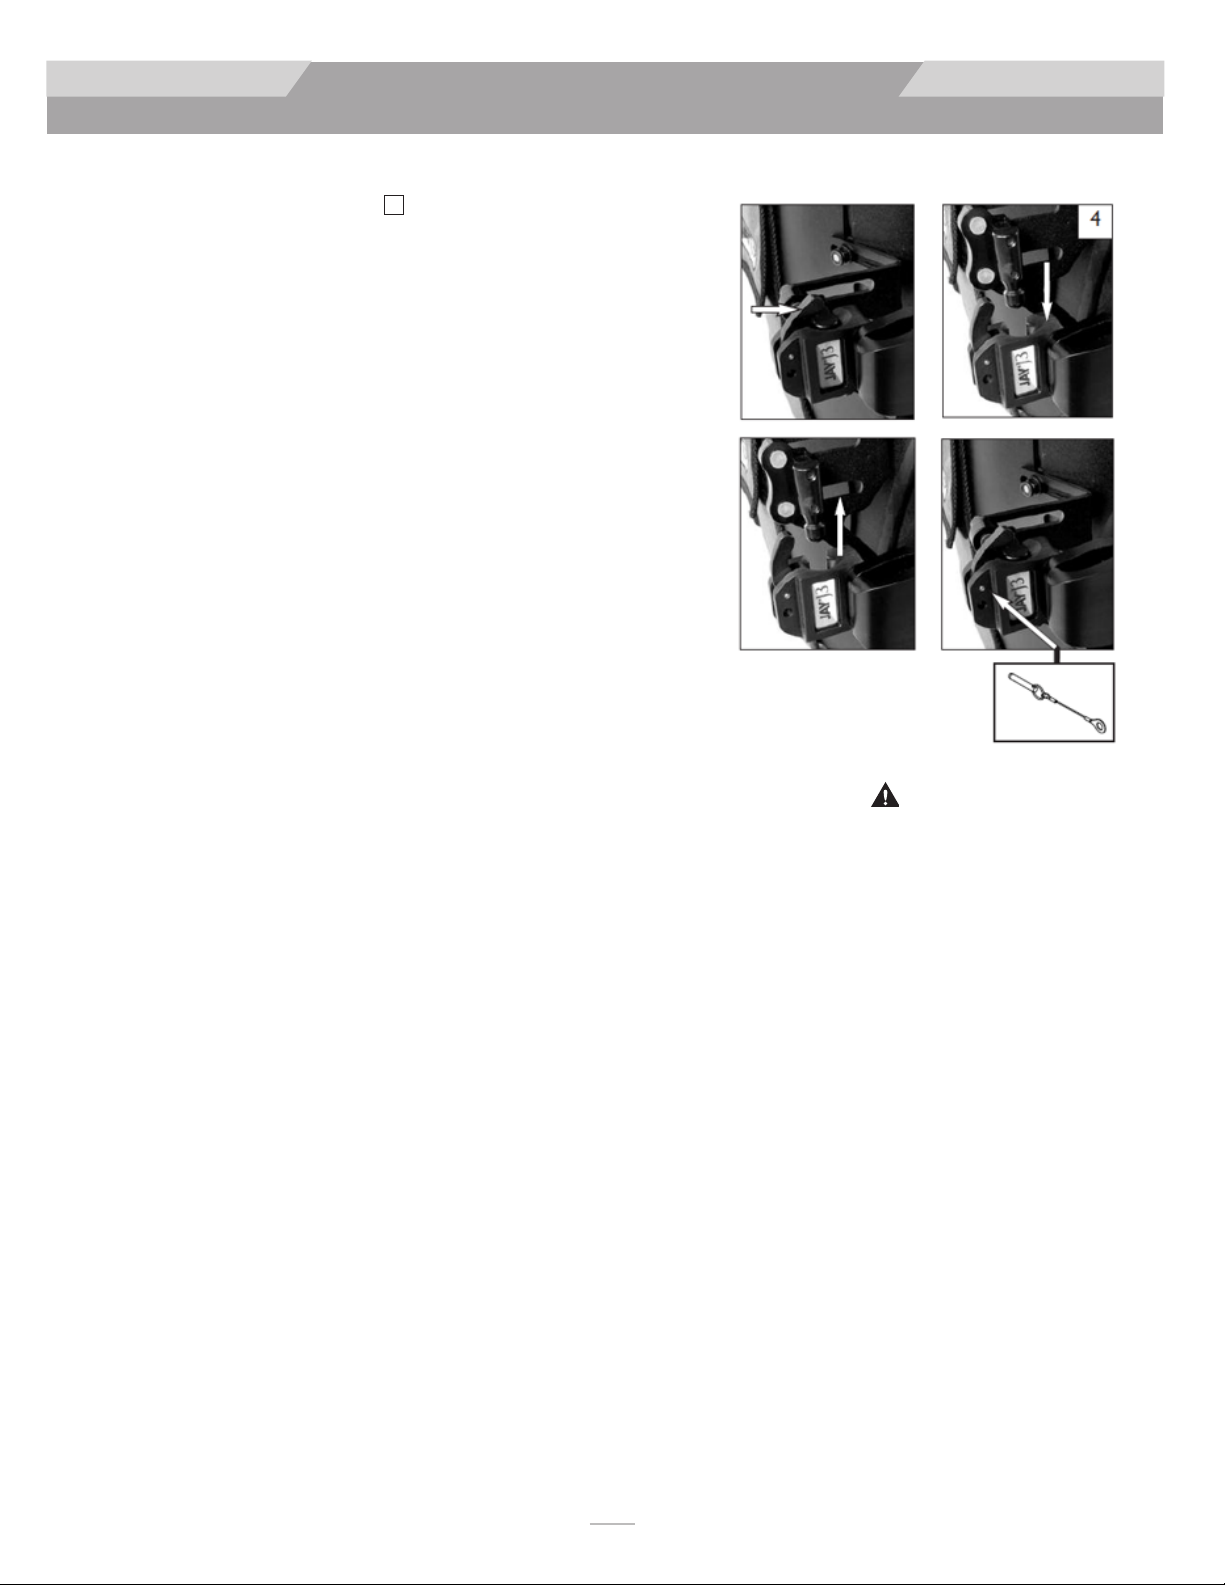
1. Do not use the J3 Plus Back handle to lift the
wheelchair. It is intended only for back removal.
2. Improper use of the back by pushing or pulling
may cause the back to unexpectedly detach from
the wheelchair.
J3 Plus Back used with these types of wheelchairs may cause
the back to accidentally disconnect from the wheelchair.
This could result in a fall or potential injury of the rider
and/or caregiver.