Karma SET 7700 User manual

RADIOMICROFONI PROFESSIONALI
PROFESSIONAL WIRELESS MICROPHONES
Manuale di istruzioni
Owner’s manual
Manual d’instruction
Bediengungsanweisungen
SET 7700
SET 7700
SET 7710
SET 7710

2
1
3
4
5
2
1
34
5
10
9
8
SET 7710
SET 7710
6
7

PRESENTAZIONE
ISTRUZIONI PER I COLLEGAMENTI
:
Nel complimentarci vivamente per la scelta di questo eccellente set
professionale, Vi preghiamo di leggere attentamente le istruzioni che
seguono per ottenere i migliori risultati.
Il SET 7700 è composto da un efficiente microfono radiotrasmittente
operante in banda VHF, e da un sensibile ricevitore in grado di ricevere il
segnale radio emesso dal microfono, rilevarne ed amplificarne la
modulazione audio, per consegnarla a qualsiasi amplificatore, riproduttore,
registratore o miscelatore. Il modello SET 7710 offre le stesse
caratteristiche ma con circuito ricevitore “Diversity” per garantire una
ricezione del segnale radiomicrofonico esente da effetto d'evanescenza.
Operando sul microfono in assoluta libertà da cavi di collegamento, che è
assicurato via radio entro un'ampia area, si beneficia tuttavia di un'ottima
protezione da interferenze, garantita dai sofisticati circuiti di cui gli
apparecchi sono dotati.
Il trasformatore a 12V è separato per evitare ogni possibile interferenza
elettrica, l'antenna estensibile e l'ottima qualità dei componenti impiegati,
assicurano una perfetta ricezione entro un'ampio raggio operativo.
In questo manuale verranno riportate informazioni riguardanti i due
radiomicrofoni: SET 7700 e SET 7710. Le annotazioni riguardanti soltanto
uno dei due modelli verranno indicate volta per volta.
Per ogni descrizione riferiteVi alle figure riportanti l'indicazione dei comandi
e delle prese.
a - AccertateVi che sia l'interruttore del ricevitore (4) che quello del
radiomicrofono (8) siano posizionati su “OFF”.
b - AccertateVi che lo spinotto del trasformatore sia inserito nell'apposita
presa DC-IN (7) quindi inserite il trasformatore nella presa di rete
domestica a 220V 50hz. Nel caso in cui intendiate alimentare il
ricevitore del radiomicrofono tramite la presa accendisigari di un
veicolo, accertatevi che il voltaggio fornito sia esatto e specialmente
che le polarità dello spinotto siano corrette. polarità
o voltaggio errati possono causare il danneggiamento del ricevitore.
c - Sistemate in posizione verticale l'antennina telescopica (5)
estendendola completamente e curando che essa rimanga per quanto
possibile libera da corpi schermanti. Nel modello SET 7710 è
necessario estendere completamente le due antenne telescopiche(5).
Attenzione
ITALIANO
1

d - Tenendo fermo il corpo del radiomicrofono, ruotate il fondo (9) in senso
antiorario: esso si sviterà e potrete accedere al vano batteria.
e - Inserite una batteria da 9V rispettando le esatte polarità e riavvitate il
manico del radiomicrofono. AccertateVi del funzionamento spostando
l'interruttore (8) su “ON”. Noterete accendersi la spina rossa (10) ad
indicarVi che il radiomicrofono è attivo. Rimuovete la batteria dal
microfono in caso di inutilizzo per lunghi perioghi. Questo preverrà
danni causati dalla eventuale fuoriuscita di acido dalla batteria.
f - Inserite il cavetto munito di jack nella presa “OUTPUT”(6) e l'altra
estremità all'ingresso dell'apparecchio di amplificazione o di
registrazione, utilizzando se necessario un apposito adattatore.
dopo aver effettuato il collegamento fra il ricevitore ed il
Vostro amplificatore, agite sul comando di accensione “POWER”
(4) e noterete illuminarsi il led “POWER” (1). Ora ponete su “ON”
l'interruttore (8) del microfono. Durante l'uso, lo spegnimento della spia
(10) accusa l'esaurimento della batteria, che andrà quindi sostituita.
L'interruttore dispone di tre funzioni: “OFF” (spento), “STAND-BY”
(posizione centrale), “ON” (acceso). Durante l'utilizzo del SET, in caso di
pause prolungate, è consigliabile posizionare l'interruttore (8) in
posizione centrale (STAND BY), in tale condizione il radiomicrofono
mantiene il collegamento con la ricevente ma esclude il microfono
riducendo drasticamente il consumo della batteria. All'accensione del
microfono il led (2) posto sulla ricevente si illuminerà a conferma
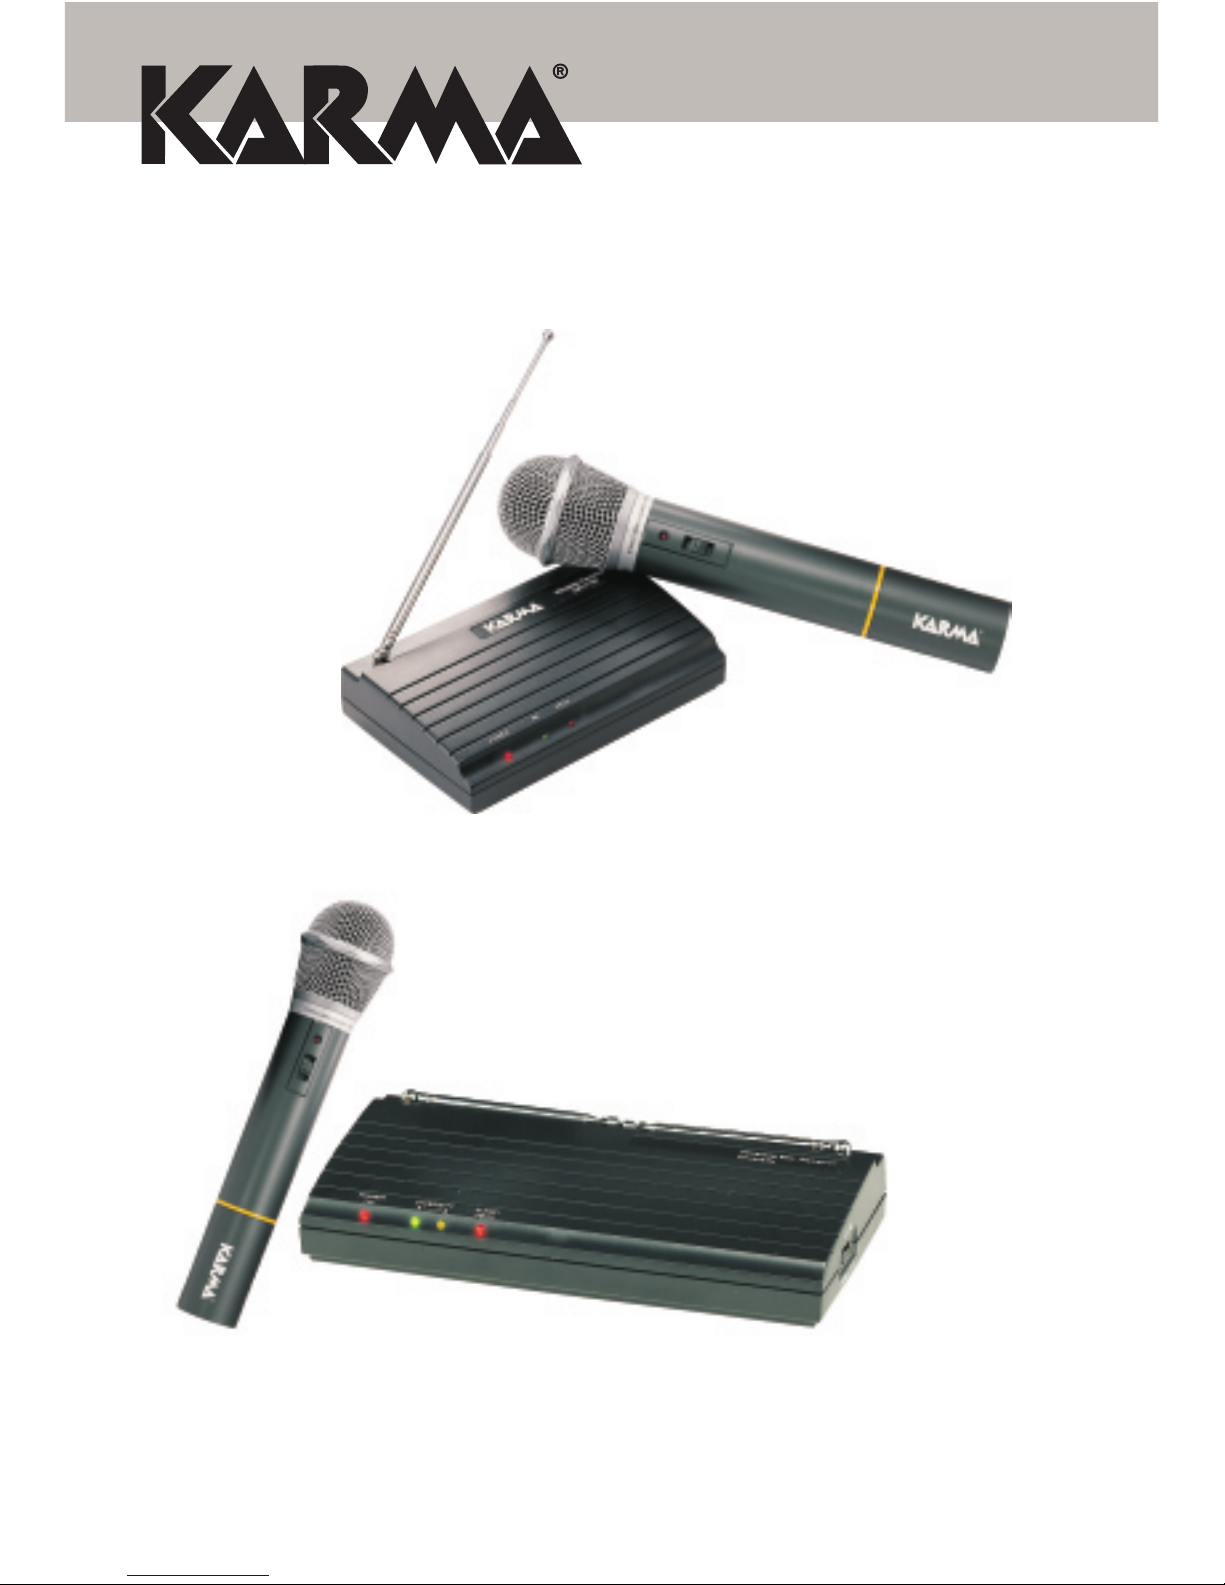
dell'avvenuto collegamento con il microfono. Nel modello SET 7710
sono presenti due led indicanti rispettivamente la migliore ricezione da
parte dell'antenna “A” o “B”.
ritoccate il comando di livello (4) per il valore
desiderato, eventualmente agite sui comandi degli apparecchi di
amplificazione collegati al ricevitore per ottenere i migliori livelli audio,
esenti da distorsioni o da fruscii. : Sul fondo della ricevente,
è presente una vite di regolazione “SQUELCH” che consente di
regolare il rapporto tra raggio di azione del radiomicrofono e il segnale di
disturbo. Regolando opportunamente questo comando, ridurrete quindi
la portata del segnale che però manterrà una qualità priva di
interferenze. Esso è modificabile solo tramite un piccolo cacciavite.
allontanandoVi dal ricevitore con il microfono
acceso, potrete esplorare l'intera area di operatività: il lampeggio o
spegnimento della spia (2) vi indicherà che il collegamento, non è più
affidabile. Nel modello SET 7710 potrete invece notare, in certe
condizioni, illuminarsi alternativamente i led “A” o “B” (2) in continua
ISTRUZIONI PER IL FUNZIONAMENTO
a - Accensione:
b - Regolazione del volume:
C - Operazione a distanza:
Attenzione
2

ricerca del segnale migliore evitando l'effetto di evanescenza.
il collegamento fra il radiomicrofono ed il
ricevitore avviene via radio, pertanto può
essere disturbato da forti campi elettromagnetici o da segnali radio
presenti sulla stessa frequenza operativa. Qualora la spia (2) dovesse
rimanere accesa pur con il radiomicrofono spento, significa che la
frequenza è occupata da altro trasmettitore: in tal caso bisognerà
variare le frequenze sia del ricevitore che del radiomicrofono con
intervento sull'apparecchio a cura di personale specializzato.
durante la conversazione si illuminerà ad
intermittenza indicando l'approssimarsi del livello di saturazione. La
continua accensione di tale spia (3), indica la necessità di ridurre il
volume della voce.
il ricevitore può essere lasciato acceso e sarà
immediatamente operativo all'accensione del microfono
radiotrasmittente. Qualora si desideri una momentanea interruzione del
collegamento, basterà porre in posizione centrale (STAND-BY) il
commutatore (8) del radiomicrofono, mentre per un prolungato
inutilizzo del sistema converrà porre su “OFF” sia il commutatore (8) del
radiomicrofono che quello del ricevitore (4).
a - Evitate di aprire l'apparecchio. Eventuali riparazioni vanno effettuate a
cura di personale esperto.
b - Evitate di esporre gli apparecchi a fonti di eccessivo calore, quali
termosifoni, stufe etc. o ai raggi diretti del sole per tempi prolungati. Se
lasciate il complesso inattivo per lunghi periodi sarà
opportuno scollegare il ricevitore dalla presa di corrente e rimuovere la
batteria dal microfono.
c - Per la pulizia usate esclusivamente uno straccio umido, evitando
detersivi o solventi di qualsiasi genere.
d - Controllate con cura il buono stato dei collegamento fra il ricevitore ed i
Vostri apparecchi audio; eventuali collegamenti imperfetti o
schermature difettose possono tradursi in ronzii o inneschi. Evitate per
quanto possibile la vicinanza al ricevitore di fonti di disturbo, quali
lampade al neon, reattori, motori etc.
E - Trattate i comandi dell'apparecchio con la dovuta delicatezza, evitando
manovre violente, cadute o colpi.
d - Eliminazione di disturbi:
e - Indicatore “PEAK”:
f - Spegnimento:
PRECAUZIONI ED AVVERTENZE
3

CARATTERISTICHE TECNICHE
RICEVITORE (SET 7700)
Dimensioni: 152x98x36mm
Alimentazione: 12-18V 300mA tramite trasformatore accluso
Sensibilità: 10dB/microVolt per 60dB rapporto segnale/disturbo
Reiezione alle spurie: migliore di 90dB
Sistema ricevente: Controllo quarzato su frequenza fissa.
Dinamica: >100dB
Livello audio d'uscita: 300mV su 10KOhm.
T.H.D.: <1%
RICEVITORE (SET 7710)
Dimensioni: 202 x 98 x 34mm
Alimentazione: 12-18V 300mA tramite trasformatore accluso
Sensibilità: 3dB/microVolt per 60dB rapporto segnale/disturbo
Reiezione alle spurie: migliore di 90dB
Sistema ricevente: “Diversity” con controllo quarzato su frequenza fissa.
Dinamica: >100dB
T.H.D.: < 1%
RADIOMICROFONO(SET 7700 / SET 7710)
Tipo: Dinamico
Dimensioni: 52X244mm
Peso: 205 g.
Potenza RF: 15mW, modulazione FM
Emissioni spurie: migliore di 45dBc
Antenna: entrocontenuta
Alimentazione: con batteria da 9Volt (OO6P)
Autonomia: da6a8ore(con batterie alkaline).
La Karma Italiana srl, allo scopo di migliorare i propri prodotti, si riserva il diritto di modificare le caratteristiche
siano esse tecniche od estetiche, in qualsiasi momento e senza alcun preavviso.
4

INTRODUCTION
INSTRUCTION FOR CONNECTIONS
:
We warmly congratulate you for the choice of these excellent and
professional apparatus. Please follow these instuctions carefully, to obtain
the best results.
The wireless system SET 7700 is composed of an efficient wireless
trasmitter microphone acting in VHF band and of a sensitive receiver, which
is able to pick up the output radio coming from the microphone amplifing the
audio modulation and giving it to any amplifier, player, recorder or mixer.
SET 7710 model has the same characteristics but it is a Diversity model that
means that ist receiver grants a signal reception without any fading
surround effects.
The electric circuits of these sets, the high affidability of their components
have been planned to assure you the maximum stability of working, to avoid
the noises in the audio frequency connections, free yourselves by the
condition of the connection cable.
In order to avoid any kind of interferencies, please note that the 12V
transformer is separate from this wireless system. Thanks to the antenna
and the good quality of components used assure you a perfect receipt in a
wild range of operation.
This manual shows all useful information about both wireless system that
are SET 7700 and SET 7710. Follows the indications that refer to your
model and that will be well pointed out each time.
For each description refer to the pictures, showing commands and power
supply positions.
a - Be sure that the power switch (4) of the receiver and commutator of
the wirelessmicrophones (8) be on “OFF”.
b - Be sure that the jack of transformer be good inserted into its DC-IN
plug (7) and then fit in the transformer plug into the 220V-50Hz
current socket. Should you need to plug wireless microphone
system with the electric lighter of your car, be sure that the voltage
stated be right and the polarieties of plug be correct.
reversed polarities or wrong voltage could cause
damages to your wireless microphone system.
reversed polarities or wrong voltage could cause damages to your
wireless microphone system.
c - Extend the telescopic antenna of the receiver (5) in all its lenght and
Attention
ENGLISH
5

be care that they are in high position and not near screened
components or of electrical disturbs. For SET 7710 model do the
same for both telescopic antennas (5).
d - Keeping still the wireless microphone, turn the bottom of its handle
(9) in anti-clockwise: it unscrew itself to open the battery
compartment.
e - Insert the 9Volt battery respecting the right polarities and re-screw
the handle of the wireless microphone. Be sure of the working
moving the (8) switch on “ON”.
A red lighting up of the led (10) will state you that the wireless
microphone is working. If unused for a long period remove the
battery from the microphone, to avoid the acid leakage from battery.
f - Insert the small cable with the jack into the “OUTPUT”
(6) sockets. The other cable-end must be connected to the input of
your recording or amplifying apparatus, using if necessary use an
adaptor.
once completed the connection between the receiver
and your audio apparatus, act on “POWER”(4) switch, the
“POWER” led (1) will light up. Put on “ON” commutators (8) of
microphone. The lighting off of led (10) during the operation means
that battery must be replaced. The microphone switch has three
steps: off/stand by/on. Using the Set, for long pauses we suggest to
put the switch (8) on “Stand by” position it will be connected but
no audio signal will be sent to the receiver and battery
consumption will be strong reduced. Led (2) will light up when
microphone is powered on to state the good connection of
microphone. For SET 7710 two leds will state the best receiving way
if antenna “A” or ”B”.
act on volume control (4) to adjust up to the
wished level, to obtain the best results without any distorsion or
ground noise act on controls of the apparatus connected to the set.
: the “SQUELCH” function can be adjusted by acting under
its base using a little screw-driver. This function is used to optimize
the performance by balancing sound quality/clarity with overall
system range.This adjustment will guarantee a clear, uninterrupted
signal but will reduce overall system range.
going away from the receiver with the
microphone switched-on, you will see the area of capacity: the
flashing or the switching-off of the led (2) will state you that signal is
no more reliable. In particular conditions for SET 7710 model will
OPERATING INSTRUCTIONS
a - Power-on:
b - Volume adjustment:
C - Operating at distance:
Attention
6

light up alternatively or led “A” orled“B” (2) looking for the best signal
avoiding any surrounding effects.
the connection between the wireless
microphone and the receiver, takes place via radio, therefore can be
interfered by strong electro-magnetic range or by radio signals that
are on the same operating frequency. In case the led (2) be switched
-on even if the wireless microphone is switched-off, it means that the
frequency is occupied by other transmitter: in this case it is
necessary to change the frequencies of receiver and wireless
microphone but this operation should be done by skilled personnel.
during the conversation it will ligth up
intermittent stating the closest saturation level. The continuous
lighting up of the led (3) means the necessary to reduce the voice
volume.
the receiver can be let switched-on indefinitely and
will be working immediately at the switch-on of the radio transmitter
microphone. If you wish a temporary pause of the connection, put
the commutator (8) of the wireless microphone on central position
(STAND-BY), while if you will not use the apparatus for a long
period, put the commutators (8) of the wireless microphones and
that one of the receiver (4) on “OFF”.
a - Do not open the equipment without due precautions, in oder to avoid
electric shocks because of the inner high-tension points of the
receiver. Reparations must be done by skilled personnel.
b - Avoid to expose the apparatus to the sun or to heat sources, such as
radiators, stoves etc. If unused for a long period, disconnect the
receiver and remove the battery from the microphones.
c - Clean only with a damp cloth, avoiding detergents or solvents.
d - Uncorrect connections or shielding of the cable connection can
cause buzzings. Control carefully cable an jack pins. Keep receiver
far away from disturbing sources, like neon lamps, reactors, motors
and so on.
e - Handle with care, avoiding rough movements. Do not drop the set.
d - Avoiding of noises:
e - “PEAK” indicator:
f - Switching-off:
WARNINGS.
7

SPECIFICATIONS
RECEIVER (SET 7700)
Dimensions: 152x98x36mm
Power supply: 12-18V 300mA using the provided transformer
Sensitivity: 10dB/microVolt S/N ratio 60dB
Spurious rejection: more than 90dB
Receiver system: Superheterodyne at quarz on fixed frequency
Dynamics: >100dB
Output audio level: 300 mV on 10KOhm
T.H.D.: <1%
RECEIVER (SET 7710)
Dimensions: 202x98x34mm
Power supply: 12-18V 300mA using the provided transformer
Sensitivity: 3dB/microVolt S/N ratio 60dB
Spurious rejection: more than 90dB
Receiver system: “Diversity” Superheterodyne at quarz on fixed frequency
Dynamics: >100dB
Output audio level: 300 mV on 10KOhm
T.H.D.: <1%
WIRELESS MICROPHONE (SET 7700/SET 7710)
Type: dynamics
Dimensions: 52x244mm
Weight: 205g.
RF power: 15mW, FM Modulation
Spurious emission: more than -45dBc
Antenna: inner receptacle
Power source: with 9Volt battery (006P)
Autonomy: 6 - 8 hours (using alkaline battery).
Karma Italiana Srl, in order to mend one’s products, reserves the right to modify the features both technical and
aesthetical, any time and without notice.
8

INTRODUCTION
INDICATIONS POUR LES RACCORDEMENTS.
:
Félicitations pour avoir choisi cet ensemble professionnel Haute Fidélité.
Veuillez lire attentivement la notice d'emploi ci-après afin d'obtenir le
maximum de services de ces appareils. Le SET 7710 est composé d'un
micros opérantent sur bande VHF et d'un récepteur sensible. Le récepteur
est en mesure de capter dans un vaste rayon, l'émission de radio provenant
du micro. La modulation audio pourra passer dans n'importe quel
amplificateur, reproducteur, enregistreur ou mélangeur. Le SET 7710 offres
les mêmes characteristiques mais il est pourvu d'un système «Diversity»
qui assure une recéption du signal radiomicrophonique sans effect
d'evanouissement. Ils permettent également d'éliminer tous les parasites
typiques des raccordements en haute fréquence. Notre système offre un
double avantage: l'efficacité des micros traditionnels et l'absence des
câbles de raccordement.
Le transformateur à 12V est séparé afin d'éviter tout genre d'interférence
tandis que la bonne qualité de ses composants et sa antenne extensible
assurent une parfaire reception dans un vaste rayon.
Dans cette manual sont mentionnés tous renseignements pour les deux
radiomicrophones SET 7700 et SET 7710. Chaque fois vous trouverez les
indications relatives à un modèle ou à l'autre.
Pour chaque description, référez-vous aux illustrations avec l'indication des
commandes et des prises.
a- Assurez-vous que l'interrupteur (4) du récepteur et les
commutateurs des micros (8) soient sur “OFF”.
b - Assurez vous que la fiiche du transformeur soit dans la prise DC-IN
(7) inserez donc le transformateur dans votre prise de courant à
220Volt 50hz. Si vous desirez le brancher à la prise du briquet de
votre voiture, assurez vous que le voltage et la polarité soient
exactes. polaritè ou voltage incorrecte peuvent
endommager l'appareil.
c - Alonger complétement la petite antenne téléscopique (5) du
récepteur; elle doit rester en position élevée et loin d'élements
faisant écran ou de sources de perturbations electriques. Pour le
modèle SET 7710 il faut alonger les deux antennes téléscopiques
(5).
Attention
FRANCAIS
9

d - Pour accéder au compartiment des piles il faut dévisser le micro en
tournant sa poignée dans le sens contraire aux aiguilles d'une
montre: le micro se dévissera au point fileté (9).
e - Plaçer la pile de 9Volt en respectant la polarité. Revisser le micro.
Testez son fonctionnement en plaçant l'interrupteur (8) sur “ON”. La
lampe témoin (10) s'allume un instant: le micro est en fonction. En
cas de non utilisation prolongée de l'appareil, débrancher le
récepteur de la prise de secteur et retirer la battérie du micro. Dans
ce cas sera évité tout dommage de sortie de la solution acide de la
batterie.
f - Placez le câble muni de la fiche pourvu de “jack” dans la prise
“OUTPUT”(6). L'autre extrémité du câble est branchée à
l'entrée de l'appareil audio (amplificateur, enregistreur, etc.), si
necessaire utilisez-vous un adaptateur.
Si la lampe témoin (10) s'eteinde pendant le fonctionnement signifie que la
pile est déchargée et elle doit être remplaçée.
après le raccordement entre le récepteur et votre
appareil audio, appuyez sur la touche “POWER” (4). La lampe
témoin «POWER» (1) s'allume. Régler l'interrupteur (8) du
microphone sur “ON”. Si la lampe témoin (10) s'eteinde pendant le
fonctionnement signifie que la pile est déchargée et elle doit être
remplaçée. L'interrupteur du micro a trois positions «OFF» (étaint),
«STAND-BY» (attente), «ON» (allumé). Pendant l'usage du SET en
cas de long arrêt est reccomandé de plaçer l'interrupteur en position
centrale (STAND-BY) il y aura toujour le signal mais votre micro
n'enverra aucun son et l'usage de la batterie est bien reduit.
Pendant l'allumage du micro la lampe témoin (2) s'allume. Pour le
modèle SET 7710 les lampes témoins sont deux à indiquer la
meilleur réception de l'antenne «A» ou «B».
régler les commandes du volume (4) pour le
niveau desiré. Eventuellement vous pouvez intervenir pour régler le
volume de l'enregistrement sur les appareils branchés au récepteur
pour obtenir les meilleurs resultats. la fonctionne de
“SQUELCH” peut être modifiée à l'aide d'un tournevis agissant sur
le fond de l'appareil. Cette fonctionne permit le réglage entre le
rayon d'action du radio micro et le signal sans interferences. Si la
commande est opportunément réglée le champ d'action du micro
sera reduit mais la qualité du signal sera sans interférences.
pour vérifier votre champ d'action, éloignez-
INDICATIONS POUR LE FONCTIONNEMENT
a - Mise en marche:
b - Réglage du volume:
:
c - Opération à distance:
Attention
10

vous le micro du récepteur à la main. Les lampes témoin (2) ne
doivent ni clignoter ni s'éteindre. Pour le modèle SET 7710 dans
certaines situations s'allument alternativement le temoin «A» ou
«B» (2) à la recherche du signal le meilleur pour éviter l'effet
d'evanouissement.
la liaison entre le micro et le ré
cepteur se faisant par la radio, elle peut etre fortement brouillée par
des champs électromagnétiques ou des signaux radio présents sur
la même fréquence. Si la lampe témoins (2) s'allument, même avec
le micros è teints, cela signifie que la fréquence est occupée par un
autre émetteur. Dans ce cas faire varier la fréquence du récepteur et
du micro, par un spécialiste.
pendant la conversation il clignote à
signaler l'approchage du niveau de saturation. L'allumage fixe du
témoin (3) signifie que il est necessaire de reduire le volume de la
voix.
vous pouvez laisser le récepteur allumé
constamment. Il sera immédiatement fonctionnel quand vous
allumerez le micro émetteur. Pour une interruption momentanée de
la liaison, placez le commutateur du micro (8) sur (STAND-BY). Au
contraire, en cas de non utilisation prolongé e des appareils placez
le commutateurs (8) des micros et celui du récepteur (4) sur “OFF”.
a - Ne pas ouvrir l'appareil sans prendre certaines mesures de sécurité
afin d'éviter décharges électriques. Faire appel à des spécialistes
pour toutes réparations.
b - Eviter l'exposition prolongée de l'appareil à toutes sources de
chaleur (radiateur, etc.) ainsi que aux rayons du soleil. Eviter
également d'exposer l'appareil à la poussière l'humidité ou la
fumée. En cas de non utilisation prolongée de l'appareil, débrancher
Le recepteur de la prise de secteur et retirer la battérie du micro.
c- Contrôler l'état des raccordements du récepteur à
vos appareils audio. Des accouplements imparfaits peuvent
provoquer des bourdonnements. Ne pas placer le récepteur prés de
sources possibles de parasites, comme tube au néon, réacteurs,
moteurs etc.
d - Pour le nettoyage utiliser seulement un chiffon humide en évitant
détergents ou solvants.
e - Eviter les chutes et les chocs et manoeuvrer délicatement les
commandes.
d - Elimination des parasites:
e - Indicateur «PEAK»:
f- Arrêt:
PRECAUTIONS ET MODE D'EMPLOI
11

CARACTERISTIQUES TECHNIQUES
RECEPTEURÊ: (SET 7700)
Dimensions: 152x98x36mm
Alimentation: 12-18V 300mA à l'aide du transformeur inclu.
Sensibilité: 10dB/micro Volt; pour 60dB rapport signal/parasite
Réjection aux parasites: mieux que 90dB
Système de réception: avec antenne super hétérodyne au quarz fréq. fixe
Dinamique: >100dB Niveau de sortie audio: 300mV sur 10K OhmT.H.D.:
<1%
RECEPTEURÊ: (SET 7710)
Dimensions: 202x98x34mm
Alimentation: 12-18V 300mA à l'aide du transformeur inclu.
Sensibilité: 10dB/micro Volt; pour 60dB rapport signal/parasite
Réjection aux parasites: mieux que 90dB
Système de réception: «ÊDiversityÊ» avec antenne super hétérodyne au
quarz fréq. fixe
Dinamique: >100dB Niveau de sortie audio: 300mV sur 10K OhmT.H.D.:
<1%
MICRO EMETTEUR (SET 7700 / SET 7710)
Type: dynamiqueDimensions: 52x244mm
Pois: 205gr
Puissance de sortie: 15mW RF, modulation FM
Emission de parasites: mieux que -45dBc
Antenne: interne
Alimentation: par batterie de 9Volt (006P)
Autonomie: 6-8 heures (avec batterie alkaline)
La Karma Italiana srl, se réserve le droit de modifier ses produits sans aucun préavis, dans le but de les améliorer.
12

VORWORT
ANSCHLUSSANWEISUNGEN
:
Wir beglückwünschen Sie sehr zu der Wahl des professionelle. Lesen Sie
bitte di nachfolgende Beschreibung um das beste Ergebnis zu erhaltern.
Das SET 7700 besteht aus ein empfindliche Funksendemikrophone, die
auf Band VHF arbeitet und aus einem besonderen Empfangsgerät, das
selbst über größe Entfernungen empfangen kann.
Das SET 7710 has die gleichen technischen Daten mit ein Diversity Kreis
die eine gute Empfangsignal garantiert.
Einen einwandfreien Empfang, ohne die typischen Funkschatten, wird
Ihnen garantiert. Ihnen wird ein echtes HI-FI Ergebnis geboten, auch ohne
Kabel.
Der 12V Stromwandler wird getrennt um jede Interferenz zu vermeiden.
Die Antenne und die gute Qualität des Komponenten sind eine Garantie
von perfekt Hörempfang.
Lesen Sie die nachfolgende Anweisungen fur SET 7700 oder SET 7710.
Jeder Beschreibung entspricht eine Reihe von Bildern.
a - Erst kontrollieren Sie, daß der Schalter des Empfangsgeräts (4) und
der Schalter der Radiomikrophone (8) in Stellung “OFF” steht.
b - Kontrollieren Sie daß der Stecker vom Adapter in der DC-IN Buchse (7)
gesteckt wird und dann stecken Sie den Stecker in der Steckdose von
220V 50 hz. Wenn Sie die Feuerzeug Steckdose Ihres Autos brauchen
kontrollieren Sie daß auf gleiche Netzspannung vom Adapter wird
gleiche von Ihre Steckdose. Beachten Sie das Polariät und
Voltage korrekt sind
c - Verlängern Sie die Stabantennen (5), die möglichweise in
Senkrechposition bleiben müssen, und achten Sie, daß sie nicht in der
Nä he von Abschirmendelemente oder von Störungsquellen sind. Das
SET 7710 hat zwei Stabantennen.
d - Halten Sie den Korper des Mikrophons und drehen seinen Handgriff
gegen den Uhrzeigersinn: Er wird sich an dem Verbindungspunkt (9)
abschrauben.
e - Fügen Sie jetzt die 9 Volt Batterie ein und schrauben Sie den Handgriff
wieder an. Kontrollieren Sie die Funktionierung, indem Sie den Schalter
(8) in Stellung “ON” stellen. Die Signallampe (10) wird einen Augenblick
lang leuchten: der Mikrophon ist angeschaltet. Die Ausschaltung der
Signallampe (18) zeigt die Ausladung der Batterie, die ersetzt werden
Achtung
DEUTCH
13

muss. Sollten Sie das Mikrophon uber langere Zeit nicht benutzen,
entfernen Sie die Batterie.
F - Stecken Sie das Jack-Kabel in eine von zwei Steckdose “OUTPUT” (6).
Das andere Ende des Kabels wird mit Ihrem Verstärker bzw.
Tonbandgerät usw verbunden. Um Notfalls benutzen Sie ein Adaptor.
nach den drücken Sie den Schalter “POWER”(4).
Die Signallampe „POWER“ (1) wird aufleuchten. Die Ausschaltung
der signallampe (10) zeigt die Ausladung der Batterie, die ersetzt
werden muss. Stellen Sie jetzt den Kommutator der Mikrophone
(19) in Stellung “ON”. Achtung: das Umsschalter von der Mikrophon
hat drei Stellungen: „ON“ (eingeschaltet), STAND-BY (erwarten),
„OFF“ (ausgeschaltet). Wenn das Umschalter auf “erwarten” wird,
gibt es die Radiosignal aber keinen Schall wird man hören. Die
Signallampe (2) wird aufleuchen um das Mikrophone gut
verbindet ist. Das SET 7710 hat zwei Signallampe „A“
und „B“ für den besten Empfang zu anzeigen.
regeln Sie die Antrieben (4). Die beste
Ergebnisse haben Sie mit Reglung die Geräte, die mit den Set
verbinden sind. das SET-7700 hat die “SQUELCH”
funktion die unter den Apparat danke zu einen kleinen
Schraubanzieher reguliert werden kann.
wenn Sie sich mit dem
angeschalteten Mikrophon vom Empfangsgerät entfernen, kö
nnen Sie den Empfangsbereichs durchsuchen: Das Aufleuchten
oder die Ausschaltung der Signallampen (2) bedeuten, dass die
Verbindung nachlässt. Fur SET 7710 konnen auch beleuchen beide
Signallampe „A“ oder „B“ (2) um die beste Signal zu finden.
die Verbindung zwischen Mikrophon
und Empfangsgerät wird mittels Radio hergestellt; daher kann sie
durch starke Elektomagnetfelder oder Radiosignale gestö
rt werden. Sollten beide Signallampen (2) eingeschaltet bleiben,
auch wenn das Mikrophone abgeschaltet sind, ist die Frequenz von
einem anderen übertragungsgerät besetzt. Auf diesem Fall wird es
nötig, die Netzfrequenz sowohl ins Mikrophon als auch in die
Empfangsstation zu
INBETRIEBNAHME
a - Einschaltung:
b - Einstellung der Lautstärke:
:
c - Funktionierung bei Entfernung:
d - Ausschluß der Störungen:
Achtung
ändern: Das wird von Fachleuten. Gemacht.
wä hrend den Vortrag beleuchtet die Singallampe fur
den Sättigungsgrad. Die Beleutung der Signallampe (3) bedeutet das
Niveau von Volumen senken muss.
die Empfangsstation kann eingeschaltet bleiben; sie wird
sofort tätig bei Einschaltung des Mikrophons sein. Wenn Sie eine Pause
der Verbindung wunschen, stellen Sie die Kommutatoren des Mikrophons
e - „PEAK“ Anzeiger:
f - Anschaltung:
14

8) in Stellung “Erwartung ” stellen Sie die Kommutatoren (13) und (4) auf
“OFF”, wenn Sie Ihr Set nicht benutzen.
a - Öffnen Sie das Gerät ohne die notwendigen Maßnahmen nicht, um elektrische
Schläge zu vermeiden. Eventuelle Reparaturen mussen vom Fachpersonal
durchgeführt werden.
b - Achten Sie darauf, daß weder das Mikrophon, noch die Empfangsstation
großen.Wä rmequellen ausgesetzt sind (Heizung, pralle Sonne etc.). Sollten
Sie das Mikrophon uber langere Zeit nicht benutzen, entfernen Sie die Batterie.
c - Zur Reinigung muß man nur einen feuchten Lappen, ohne irgendwelche
Reinigungs- oder Losungsmittel verwenden.
d - Uberprüfen Sie die Verbindung der Empfangsstation zu Ihrem Verstärker bzw.
Mischpult. Falsche Anschusse bzw. mangelhafte Abschirmung können Stö
rungen verursachen. Betreiben Sie die Empfangsstation nicht in der Nähe von
Störungsquellen wie Motoren, Neonlich etc.
e - Steuerungen des Gerätes mit der erforderlichen Rücksicht behandeln, unter
Vermeidung von kräftigen Handlungen, Fallen oder Stößen.
EMPFANGER (SET 7700)
Abmessungen: 152x98x36mm.
Speisung: 12-18Volt 300mA mit eigeliefert Adapter.
Empfindlichkeit: 10dB/microVolt für 60dB Signal/Störung
BeziehungStörsignalunterdruckung: besser als 90dB.
Empfangssystem: super Quarz HeterodynDynamik: >100dB.
Lautstärke-Ausgang: 300mV über 10KOhm.
T.H.D.: <1%
EMPFANGER (SET 7710)
Abmessungen: 202x98x34mm.
Speisung: 12-18Volt 300mA mit eigeliefert Adapter.
Empfindlichkeit: 10dB/microVolt für 60dB Signal/Störung
BeziehungStörsignalunterdruckung: besser als 90dB.
Empfangssystem: „Diversity“ mit super Quarz HeterodynDynamik: >100dB.
Lautstärke-Ausgang: 300mV über 10KOhm.
T.H.D.: <1%
SENDERMIKROPHONE (SET 7700 / SET 7710)
Typ: dynamisch
Abmessungen: 52x244mm.
Gewicht: 205 g.
Ausgangstärke RF: 15 mW, FM.Störsignalsenden: besser als -45dBc.
Antenne: innere.Speisung: mit Batterie 9Volt (006P)Dauer:6-8 Stunden (mit
alkaline Batterie).
VORSICHTSMAßNAHMEN UND WARNUNGEN
TECHNISCHE DATEN
15

La garantisce il buon funzionamento del prodotto descritto nel
presente certificato per un periodo di dodici mesi dalla data di acquisto.
Il certificato di garanzia compilato in tutte le sue parti e convalidato dallo scontrino fiscale
rilasciato dal rivenditore è l’unico documento che dà diritto alle prestazioni in garanzia e
dovrà essere esibito al personale autorizzato all’atto di ogni richiesta di intervento in
garanzia. Il presente certificato di garanzia esclude ogni altra forma di garanzia per vizi ed
attribuisce solo il diritto alla riparazione gratuita del prodotto che dovesse risultare inidoneo
al funzionamento, escludendo altresi ogni diritto alla risoluzione del contratto di
compravendita, alla riduzione del prezzo ed al risarcimento dei danni; è espressamente
esclusa inoltre la responsabilità della ditta KARMA ITALIANA srl per ogni altro danno
comunque dipendente o connesso con la vendita del prodotto eventualmente difettoso.
La garanzia non potrà trovare applicazione in tutti quei casi in cui il prodotto sia stato
danneggiato dopo la vendita, usato non conformemente alle istruzioni d’uso e
manutenzione che lo accompagnano o risulti installato o riparato impropriamente.
L’esame degli eventuali difetti di funzionamento e delle loro cause sarà sempre effettuato
da tecnici autorizzati dalla KARMA ITALIANA srl. Eventuali spese di trasporto in un
laboratorio autorizzato (e ritorno) per l’accertamento del diritto alla garanzia, sono a carico
del cliente.
KARMA ITALIANA srl
Modalità di applicazione della garanzia:
CERTIFICATO DI GARANZIA
GUARANTEE - GARANTIE
DA COMPILARE IN TUTTE LE SUE PARTI E CONSERVARE
MODELLO DATA DI ACQUISTO
SCONTRINO FISCALE
- L’utilizzo di questo prodotto è soggetto alla concessione amministrativa PPTT nazionale.
- This model can be used under national licence.
- L’usage de cet appareil est sujet à l’autorisation national.
- Die Benutzung von diesem Apparat ist under national Bewilligung.
INDIRIZZO DELL’ACQUIRENTE
TIMBRO DEL RIVENDITORE

DICHIARAZIONE CE DI CONFORMITÁ
DECLARATION OF CONFORMITY
La KARMA ITALIANA SRL con sede in Busto Arsizio (Va),
Via Gozzano 38Bis, partita IVA 01632210124, dichiara sotto la
propria responsabilità che i prodotti:
e
al quale questa dichiarazione si riferisce sono conformi alle
seguenti norme:
EN 50081-1 EN 50082-1 ETS 300 445
e quindi rispondenti ai requisiti essenziali delle direttive
89/336/EEC
.
Karma Italiana S.r.l.
Presidente
Busto Arsizio, 28 Gennaio 2000
RADIOMICROFONO SET 7700
RADIOMICROFONO SET 7710

Karma Italiana srl
Via Gozzano, 38bis - 21052 BUSTO ARSIZIO (VA)
Tel. 0331-628244 - Fax. 0331-622470
www.karma-italiana.itWeb Site:
This manual suits for next models
1
Table of contents
Languages:
Other Karma Microphone manuals

Karma
Karma SET 5002 User manual

Karma
Karma 6170 User manual

Karma
Karma SET 8102 User manual

Karma
Karma SET 8200LAV User manual

Karma
Karma SET 6090 User manual

Karma
Karma SET 6090 User manual

Karma
Karma SET 7822 User manual

Karma
Karma DM 789 User manual

Karma
Karma SET 169 User manual

Karma
Karma DMC 943 User manual