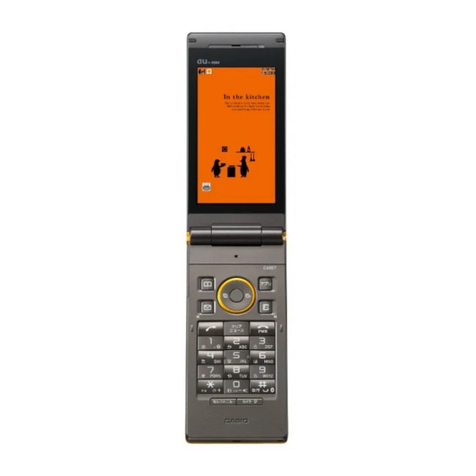
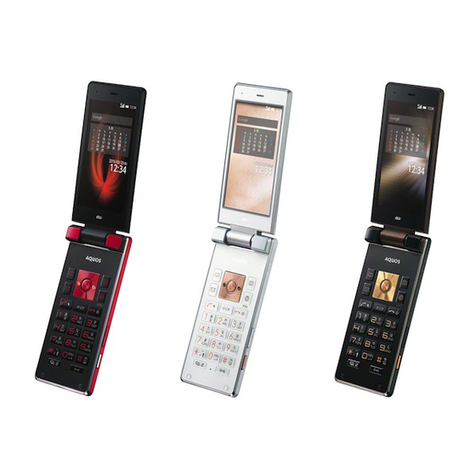
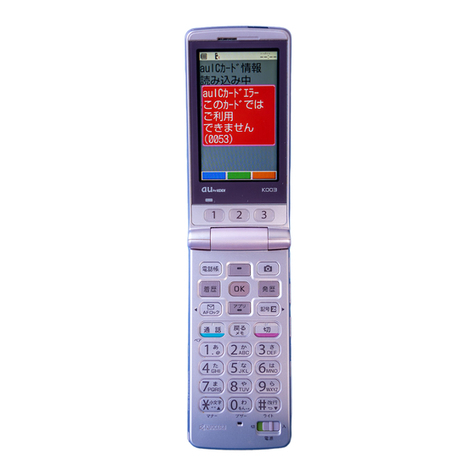
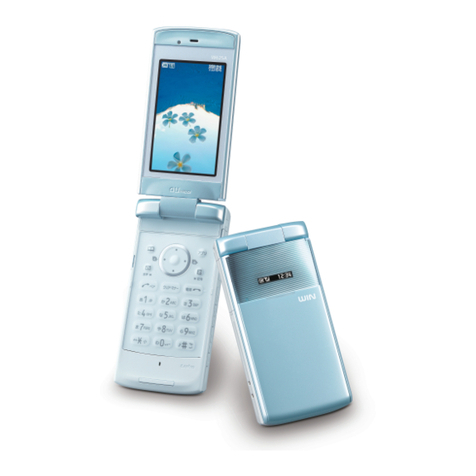
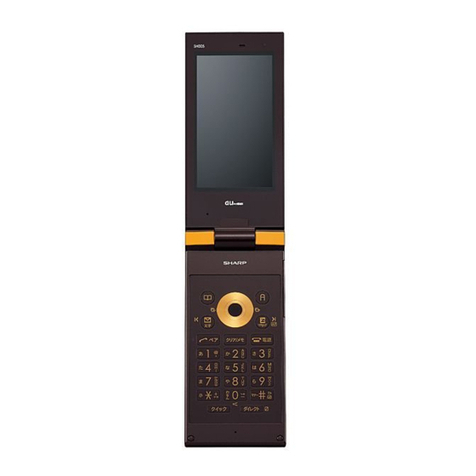
KDDI infobar 2 User manual

Basic Manual
Contents/Before Use
PhoneCall
InputtingText
AddressBook/
PairFunction
Mail
Camera
EZweb/EZ News Flash
EZ Navi
EZTelevision(1Seg)
RemoteCtrlLock
OtherFeatures/
Troubleshooting
Index

Printed Manuals for INFOBAR 2 (Japanese)
The INFOBAR 2 comes with Basic Manual and a Manual.
The following manuals are available in the au website:
¡Download site for "Basic Manual" (Japanese and English) and "Manual" (Japanese only)
(http://www.au.kddi.com/torisetsu/index.html)
¡The au online manual (Japanese) for searching by keyword
(http://www.au.kddi.com/manual/index.html)
The au online manual (Japanese) is also available from EZweb:
<How to access>
"au one Top" →"auお客さまサポート(au Customer Support)"→"調べる(Information)"
→"オンラインマニュアル(Online Manual)".
Note that the shape and typeface used in the screens of this manual may differ from those
used in the actual screens, and some screens are partly omitted.
Check the website of au or customer support below, for the trouble on your INFOBAR 2.
¡From INFOBAR 2
:
"au one Top" →"auお客さまサポート(au Customer Support)"→"調べる(Information)"
→"オンラインマニュアル(Online Manual)"→"故障診断Q&A(Malfunction Diagnosis Q&A)".
¡From PC
:http://www.au.kddi.com/audesignproject/index.html
INFOBAR 2 Manual
English version is not available.
INFOBAR 2 Basic Manual
Equivalent to this English PDF manual.
Preface
Thank you for choosing INFOBAR 2.
Before using your INFOBAR 2, be sure to read the INFOBAR 2 "Basic Manual (this PDF
manual)" to ensure proper use of your INFOBAR 2. After you have finished reading, keep this
PDF manual and the printed manuals (Japanese) in a safe place for your reference whenever
you need.
Contact the au shop or the au Customer Service Center for replacements if you lose either of
these manuals.
目次/準備
通話
文字入力
アドレス帳/ペア機能
メール
カメラ
EZweb/
EZニュースフラッシュ
EZナビ
EZテレビ(ワンセグ)
遠隔ロック
その他機能/困ったときは
English(英語)/
中文(中国語)
索引
目次/ご利用いただく前に
auICカード
基本機能
EZweb
EZナビ
LISMO/
メディアプレーヤー
EZアプリ(BREW®)
EZFeliCa
PCサイトビューアー
M機能
便利な機能
auのネットワークサービス
付録/索引/
クイックガイド
EZテレビ(ワンセグ)/
EZ・FM
メール
カメラ
データフォルダ
microSDTMメモリカード

1
Manners for Using Cellphones
A cellphone always generates weak electric waves while its power is ON.
Be considerate of others around you to use your cellphone enjoyably and safely.
In some places, the use of cellphones is prohibited.
Consider where to use your cellphone and be careful of the volume
of your voice.
Electric waves from cellphones may adversely influence
medicaldevices and equipment.
●There may be someone with a pacemaker
around you in crowded places such as
trains. Turn your cellphone OFF in such
places.
●Follow the instructions of hospitals and
other medical institutions where it is
forbidden to use or carry cellphones.
●Do not make calls in cinemas, theaters, museums, libraries and other similar
places. Turn your cellphone OFF or set it to the manner mode to prevent others
around you from being inconvenienced by ring tones for incoming calls or mails.
●When on a crowded street, use your
cellphone in places where you do not
prevent others from passing.
●When on a train or in a hotel lobby, move to
an area where you will not bother others
around you.
●Take care not to talk too loudly during
conversations.
●When you shoot photos or movies of others
with your cellphone, get permission from
them.
●Using cellphones while driving is dangerous
and also forbidden by the law.
●Be sure to turn your cellphone OFF before
you board airplanes. The use of cellphones
onboard airplanes is forbidden by the law.
OFF
OFF

2
Page 38 Page 40
Page 52
Page 57
Page 64
What You Can Do with INFOBAR 2
You can send mails to other cellphones
or personal computers.
You can shoot photos or movies and
easily send them by E-mail.
You can easily call and send mail to
your registered Popular Contact.
For other features, refer to page 72.
You can search various location
information with the functions of
"EZ Navi Walk", "Passenger Seat Navi",
"Evacuate Navi" or "Security Navi".
Pair Function Mail
You can download Chaku-Uta®,
Chaku-Uta-Full®, and wallpapers, etc.
EZweb
Camera EZ Navi
EZ Television (1Seg)
Page 66
メール
通話
You can watch the Digital Terrestrial
Broadcasting for Mobile Television
Service (1Seg).

3
Page 27
Page 12
Page 12
Page 12
Page 23
Manner Mode and Answer Phone
Manner Mode Answer Phone
With Manner Mode, you can set the
ringer not to sound so as not to bother
the people around you.
Press for more than one second
while the standby screen is displayed.
The caller can leave a message
when you cannot answer the phone.
Press for more than one second
while the standby screen is displayed.
Check the Power, Reception and Battery!
Keep the "power" ON for normal use.
You cannot talk on the phone if the "radio wave" is too weak.
Keep the power ON to make or answer calls.
Press for more than one second.
It is sometimes difficult to receive the radio wave in some
places even within a service area.
" " indicates the reception condition.
If the remaining battery power is too low, you may not be
able to use the cellphone properly.
" " indicates the remaining battery power.
Be careful of the remaining "battery" power.
ON
“I can’t answer
the phone
right now.”
(Japanese)

4
Do Not Use the Cellphone While Driving
Using cellphone while driving is subject to penalties.
Drive Mode
Turn the Power OFF or Set Drive Mode While Driving.
Viewing E-mails and watching the screen
Holding a cellphone in your hand to make phone calls or watching the screen to
view E-mails etc., while driving shall be subject to penalties. (The implementation
of the revised Road Traffic Law on November 1, 2004)
By setting Drive Mode, you will enable the caller to hear a response message such
as "Now driving. I cannot answer the phone right now...(Japanese)", and to store a
message in Answer Phone.
“Now driving.
I cannot answer
the phone right now...”
(Japanese)
Calling with a cellphone in your hand
①Press while the standby
screen is displayed.
②Use to select "Useful Tools"
and press [Select].
③Use to select "Manner Mode"
and press [Select].
④Use to select "Drive"
and press [Set].
⑤Use to select "Continuous Mode"
and press [Set].

5
Page 47
Page 18
Beware of Junk Mails and One-ring Calls!
If you receive junk mails...
You can prevent arrival of junk mail by changing E-mail
address.
●Mail Filter
●Change E-mail Address
Using the mail filter function, you can select to reject E-mails sent from specified
addresses and to reject Spoof E-mails.
The following mail functions are available for preventing arrival of junk mails.
・Reject E-mails with "未承諾広告※(Unsolicited advertisement)" in the subject.
・Reject E-mails from specified addresses.
・Reject Spoof E-mails .
If you receive calls from unknown numbers...
It may be "One-ring Calls" intended to trick you into calling back and accessing
unwanted pay programs.Be careful to a call from unknown number.
In case of a missed incoming call with a length of 3 seconds orless, will appear
on the incoming call history list, so that you can classify it as a
"
One-ring Call
"
.
●Icon for One-Ring Calls

6
Disaster Message Board Service
Registering
Safety
Information
Referring to
Safety
Information
"au one Top"
→"災害用伝言板(Disaster Message Board)"
http://dengon.ezweb.ne.jp/
How to
Access
When a big scale disaster occurs, you can register your safety
information through EZweb. The registered safety information can be
referred from anywhere in Japan through EZweb or Internet.
¡When a big scale disaster occurs, you can register yoursafety
information such as your condition or comments,from au
cellphone, to " 災害用伝言板 (Disaster Message Board)"
created on EZweb.
¡After the registration of your safety information, you can notify
by E-mail your family or acquaintances you have previously
designated that you registered your safety information on "災
害用伝言板 (Disaster Message Board)".
¡You can check the safety information of the person you desire
to know about, by entering his/her phone number from EZweb
or Internet*1.
*1The safety information can be accessed at
http://dengon.ezweb.ne.jp/ from cellphones of other carriers,
PHS or personal computer.
* The maximum preservation period of the registered
information is 72 hours.
* The maximum number available for each registration is 10.
When the number of registration exceeds 10, the information
will be overwritten from the oldest one.
* The demonstration of this service can be referred to anytime
by "au one Top" →"auお客さまサポート(au Customer
Support)" →"災害用伝言板(デモ版) (The demonstration of
Disaster Message Board)".
* Select "English" to use the English mode.
I’ m fine.

7
Before Use
Phone Call Making a Call.......................................................................... 20
Making an International Call................................................... 20
Answering a Call..................................................................... 21
Calling Back (Outgoing Calls/Incoming Calls)........................ 22
Adjusting the Other Party's Voice Volume.............................. 22
Using Answer Phone .............................................................. 23
Changing Ringer Volume and Type ........................................ 25
Setting Manner Mode............................................................. 27
Manners for Using Cellphones................................................. 1
What You Can Do with INFOBAR 2.......................................... 2
Manner Mode and Answer Phone............................................ 3
Check the Power, Reception and Battery ! .............................. 3
Do Not Use the Cellphone While Driving ................................. 4
Beware of Junk Mails and One-ring Calls ! .............................. 5
Disaster Message Board Service ............................................. 6
Contents................................................................................... 7
Confirming the Package Contents ........................................... 9
Name of Parts ....................................................................... 10
How to Charge the Battery Pack............................................ 11
Turning the Power ON ............................................................ 12
Switching Screen Display to English...................................... 12
Basic Operation...................................................................... 13
Viewing the Screen................................................................. 15
Displaying the Menu............................................................... 16
Initializing E-mail and EZweb Settings ................................... 17
Displaying Your Phone Number and E-mail Address............. 17
Changing Your E-mail Address .............................................. 18
Before Use
Inputting Text How to Input Characters ........................................................ 28
Address Book
/Pair Function
Registering Data in Address Book ......................................... 33
Making a Call from Address Book.......................................... 35
Editing Address Book Data .................................................... 36
Registering Data from Outgoing/Incoming Calls.................... 37
Registering Data as Popular Contact..................................... 38
Making a Call to the Popular Contact .................................... 39
Mail About E-mail........................................................................... 40
Creating and Sending E-mail ................................................. 41
Reading Received E-mail ....................................................... 44
Replying to Received E-mail .................................................. 46
Blocking Junk Mails ............................................................... 47
About C-mail .......................................................................... 48
Creating and Sending C-mail ................................................. 49
Reading Received C-mail....................................................... 51
Contents
Camera What You Can Do with Camera.............................................. 52
Shooting Photo ...................................................................... 54
Viewing Photos....................................................................... 55
Attaching Photo to E-mail Message....................................... 56
About EZweb.......................................................................... 57
Displaying au one Top ............................................................ 58
Bookmarking Frequently-Accessed Site................................ 59
Accessing Bookmarked Site .................................................. 60
Viewing Charge ...................................................................... 60
Downloading Chaku-Uta®/Chaku-Uta-Full®.......................... 61
What You Can Do with EZ News Flash .................................. 62
Enable to use EZ News Flash................................................. 63
EZweb/
EZ News Flash
EZ Navi What You Can Do with EZ Navi.............................................. 64
EZ Television
(1Seg)
What You Can Do with EZ Television (1Seg) .......................... 66
Watching EZ Television (1Seg) ............................................... 68
Ending EZ Television (1Seg) ................................................... 69
Remote Ctrl Lock
In Case You Lose Your INFOBAR 2........................................ 70
Other Features........................................................................ 72
Troubleshooting...................................................................... 73
Other Features/
Troubleshooting
Index Index....................................................................................... 74
8
Before Use

Before Use
●INFOBAR 2 Main Unit
●USB Cable
(Sample)
●Desktop Holder●Battery Pack
Confirming the Package Contents
●Stereo Earphones
(Sample)
●SANYO Round-type
Earphone Jack Conversion
Adapter 03
●CD-ROM (Japanese)
MDR-
E0921
by Sony
●Warranty (Japanese)
●Precautions in Use (Japanese)
●Global Expert Owner’s Guide (Japanese)
●LISMO Installaction Guide (Japanese)
●Osaifu-Keitai®Basic Manual (Japanese)
●Promotional Fliers (Japanese)
●AC Adapter and microSD™ Memory Card are not included in the package. Please
purchase the Common AC Adapter 01. microSD™ Memory Cards are also available
separately.
Information
●Basic Manual (Japanese) ●Manual (Japanese)
目次/ご利用いただく前に
auICカード
基本機能
EZweb
EZナビ
LISMO/
メディアプレーヤー
EZアプリ(BREW®)
EZFeliCa
PCサイトビューアー
M機能
便利な機能
auのネットワークサービス
付録/索引/
クイックガイド
EZテレビ(ワンセグ)/
EZ・FM
メール
カメラ
データフォルダ
microSDTMメモリカード
目次/準備
通話
文字入力
アドレス帳/ペア機能
メール
カメラ
EZweb/
EZニュースフラッシュ
EZナビ
EZテレビ(ワンセグ)
遠隔ロック
その他機能/困ったときは
English(英語)/
中文(中国語)
索引
9
Before Use

10
Before Use
Name of Parts
Do not take out the
card when not
necessary as your
phone number is
recorded on it.
au IC card
Optical Sensor
Earpiece
Speaker
Display
Flat-type Earphone
Terminal/Cover
Center Key
Cursor Key
EZ apps Key
EZ/Symbol Key
Power/End Key
Microphone
(Mouthpiece)
Dial Keys
Call/Pair Key
Clear/Memo Key
Mail/Character Key
Address Book Key
Lens(Camera)
Flash/Pocket Light
Infrared Port
Incoming/Charge
Indicator
microSDTMMemory
Card Slot/Cover
External Connector/Cover
Battery Pack/Cover
Built-in Antenna
Charge Terminal
FeliCa Mark
Built-in Antenna(TV)
Strap Hole

11
Before Use
●The battery pack can also be charged by directly inserting
the Common AC Adapter 01 connector (not included in the
package) into the external connector on the INFOBAR 2.
Information
How to Charge the Battery Pack
Charge Indicator
Desktop Holder
Connector
Common AC Adapter
01 (not included in
the package)
¡Red light is on →Charging
¡Light is off →Charging is completed
The battery pack is not fully charged at the time of purchase. Charge the
battery pack before using your INFOBAR 2 for the first time.
Connect the Common AC Adapter 01 (not included in the package), plug the
power plug into a power outlet, and insert the INFOBAR 2 to the desktop
holder. If you charge the battery pack while the INFOBAR 2 is turned on, it
beeps when charging starts or ends.
1
2
3
②
①

●Turning the Power OFF
Check the radio wave reception.
Press for more than one
second.
The standby screen appears.
Press for more than one second.
* is displayed while charging.
* When appears, you cannot make or receive calls.
* When appears, you may not be able to make or receive calls.
Check the battery level.
Standby Screen
High
Strong Weak Very
weak
Out of
service area
Medium
Medium Low Zero
Turning the Power ON
Press while the
standby screen is displayed.
The Set Language screen appears.
Use to select "English"
and press [Set].
The screen display is set to English.
1
2
Switching Screen Display to English
Menus, messages and other screen display language can be switched
between Japanese and English.
12
Before Use

●
〜
Up Down Left Right
¡
Moving the cursor up
¡
Increasing the volume
¡
Moving the cursor down
¡
Decreasing the volume
¡
Moving the cursor left
¡
Viewing Incoming Calls
¡
Moving the cursor right
¡
Viewing Outgoing Calls
Cursor keys are indicated in this
manual as follows:
¡
Viewing Address Book
¡
Accessing E-mail/C-mail
Menu
¡
Switching character type
¡
Making/answering a call
¡
Accessing Popular Menu
¡
Entering phone numbers or
characters
¡
Setting/releasing Manner
Mode
¡
Viewing Main Menu
¡
Selecting an item where
the cursor is placed
¡
Accessing EZ apps
(BREW®) Menu
¡
Accessing EZ Service
Menu
¡
Entering symbols and
others
¡
Turning the power ON/OFF
¡
Ending calls or operations
¡
Setting/releasing Answer
Phone
¡
Erasing characters
¡
Returning to the previous
screen
¡
Turning ON the pocket light
Key Functions
Basic Operation
13
Before Use

Pressing the key executes
the function displayed at
the lower left
Pressing the key executes
the function displayed at
the lower right
Pressing the key executes
the function displayed at
the lower center
Press .
Press . Press .
Press dial key.
Press .
Use to select
an item and
press .
Use the assigned key to operate the item indicated in the underpart of the
display. The displayed items may differ depending on the screen.
Selecting items/Returning
Use to select
an item and
press .
Items in the Underpart of the Display and the Operation
To select an item, use to move the cursor and press . In some cases,
numbered items can also be selected by pressing the corresponding dial
key. Press to return to the previous screen if you get confused or make a
wrong operation. Press to return to the standby screen.
<Example>
Standby Screen
14
Before Use

①
②
③
①
②
③
④
⑤
⑥
⑦
⑧
⑨
During a call
Running EZ Television (1Seg)
Running EZ apps (BREW®)
Using EZweb
Battery level
Reception condition
microSDTM Memory Card inserted
④
⑤
⑥
Unchecked missed call
Manner Mode ON
Vibrator ON
Answer Phone ON
Ringer volume OFF
Currrent date and time
Unread E-mail
Unread C-mail
⑧
⑦
⑪
⑩
⑨
⑬
⑫
Viewing the Screen
⑬
⑫
⑪
⑩
The main icons are listed below.
15
Before Use

16
Before Use
Press .
Main Menu
About Main Menu
About EZ Service Menu
You can enjoy all kinds of services, such as connecting to the EZweb
information site, EZ Navi, EZ Channel-Plus and so on.
Ex.) Camera Function
Screen
Ex.) EZnavi Screen
Standby Screen EZ Service Menu
Standby Screen
Press .
Use to select
an item and
press .
Use to select
service.
Each one of the INFOBAR 2 functions can be accessed.
Displaying the Menu

17
Before Use
Press while the standby
screen is displayed, and
press [OK].
Initialization automatically provides
your E-mail address.
Press while the standby
screen is displayed, and
press .
Your phone number and E-mail
address are displayed.
Press [OK].
1
1
2
●Initialization can also be performed by pressing or while the standby screen is
displayed.
Information
Initializing E-mail and EZweb Settings
Displaying Your Phone Number and E-mail Address
Application to the EZweb service is required in advance to use the E-mail and
EZweb services. Contact au shops or the au Customer Service Center if you
did not apply to the service at the time of purchase.
Perform the EZweb initialization before using this service.
●For choosing an e-mail address of your
own choice, refer to pages 18 to 19.

18
Before Use
Use to select "Eメールアドレス
の変更 (Change E-mail Address)"
and press [Select].
Use to select "Other" and
press [Select].
Changing Your E-mail Address
E-mail Address
△△△ ezweb.ne.jp
@
Customizable Part
Domain
1
2
3
4
Press while the standby
screen is displayed.
Use to select "E-Mail Setup"
and press [Select].
Table of contents
Other KDDI Cell Phone manuals

KDDI
KDDI ARROWS Z ISW11F Installation guide

KDDI
KDDI CYBER-SHOT S001 User manual

KDDI
KDDI sportio water beat User manual

KDDI
KDDI S002 User manual

KDDI
KDDI NS02 User manual

KDDI
KDDI URBANO V03 Installation guide

KDDI
KDDI CA001 User manual

KDDI
KDDI aquos shot SH003 User manual

KDDI
KDDI HI-VISION CAM WOOO User manual

KDDI
KDDI AQUOS SHOT SH008 User manual