manuals.online logo
Brands
  1. Home
  2. •
  3. Brands
  4. •
  5. KI
  6. •
  7. Indoor Furnishing
  8. •
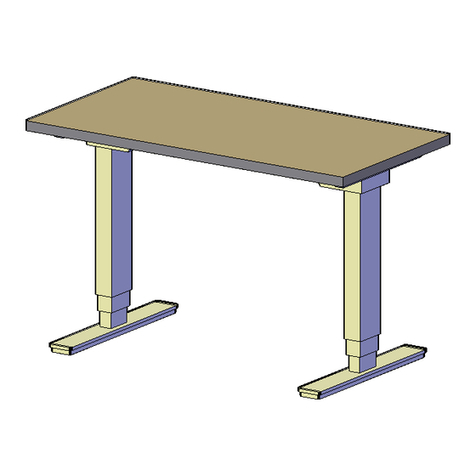
  9. KI Inquire Table User manual

KI Inquire Table User manual

Note: The following instructions
illustrate how to install “canted”
and “straight” legs onto one
table. See “Detail A” to
determine and identify leg
style(s). Worksurface
undersides are pre-drilled for
specific table leg configurations
to aid in assembly. Your table
leg configuration may include
the four canted, four straight, or
a combination of two canted and
two straight legs. See “Detail B”
to view possible leg
combinations.
1. Carefully unpack worksurface
and table legs. Place the
worksurface top side down onto
a soft protective surface. Set all
hardware parts and table legs
aside. Identify the type(s) of legs
you have to assemble (Detail A).
2. To assemble straight legs, begin
by locating the appropriate
pre-drilled hole pattern on the
underside of the worksurface.
Remove the round mounting
plate from the top of the straight
leg. Position the mounting plate
over the holes and secure using
four #12 x 1" Phillips screws as
illustrated (Figure 1).
3. Next, secure the straight leg to
the mounting plate by engaging
the external threads at the center
top of the leg with the internal
threads in the leg mounting
plate. Continue to spin the leg
in a clockwise direction until the
leg is securely tightened against
the underside of the worksurface.
4. For canted leg assembly,
position the leg over the
pre-drilled holes at the
underside of the worksurface.
Secure base of leg to underside
of worksurface using four
#12 x 1" Phillips screws. Repeat
for all remaining canted legs
requiring assembly (Figure 2).
Assembly Instructions
Inquire®Table
Canted and Straight Four-Leg
July 2011
Assemble units as described herein only. To do otherwise
may result in instability. All screws, nuts and bolts must be
tightened securely and must be checked periodically after
assembly. Failure to assemble properly, or to secure parts
may result in assembly failure and injury.
Straight Leg Canted Leg
FourCanted Legs
Two Straight &
Two Canted Legs
FourStraight Legs
Detail A - Leg Identification Detail B - Typical Leg Configurations
leg mounting
plate
table top
#12x 1”
screw
Figure 1
leg mounting
plate
straight leg
canted leg
#12x 1”
screw
Figure 2
Assemble units as described herein only. To do otherwise may
result in instability. All screws, nuts and bolts must be tight-
ened securely and must be checked periodically after assem-
bly. Failure to assemble properly, or to secure parts may result
in assembly failure and injury.
Inquire®Tables
Assembly Instructions
2
Figure 3
straight leg
adjustable glide
tube insert
Note: Inquire straight leg tables
can be fitted with glides or with
casters. Tables with canted legs
can be fitted only with glides.
5. To assemble glides into either
canted or straight legs, first place
a tube insert into the end of the
legs as illustrated (Figure 3). If
required, gently tap the insert into
place using a rubber mallet to seat
the insert fully. Finally, thread the
adjustable glide into the tube
insert to desired depth (Figure 3).
6. To assemble casters into straight
legs, first place a tube insert into
the end of the leg as shown
(Figure 4). If required, gently tap
the insert into place using a rubber
mallet to seat the insert fully.
Next, thread the caster mount into
the tube insert. Finally, push the
caster into the hole at the bottom
of the caster mount as illustrated
(Figure 4).
7. Carefully turn the Inquire Table to
the upright position and check it
for level and stability. Turn any
table glides or caster mounts in or
out to adjust legs for a level, stable
table.
Figure 4
tube insert
caster
caster
mount
straight leg
Assemble units as described herein only. To do otherwise may
result in instability. All screws, nuts and bolts must be tight-
ened securely and must be checked periodically after assem-
bly. Failure to assemble properly, or to secure parts may result
in assembly failure and injury.
Inquire®Tables
Assembly Instructions
Assemble units as described herein only. To do otherwise may
result in instability. All screws, nuts and bolts must be tight-
ened securely and must be checked periodically after assem-
bly. Failure to assemble properly, or to secure parts may result
in assembly failure and injury.
3
Note: The Inquire Modesty
Panel/Wire Manager can be
installed in one of two positions.
When installed as a “modesty
panel”, the open section of the
extrusion faces toward the user
side, or the center of the table.
When unit is installed as a “wire
manager”, the opening will face
toward the back of the table, or
away from the user. Before
installation, confirm with
end user to make certain
that the Modesty Panel/Wire
Manager unit is installed in
the desired position.
8. For Modesty Panel installation,
orient the unit as illustrated in
Figure 5, with the open section of
the unit facing the center of the
table. Align the holes in the unit
over the pre-drilled holes in the
worksurface and secure with
#12 x 1" screws (Figure 5).
9. For Wire Manager installation,
orient the unit as illustrated in
Figure 6, with the open section of
the unit facing out toward the
back of the table. Align the holes
in the unit over the pre-drilled
holes in the worksurface and
secure with #12 x 1" screws
(Figure 6).
10. Vertical Wire Management
Clips snap onto any leg to help
guide power and data wires from
the table to the floor. To install
the leg vertical wire management
clips, first place each around the
wires to be managed and snap the
open end over the leg. To remove
the clips, pull away from the table
leg (Figure 6).
Figure 5
modestypanel
orientation
#12x 1”
screw
Figure 6
wire manager
orientation
leg vertical wire
manager
#12x 1”
screw
1330 Bellevue Street • P. O. Box 8100 • Green Bay, WI 54308-8100 • Tel 1-800-424-2432 • www.ki.com
© 2011 KI All Rights Reserved • Litho in USA • Code KI-61979R1/HT/GT/0711
Assemble units as described herein only. To do otherwise may
result in instability. All screws, nuts and bolts must be tight-
ened securely and must be checked periodically after assem-
bly. Failure to assemble properly, or to secure parts may result
in assembly failure and injury.
Inquire®Tables
Assembly Instructions
Note: Worksurfaces 72" and 84"
in length require the installation of
two worksurface stiffeners.
11. Position two worksurface
stiffeners over pre-drilled holes at
underside of worksurface. Attach
each stiffener using ten #10 x 3/4"
wood screws. Take care to not
over-tighten, which could strip out
pilot holes (Figure 7).
Figure 7
worksurface
stiffener
#10 x 3/4”
wood screw

Other KI Indoor Furnishing manuals

KI WorkZone Series Installation instructions

KI

KI WorkZone Series Installation instructions

KI Aristotle Casegoods Overhead Paper Sorter User manual

KI

KI Aristotle Casegoods Overhead Paper Sorter User manual

KI WorkZone User manual

KI

KI WorkZone User manual

KI Enlite ENRC Series User manual

KI

KI Enlite ENRC Series User manual

KI Genesis Desking User manual

KI

KI Genesis Desking User manual

KI 700 Series User manual

KI

KI 700 Series User manual

KI Lancaster Auditorium Seating Installation instructions

KI

KI Lancaster Auditorium Seating Installation instructions

KI Pirouette User manual

KI

KI Pirouette User manual

KI Pirouette User manual

KI

KI Pirouette User manual

KI WireWorks User manual

KI

KI WireWorks User manual

KI U Series User manual

KI

KI U Series User manual

KI Uniframe Convertible Bench User manual

KI

KI Uniframe Convertible Bench User manual

KI Impress Guide

KI

KI Impress Guide

KI Lancaster User manual

KI

KI Lancaster User manual

KI Pirouette User manual

KI

KI Pirouette User manual

KI USPF2324 User manual

KI

KI USPF2324 User manual

KI Vertical Cable Manager User manual

KI

KI Vertical Cable Manager User manual

KI HF User manual

KI

KI HF User manual

KI Intellect Book Box User manual

KI

KI Intellect Book Box User manual

KI Barron Table User manual

KI

KI Barron Table User manual

KI CafeWay ECRCP User manual

KI

KI CafeWay ECRCP User manual

KI U Series User manual

KI

KI U Series User manual

KI Tattoo Low Cupboard User manual

KI

KI Tattoo Low Cupboard User manual

KI InTandem User manual

KI

KI InTandem User manual

Popular Indoor Furnishing manuals by other brands

Regency LWMS3015 Assembly instructions

Regency

Regency LWMS3015 Assembly instructions

Furniture of America CM7751C Assembly instructions

Furniture of America

Furniture of America CM7751C Assembly instructions

Safavieh Furniture Estella CNS5731 manual

Safavieh Furniture

Safavieh Furniture Estella CNS5731 manual

PLACES OF STYLE Ovalfuss Assembly instruction

PLACES OF STYLE

PLACES OF STYLE Ovalfuss Assembly instruction

Trasman 1138 Bo1 Assembly manual

Trasman

Trasman 1138 Bo1 Assembly manual

Costway JV10856 manual

Costway

Costway JV10856 manual

moss DESIGN Caisson Credenza Assembly instructions

moss DESIGN

moss DESIGN Caisson Credenza Assembly instructions

Aquaglide FULL DECK 15.0 owner's manual

Aquaglide

Aquaglide FULL DECK 15.0 owner's manual

AREBOS AR-HE-SW30 user manual

AREBOS

AREBOS AR-HE-SW30 user manual

Till-Hilft Fulda 87005.330 Assembly instructions

Till-Hilft

Till-Hilft Fulda 87005.330 Assembly instructions

Twoey Outside 2010 quick start guide

Twoey Outside

Twoey Outside 2010 quick start guide

Hettich Easys 200 operating instructions

Hettich

Hettich Easys 200 operating instructions

The bedboss RELAX 404 Series owner's manual

The bedboss

The bedboss RELAX 404 Series owner's manual

Oeseder Möbelindustrie Bern 991 720 Assembly instructions

Oeseder Möbelindustrie

Oeseder Möbelindustrie Bern 991 720 Assembly instructions

Costway HW68469 user manual

Costway

Costway HW68469 user manual

Next ALIX A27743 Assembly instructions

Next

Next ALIX A27743 Assembly instructions

BROSA Hans Assembly guide

BROSA

BROSA Hans Assembly guide

Prodigg MINIKA PBA015T-FUR installation manual

Prodigg

Prodigg MINIKA PBA015T-FUR installation manual

manuals.online logo
manuals.online logoBrands
  • About & Mission
  • Contact us
  • Privacy Policy
  • Terms and Conditions

Copyright 2025 Manuals.Online. All Rights Reserved.