Kooper Stiramicca User manual

UNICAMENTE AD USO DOMESTICO
ATTENZIONE! LEGGERE ATTENTAMENTE LE ISTRUZIONI E LE AVVERTENZE CONTENUTE NEL PRESENTE LIBRETTO E CONSERVARLE PER
ULTERIORI CONSULTAZIONI PER TUTTA LA VITA DEL PRODOTTO. ESSE INFATTI FORNISCONO INDICAZIONI IMPORTANTI PER QUANTO
RIGUARDA LA FUNZIONALITÀ E LA SICUREZZA NELL’INSTALLAZIONE, NELL’USO E NELLA MANUTENZIONE DEL PRODOTTO.
PRODOTTO IMPORTATO DA GALILEO SPA - STRADA GALLI N. 27 - 00019 VILLA ADRIANA (RM) - MADE IN EXTRA UE
VENTILATORE A PIANTANA ART. 2408574
POTENZA MAX. ASSORBITA 50 W •220/230 V •50/60 HZ
UNICAMENTE AD USO DOMESTICO
ATTENZIONE! LEGGERE ATTENTAMENTE LE ISTRUZIONI E LE AVVERTENZE CONTENUTE NEL PRESENTE LIBRETTO E CONSERVARLE PER ULTERIORI CONSULTAZIONI PER
TUTTA LA VITA DEL PRODOTTO. ESSE INFATTI FORNISCONO INDICAZIONI IMPORTANTI PER QUANTO RIGUARDA LA FUNZIONALITÀ E LA SICUREZZA NELL’INSTALLAZIONE,
NELL’USO E NELLA MANUTENZIONE DEL PRODOTTO.
PRODOTTO IMPORTATO DA GALILEO SPA - STRADA GALLI N. 27 - 00019 VILLA ADRIANA (RM) - MADE IN EXTRA UE
MANUALE DI ISTRUZIONI
PER UN USO CORRETTO E SICURO DELL’APPARECCHIO
IT
MANUALE DI ISTRUZIONI IT
PER UN USO CORRETTO E SICURO DELL’APPARECCHIO
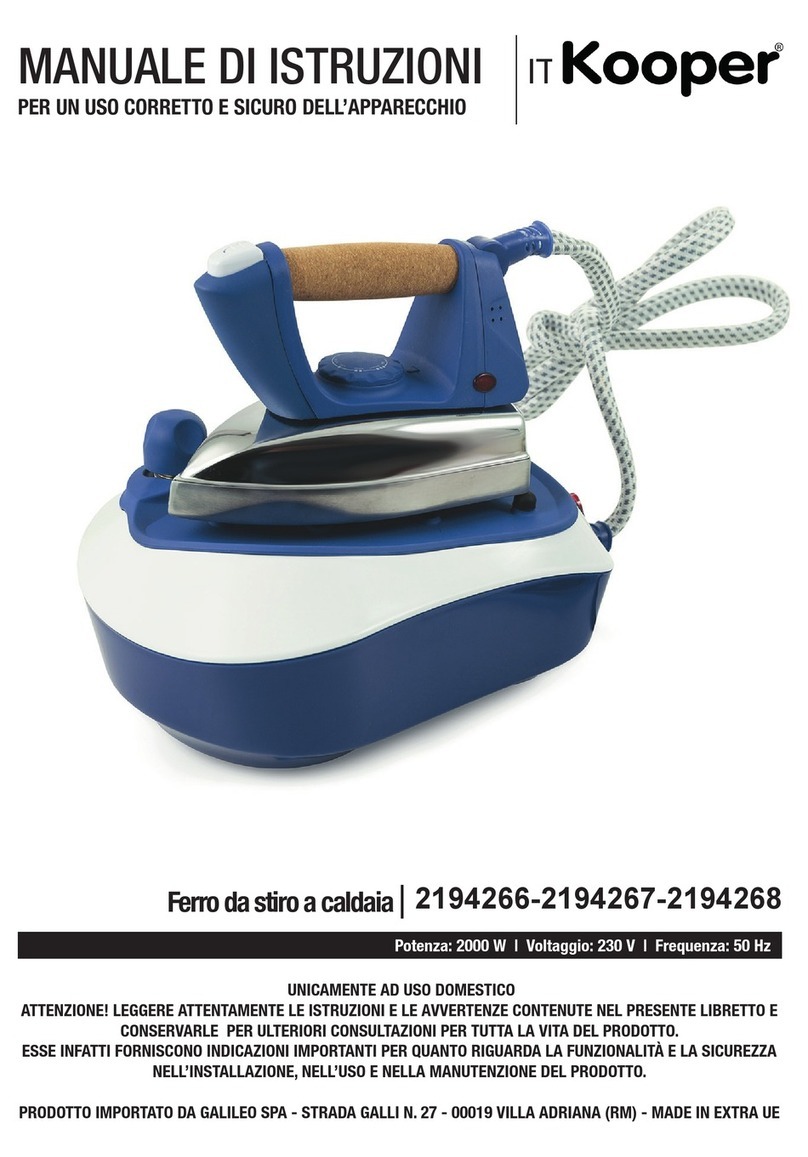
Ferro da stiro a caldaia 2406739 - 2412032
POTENZA MAX. ASSORBITA 2600 W • 220 V • 50 HZ
Stiramica

2
AVVERTENZE GENERALI DI SICUREZZA
PERICOLO PER I BAMBINI!
• UN APPARECCHIO ELETTRICO NON È UN GIOCATTOLO. UTILIZZARLO E
RIPORLO FUORI DALLA PORTATA DEI BAMBINI. I COMPONENTI DELL’IMBAL-
LAGGIO (EVENTUALI SACCHETTI IN PLASTICA, CARTONI, ECC.) DEVONO
ESSERE TENUTI LONTANI DALLA PORTATA DEI BAMBINI.
• L’APPARECCHIO PUÒ ESSERE UTILIZZATO DA BAMBINI DI ETÀ NON INFE-
RIORE A 8 ANNI E DA PERSONE CON RIDOTTE CAPACITÀ FISICHE, SENSO-
RIALI O MENTALI, O PRIVE DI ESPERIENZA O DELLA NECESSARIA CONO-
SCENZA, PURCHÉ SOTTO SORVEGLIANZA OPPURE DOPO CHE LE STESSE
ABBIANO RICEVUTO ISTRUZIONI RELATIVE ALL’USO SICURO DELL’APPA-
RECCHIO E ALLA COMPRENSIONE DEI PERICOLI AD ESSO INERENTI. I BAM-
BINI NON DEVONO GIOCARE CON L’APPARECCHIO. LA PULIZIA E LA MANU-
TENZIONE DESTINATA AD ESSERE EFF ETTUATA DALL’UTILIZZATORE NON
DEVE ESSERE EFF ETTUATA DA BAMBINI SENZA SORVEGLIANZA..
• I BAMBINI DEVONO ESSERE TENUTI SOTTO CONTROLLO PER EVITARE
CHE GIOCHINO CON L’APPARECCHIO.
PERICOLO LESIONI!
• PER EVITARE LESIONI TENERE LONTANI CAPELLI, VESTITI E ALTRI OGGET-
TI.
• PRIMA DI SOSTITUIRE GLI ACCESSORI SPEGNERE L’APPARECCHIO E
STACCARE LA SPINA! NON INSERIRE LA SPINA DELL’APPARECCHIO NELLA
PRESA SENZA AVER PRIMA INSTALLATO TUTTI GLI ACCESSORI NECESSARI.
• NON TOCCARE MAI LE PARTI IN MOVIMENTO DELL’APPARECCHIO ED AT-
TENDERE SEMPRE L’ARRESTO.
PERICOLO SCOSSA ELETTRICA!
• QUESTO APPARECCHIO È CONCEPITO PER FUNZIONARE UNICAMENTE A
CORRENTE ALTERNATA. PRIMA DI METTERLO IN FUNZIONE ASSICURARSI
CHE LA TENSIONE DI RETE CORRISPONDA A QUELLA INDICATA SULLA TAR-
GHETTA DATI.
• COLLEGARE L’APPARECCHIO SOLO A PRESE DI CORRENTE AVENTI POR-
TATA MINIMA 10 AMPERE.
• NON TIRATE IL CAVO DI ALIMENTAZIONE O L’APPARECCHIO STESSO PER
TOGLIERE LA SPINA DALLA PRESA DI CORRENTE.
• SVOLGERE COMPLETAMENTE IL CAVO DI ALIMENTAZIONE ELETTRICA

3
PRIMA DI METTERE IN FUNZIONE L’APPARECCHIO.
• UTILIZZARE UNA PROLUNGA ELETTRICA SOLO SE IN PERFETTO STATO.
• NON LASCIARE MAI SCORRERE IL CAVO DI ALIMENTAZIONE SU SPIGOLI
TAGLIENTI; EVITARE DI SCHIACCIARLO.
• NON LASCIARE L’APPARECCHIO ESPOSTO AD AGENTI ATMOSFERICI
(PIOGGIA, GELO, SOLE, ECC.).
• NON UTILIZZARE MAI L’APPARECCHIO:
O CON LE MANI BAGNATE O UMIDE;
O SE È CADUTO E PRESENTA EVIDENTI ROTTURE O ANOMALIE DIFUNZIO-
NAMENTO;
O SE LA SPINA O IL CAVO DI ALIMENTAZIONE ELETTRICA È DIFETTOSO;
O IN AMBIENTI UMIDI O SATURI DI GAS.
• NON COPRIRE L’APPARECCHIO CON ASCIUGAMANI, INDUMENTI, ECC.
• COLLOCARE L’APPARECCHIO SOLO SU PIANI DI APPOGGIO ORIZZONTALI
E STABILI, LONTANO DA DOCCE, VASCHE DA BAGNO, LAVANDINI, ECC.
• SE L’APPARECCHIO DOVESSE CADERE IN ACQUA, ESTRARRE IMMEDIA-
TAMENTE LA SPINA E SOLO SUCCESSIVAMENTE PRENDERE L’APPAREC-
CHIO. IN QUESTO CASO NON UTILIZZARE PIÙ L’APPARECCHIO, MA FARLO
CONTROLLARE DA UN LABORATORIO SPECIALIZZATO. UTILIZZARE L’APPA-
RECCHIO SOLO IN POSIZIONE VERTICALE.
• TOGLIERE SEMPRE LA SPINA DALLA RETE DI ALIMENTAZIONE ELETTRICA
IMMEDIATAMENTE DOPO L’USO E PRIMA DI ESEGUIRE QUALSIASI INTER-
VENTO DI PULIZIA O MANUTENZIONE.
• LE EVENTUALI RIPARAZIONI DEVONO ESSERE ESEGUITE SOLO DA UN
TECNICO SPECIALIZZATO.
• RIPARARE DA SÉ L’APPARECCHIO PUÒ ESSERE ESTREMAMENTEPERICO-
LOSO.
• UN APPARECCHIO FUORI USO DEVE ESSERE RESO INUTILIZZABILE, TA-
GLIANDO IL CAVO DI ALIMENTAZIONE ELETTRICA, PRIMA DI BUTTARLO.
• PULIRE L’APPARECCHIO UTILIZZANDO UN PANNO UMIDO. NON USARE
SOLVENTI O DETERSIVI ABRASIVI.
• L’APPARECCHIO È CONCEPITO PER L’USO DOMESTICO.
• L’APPARECCHIO PUÒ ESSERE UTILIZZATO ESCLUSIVAMENTE IN AMBIEN-
TI CHIUSI.
• IL PRESENTE APPARECCHIO NON DEVE ESSERE IMPIEGATO PER SCOPI
COMMERCIALI.
• NON UTILIZZARE SOTTO LA DOCCIA O NELLA VASCA DA BAGNO.

4
Prima di utilizzare il ferro da stiro per la prima volta stirare un pezzo di vecchia stoffa per assicurarsi che la piastra
e il serbatoio dell’acqua siano puliti. Fare la stessa cosa quando il ferro non è stato utilizzato per un lungo periodo.
L’apparecchio potrebbe emanare un pò di fumo e un odore particolare quando lo si accende per la prima volta.
Ciò è normale e cesserà dopo poco. Assicurarsi che l’apparecchio abbia sufficiente ventilazione.
COMPONENTI
1. Cavo dell’elettricità e del vapore
2. Manopola di controllo della temperatura
3. Pulsante getto vapore
4. Ferro da stiro
5. Piastra in ceramica
6. Gommini antiscivolo resistenti al calore
7. Serbatoio dell’acqua estraibile
8. Coperchio del serbatoio dell’acqua
9. Spia raggiungimento della temperatura
10. Spia aumento della pressione
11. interruttore principale ON/OFF con spia
12. Sistema di bloccaggio del ferro per il trasporto
13. Cavo di alimentazione e presa
PRIMA DEL PRIMO UTILIZZO
UTILIZZO - RIEMPIRE IL SERBATOIO DELL’ACQUA
1. L’apparecchio può essere riempito con acqua prima e durante l’utilizzo. Ciò è possibile aprendo il coperchio
del serbatoio (8) e servendosi del misurino in dotazione. É anche possibile rimuovere il serbatoio dell’acqua (7),
riempirlo sotto il rubinetto e poi reinserirlo al suo posto.
2. Riempire il serbatoio dell’acqua con massimo 1,2 l di acqua del rubinetto pulita.
- Non riempire il serbatoio mettendo l’intero apparecchio sotto l’acqua corrente o si corre il rischio che il rivesti-
mento esterno si bagnie che dell’acqua entri nell’apparecchio.
- Se l’acqua del rubinetto è a elevata durezza utilizzare acqua distillata o demineralizzata. Non aggiungere
smacchiatori o altri additivi all’acqua.
- Lasciare fuoriuscire il vapore (per circa 20 sec.) prima di ogni utilizzo premendo il tasto di erogazione del vapo-
re (3) per rimuovere i depositi di calcio.

5
UTILIZZO – POSIZIONARE IL SERBATOIO DELL’ACQUA
Assicurarsi che il serbatoio dell’acqua sia correttamente allocato nell’apposito alloggio.
Fig. 2 posizionare il serbatoio dell’acqua.
UTILIZZO – STIRARE SENZA VAPORE
1. Inserire la spina (13) nella presa a muro.
2. Accendere l’interruttore principale on/off (11) portandolo sulla posizione 1. La spia si accenderà.
3. Girare la manopola di controllo della temperatura del ferro da stiro fino alla posizione desiderata
(vedere la tabella in “Istruzioni per la stiratura”). La spia (9) si accenderà.
4. Posizionare il ferro da stiro in posizione verticale (in piedi) e aspettare che la spia si spenga. Il ferro è ora
pronto per la stiratura.
Stirare il tessuto facendo scivolare il ferro da stiro sul tessuto. Durante l’utilizzo l’elemento riscaldante si spen-
gerà e accenderà automaticamente per mantenere la piastra alla temperatura impostata. Di conseguenza
anche la spia si accenderà e spengerà automaticamente.
5. Dopo l’utilizzo, ruotare la manopola di controllo della temperatura fino alla posizione 0 , spengere l’interrutto-
re principale portandolo sulla posizione 0. Rimuovere la spina dalla presa a muro. Posizionare il ferro da stiro in
posizione verticale e lasciarlo raffreddare.
UTILIZZO – STIRATURA CON VAPORE
1. Riempire il serbatoio dell’acqua (vedere “Riempire il serbatoio dell’acqua”).
2. Inserire la spina (13) nella presa a muro.
3. Accendere l’interruttore principale on/off (11). Portare la manopola di controllo della temperatura (2) oltre
il simbolo del vapore. SOLO COSÌ LA PIASTRA RAGGIUNGERÀ LA TEMPERATURA NECESSARIA PER
LASTIRATURA A VAPORE, EVITANDO PERDITE DI ACQUA.
4. Quando entrambe le spie si saranno spente è possibile cominciare la stiratura.
5. Quando la spia del vapore si accende, è necessario aspettare che si ricrei la pressione sufficiente
6. Il getto di vapore sarà omogeneo solamente dopo aver premuto il pulsante di erogazione del vapore diverse
volte.
7. Lasciare fuoriuscire il vapore (per circa 20 sec.) prima di ogni utilizzo premendo il tasto di erogazione del
vapore (3) per rimuovere i depositi di calcio.
8. Dopo l’utilizzo, ruotare la manopola di controllo della temperatura fino alla posizione 0 , spengere l’interrutto-
re principale portandolo sulla posizione 0. Rimuovere la spina dalla presa a muro. Posizionare il ferro da stiro in
posizione verticale e lasciarlo raffreddare.
Se la temperatura è troppo bassa, delle gocce d’acqua possono fuoriuscire con il vapore provocando delle
macchie. In caso ciò accada portare il comando della temperatura alla posizione raccomandata. Non continua-
re a stirare se delle gocce d’acqua sono presenti sulla piastra.

6
UTILIZZO – STIRATURA IN POSIZIONE VERTICALE
Il getto di vapore può essere attivato anche quando il ferro da stiro è in posizione verticale, per esempio, per
pulire i tessuti. Il risultato migliore lo si ottiene stirando in due fasi: inumidire innanzitutto il capo con il vapore
tenendo la piastra approssimativamente 20 cm al di sopra dell’indumento. Erogare più vapore se l’indumento
presenta molte pieghe, poi stirare senza vapore.
UTILIZZO – STIRATURA CON VAPORE
1. Prima di stirare un indumento controllare che le istruzioni di stiratura siano presenti sull’etichetta. Seguire
sempre le istruzioni sull’etichetta. La seguente tabella spiega il significato dei simboli che potrebbero trovarvisi.
2. La seguente tabella può costituire un riferimento anche quando il capo non ha un’etichetta ma se ne conosce il
materiale.
3. La temperatura raccomandata è applicabile solamente ai tessuti specificati. Tessuti con una superficie sati-
nata o in rilievo devono essere stirati ad una temperatura più bassa.
4. Smistare i tessuti secondo la temperatura di stiratura, ad esempio lana con lana, cotone con cotone ecc. Sti-
rare per primi i capi che necessitano una stiratura a temperature più basse prima di passare a quelli da stirare ad
alte temperature. Ciò è consigliabile in quanto il ferro da stiro si riscalda più velocemente di quanto si raffreddi.
5. Stirare i capi di materiale misto, per esempio 60% poliestere e 40% cotone, alla temperatura più bassa – in
questo esempio impostare la temperatura indicata per il poliestere.
6. Quando si stira un capo di cui non si conosce il materiale cominciare sempre con una temperatura più bas-
sa. Testare la stiratura su una piccola area del tessuto, per esempio un’area sulla parte interna del capo.
7. I tessuti di pura lana (100% lana) possono essere stirati con il vapore. È preferibile disporre un panno asciutto
tra il ferro e stirare la lana al rovescio.
8. Stirare i tessuti vellutati e altri tessuti che diventano facilmente lucidi in una sola direzione. Applicare
una leggera pressione sul ferro da stiro.
9. Non stirare sulle chiusure zip ecc. perché potrebbero graffiare la piastra.

7
PULIZIA E MANUTENZIONE – PULIRE IL SERBATOIO
Lavare il serbatoio mensilmente riduce il depositarsi di calcare e allunga la vita del dispositivo.
1. Assicurarsi che il serbatoio sia vuoto e completamente raffreddato.
2. Riempire i tre quarti del serbatoio con acqua fredda.
3. Agitare il serbatoio in modo che l’interno sia pulito completamente.
4. Svuotare il serbatoio. Per un risultato migliore ripetere questo processo diverse volte.
5. Per un risultato ottimale lavare il serbatoio quando non è stato usato per almeno qualche ora.
6. Non versare agenti disincrostanti, solventi acidi o aceto nel serbatoio, della semplice acqua corrente sarà
sufficiente.
7. Lavare il serbatoio ogni dieci utilizzi. Se l’acqua del rubinetto è a elevata durezza si consiglia di lavare il ser-
batoio più spesso e di impiegare acqua distillata o in bottiglia.
PULIZIA E MANUTENZIONE
1. Assicurarsi che l’apparecchio e la piastra siano raffreddati e che la spina sia stata rimossa dalla presa a muro.
2. Pulire la piastra con un panno umido. Non impiegare disincrostanti.
3. Riporre il ferro da stiro.
4. Non impiegare strumenti di metallo o spugne abrasive per pulire la piastra altrimenti potrebbe essere dan-
neggiata.
5. Non immergere l’apparecchio, la presa o il cavo di alimentazione in acqua.
6. Non impiegare solventi corrosivi o abrasivi o oggetti affilati (come coltelli o spazzole a setole dure) per pulire
l’apparecchio.
RISOLUZIONE DEI PROBLEMI
ACCENSIONE
L’apparecchio non riceve la corrente elettrica
POSSIBILE SOLUZIONE
Controllare che la spina sia collegata alla presa e che l’apparecchio sia acceso
IL FERRO DA STIRO PRESENTA PERDITE D’ACQUA.
POSSIBILE SOLUZIONE
1. Il pulsante di erogazione del vapore è stato premuto prima che si sia creato sufficiente calore. Aspettare che
la spia sia spenta, ciò significa che la temperatura corretta è stata raggiunta.
2. Assicurarsi che il disco di controllo della temperatura sia posizionato oltre il simbolo del vapore. SOLO COSÌ
LA PIASTRA RAGGIUNGERÀ LA TEMPERATURA NECESSARIA PER LA STIRATURA A VAPORE, EVITANDO
PERDITE DI ACQUA.
3. Quando si utilizza il dispositivo per la prima volta (dopo molto tempo) l’acqua condensata resta nel circuito
del vapore. Allontanare il ferro dalla tavola da stiro e spingere il pulsante di erogazione del vapore finché il vapo-
re non viene emesso.
SERBATOIO DELL’ACQUA TROPPO PIENO
POSSIBILE SOLUZIONE
Assicurarsi che il serbatoio dell’acqua non sia stato riempito oltre il segno “max”.
IL FERRO PERDE LIQUIDI MARRONI
POSSIBILE SOLUZIONE
L’acqua contiene additivi (come disincrostanti, acqua profumata o appretto).
Non impiegare additivi di alcun genere.
IL FERRO PERDE LIQUIDI BIANCHI
POSSIBILE SOLUZIONE
L’acqua contiene calcare. Lavare il serbatoio come descritto in “Pulizia e manutenzione - lavare il serbatoio”.

8
L’APPARECCHIO EROGA POCO O NON EROGA VAPORE
POSSIBILE SOLUZIONE
Il serbatoio dell’acqua è vuoto: riempire il serbatoio.
L’ACQUA NON RAGGIUNGE LA CORRETTA TEMPERATURA
POSSIBILE SOLUZIONE
Aspettare finché la spia non si sia spenta, ciò significa che la giusta temperatura è stata raggiunta.
IL SERBATOIO DELL’ACQUA NON É STATO INSERITO CORRETTAMENTE
POSSIBILE SOLUZIONE
Assicurarsi che il serbatoio sia stato inserito correttamente. Spingerlo verso il basso fino ad allocarlo nell’apposito
alloggio
IL FERRO DA STIRO LASCIA MACCHIE SUI VESTITI
POSSIBILE SOLUZIONE
- La temperatura è troppo elevata per il tipo di tessuto che si sta stirando. Assicurarsi che l’apparecchio sia imposta-
to sulla temperatura consigliata per il capo nelle istruzioni di stiratura.
- Si sta stirando direttamente sull’appretto.
- Quando si usa l’appretto assicurarsi di applicarlo sul rovescio della zona da stirare.
- I capi non sono stati risciacquati bene e presentano residui di sapone. Lavare i capi assicurandosi di rimuovere ogni
residuo di sapone.
- I capi sono nuovi e non sono stati ancora lavati. Assicurarsi che i nuovi capi vengano lavati prima di stirarli.
INFORMAZIONI TECNICHE
Potenza: 2600 W
Alimentazione elettrica: 220V~50Hz

9
VENTILATORE A PIANTANA ART. 2408574
POTENZA MAX. ASSORBITA 50 W •220/230 V •50/60 HZ
UNICAMENTE AD USO DOMESTICO
ATTENZIONE! LEGGERE ATTENTAMENTE LE ISTRUZIONI E LE AVVERTENZE CONTENUTE NEL PRESENTE LIBRETTO E CONSERVARLE PER ULTERIORI CONSULTAZIONI PER
TUTTA LA VITA DEL PRODOTTO. ESSE INFATTI FORNISCONO INDICAZIONI IMPORTANTI PER QUANTO RIGUARDA LA FUNZIONALITÀ E LA SICUREZZA NELL’INSTALLAZIONE,
NELL’USO E NELLA MANUTENZIONE DEL PRODOTTO.
PRODOTTO IMPORTATO DA GALILEO SPA - STRADA GALLI N. 27 - 00019 VILLA ADRIANA (RM) - MADE IN EXTRA UE
MANUALE DI ISTRUZIONI
PER UN USO CORRETTO E SICURO DELL’APPARECCHIO
IT
USER INSTRUCTIONS EN
FOR A CORRECT AND SAFE USE OF THE APPLIANCE
GENERAL SAFETY INSTRUCTIONS
RISK FOR CHILDREN!
• A POWER DEVICE IS NOT A TOY. AFTER USE, STORE IT OUT OF REACH
OF CHILDREN. KEEP PACKING MATERIAL (PLASTIC BAGS, CARTON, ETC.)
OUT OF REACH OF CHILDREN.
• THIS APPLIANCE CAN BE USED BY CHILDREN AGED FROM 8 YEARS AND
ABOVE AND PERSONS WITH REDUCED PHYSICAL, SENSORY OR MENTAL
CAPABILITIES OR LACK OF EXPERIENCE AND KNOWLEDGE IF THEY HAVE
BEEN GIVEN SUPERVISION OR INSTRUCTION CONCERNING USE OF THE
APPLIANCE IN A SAFE WAY AND UNDERSTAND THE HAZARDS INVOLVED.
CHILDREN SHALL NOT PLAY WITH THE APPLIANCE. CLEANING AND USER
MAINTENANCE SHALL NOT BE MADE BY CHILDREN UNLESS THEY ARE
OLDER THAN 8 AND SUPERVISED. KEEP THE APPLIANCE AND ITS CORD
OUT OF REACH OF CHILDREN LESS THAN 8 YEARS.
• CHILDREN SHOULD BE SUPERVISED TO MAKE SURE THEY DO NOT PLAY
WITH THE APPLIANCE.
RISK OF INJURY!
• TO AVOID INJURIES, DO NOT INTRODUCE YOUR HANDS IN THE MACHI-
NE WHILE IT IS OPERATING AND KEEP AWAY HAIR, CLOTHES AND OTHER
OBJECTS.
• SWITCH OFF AND UNPLUG THE APPLIANCE BEFORE CHANGING THE
ACCESSORIES! DO NOT CONNECT THE PLUG TO THE POWER SOCKET IF
THE NECESSARY ACCESSORIES ARE NOT INSTALLED.
• NEVER TOUCH THE MOVING PARTS OF THE APPLIANCE AND ALWAYS
WAIT FOR THE APPLIANCE TO STOP COMPLETELY.
RISK OF ELECTRIC SHOCK!
• THIS APPLIANCE IS INTENDED TO WORK ONLY WITH AC. BEFORE OPE-
RATING, MAKE SURE THAT MAINS VOLTAGE RATING CORRESPONDS TO
THE VALUE INDICATED ON THE RATING PLATE OF THE PRODUCT.
•CONNECTTHEAPPLIANCEONLYTO OUTLETS WITH A MINIMUM ELECTRIC

10
CURRENT OF 10 AMPERE.
• DO NOT PULL THE POWER CORD OR THE APPLIANCE ITSELF IN ORDER
TO UNPLUG IT FROM THE OUTLET.
• UNWIND COMPLETELY THE POWER CORD BEFORE SWITCHING ON THE
APPLIANCE.
• USE AN EXTENSION CORD ONLY IF IT IS IN PERFECT CONDITIONS.
• DO NOT LET THE CORD HANG OVER SHARP EDGES. DO NOT SQUASH
IT.
• DO NOT LET THE APPLIANCE EXPOSED TO THE WEATHER (RAIN, FREE-
ZING, SUN, ETC).
• NEVER USE THE APPLIANCE:
O WITH WET OR DAMP HANDS;
O IF IT HAS FALLEN AND IT CLEARLY BROKE OR DOESN’T WORK PRO-
PERLY;
O IN CASE OF FAULTY PLUG OR POWER CORD;
O IN PRESENCE OF HUMIDITY OR GAS.
• NEVER COVER THE APPLIANCE WITH TOWELS, CLOTHES, ETC.
• PLACE THE APPLIANCE ONLY ON HORIZONTAL AND STABLE SURFACES,
FAR FROM SHOWERS, BATHTUBS, SINKS, ETC.
• HOWEVER, IF THE APPLIANCE FALLS INTO THE WATER, UNPLUG IT IM-
MEDIATELY AND TAKE IT ONLY AFTERWARDS. IN THIS CASE, STOP USING
THE APPLIANCE AND HAVE IT CHECKED BY QUALIFI ED PERSONNEL.
• ONLY OPERATE THE APPLIANCE IN VERTICAL POSITION.
• ALWAYS UNPLUG FROM THE MAINS SUPPLY IMMEDIATELY AFTER THE
USE AND BEFORE ANY CLEANING OR MAINTENANCE OPERATION.
• THE APPLIANCE MAY ONLY BE REPAIRED BY A SPECIALIZED TECHNI-
CIAN.
• REPAIRING THE APPLIANCE BY YOURSELF MIGHT BE EXTREMELY DAN-
GEROUS.
• ALWAYS CUT THE POWER CORD OF A BROKEN UNIT IN ORDER TO
MAKE IT UNUSABLE BEFORE THROWING IT AWAY.
• CLEAN THE APPLIANCE WITH A DAMP CLOTH AFTER IT COOLED
DOWN. DO NOT USE SOLVENTS OR ABRASIVE PRODUCTS.
• THE APPLIANCE IS INTENDED ONLY FOR HOME USE. IT CAN ONLY BE
USED INDOOR.
• THIS APPLIANCE CANNOT BE USED FOR COMMERCIAL PURPOSES.

11
Before using the iron for the first time, begin by ironing a piece of old fabric to ensure that the soleplate and water
reservoir are clean. Repeat this when the iron has not been used for a period of time. The appliance may emit a
little smoke and a characteristic smell when you switch it on for the first time. This is normal and will soon stop.
Make sure the appliance has sufficient ventilation.
COMPONENTS
1.Electricity and steam cable
2. Iron temperature control
3. Steam realease button
4. Iron
5. Ceramic soleplate
6. Heat-resistant non- slip rubber feet
7. Removable water tank
8. Water tank lid
9. Temperature indicator light
10. pressure indicator light
11. Main ON/OFF switch with pilot light
12. Blocking system for transportation
13. Electric cord and plug
BEFORE THE FIRST USE
USE - FILLING THE WATER RESERVOIR
1. The appliance can be filled with water before and during use. You can do that by opening the water tank lid
(8) and using the supplied measuring cup. You can also take out the water tank (7), fill under the tap and then
reinstall it.
2. Fill the water tank with maximum of 1,2 litres of clean tap water.
- Never fill by holding the complete appliance under tap. There is a good chance taht water will flow over the
casing and into the appliance.
- If you live in an area with hard water, it is recommended to use distilled or demineralised water.
- Never add a stain remoer or other additives to the water.
- Leave the device dtesming (for ca. 20 sec) before every use by pushing the steam release button (3) to remo-
ve calcium deposits.

12
USE – PLACING THE WATER TANK
Make sure the water tank is placed correctly.
Fig. 2 Place the water thank.
USE – DRY IRONING
1. Insert the plug (13) into the wall socket.
2. Turn on the main on/off switch (11) by switching if to position 1. The pilot light turns on.
3. Turn the iron temperature control dial (2) to the desired position (see the table in “Ironing instructions” ) . The
pilot light (9) turns on.
4. Place the iron in a vertical position (upright) and wait until the pilot light (9) goes out. The iron is now ready to
iron. Iron the fabric by sliding the iron over the fabric. While you are ironing, the heating element will automati-
cally switch on and off to keep the soleplate at the set temperature. The pilot light (9) will, therefore, also turn on
and off automatically.
5. After use, rotate the iron temperature control to the 0 position, turn off the main on/ off switch by switching
it to position 0. Remove the plug from the wall socket. Place the iron in a vertical position and allow it to cool
down.
USE – STEAM IRONING
1. Fill the water tank (see “Filling the water reservoir”) .
2. Insert the plug (13) into the wall socket.
3. Turn on the main on/off switch (11) and turn the temperature control knob (2) beyond the steam symbol.
ONLY IN THIS WAY THE SOLEPLATE WILL REACH THE TEMPERATURE NEEDED TO STEAM IRON
AVOIDING WATER LEAKEGE.
4. When both pilot light go out you can start steam ironing.
5. When the steam pilot light turns on, you must wait until the boiler has built up sufficient steam pressure
again.
6. The steam spray of this product can only be smooth after pressing the steam iron button for several times.
7. Leave the device steaming (for ca. 20 sec) before every use by pushing the steam release button (3) to remo-
ve calcium deposits.
8. After use, rotate the iron temperature control to the 0 position, turn off the main on/ off switch by switching
it to position 0. Remove the plug from the wall socket. Place the iron in a vertical position and allow it to cool
down.
If the temperature is too low, drops of water can escape with the steam causing stains. If this does happen,
you should turn the temperature control dial to the recommended position. Never iron whilst there are drops of
water on the soleplate.

13
USE – VERTICAL STEAM IRONING
You can also release steam when the iron is held vertically, for example, to clean fabric. The best result is achie-
ved by ironing in two stages: moisten the article of clothing with steam first by holding the soleplate approxima-
tely 20 cm above the clothing. Use more steam if the item of clothing contains a lot of creases.
Then, iron the item of clothing dry.
USE – IRONING INSTRUCTIONS
1. Before ironing a garment check whether the garment has a label with ironing directions. Always follow the
instructions on the label. The following table explains the meaning of symbols that may be shown on the label.
2. You can also use the following table when the garment does not have a label but you do know which fabric
was used to make the garment.
3. The prescribed temperature settings are applicable solely to the specified fabrics. Fabrics with a glossy or
raised surface should be ironed at a lower temperature.
4. Sort the fabrics by ironing temperature, i.e. wool with wool, cotton with cotton, etc. Begin by ironing the gar-
ments that need to be ironed at a lower temperature before moving on to the garments that need to be ironed
at a higher temperature. This is advisable because the iron heats up faster than it cools down.
5. Iron garments containing a mixture of fabrics, for example 60% polyester and 40% cotton, at the lowest tem-
perature - in this example the ironing temperature for polyester.
6. When ironing garments made from an unknown fabric always begin at a lower temperature. Test the iron on
a concealed area, for example an area on the inside of the garment.
7. Pure woollen fabrics (100% wool) can be pressed using steam. Preference is given to the use of a dry cloth
between the iron and the wool and to ironing wool inside out.
8. Always iron velvety fabrics and other fabrics that readily become shiny in one direction. Apply gentle pressure
to the iron.
9. Never iron over zips, etc. These can scratch the soleplate.

14
CLEANING AND MAINTENANCE – RINSING THE TANK
Rinsing the tank monthly reduces limescale and lengthens the lifespan of your device.
1. Make sure the tank is empty and completely cooled down.
2. Fill the tank for up to three quarters with cold water.
3. Shake the tank thoroughly so the insides will be rinsed completely.
4. Empty the tank. For the best result repeat these steps several times.
5. For optimal results it is best to rinse the tank when it hasn’t been used for at least a few hours.
6. Never use descaling agents, cleaning acids or vinegar in your rinsing water. Simple tap water will suffice.
7. Rinse the tank after every tenth use. If the area you live in has particularly hard water, it is recommended to
rinse more frequently and use distilled or bottled water.
CLEANING AND MAINTENANCE
1. Make sure the boiler and the soleplate have cooled down and the plug has been removed from the wall
socket.
2. Clean the soleplate with a damp cloth. Never use a descaling agent.
3. Store the iron.
4. Never use metal implements or scourers to clean the soleplate; otherwise the soleplate could be damaged.
5. Never immerse the appliance, plug or power cord in water.
6. Never use corrosive or scouring cleaning agents or sharp objects (such as knives or hard brushes) to clean
the appliance.
TROUBLESHOOTING
SWITCHING ON
The device doesn’t receive electricity.
POSSIBLE SOLUTION
Check if the plug is connected to the socket and if the device has been switched on.
THE IRON IS LEAKING WATER
POSSIBLE SOLUTION
1. You are pressing the steam release button before sufficient heat has been generated. Wait until the pilot light
turns off, this means the correct temperature has been reached.
2. Make sure the temperature control disk is positioned beyond the steam symbol. ONLY IN THIS WAY THE
SOLEPLATE WILL REACH THE TEMPERATURE NEEDED TO STEAM IRON AVOIDING WATER LEAKEGE.
3. Because you are using the device for the first time (in a long while), condensated water remains in the steam
circuit. While directing the iron away from the ironing board, press the steam release button until steam dischar-
ges from the iron.
THE WATER TANK IS TOO FULL
POSSIBLE SOLUTION
Make sure the water tank has not been filled beyond its “max” indication.
THE IRON LEAKES BROWN FLUIDS
POSSIBLE SOLUTION
The water contains additives (like descaling agents, perfumed water or starch).
Do not add any additives whatsoever to the water.
THE IRON LEAKES WHITE FLUIDS
POSSIBLE SOLUTION
The water tank contains limescale. Rinse the tank as described in “Cleaning and Maintenance - Rinsing the tank”.

15
THE DEVICE DISCHARGES LITTLE TO NO STEAM
POSSIBLE SOLUTION
The water tank is empty. Fill the water tank.
THE WATER DOES NOT REACH THE CORRECT TEMPERATURE
POSSIBLE SOLUTION
Wait until the pilot light turns off, this means the correct temperature has been reached.
THE WATER TANK HAS BEEN PLACED INCORRECTLY
POSSIBLE SOLUTION
Make sure the water tank is placed correctly. Press it downwards so the tank becomes lodged in its notch.
THE IRON LEAVES STAINS ON THE CLOTHES
POSSIBLE SOLUTION
- The ironing temperature is too high for the type of fabric you are ironing. Make sure the device is set at the tempe-
rature described in the ironing instruction of your garment.
- You are directly ironing over the applied starch. When using starch, make sure you apply it to the back of the area
that is to be ironed.
- The garments have been insufficiently rinsed and contain soap residue. Thoroughly rinse your garments to ensure
they do not contain any soap residue.
- The garments are new and have not yet been washed. Make sure your new garments have been washed and
rinsed before ironing them.
TECHNICAL SPECIFICS
Power: 2400 W
Power Supply: 220V~50Hz

16
TRATTAMENTO DEL DISPOSITIVO ELETTRICO ED ELETTRONICO A FINE VITA
Informazione agli utenti per il corretto smaltimento del prodotto ai sensi della Direttiva Europea 2012/19/EU
e del D.lgs N. 49/2014.
Caro consumatore,
è importante ricordarti che, come buon cittadino, avrai l’obbligo di smaltire questo prodotto non come riuto urbano, ma
di effettuare una raccolta separata.
Il simbolo sopra indicato e riportato sull’apparecchiatura indica che il riuto deve essere oggetto di “raccolta separata”.
I dispositivi elettrici ed elettronici non devono essere considerati riuti domestici. Pertanto, il prodotto alla ne della sua
vita utile, non deve essere smaltito insieme ai riuti urbani. L’utente dovrà conferire (o far conferire) il riuto ai centri di
raccolta differenziata predisposti dalle amministrazioni locali, oppure consegnarlo al rivenditore contro l’acquisto di una
nuova apparecchiatura di tipo equivalente.
La raccolta differenziata del riuto e le successive operazioni di trattamento, recupero e smaltimento favoriscono la pro-
duzione di apparecchiature con materiali riciclati e limitano gli effetti negativi sull’ambiente e sulla salute eventualmente
causati da una gestione impropria del riuto.
Grazie!
DISPOSAL OF THE ELECTRIC OR ELECTRONIC DEVICE AT THE END OF ITS LIFE
Information for users about the correct disposal of the product according to the European Directive 2012/19/EU
and to the Legislative Decree N. 49/2014.
Dear Customer,
It is important to remind you that, as a good citizen, you cannot dispose of this product as municipal waste; you have to
do a separate collection.
The symbol labelled on the appliance indicates that the rubbish is subject to “separate collection”.
Electrical and electronic appliance cannot be considered as domestic waste. Therefore, at the end of its useful life, this
product should not be disposed with municipal wastes. The user must therefore assign or (have collected) the rubbish to
a treatment facility under local administration, or hand it over to the reseller in exchange for an equivalent new product.
The separate collection of the rubbish and the successive treatment, recycling and disposal operations promote pro-
duction of appliances made with recycled materials and reduce negative effects on health and the environment caused
by improper treatment of rubbish.
Thank you!
Table of contents
Languages:
Other Kooper Iron manuals

Kooper
Kooper Vaporspeed plus 2166938 User manual

Kooper
Kooper 5901016 User manual

Kooper
Kooper 5902399 User manual

Kooper
Kooper 2194479 User manual

Kooper
Kooper 2193565 User manual

Kooper
Kooper Vaporix 2415783 User manual

Kooper
Kooper 2194458 User manual

Kooper
Kooper 5913664 User manual

Kooper
Kooper 2196206 User manual

Kooper
Kooper 2412024 User manual