Kooper Vaporspeed plus 2166938 User manual

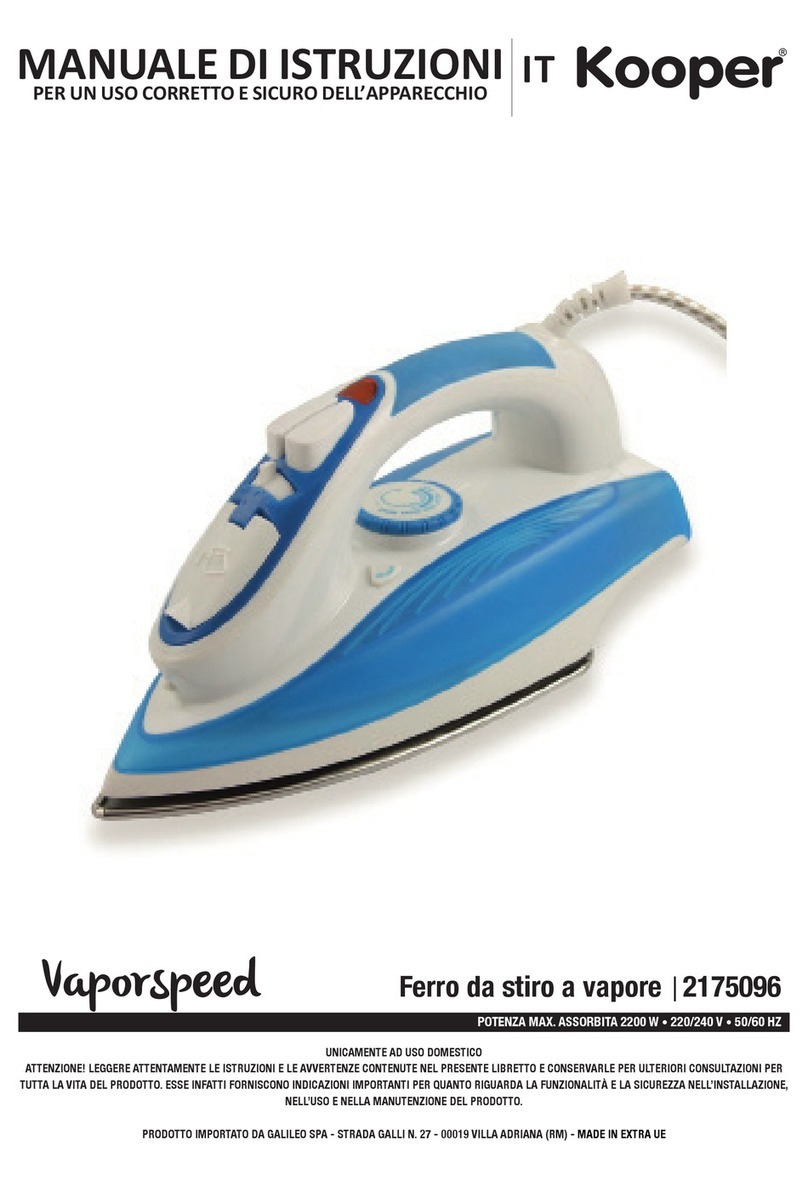
Vaporspeed plus Ferro da stiro a vapore 2166938
POTENZA MAX. ASSORBITA 2200 W •220/240 V •50/60 HZ
UNICAMENTE AD USO DOMESTICO
ATTENZIONE! LEGGERE ATTENTAMENTE LE ISTRUZIONI E LE AVVERTENZE CONTENUTE NEL PRESENTE LIBRETTO E CONSERVARLE PER ULTERIORI CONSULTAZIONI PER
TUTTA LA VITA DEL PRODOTTO. ESSE INFATTI FORNISCONO INDICAZIONI IMPORTANTI PER QUANTO RIGUARDA LA FUNZIONALITÀ E LA SICUREZZA NELL’INSTALLAZIONE,
NELL’USO E NELLA MANUTENZIONE DEL PRODOTTO.
PRODOTTO IMPORTATO DA GALILEO SPA - STRADA GALLI N. 27 - 00019 VILLA ADRIANA (RM) - MADE IN EXTRA UE
MANUALE DI ISTRUZIONI
PER UN USO CORRETTO E SICURO DELL’APPARECCHIO
IT

AVVERTENZE GENERALI DI SICUREZZA
PERICOLO PER I BAMBINI!
UN APPARECCHIO ELETTRICO NON È UN GIOCATTOLO. UTILIZZAR-
LO E RIPORLO FUORI DALLA PORTATA DEI BAMBINI. I COMPONENTI
DELL’IMBALLAGGIO (EVENTUALI SACCHETTI IN PLASTICA, CARTONI,
ECC.) DEVONO ESSERE TENUTI LONTANI DALLA PORTATA DEI BAMBINI.
L’APPARECCHIO PUÒ ESSERE UTILIZZATO DA BAMBINI DI ETÀ NON IN-
FERIORE A 8 ANNI E DA PERSONE CON RIDOTTE CAPACITÀ FISICHE,
SENSORIALI O MENTALI, O PRIVE DI ESPERIENZA O DELLA NECESSA-
RIA CONOSCENZA, PURCHÉ SOTTO SORVEGLIANZA OPPURE DOPO
CHE LE STESSE ABBIANO RICEVUTO ISTRUZIONI RELATIVE ALL’USO
SICURO DELL’APPARECCHIO E ALLA COMPRENSIONE DEI PERICOLI
AD ESSO INERENTI. I BAMBINI NON DEVONO GIOCARE CON L’APPA-
RECCHIO. LA PULIZIA E LA MANUTENZIONE DESTINATA AD ESSERE
EFFETTUATA DALL’UTILIZZATORE NON DEVE ESSERE EFFETTUATA DA
BAMBINI SENZA SORVEGLIANZA.
I BAMBINI DEVONO ESSERE TENUTI SOTTO CONTROLLO PER EVITARE
CHE GIOCHINO CON L’APPARECCHIO.
PERICOLO LESIONI!
PER EVITARE LESIONI TENERE LONTANI CAPELLI, VESTITI E ALTRI OG-
GETTI.
PRIMA DI SOSTITUIRE GLI ACCESSORI SPEGNERE L’APPARECCHIO E
STACCARE LA SPINA! NON INSERIRE LA SPINA DELL’APPARECCHIO
NELLA PRESA SENZA AVER PRIMA INSTALLATO TUTTI GLI ACCESSORI
NECESSARI.
NON TOCCARE MAI LE PARTI IN MOVIMENTO DELL’APPARECCHIO ED
ATTENDERE SEMPRE L’ARRESTO.
PERICOLO SCOSSA ELETTRICA!
QUESTO APPARECCHIO È CONCEPITO PER FUNZIONARE UNICAMENTE
A CORRENTE ALTERNATA. PRIMA DI METTERLO IN FUNZIONE ASSICU-
RARSI CHE LA TENSIONE DI RETE CORRISPONDA A QUELLA INDICATA
SULLA TARGHETTA DATI.
COLLEGARE L’APPARECCHIO SOLO A PRESE DI CORRENTE AVENTI
PORTATA MINIMA 10 AMPERE.
NON TIRATE IL CAVO DI ALIMENTAZIONE O L’APPARECCHIO STESSO
PER TOGLIERE LA SPINA DALLA PRESA DI CORRENTE.

SVOLGERE COMPLETAMENTE IL CAVO DI ALIMENTAZIONE ELETTRICA
PRIMA DI METTERE IN FUNZIONE L’APPARECCHIO.
UTILIZZARE UNA PROLUNGA ELETTRICA SOLO SE IN PERFETTO STATO.
NON LASCIARE MAI SCORRERE IL CAVO DI ALIMENTAZIONE SU SPIGO-
LI TAGLIENTI; EVITARE DI SCHIACCIARLO.
NON LASCIARE L’APPARECCHIO ESPOSTO AD AGENTI ATMOSFERICI
(PIOGGIA, GELO, SOLE, ECC.).
NON UTILIZZARE MAI L’APPARECCHIO:
- CON LE MANI BAGNATE O UMIDE;
- SE È CADUTO E PRESENTA EVIDENTI ROTTURE O ANOMALIE DI
FUNZIONAMENTO;
- SE LA SPINA O IL CAVO DI ALIMENTAZIONE ELETTRICA È DIFETTOSO;
- IN AMBIENTI UMIDI O SATURI DI GAS.
NON COPRIRE L’APPARECCHIO CON ASCIUGAMANI, INDUMENTI, ECC.
COLLOCARE L’APPARECCHIO SOLO SU PIANI DI APPOGGIO ORIZZON-
TALI E STABILI, LONTANO DA DOCCE, VASCHE DA BAGNO, LAVANDINI,
ECC.
SE L’APPARECCHIO DOVESSE CADERE IN ACQUA, ESTRARRE IMME-
DIATAMENTE LA SPINA E SOLO SUCCESSIVAMENTE PRENDERE L’AP-
PARECCHIO. IN QUESTO CASO NON UTILIZZARE PIÙ L’APPARECCHIO,
MA FARLO CONTROLLARE DA UN LABORATORIO SPECIALIZZATO.
UTILIZZARE L’APPARECCHIO SOLO IN POSIZIONE VERTICALE.
TOGLIERE SEMPRE LA SPINA DALLA RETE DI ALIMENTAZIONE ELETTRI-
CA IMMEDIATAMENTE DOPO L’USO E PRIMA DI ESEGUIRE QUALSIASI
INTERVENTO DI PULIZIA O MANUTENZIONE.
LE EVENTUALI RIPARAZIONI DEVONO ESSERE ESEGUITE SOLO DA UN
TECNICO SPECIALIZZATO.
RIPARARE DA SÉ L’APPARECCHIO PUÒ ESSERE ESTREMAMENTE PERI-
COLOSO.
UN APPARECCHIO FUORI USO DEVE ESSERE RESO INUTILIZZABILE,
TAGLIANDO IL CAVO DI ALIMENTAZIONE ELETTRICA, PRIMA DI BUTTAR-
LO.
PULIRE L’APPARECCHIO UTILIZZANDO UN PANNO UMIDO. NON USARE
SOLVENTI O DETERSIVI ABRASIVI.
L’APPARECCHIO È CONCEPITO PER L’USO DOMESTICO.
L’APPARECCHIO PUÒ ESSERE UTILIZZATO ESCLUSIVAMENTE IN AM-
BIENTI CHIUSI.
IL PRESENTE APPARECCHIO NON DEVE ESSERE IMPIEGATO PER SCO-
PI COMMERCIALI.

FUNZIONE SPRAY
FUNZIONE STIRATURA A VAPORE
Questa funzione può essere usata in qualsiasi momento in quanto non infl uisce sulla temperatura del ferro.
• Riempire il serbatoio dell’acqua.
• Indirizzare la bocchetta verso gli indumenti.
• Premere il pulsante spruzzo (3).
Questa funzione può essere usata solo ad alte temperature.
“OO” vapore medio
“OOO” o “MAX” vapore massimo
• Riempire il serbatoio dell’acqua.
• Posizionare il ferro da stiro in verticale.
• Connettere il ferro da stiro alla corrente.
• Sistemare la manopola regolazione temperatura (1) su “OO” o “OOO” o “MAX”.
• La spia temperatura si spegne quando viene raggiunta la temperatura richiesta.
Il ferro da stiro è pronto per essere usato.
• Girare la manopola controllo vapore (7) fi no alla posizione richiesta, il vapore comincia ad uscire dai fori sulla piastra.
Notare: con questa funzione potrebbe fuoriuscire dell’acqua dai fori della piastra se la temperatura selezionata è troppo
bassa. Nel caso si verifi casse questo fatto, girare la manopola regolazione temperatura (1) fi no alla posizione appropria-
ta. Il vapore ricomincerà a fuoriuscire appena sarà raggiunta la giusta temperatura.
COMPONENTI
1. Manopola regolazione temperatura
2. Pulsante doppio vapore
3. Pulsante spray
4. Bocchetta spruzzo
5. Foro immissione acqua
6. Spia temperatura
7. Manopola controllo vapore
8. Piastra
9. Alloggio
10. Serbatoio acqua
11. Pulsante auto-pulizia
6

FUNZIONE DOPPIO VAPORE
FUNZIONE STIRATURA A SECCO
ULTERIORE RISCALDAMENTO
FUNZIONE AUTO-PULIZIA
Questa funzione produce un’ulteriore quantità di vapore in grado di rimuovere anche le pieghe più diffi cili.
• Riempire il serbatoio dell’acqua.
• Sistemare la manopola regolazione temperatura su MAX.
• La spia temperatura si spegne quando viene raggiunta la temperatura richiesta.
Il ferro da stiro è pronto per essere usato.
• Premere il pulsante doppio vapore (2) una volta.
• Il vapore penetrerà negli indumenti rimuovendo ogni piega.
• Attendere qualche secondo prima di premere di nuovo il pulsante doppio vapore in corrispondenza di altre pieghe.
• Assicurarsi che la manopola controllo vapore (7) sia in posizione 0.
• Selezionare una temperatura con la manopola regolazione temperatura (1).
• La spia temperatura si spegne quando viene raggiunta la temperatura richiesta.
Il ferro da stiro è pronto per essere usato.
Per fare in modo che il ferro continui a restare caldo, muoverlo leggermente.
Se la spia temperatura si accende dopo che il ferro è stato mosso, aspettare che essa si spenga prima di continuare a
stirare.
Se la spia temperatura non si accende dopo che il ferro è stato mosso, la piastra ha ancora la giusta temperatura ed
il ferro è pronto per essere usato.
La funzione auto-pulizia può essere usata per rimuovere il calcare e le impurità. Usare la funzione auto-pulizia una volta
ogni due settimane.
a. Assicurarsi che il ferro sia disconnesso.
b. Posizionare la manopola controllo vapore su 0.
c. Riempire completamente il serbatoio dell’acqua.
d. Selezionare la temperatura di stiratura massima.
e. Inserire la spina nella presa.
f. Sfi lare la spina quando la spia arancione della temperatura si spegne.
g. Mettere il ferro al di sopra del lavabo, tenere premuto il pulsante auto-pulizia e scuotere leggermente (vapore e acqua
bollente usciranno dalla piastra portando via le impurità).
h. Rilasciare il pulsante auto-pulizia quando l’acqua nel serbatoio è stata completamente consumata.
Ripetere l’operazione se necessario.

MANUTENZIONE E PULIZIA
SCELTA DELL’ACQUA
1. Posizionare la manopola “regolazione temperatura” su OFF, poi disconnettere il ferro da stiro dalla corrente e lasciare
che si raff reddi completamente.
2. I residui e gli altri depositi sulla piastra possono essere rimossi mediante un panno inumidito con una soluzione
acqua/aceto.
3. Il rivestimento può essere pulito con un panno umido e poi con uno asciutto.
4. Non utilizzare nulla di abrasivo per pulire la piastra.
5. Mantenere la piastra liscia: evitare il contatto con oggetti in metallo.
6. Quando si fi nisce di stirare o quando si lascia il ferro incustodito: girare la manopola controllo vapore (7) fi no alla
posizione 0; posizionare la manopola “regolazione temperatura” su OFF; mettere il ferro in verticale; disconnettere il
ferro dalla presa di corrente.
7. Non lasciare che i bambini tocchino il ferro o il cavo elettrico quando è in uso.
8. Non immergere il ferro o il cavo in acqua o in altri liquidi.
9. Non toccare le parti metalliche calde, l’acqua calda o il vapore. Questi elementi possono provocare bruciature.
Sempre fare attenzione che non ci sia acqua nel serbatoio se si gira il ferro da stiro sottosopra.
10. La spina ed il cavo elettrico non devono venire a contatto con la piastra calda. Lasciare che il ferro si raff reddi prima
di riporlo. Avvolgere il cavo intorno al ferro e riporlo.
11. Disconnettere il cavo dalla presa prima di riempire il serbatoio o prima di svuotarlo del tutto dopo l’uso.
12. Il prodotto è destinato esclusivamente all’uso domestico.
CONSERVARE IL MANUALE D’ISTRUZIONE PER LA FUTURA CONSULTAZIONE
Note:
• Alcune parti del ferro sono state leggermente lubrifi cate, quindi, esso potrebbe produrre un po’ di fumo durante la
prima accensione.
• Prima di accendere il ferro per la prima volta, rimuovere ogni pellicola di protezione. Pulire la piastra con un panno
morbido.
• Prima di utilizzare il ferro per la prima volta, provarlo su di un vecchio pezzo di stoff a per assicurarsi che la piastra ed
il serbatoio dell’acqua siano completamente puliti.
• E’ consigliabile usare acqua distillata.
• Non usare acqua chimicamente decalcifi cata o altri liquidi.
COME RIEMPIRE IL SERBATOIO DELL’ACQUA
• Sistemare la manopola controllo vapore su 0 e la manopola “regolazione temperatura” su OFF.
• Sfi lare la spina dalla presa di corrente e aspettare che il ferro sia completamente freddo.
• Inserire l’acqua tramite il foro di immissione dell’acqua (5).
• Riempire il serbatoio fi no al livello massimo MAX.

SCELTA DELLA TEMPERATURA
REGOLAZIONE DELLA TEMPERATURA
• Controllare sempre le istruzioni riportate sull’etichetta degli indumenti prima di procedere alla stiratura.
• Dividere il bucato secondo il tessuto: lana con lana, cotone con cotone ecc. Stirare prima i tessuti che richiedono una
temperatura più bassa e procedere poi con tutti gli altri: infatti il ferro riesce a riscaldarsi in un tempo minore di quello
necessario per raff reddarsi.
• Se il tessuto è formato da vari tipi di fi bre (per esempio, cotone con poliestere), selezionare la temperatura relativa al
materiale che richiede la temperatura di stiratura più bassa.
• Inserire la spina nella presa di corrente e posizionare il ferro in verticale.
• Sistemare la manopola regolazione temperatura (1) sulla temperatura desiderata.
• La temperatura selezionata è raggiunta quando la spia temperatura si spegne. La suddetta spia si accende e si spegne
di tanto in tanto per indicare se la temperatura selezionata è ancora mantenuta o meno.
COME RIPORRE IL FERRO DA STIRO AL VAPORE
• Posizionare la manopola regolazione temperatura (1) su “min” e la manopola controllo vapore (7) su 0.
• Disconnettere il ferro dalla corrente.
• Svuotare il serbatoio dell’acqua.
• Posizionare il ferro in verticale e lasciare che si raff reddi completamente.
• Il cavo può essere avvolto intorno al ferro.
• Riporre sempre il ferro lasciandolo in posizione verticale.

GENERAL SAFETY INSTRUCTIONS
WARNING! READ THE INSTRUCTIONS CONTAINED IN THIS MANUAL VERY CAREFULLY AND SAVE THEM FOR FU-
TURE REFERENCE DURING THE WHOLE LIFE OF THE PRODUCT SINCE THEY PROVIDE IMPORTANT INDICATIONS
ABOUT THE FUNCTIONING AND THE SAFETY OF INSTALLATION, USE AND MAINTAINANCE OF THE PRODUCT.
RISK FOR CHILDREN!
A POWER DEVICE IS NOT A TOY. AFTER USE, STORE IT OUT OF REA-
CH OF CHILDREN. KEEP PACKING MATERIAL (PLASTIC BAGS, CARTON,
ETC.) OUT OF REACH OF CHILDREN.
THIS APPLIANCE CAN BE USED BY CHILDREN AGED FROM 8 YEARS
AND ABOVE AND PERSONS WITH REDUCED PHYSICAL, SENSORY OR
MENTAL CAPABILITIES OR LACK OF EXPERIENCE AND KNOWLEDGE IF
THEY HAVE BEEN GIVEN SUPERVISION OR INSTRUCTION CONCERNING
USE OF THE APPLIANCE IN A SAFE WAY AND UNDERSTAND THE HA-
ZARDS INVOLVED. CHILDREN SHALL NOT PLAY WITH THE APPLIANCE.
CLEANING AND USER MAINTENANCE SHALL NOT BE MADE BY CHIL-
DREN UNLESS THEY ARE OLDER THAN 8 AND SUPERVISED. KEEP THE
APPLIANCE AND ITS CORD OUT OF REACH OF CHILDREN LESS THAN
8 YEARS.
CHILDREN SHOULD BE SUPERVISED TO MAKE SURE THEY DO NOT
PLAY WITH THE APPLIANCE.
RISK OF INJURY!
TO AVOID INJURIES, DO NOT INTRODUCE YOUR HANDS IN THE MA-
CHINE WHILE IT IS OPERATING AND KEEP AWAY HAIR, CLOTHES AND
OTHER OBJECTS.
SWITCH OFF AND UNPLUG THE APPLIANCE BEFORE CHANGING THE
ACCESSORIES! DO NOT CONNECT THE PLUG TO THE POWER SOCKET
IF THE NECESSARY ACCESSORIES ARE NOT INSTALLED.
NEVER TOUCH THE MOVING PARTS OF THE APPLIANCE AND ALWAYS
WAIT FOR THE APPLIANCE TO STOP COMPLETELY.
RISK OF ELECTRIC SHOCK!
THIS APPLIANCE IS INTENDED TO WORK ONLY WITH AC. BEFORE OPE-
RATING, MAKE SURE THAT MAINS VOLTAGE RATING CORRESPONDS
TO THE VALUE INDICATED ON THE RATING PLATE OF THE PRODUCT.
USER INSTRUCTIONS
FOR A CORRECT AND SAFE USE OF THE APPLIANCE
EN

CONNECT THE APPLIANCE ONLY TO OUTLETS WITH A MINIMUM
ELECTRIC CURRENT OF 10 AMPERE.
DO NOT PULL THE POWER CORD OR THE APPLIANCE ITSELF IN ORDER
TO UNPLUG IT FROM THE OUTLET.
UNWIND COMPLETELY THE POWER CORD BEFORE SWITCHING ON
THE APPLIANCE.
USE AN EXTENSION CORD ONLY IF IT IS IN PERFECT CONDITIONS.
DO NOT LET THE CORD HANG OVER SHARP EDGES. DO NOT SQUASH IT.
DO NOT LET THE APPLIANCE EXPOSED TO THE WEATHER (RAIN, FRE-
EZING, SUN, ETC).
NEVER USE THE APPLIANCE:
- WITH WET OR DAMP HANDS;
- IF IT HAS FALLEN AND IT CLEARLY BROKE OR DOESN’T WORK
PROPERLY;
- IN CASE OF FAULTY PLUG OR POWER CORD;
- IN PRESENCE OF HUMIDITY OR GAS.
NEVER COVER THE APPLIANCE WITH TOWELS, CLOTHES, ETC.
PLACE THE APPLIANCE ONLY ON HORIZONTAL AND STABLE SURFA-
CES, FAR FROM SHOWERS, BATHTUBS, SINKS, ETC.
HOWEVER, IF THE APPLIANCE FALLS INTO THE WATER, UNPLUG IT
IMMEDIATELY AND TAKE IT ONLY AFTERWARDS. IN THIS CASE, STOP
USING THE APPLIANCE AND HAVE IT CHECKED BY QUALIFIED PER-
SONNEL.
ONLY OPERATE THE APPLIANCE IN VERTICAL POSITION.
ALWAYS UNPLUG FROM THE MAINS SUPPLY IMMEDIATELY AFTER THE
USE AND BEFORE ANY CLEANING OR MAINTENANCE OPERATION.
THE APPLIANCE MAY ONLY BE REPAIRED BY A SPECIALIZED TECHNI-
CIAN.
REPAIRING THE APPLIANCE BY YOURSELF MIGHT BE EXTREMELY DAN-
GEROUS.
ALWAYS CUT THE POWER CORD OF A BROKEN UNIT IN ORDER TO
MAKE IT UNUSABLE BEFORE THROWING IT AWAY.
CLEAN THE APPLIANCE WITH A DAMP CLOTH AFTER IT COOLED DOWN.
DO NOT USE SOLVENTS OR ABRASIVE PRODUCTS.
THE APPLIANCE IS INTENDED ONLY FOR HOME USE. IT CAN ONLY BE
USED INDOOR.
THIS APPLIANCE CANNOT BE USED FOR COMMERCIAL PURPOSES.

STEAM IRONING
You can only use this function with high temperature.
“OO”: medium steam.
“OOO” or “MAX”: maximum steam.
• Fill the water tank.
• Position the iron upright.
• Connect the iron to the power socket.
• Set the temperature knob (1) to “OO”, “OOO” or “MAX”.
• The temperature indicator light turns off when the desired temperature is reached.
The iron is now ready to use.
• Turn the steam knob (7) to the position needed. Some steam will come out from the holes in the soleplate.
Note: if the set temperature is too low, some water may come out from the holes in the soleplate. Should this happen,
turn the temperature knob (1) to the adequate position. Steam will come out again when the right temperature will be
reached.
COMPONENTS
1. Temperature knob
2. Double steam button
3. Spray button
4. Spray nozzle
5. Water intake hole
6. Temperature light indicator
7. Steam knob
8. Soleplate
9. Base
10. Water tank
11. Self-Clean button
6
SPRAY FUNCTION
You can use this function at any moment as it doesn’t aff ect the iron’s temperature.
• Fill the water tank.
• Direct the nozzle to the garment.
• Press the spray button (3).

DOUBLE STEAM FUNCTION
DRY IRONING
CONSTANT HEAT
SELF-CLEAN FUNCTION
This function produces a bigger quantity of steam to remove the most diffi cult creases.
• Fill the water tank.
• Set the temperature knob (1) to “MAX”.
• The temperature indicator light turns off when the desired temperature is reached.
The iron is now ready to use.
• Press the double iron button (2) once.
• Steam will penetrate into the fabric to remove all the creases.
• Wait a few seconds before pressing the double steam button again on other creases.
• Make sure the steam knob (7) is on “0” position.
• Set the temperature by turning the temperature knob (1).
• The temperature indicator light turns off when the desired temperature is reached. The iron is now ready to use.
Slightly move the iron in order for it to stay warm.
If the temperature light turns on after moving the iron, wait for it to turn off again before keeping ironing.
If the temperature light doesn’t turn on after moving the iron, the soleplate is still hot and you can keep ironing.
The self-clean function can only be used to remove scale and dirt. Use this function once a week.
a. Make sure the iron is unplugged.
b. Set the steam knob to “0”.
c. Completely fi ll the water tank.
d. Select the maximum ironing temperature.
e. Connect the appliance to the power socket.
f. Remove the plug from the socket when the orange temperature light indicator turns off .
g. Place the iron on the sink, press and hold the self-clean button and shake it gently (steam and hot water will come
out from the soleplate removing all dirt).
h. Release the self-clean button when all the water in the tank has come out.
Repeat the operation if necessary.

CLEANING AND MAINTENANCE
WATER CHOICE
1. Set the temperature knob to “off ”, unplug the appliance and let it cool down completely.
2. Dirt and deposits on the soleplate can be removed with a cloth moistened with a water/vinegar solution.
3. Clean the housing with a damp cloth, then dry with a dry cloth.
4. Do not use any abrasive product or object to clean the soleplate.
5. Take care not to damage or scratch the soleplate by allowing it to come into contact with metal objects.
6. When you fi nish ironing or if you leave the iron unattended: turn the steam knob (7) until position “0”, set the
temperature knob to “OFF”, fi nally unplug the iron.
7. Do not allow children touch the iron or the power cord when the appliance is in use.
8. Never immerse the appliance, the cord or the plug in water or any other fl uid.
9. Do not touch the hot metal parts, the hot water or steam in order to avoid the risk of scalding. Make always sure the
tank is empty before turning the iron upside down.
10. The plug and the power cord should not come into contact with the hot plate. Let the appliance cool down before
storing it. Wrap the cord around the iron and store the appliance.
11. Unplug the appliance before fi lling the tank or emptying it after the use.
12. The product is intended for household use only.
KEEP THE MANUAL FOR FUTURE REFERENCE
Notes:
- Some parts of the iron have been slightly oiled, therefore it could emit some smoke the fi rst time you turn it on.
- Before turning on the iron for the fi rst time, remove any protection fi lm. Clean the soleplate with a soft cloth.
- Before using the iron for the fi rst time, begin by ironing a piece of old fabric to ensure that the soleplate and water
reservoir are completely clean.
• The use of distilled water is recommended.
• Do not use chemically decalcifi ed or other liquids.
FILLING THE WATER TANK
• Set the steam knob to “0” and the temperature knob to “OFF”.
• Unplug the appliance and let it cool down completely.
• Fill water through the intake hole (5).
• Fill the tank until MAX sign.

CHOOSING THE TEMPERATURE
SETTING THE TEMPERATURE
Always follow the instructions on the garment’s label before ironing.
• Sort the clothes by fabric: wool with wool, cotton with cotton etc. Start by ironing garments that require low
temperature, then continue with the others. The iron warms up slowly than how it cools down.
• In case of mixed fabrics (such as cotton with polyester), set the temperature related to the fabric requiring the lowest
ironing temperature.
• Plug the appliance and place it upright.
• Set the temperature knob (1) to the desired position.
• Temperature is reached when the temperature indicator light turns off . The indicator light turns on and off when
temperature decreases/reaches again desired level.
STORING THE STEAM IRON
• Set the temperature knob (1) to “min” and the steam knob (7) to “0”.
• Unplug the appliance.
• Empty the water tank.
• Position the iron upright and let it cool down completely.
• You can wrap the cord around the appliance.
• Always store the iron in upright position.

TRATTAMENTO DEL DISPOSITIVO ELETTRICO ED ELETTRONICO A FINE VITA
Informazione agli uten per il correo smalmento del prodoo ai sensi della Direva Europea 2012/19/EU e del D.lgs N. 49/2014.
Caro consumatore,
è importante ricordarti che, come buon cittadino, avrai l’obbligo di smaltire questo prodotto non come riuto urbano, ma di eettuare una raccolta separata.
Il simbolo sopra indicato e riportato sull’apparecchiatura indica che il riuto deve essere oggetto di “raccolta separata”.
I dispositivi elettrici ed elettronici non devono essere considerati riuti domestici. Pertanto, il prodotto alla ne della sua vita utile, non deve essere smaltito insieme
ai riuti urbani. L’utente dovrà conferire (o far conferire) il riuto ai centri di raccolta dierenziata predisposti dalle amministrazioni locali, oppure consegnarlo al
rivenditore contro l’acquisto di una nuova apparecchiatura di tipo equivalente.
La raccolta dierenziata del riuto e le successive operazioni di trattamento, recupero e smaltimento favoriscono la produzione di apparecchiature con materiali
riciclati e limitano gli eetti negativi sull’ambiente e sulla salute eventualmente causati da una gestione impropria del riuto.
Grazie!
DISPOSAL OF THE ELECTRIC OR ELECTRONIC DEVICE AT THE END OF ITS LIFE
Informaon for users about the correct disposal of the product according to
the European Direcve 2012/19/EU and to the Legislave Decree N. 49/2014.
Dear Customer,
It is important to remind you that, as a good citizen, you cannot dispose of this product as municipal waste; you have to do a separate collection.
e symbol labelled on the appliance indicates that the rubbish is subject to “separate collection”.
Electrical and electronic appliance cannot be considered as domestic waste. erefore, at the end of its useful life, this product should not be disposed with municipal
wastes. e user must therefore assign or (have collected) the rubbish to a treatment facility under local administration, or hand it over to the reseller in exchange for
an equivalent new product.
e separate collection of the rubbish and the successive treatment, recycling and disposal operations promote production of appliances made with recycled materials
and reduce negative eects on health and the environment caused by improper treatment of rubbish.
Thank you!


Table of contents
Languages:
Other Kooper Iron manuals

Kooper
Kooper Stiramicca User manual

Kooper
Kooper 2167122 User manual

Kooper
Kooper 5902429 User manual

Kooper
Kooper 2193565 User manual

Kooper
Kooper 5901017 User manual

Kooper
Kooper 2196206 User manual

Kooper
Kooper 5913664 User manual

Kooper
Kooper 5901016 User manual

Kooper
Kooper 2194266 User manual

Kooper
Kooper 2412024 User manual