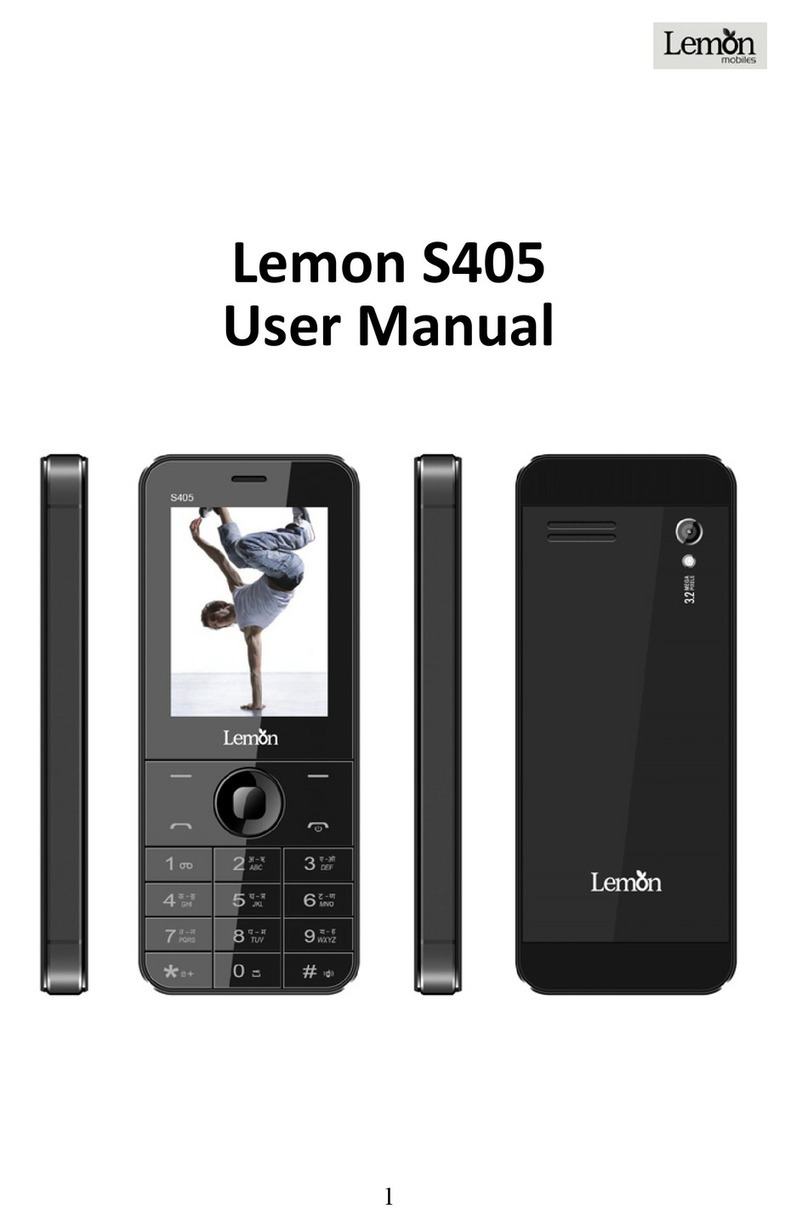
Lemon MB1 Trio 360 User manual

1
USER MANUAL LEMON MB1

2
TABLE OF CONTENTS
1 SAFETY PRECAUTIONS.......................................... 3
2 YOUR PHONE ..................................................... 3
3 GETTING STARTED............................................... 5
4 BASIC FUNCTIONS ............................................... 8
5 USAGE OF FUNCTION MENU...................................10
6 INSTRUCTIONS OF FUNCTION MENU .........................11
1.ORGANIZER...............................................................................................................11
2.PHONEBOOK..............................................................................................................11
3.GAMES.....................................................................................................................12
4.FILEMANAGER...........................................................................................................12
5.MESSAGES................................................................................................................12
6.MULTIMEDIA.............................................................................................................14
7.LEMONTWIST............................................................................................................15
8.AUDIOPLAYER............................................................................................................15
9.NETWORKSERVICES....................................................................................................15
10.CALLHISTORY...........................................................................................................16
11.SETTINGS.................................................................................................................16
12.USERPROFILES.........................................................................................................19
7 INPUT METHOD..................................................19

3
Thank you for purchasing Lemon Trio 360 phone.
To guarantee your mobile phone works properly, please follow the instructions in this
manual to prevent any possible incidents or malfunctions.
Follow all safety warnings to avoid injury or property damage.
Screen displays and illustrations in this user’s manual are designed to help you
operate your phone to its optimum performance.
1 Safety Precautions
1.1 Road safety comes first
When driving, care must be taken for using phone; if driving conditions are poor,
please pull up at road side to use the phone.
1.2 Power off your phone in hospitals
Please abide by relevant regulations or rules. Please power off the mobile phone when
close to medical equipment.
1.3 Power off your phone in aircrafts
Wireless phones can cause interference. Using phones in aircraft is both dangerous
and illegal.
1.4 Power off your phone when refueling
Do not use the phone at a refueling station or near fuels or chemicals.
Precautions When Using Phone
2.1 Interference
All phones are subject to interference, which will affect their performance.
2.2 Use sensibly
Use phone only in its normal position. Please do not touch antenna area unless
necessary.
2.3 Use qualified servicing
Only qualified maintenance staff can assemble or repair the equipment.
2.4 Waterproof
Your phone is not waterproof, please keep it dry.
2.5 Emergency calls
Make sure the phone is powered on and in service. Input emergency service number
and press Dial key, give your location and do not end the call until told to do so.
Precautions When Using Batteries
3.1 Keep the batteries away from fire; do not dispose off batteries in a fire it should be
danger.
3.2 Do not dispose off used batteries in dustbin, and they should be sent to designated
recycling center.
Precautions for children
Keep the phone out of the children’s reach.
2 Your Phone
Description of keypad keys

4
1, Left function key
Carry out the functions of the indicator showed at the lower left corner of the screen.
2, Right function key
Carry out the functions of the indicator showed at the lower right corner of the monitor.
3, Dial key
Dial or answer a phone call. Input the phone number then press dial key to select SIM
card.
4, End key
End or reject a call. Press and hold the key to power on/off the phone. In other
circumstances, press the key to return to standby state.
5, Number key
Enter numbers and characters. In standby state, press and hold “1” to enter Voicemail,
number 2-9 may be set up as shortcut keys in call settings; in menus, press number
key to fast choose the menu option.
6, * key
This key has different functions in different state or function menus.
7, # key
This key has different functions in different state or function menus.
Status Icon List
SIM1/SIM2 Network signal intension
SIM1/SIM2 unread SMS
SIM1/SIM2 unread MMS
SIM1/SIM2 missed call

5
Keypad locked
Bluetooth
Alert Type - Ring
Alert Type - Vibration Only
Alert Type -Vibra and Ring
Alert Type - Vibra then Ring
Alert Type - Mute
Plug handsfree
Set and start alarm
Battery
3 Getting Started
1. Battery
The battery is initially charged 50% only and can be used after fully charged. For the
first three times needs charging & discharging, do not recharge until the battery is
totally exhausted, so that the battery can reach its best usage performance.
1.1 Removing and installing battery
For removing:
A. Push the battery back cover;
B. Lift the battery up as indicated by the arrow;
C. Take the battery out.
Warning: Make sure to power off the phone before taking out SIMcard, otherwise your

6
SIMcard might be damaged.
For installing:
A. Place the metal contact points of the battery upward and flush with metal
contact points in the battery slot, then insert the bottom of battery into battery slot;
B. Place the back cover of the battery onto the phone squarely, and push in the
direction of the arrow till it clicks into place.
1. 2 Charging Battery
While charging, the power supply indicator at phone’s screen icon zone will flash in a
rotation manner, if the phone is off while charging, a charging screen will still appear,
indicating that the phone is recharging. If the phone is still being overused while the
power supply is insufficient, the recharging indicator will appear on the screen after the
recharging has started for a while.
When the power supply indicator at the screen’s icon zone shows full and stops
flashing, it means charging has completed. If it takes place when the phone is off, the
screen will display charging-finished icon. The process generally takes about 2.5 hours.
It is normal that the battery, the phone and the charger will become hot during the
charging process.
After completing charger, disconnect the phone and the charger from the AC power
supply.
Note: Battery must be charged in a well ventilated place with surrounding temperature
at -10℃~+55℃, and it is imperative that a charger provided by manufacturer is used.
Using unauthorized charger might cause danger, which also violates warranty terms
prescribed by the manufacturer. If the charging temperature is too high or too low, the
phone will automatically give warning and stop charging, so as to prevent damages to
battery.
2. Connecting to Network
2.1 SIMcard
A valid SIM (Subscriber Identity Module) card must be inserted in the phone before
using it.
All information related to making connection to the network are recorded in the chips of
SIMcard, including the names, phone numbers and short messages you have stored
in the SIMcard Phone book. In order to prevent loss or damage of the info in the
SIMcard, it is necessary to avoid touching metal contact surface, and keep SIMcard far
from electricity current and magnet.
2.2 Inserting and removing SIMcard
Power off the phone; remove battery and other external power connection, as shown
in the image.
Insert SIMcard into SIMcard socket.
When you need to remove SIMcard, please power off the phone first, remove battery,
then remove the card.

7
2.3 Inserting and removing memory card
Power off the phone; remove battery and other external power connection. Insert
memory card into card slot as shown in the image.
2.4 Power on/off phone
To power on or power off phone, please press and hold the Disconnect key.
Then the screen will display the following prompts in sequential order:
Enter phone password – if you have set up phone lock password.
Enter PIN – if you have set up SIMcard password.
Search – the phone will search till finding appropriate network connection.
2.5 Unlocking SIMcard
To prevent illegal usage, PIN (Personal Identification Number) code is adopted to
encrypt for protection of your SIMcard. Selecting this option and if having set up PIN
code protection, you have to enter PIN code each time you start it, unlocking SIMcard
to use the mobile phone.
Users can erase SIMcard password; however, in this case SIMcard cannot prevent
illegal usage.
Press and hold the Ring off key to power on the phone;
Enter PIN1 code, use Right function key to delete input-errors, Left function key for
"OK". For instance, if PIN1 setting is 0000, then enter the following input: 0 0 0 0 "OK"
If there are three consecutive input errors, your SIMcard will be locked up by the

8
network, the phone will inquire PUK1 code.
Note: Your service provider will set up a standard PIN (4 to 8 digits) number for your
SIMcard; you should change it into your private password as soon as possible.
2.6 Unlocking phone
The phone lock protects your phone from unauthorized use. The default phone lock
code is 0000. You can change it into any numeric string of 4 to 8 digits.
If the phone lock function is enabled, you need to enter the correct phone lock code
when the phone is powered on or in the standby mode.
2.7 Connecting to network
After SIMcard is successfully unlocked, the phone will automatically search available
network (with searching showing on the screen). Once the connection is made, the
name of the service provider will be displayed on the top central part of the text and
graphic area. At this time your phone has been connected to the service network.
Note: If the screen prompts "Emergency ", this means you have moved out of the
normal network coverage (service range) or your card has not passed authentication,
but you can still transmit emergency calls based on signal strength.
4 Basic Functions
Making a call
When the logo of service provider appears on the display screen, you can dial or
receive calls. The info bar at the upper left corner of the display screen shows network
signal strength (when there are 5 info bars the signal is at its strongest).
The call quality is very likely to be affected by obstructions; therefore movement in a
small area can effectively improve call performance.
Making domestic calls
Enter phone number and then press Dial Key to make the call. If the user needs to
change phone number, press Right function key "Clear" back and delete numbers.
Dialing animation will be displayed on the screen during dialing. Call state info will be
shown on the screen after the called party ends the call
You can enter and dial domestic call following the order:
Area code Phone number Dial
Dialing extension number of fixed-line telephone
Some extension numbers of fixed-line telephone cannot be connected directly, you
must dial the power board phone number, then press * key to power continually, until
the screen displays "P", then dial extension number.
You can dial extension numbers of fixed-line telephone in the following order:
Area code Power board number P Extension number Dial Key
Dialing international calls
To make an international call, you may press * key to power continually, till the screen
displays the pre-digit symbol "+" for international long distance call, which will enable
you to make a call from any country without knowing the local international access
code.

9
You can enter numbers in the following sequence to make an international call: +
country code complete phone number Dial Key
After inputting prefix number, input the code and the complete phone number of the
wanted country. The country code follows usual practice, such as Germany 49, UK 44,
Sweden 46, etc.
Like making an international call, use "0" before city code number.
Dialing phone numbers in the call records
Every phone number you have dialed or received will be stored in the list of phone call
records. The latest dialed, received and missed numbers will be listed, according to
their types, in the respective menu of dialed calls, received calls and missed calls.
When call record list is full, the old numbers will automatically be deleted. To view the
list, do the followings:
In standby state press Dial key to view the record for dial calls.
All phone numbers in the list can be dialed directly by pressing the Dial key.
When the list is displayed, press “OK” to read the details, then “options” to Save or
Delete the number.
Emergency calls
As long as in the network service range (which can be confirmed by checking the
signal strength bars on the top left corner of the screen), you can always call
emergency service. If your network supplier does not provide roaming service in your
area, the screen will display "Emergency", to inform you that only emergency call is
permitted. If you are within the network service range, you can also make emergency
calls even without the SIMcard.
Answering a call
Press dialing key to answer an incoming call. If an earphone has been connected, use
the button on the earphone to answer a call. If Any Key answer function is chosen,
pressing any key, other than Ring off key and Right function key, can answer an
incoming call.
Call records
Your phone can also store call records of the latest missed calls, received calls, dialed
calls, the time of last call as well as total amount of received calls and total dialed calls
for you.
Call options
In connected state, pressing Left function key “Options” can enter call option, or
pressing Right function key "H-free" to activate speaker, under activated-hands free
condition, press Right function key “H-held" to power off speaker. Operation methods
of call options are the same with that of Function menu.
This call options can only be viewed during call process, moreover, the functions of call
waiting, call holding, and conference calls need service support, please contact your
service provider for details.
In the call options, you can make the following operations:
Hold single call

10
Make the current call hold.
End single call
End the current call.
New call
Enter new dialing interface.
Phonebook
Enter Phone book menu.
Messages
Enter Short message menu. Owing to restriction of network engagement, MMS
function is barred during call process.
Sound recorder
Record the current call.
DTMF
Turn on or off DTMF function.
Conference*
Enter multiple party conference call state. By following the prompts, you can have the
following functions: receive waiting calls, add them into multiple party call, maintain the
multiple party call, talk privately with one party of the conference while maintaining all
other callers, connect one party in the call conference with another party while exiting
the multiple party call oneself, maintain one party of the multiple party call and end
current call and all other maintained calls.
Note: The menu marked * items will only appear in special circumstances. For
conference function, it is necessary to apply for service supply to corresponding
service operator.
5 Usage of function menu
Scrolling search and select function
In standby state, press Left function key "menu" to enter function menu, or during the
call, press ”Options” to enter call option menu.
At all main menu or sub-menu interface, it is possible to press up, down, right and left
keys of keypad (under menu of page scrolling, press up or down keys to realize
scrolling up or down) to scroll to the function you need, then press Left function key, or
OK key, to enter that function option.
Shortcut selection function
Generally sub-menu and menu option are equipped with shortcut numbers, which are
their corresponding index numbers.
Enter different options by pressing shortcut number, in the menu list input short-cut
number of sub-menu option to highlight the selected corresponding options.
Exit menu
In function menu, generally you can exit a menu by pressing Right function key, press
Ring off key to return to standby state.

11
6 Instructions of Function menu
1. Organizer
Use this menu to keep track of your schedule. You can also use convenient features,
such as Calendar, To do list, Alarm, World Clock. To access this menu, press [Menu] in
Idle mode and select Organizer. The available options are:
zMemory Card backup: You can backup phone book and SMS.
zCalendar: You can keep track of your monthly schedule.
zTasks: You can use your phone to keep track of all your Date, Call and
Anniversary.
zAlarm: Set the alarm to ring at a specific time.
zWorld clock: Set your local time zone and find out the current time in another
part of the world.
zCalculator: you can use direction key to make addition, subtraction,
multiplication and division, and carry out corresponding memory operations
when selecting M+, M-, MR, MC.
zEBook reader: With the function, you may read any file in TXT format saved in
the memory card.
2. Phonebook
You can store info such as names, phone numbers, and mobile phone numbers.
Phone numbers can be stored in your mobile phone or SIM card. The mobile phone
can store up to 500 records, the amount of phone numbers that SIM card can store
vary with its capacity.
In standby state, you can visit this interface by Right function key or “Names”.
2.1 Quick Search
Use this menu to search for numbers in Phone Book.
2.2 Add new contac
Add a new number record to SIM card or mobile phone in Phone book.
2.3 Copy
Select to copy all phone number records from SIM card to mobile phone, or select to
copy inverted from mobile phone.
Note: When copying, only the names and phone numbers will be copied from the
mobile phone onto SIM card.
2.4 Delete
Delete all phone book records respectively from SIM or from phone. Or delete phone
book record one by one.
2.5 Caller Groups
This mobile phone supports incoming call group function, you can select groups, view
and edit group details under incoming call group list interface.

12
Group details include group name, associate sound, associate picture, member list. It
can edit setup (wherein incoming call image connection can be realized by selecting
images suitable for the image displayed by the screen from directory as incoming call
image), and can add or reduce group members.
Note: Member addition or reduction of incoming groups is only limited to phone record
on the mobile phone.
2.6 Phonebook Settings
The options such as space inquiry or saving position are available.
Note: When phone number records are stored in SIM card, only record the info of
name and phone number.
2.7 Caller Picture
Set an associate picture to a new contact, selected contact or caller group.
2.8 Caller Ringtone
Set an associate ring tone to a new contact, selected contact or caller group.
Note: The above three functions are only effective for numbers in the mobile phone.
3. Games
You can play the game in this phone like Single-player Games.
4. File Manager
You can use File Manager to organize your files in folders in the memory card.
Select Memory card and select Options to Open, New folder, Rename, Delete, Sort by
and so on.
5. Messages
5.1 SMS
Enhanced Short message (EMS) is supported by SIM card only, and picture, animation,
melody, and sound can be added in the Short message. Short message can be
created by templates.
Write Message
Create a new short message.
1. Enter text
2. Press the Left function key (Option) and select the required items, including Send
to,Insert template, Insert SMS content, Insert vcard, Insert Call Log, Insert
bookmark ,Save to Drafts and Input method.
3. Press the OK key (Options) and select send.
Inbox
View received Short message in Inbox sub-menu.
Sent
Enter sent list to view short messages you saved in your phone (including SIM1 card
and SIM 2 card).In Outbox info list, press “OK” to read detailed contents of the info.
Drafts

13
Drafts stores SMS unprepared for sending for future revision and sending.
Archive
Can move the receive SMS to archive.
Scheduled SMS
Set the text messaging’s time regularly, phone number, cell phone text message
contents will be set according to the contents of the messages sent to the specified
phone.
SMS Settings
Before using Short message function, you need to make corresponding setup. Enter
setup sub-menu, and select the following settings:
ySIM 1 /SIM 2 message setting
Profile Setting: Please contact your local service provider, so as to receive short
message service center number. Entering this sub-menu will display the current info
mode setup list, the number of lists will vary subject to service provider and SIMcard
types. After selecting mode selection, press “Edit” to set up file name, short message
center number, expiration time of an undelivered message as well as sending format in
sequential order.
Note: Realization of message, valid period, fax, paging, e-mail need service provider
support.
Voicemail sever: edit voicemail server.
Common Setting will activate/deactivate delivery report and reply path.
Check memory status: Short message memory status conditions in SIMcard and the
phone will be displayed in n/m format.
Preferred Storage: It is possible to select to use default saving for incoming short
messages or to save them on the phone.
5.2 MMS
Your phone supports MMS function, you only need to make some necessary MMS
setup before you can receive and send multimedia info.
Write Message
Create a new Multimedia Message.
1. Enter recipients in to by pressing the Left function key (Edit) .Confirm with done.
2. Enter a subject in Subject by selecting Edit. Press the Left function key (Options)
and select done.
3. Enter text in Edit content by selecting Edit.
4. Press the Left function key (Option) and select the items you want to send, including
images (add picture), audios (add audio), add video files in other formats (Add
attachment) and slide (add slide before / after ), add bookmark text, preview and so on.
5. Confirm the contents by selecting Options and Done.
6.Press the Right function key (Done) for send options.
Inbox
Incoming multimedia messages are saved in inbox.
Outbox

14
You can view or process the multimedia messages saved in outbox.
Drafts
You can save a multimedia message as draft while creating it.
Templates
You can setup MMS as a template, then send or view it.
MMS Settings.
If the user needs to use MMS service, necessary setup must be done first. Enter
MMS Settings sub-menu to make the following setup.
Proxy setting: Add new or edit current account.
Common settings :You can do edit setting, send,retrieve,filter,and memory
status.
Note: 1. Cases of delivery report and anonymous transmission are related to the
service provided by your service provider, for more info please contact your service
provider.
2. Your phone has specially reserved a certain available spaces for storing MMS.
Saving a large amount of MMS might totally occupy this available storage capacity,
therefore your phone might prompt your storage capacity is full. At this time you must
first delete redundant info in all MMS mail directories, so as to ensure there is sufficient
space for keep saving new MMS.
5.3 Broadcast message
Broadcast message refers to the public message sent by service provider. Using
broadcasting of short message service, you can receive info on various topics from the
service provider, such as weather, taxis, hospital, etc. For detailed info of relevant
topics available, please contact your local service provider.
6. Multimedia
6.1 Camera
In standby interface, press right and left keys to adjust camera exposure compensation
parameter; press up and down keys to adjust camera focus; and press OK key to take
photos.
6.2 Image Viewer
Entry the sub-menu of Image Viewer, you can conveniently view images that saved in
Image Viewer shot by camera, and can View, Browse style, Send, Use as, Rename,
Delete, Sort by, Storage.
Wherein Use operation can select to wallpaper, Screen Saver to setup as power on
Display, to setup as power off Display, to Caller picture, send:send to MMS, to
Bluetooth ,successful or failing operation in actual conditions are subject to factors
such as MMS space size, screen size, etc.
6.3 Video recorder
In Preview, press left or right keys to adjust camera exposure compensation parameter;
press up and down keys to adjust Camera focus. Press OK key to start video recording.
In the course of video recording , press Right function key or OK key to stop recording.
After recording, it will inquire whether need to save .If choose YES, then will save to

15
the appropriate folder, choose “No", then give up the recording of the video.
6.4 Video player
Select Video player sub-menu, and enter video player list, direction keys of “Up” and
“Down” keys can be used to select files to be played, press OK key to see the options,
press “Options” to perform operations such as Play, Send, Rename, Delete, Delete all
files, Sort by, Storage.
At the playing interface, press OK key to play current media files; press it again will
pause playing; press Right function key to stop playing; press up or down key to adjust
sound volume; left or right key can fast adjust the speed of video playing,(It supports
3GP video).
6.5 FM Radio
FM radio interfaces, according to the "option" and can enter the following features:
Channel list, Manual input, PresetAuto Search, Settings.
6.6 Schedule FM record
You can enter common channel and time.
6.7 Sound Recorder
This sub-menu will list audio files stored in the current mobile phone.
Press Left function key “Options”, it can list the functions of the sound recorder menu,
whose contents are as follows in sequential order: Record, Play, Append, Rename,
Delete, Delete all files, Settings, Use as, Send.
7. Lemon Twist
MSN
Select start, input username and password, then select sign in.If you use it first time,
you should select settings to set the data account.
8. Audio player
In Audio player interface, press "List" to enter the current Mobile phone’s playing list, it
is possible to perform the following operations in music files in the list: Play, Details,
and Add to ringtones, Refresh List, and Settings.
9. Network Services
9.1 STK
In addition to the functions available in the phone, your SIM card may provide
additional services that you can access in this menu.
This menu is shown only if it is supported by your SIM card. The name and contents of
this menu depend on the services available.
9.2 Internet service
WAP function enables you to use the phone to surf the Internet.Your phone only
support to access the WAP sites.
9.3 Data account
This function enables to set the account information.

16
10.Call history
You can view SIM info related to call records, including: Missed Calls, Dialed Calls,
Received Calls, Delete Call Log, Call Timers. If you only have been inserted a SIM
card, you can only see one of the SIMcard phone records.
11.Settings
11.1 Display setting
In this menu, you can set such as: Themes, 3D effects main menu,wallpaper, screen
saver,power on display,power off display,show date and time,show owner
number,show operator name, etc.
11.2 Phone settings
Dual SIM settings
Dual SIM open:SIM1 and SIM2 are all power on.
Only SIM1 open:SIM1 is power on,but SIM2 is power off.
Only SIM2 open:SIM1 is power off,but SIM2 is power on.
Flight mode: SIM1 and SIM2 are all power off.
Security settings
SIM1(SIM2) security settings
SIM Lock
When the PIN Check feature is enabled, you must enter your PIN each time you switch
the phone on.
Any person who does not have your PIN cannot,therefore, use your phone without
your approval.
Referring to the current status provided by yellow status bar floating close to the item,
you can make the following setup:
If SIM card lock is off, you can select “on” ,then enter the pin code to set the sim lock
on, then you must enter the PIN each time the phone is switched on.
; if PIN check is ”on” now, selecting “off” to turn off the pin check..
Note: If PIN code is wrongly inputted for three times, SIM card will be locked, then
you’ll be asked to enter PUK code to unlock SIM card.
PIN code and PUK code may be supplied to you together with SIM card,else, please
contact your network operator. Default PIN code is generally 1234, please replace it
with your own password as soon as possible.
Fixed Dial
The FDN(Fixed Dial Number) mode, if supported by your SIM card, allows you to
restrict your outgoing calls to a limited set of phone numbers.
The following options are available.
Mode: enter your PIN2 code, to switch fixed dialing mode on/off.
Fixed Dial List: you can add,edit ,delete your fixed dialing numbers here
Note: For switch on/off this mode, you need to enter PIN2 code, please contact your
network operator to acquire PIN2 code. After switching on fixed dialing mode, there will
be mark by the side of the phone number in the phonebook to tell you the number is
also the one in the fixed dial list

17
Barred Dial
If your SIM card supports this function, you can bar dialing selected phone numbers.
When this option is on, the numbers can’t be dialed in the current barred dialing list.
Note: you need to enter PIN2 code to switch on this function, please contact your
network operator to acquire PIN2 code. After switching on Barred Dial option, the
barred number will not be displayed in the phone book.
Change Password
The change password feature allows you to change your current PIN2 pin1 phone lock
password to a new one. You must enter the current password before you can specify a
new one.
Note: To successfully change password, the above entered password must be digits
between 4 digits (including 4 digits) and 8 digits (including 8 digits) then press ”OK”, or
enter any digits no more than 8 digits (including 8 digits) then add # at the end.
Phone Lock
Mobile phone lock can prevent your mobile phone being illegally used.
to change your current phone password to a new one. You must enter the current
password before you can specify a new one.
Note: The password is factory set to 0000, please replace it with your own password
as soon as possible.
Auto Keypad Lock
In standby mode, press right soft key and * key can lock/unlock your phone.
By the way, if keypad lock time has been set up in the “Keypad lock” option, then, when
a corresponding period of time passes and the phone receivies none operation
instructions, keypad will be automatically lock up.
Although, you can answer an incoming call without unlock the keypad, after the call
ends the keypad will automatically lock up.
Mobile Tracker
After entering the password of mobile tracker,you can change the status and settings.
A. Status: On/off this function by left function key.
B. Settings: enter to the Settings, user need to input the following infomations:
a) Anti-Thief Password:The phone password is “0000” by default.
b) Bonding Phone: enter phone number.
c) Preset alarm content: User also can edit the prest content.
After changing SIM card, if user input wrong mobile tracker Password for only
once, phone will send a message to specified number.The phone password is “0000”

18
by default.
Change Password
You can change phone lock password and SMS password. The default password is
0000.
Private protection
In this menu, you can set password-protected on the need of menu.
For the menu open the private protection,need to input a phone password when you
entered.
Enter the other module which has opened the funciton,do not input the password again
until return to idle to give up operation of authority.
Time and Date
Including set time zone,set time/date,set format.
Schedule pwer on/off
There are four different times to set for the phone to auto power on/off according to
the setting type.
Note: If the setting times are the same,it will cause failure, please set different times.
Language
You can set a desired language to be displayed on your phone.
Prefer. Input Methods
There are a number of input methods for you to select.
Shortcuts
This menu allows you to set shortcuts menu list.
Dedicated key
You can select specific functions for the up/down/left/right navigation keys to quick
access in the idle screen.
Auto update of date and time
You can setup on/off.
LCD backlight
LCD backlighting time, LCD backlighting brightness setting.
Restore factory settings
In this menu, enter mobile phone lock Password, then confirm to restore relevant
parameters of the mobile phone to its factory settings values.
Bluetooth

19
Activate Bluetooth:on/off Bluetooth function.when the Bluetooth is on, main LCD
interface status bar will display the Bluetooth icon.
Inquiry audio device: open ,the search Bluetooth hands-free devices.
Search for Bluetooth device: show the devices which had matched with my device.
Connecting devices: show devices conection with my deviced.
Settings: Include the following
This device is visible: wheather the device can be searcher
Name of this device:change device name
Set audio path: set up voice to transfer path for Bluetooth headset or remain in
the machine.
Storage:set up the storage,such as phone, memory card,or always ask.
My Bluetooth: Service records.
11.3 Call settings
For a general setting,such as: Smart call divert,SIM1/SIM2 call settings, Low
battery protection, IP dial, Reply by SMS,Advance settings.
11.4 Network settings
11.4.1 Network Selection
The Network Selection feature enables you to:select a network automatic or manually.
11.4.2 Preferences
Support selection preferred networks.
12. User profiles
The phone provide several pre-defined user profiles that allow the operations of the
phone to best suit the environment you are in. The profiles are General, Meeting,
Outdoor, Indoor, Slient mode, Headset,Bluetooth. The phone will automatically enter
the headset profile if you connect the headset.
Note: seven modes have been set up at factory configuration, with the General mode
activated as default mode.
7 Input method
This mobile phone supports two input modes: keypad input Under keypad input mode,
we support: English input digit input, character input.
Keypad definition
Navigation key (up, down, right and left keys): Generally using for moving cursor or
selecting characters.
#key: pressing “#” key will alter different input methods, with corresponding input
method icon at the left side of Icon zone. Digit key (2-9) In English input status; these
keys indicate letters on each key;
* Key: press * key to activate punctuation marks and character input method.
Input method explanations
English input method

20
Under English input method status, detailed definitions of keypad are described as
follows:
The keypad of English input method (including English upper case input and English
lower case input) is defined in detail as follows:
Common operation method for English input:
Each key is used to enter a number of characters. Keep pressing the keys rapidly till
the character you need appears.
When you need to enter English punctuations and some special symbol, under English
input mode (including English upper case and lower case) press * key to activate
special symbol input box.
Use # key to power input methods.
When you need a space key, press 0 key once.
Use Right function key to erase input error, press Right function key continually to
erase all current input.
Digit input method
Under digit input method, Keypad is defined as follows:
Detailed definitions of Keypad in digit input method are described below:
General operation methods in digit input method
Press Digit key 0-9 to enter corresponding digits.
Press # key to power input method.
Press Right function key to select “Clear” to delete input errors, press Right function
key continually to erase all input contents.
Symbol input method
During the text input process, it is possible to press * key to enter symbol selection box,
through navigation key to select the required symbol
This manual suits for next models
1
Table of contents
Other Lemon Cell Phone manuals

Lemon
Lemon Duo339 Super User manual

Lemon
Lemon Lemon Duo 305 User manual

Lemon
Lemon iQ 303 User manual

Lemon
Lemon Duo216 User manual

Lemon
Lemon iQ 505 User manual

Lemon
Lemon i T414 User manual

Lemon
Lemon Duo 216 Plus User manual

Lemon
Lemon duo349 User manual

Lemon
Lemon D226 User manual

Lemon
Lemon iT 717 User manual