manuals.online logo
Brands
  1. Home
  2. •
  3. Brands
  4. •
  5. LOVATO ELECTRIC
  6. •
  7. Control Unit
  8. •
  9. LOVATO ELECTRIC EXP10 30 User manual

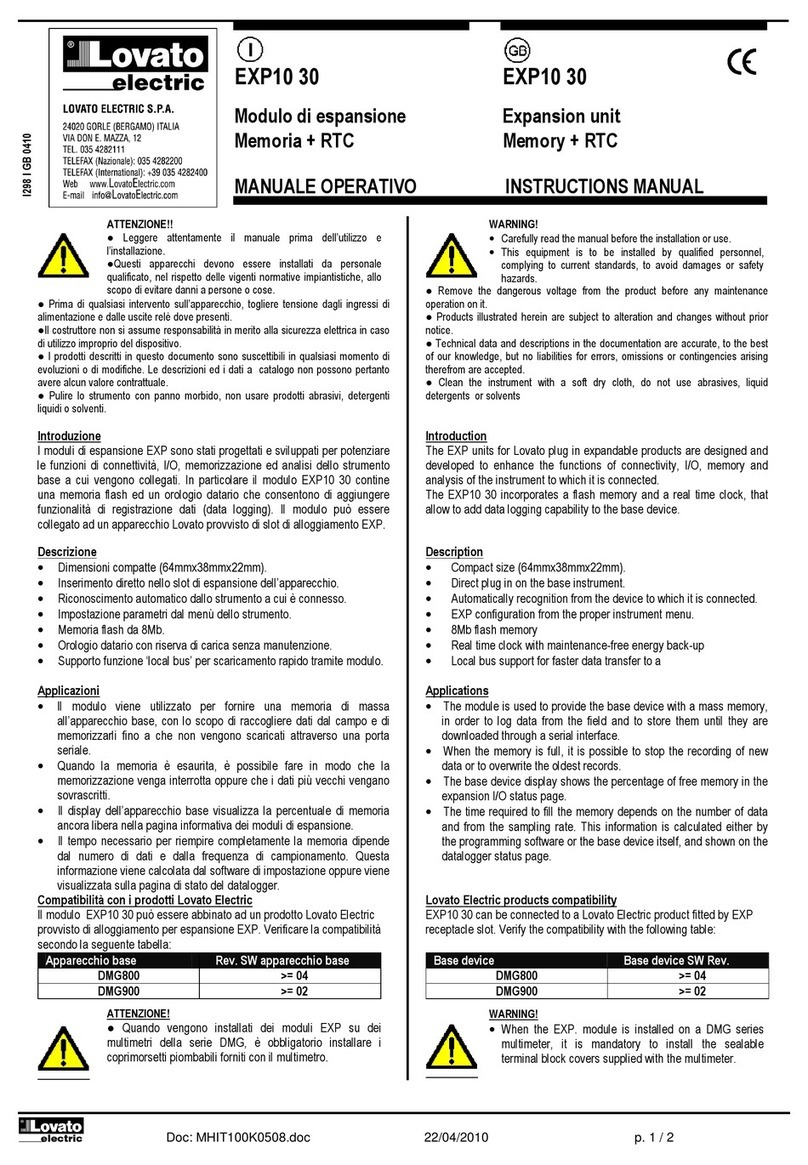
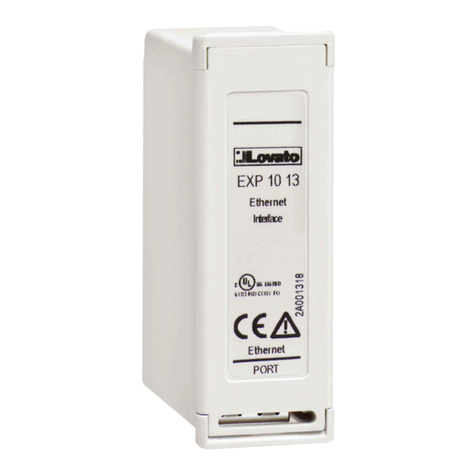
LOVATO ELECTRIC EXP10 30 User manual

Doc: I298PLGB0611 25/11/2010 s. 1 / 3
PL
EXP10 30 EXP10 30
ModułrozszerzeńExpansion unit
Pamięć + RTC Memory + RTC
INSTRUKCJA OBSŁUGI INSTRUCTIONS MANUAL
●Przed pracami serwisowymi, należy odłączyćwszystkie napięcia od wejść
pomiarowych i zasilania pomocniczego oraz zewrzećzaciski przekładnika
prądowego.
●Produkty zaprezentowane w poniższym dokumencie mogązostaćzmienione
lub ulepszone bez konieczności wcześniejszego informowania o tym.
●Dane techniczne oraz opisy oddająw jak najdokładniejszy sposób posiadaną
przez nas wiedzę, jednak nie bierzemy odpowiedzialności za ewentualne błędy,
braki oraz sytuacje awaryjne.
●Należy czyścićurządzenie delikatnąsuchąszmatką, nie należy używaćśrodków
ściernych, płynnych detergentów lub rozpuszczalników.
●Remove the dangerous voltage from the product before any maintenance
operation on it.
●Products illustrated herein are subject to alteration and changes without prior
notice.
●Technical data and descriptions in the documentation are accurate, to the best
of our knowledge, but no liabilities for errors, omissions or contingencies arising
therefrom are accepted.
●Clean the instrument with a soft dry cloth, do not use abrasives, liquid
detergents or solvents
Wprowadzenie
Moduły EXP dedykowane sądo produktów z możliwościąrozszerzenia
przez gniazda wtykowe i zostały zaprojektowane by zwiększyćmożliwość
typu podłączenia, dostępność wejść/wyjść i zapamiętywanie
i analizępomiarów z urządzenia do którego jest podłączony. EXP1030
zapewnia pamięć i zegar czasu rzeczywistego, który daje możliwość zapisu
danych z jednostki bazowej. Modułten może byćpodłączony do urządzeń
LOVATO Electric wyposażonych w otwór montażowy do EXP.
Introduction
The EXP units for Lovato plug in expandable products are designed and
developed to enhance the functions of connectivity, I/O, memory and
analysis of the instrument to which it is connected.
The EXP10 30 incorporates a flash memory and a real time clock that
allow adding data logging capability to the base device. This module can
be connected to LOVATO Electric device equipped with EXP slot.
Opis
Kompaktowe wymiary (64mmx38mmx22mm).
Bezpośrednie podłączenie do jednostki bazowej.
Automatyczne rozpoznanie przez urządzenie, do którego jest
podłączony.
Konfiguracja parametrów EXP przez oprogramowanie DMKSW10.
Pamięć flash 8Mb.
Zegar czasu rzeczywistego z bezobsługowym podtrzymaniem.
Wewnętrzna szyna komunikacji do szybszego przesyłania danych
do modułu.
Description
Compact size (64mmx38mmx22mm).
Direct plug in on the base instrument.
Automatically recognition from the device to which it is connected.
EXP configuration from the software DMKSW10
8Mb flash memory
Real time clock with maintenance-free energy back-up
Local bus support for faster data transfer to a communication
module
Aplikacje
Modułjest stosowany do zapewnienia jednostce bazowej pamięci
do zapisu zdarzeńwystępujących na obiekcie i przechowywania ich
listy do momentu pobrania ich przez port komunikacyjny.
Kiedy pamięć zostaje zapełniona mamy możliwość zakończenia zapisu
lub nadpisywania najstarszych pomiarów.
Jednostka bazowa pokazuje procentowo dostępnąpamięć na stronie
dedykowanej statusowi rozszerzeń.
Czas wymagany do zapełnienia pamięci zależy od ilości danych
i czasu ich próbkowania. Ta informacja jest kalkulowana przez
oprogramowanie lub jednostkębazowąi wyświetlana na stronie
statusu modułu pamięci.
A
pplications
The module is used to provide the base device with a mass memory,
in order to log data from the field and to store them until they are
downloaded through a serial interface.
When the memory is full, it is possible to stop the recording of new
data or to overwrite the oldest records.
The base device display shows the percentage of free memory in the
expansion I/O status page.
The time required to fill the memory depends on the number of data
and from the sampling rate. This information is calculated either by
the programming software or the base device itself, and shown on the
datalogger status page.
Kompatybilność z urządzeniami LOVATO Electric
ModułEXP10 30 może byćpodłączony do produktów Lovato Electric
wyposażonych w gniazdo wtykowe. Należy sprawdzićkompatybilność
w poniższej tabeli:
Jednostka bazowa Wersja oprogramowania j.b.
DMG800 >= 04
DMG900 >= 02
Lovato
Electric
products compatibility
EXP10 30 can be connected to a Lovato Electric product fitted by EXP
receptacle slot. Verify the compatibility with the following table:
Base device
Base device SW Rev.
DMG800
>= 04
DMG900
>= 02
I298 PLGB 0611
UWAGA!
●Należy dokładnie zapoznaćsięz poniższąinstrukcjąprzed
instalacjąlub używaniem urządzenia.
●By uniknąć uszkodzeńi zagrożenia życia urządzenia
te powinny byćinstalowane przez wykwalifikowany personel,
i w zgodzie z odpowiednimi przepisami.
WARNING!
Carefully read the manual before the installation or use.
This equipment is to be installed by qualified personnel,
complying with current standards, to avoid damages or safety
hazards.
UWAGA!
●Kiedy modułEXP jest zamontowany w mierniku DMG,
należy koniecznie zamontowaćosłonęzacisków
dostarczanąz miernikiem.
WARNING!
When the EXP. module is installed on a DMG series
multimeter, it is mandatory to install the sealable
terminal block covers su
pp
lied with the multimeter.
Doc: I298PLGB0611 25/11/2010 s. 2 / 3
Procedura podłączenia modułu
Module connection procedure
1. Odłączyćniebezpieczne napięcie.
2. Należy zdjąć osłonęzacisków i zaciski przyłączeniowe.
3. Następnie należy zdjąć osłonęotworu montażowego w produkcie
Lovato, w miejscu gdzie EXP będzie zamontowany.
4. Uwaga: dla niektórych modeli jednostek bazowych koniecznym jest
umieszczenie modułu w odpowiednim otworze montażowy.
By podłączyćEXP1030 do serii DMG używaćnależy tylko otworu
nr 1.
5. Należy umieścićmodułEXP1030 w otworze montażowym jak
pokazano na zdjęciu.
6. Należy ponownie umieścićosłonęzacisków i zaciski przyłączeniowe.
7. Następnie włączyćzasilanie (jednostka bazowa automatycznie
rozpozna podłączony moduł).
UWAGA: By zdemontowaćmodułnależy odłączyćniebezpieczne
napięcie i powtórzyćoperacje w odwrotnej kolejności od punktu 5 do 2.
Należy wcisnąć punkt wskazany gwiazdką(*) i wyciągnąć moduł.
1. Remove any dangerous voltage.
2. Remove the terminal covers and the terminal block.
3. Remove the expansion slot cover of the Lovato product at the
position in which the EXP will be plug in.
4. Attention: for some models of base device, there is a mandatory
slot position for the memory module. For DMG series
multimeters, mandatory position of EXP1030 is in slot 1.
5. Insert the EXP10 30 as illustrated in the above picture.
6. Replace the terminal block and the terminal cover.
7. Power up the system (the base product will automatically
recognize the expansion unit).
NOTE: Remove any dangerous voltage and repeat the operations from
step 5 to step 2 in the opposite direction. Press in the point indicated by
the * in the picture in order to remove the module.
Programowanie parametrów
W celu ustawienia parametrów modułu EXP należy zapoznać
sięz instrukcjągłównąurządzenia bazowego.
Module parameters setup
For the EXP parameters configuration, see the manual of the main
instrument to which it intends to connect.
Wymiary mechaniczne [mm]
Mechanical dimensions
[mm]
Pod
ł
ączenie do jednostki bazowej
Base product connection
Warunki otoczenia pracy
A
mbient operating conditions
Temperatura pracy -20 - +60°C
Operating temperature
-20 - +60°C
Temperatura składowania -30 - +80°C
Storage temperature
-30 - +80°C
Wilgotność względna

90% (IEC/EN 60068-2-70)
Relative humidity
90% (IEC/EN 60068-2-70)
Maksymalny stopieńzanieczyszczenia Stopień2
Maximum pollution degree
Degree 2
Dane techniczne
Technical characteristics
Zasilanie
Supply
Napięcie zasilania 5V=
(z urządzenia bazowego)
Supply voltage
5V=
(supplied by main instrument)
Maksymalny pobór prądu 30mA
Max supply current
30mA
Pobór mocy / rozproszenie mocy 0,15W
Power consumption/dissipation
0.15W
Typ podłączenia Wtykowe
Terminal type
Plug-in connector
Pamięć
Memory
Typ pamięci Flash
Mass memory type
Flash
Pojemność 8 Mb
Capacity
8 Mbytes
Pamięć podręczna FRAM
Cache memory type
FRAM
Zegar czasu rzeczywistego (RTC)
Real time clock
Data Rok, miesiąć, dzień, godzina, minuty,
sekundy
Data
Year, month, date, hour, minutes, seconds
Podtrzymanie Kondensator, bezobsługowy
Energy back-up
Capacitor, maintenance-free
Czas podtrzymania > 2 tygodnie (od maksymalnej rezerwy)
Energy back-up duration
> 2 weeks (from max reserve)
KLIK!
1 2 3
*
Otw. Otw. Otw. Otw.
1 2 3 4
Doc: I298PLGB0611 25/11/2010 s. 3 / 3
Kategoria przeciążeniowa 3
Overvoltage category
3
Wysokość n.p.m. ≤2000m
A
ltitude
≤2000m
Komora klimatyczna Z/ABDM (IEC/EN 60068-2-61)
Climatic sequence
Z/ABDM (IEC/EN 60068-2-61)
Odporność na wstrząsy 15g (IEC/EN 60068-2-27)
Shock resistance
15g (IEC/EN 60068-2-27)
Odporność na wibracje 0.7g (IEC/EN 60068-2-6)
Vibration resistance
0.7g (IEC/EN 60068-2-6)
Wymiary 64,5mmx38,2mmx22mm
Dimensions
64.5mmx38.2mmx22mm
MontażWtykowy w otworze montażowym
Mounting
For inclusion in the EXP plug in expansion
slot
MateriałPoliamid RAL 7035
Material
Polyamide RAL7035
Stopieńochrony IP20
Degree of protection
IP20
Masa 50g
Weight
50g
Obudowa
Housing
Certyfikaty i zgodności
Certifications and compliance
Certyfikaty cULus
Certifications
cULus
Zgodne z normami IEC/EN 61010-1, IEC/EN 61000-6-2
IEC/ EN 61000-6-3, UL508 i CSA
C22.2-N°14
Reference standards
IEC/EN 61010-1, IEC/EN 61000-6-2
IEC/ EN 61000-6-3, UL508 and CSA
C22.2-N°14

Other LOVATO ELECTRIC Control Unit manuals

LOVATO ELECTRIC DCTL Series User manual

LOVATO ELECTRIC

LOVATO ELECTRIC DCTL Series User manual

LOVATO ELECTRIC ATL DPS1 User manual

LOVATO ELECTRIC

LOVATO ELECTRIC ATL DPS1 User manual

LOVATO ELECTRIC RGK800 User manual

LOVATO ELECTRIC

LOVATO ELECTRIC RGK800 User manual

LOVATO ELECTRIC EXP10 14 User manual

LOVATO ELECTRIC

LOVATO ELECTRIC EXP10 14 User manual

LOVATO ELECTRIC EXS4000 User manual

LOVATO ELECTRIC

LOVATO ELECTRIC EXS4000 User manual

LOVATO ELECTRIC RGK800SA User manual

LOVATO ELECTRIC

LOVATO ELECTRIC RGK800SA User manual

LOVATO ELECTRIC EXM 10 12 User manual

LOVATO ELECTRIC

LOVATO ELECTRIC EXM 10 12 User manual

LOVATO ELECTRIC RGK900 User manual

LOVATO ELECTRIC

LOVATO ELECTRIC RGK900 User manual

LOVATO ELECTRIC DCTL Series User manual

LOVATO ELECTRIC

LOVATO ELECTRIC DCTL Series User manual

LOVATO ELECTRIC EXP1000 User manual

LOVATO ELECTRIC

LOVATO ELECTRIC EXP1000 User manual

LOVATO ELECTRIC EXP1016 User manual

LOVATO ELECTRIC

LOVATO ELECTRIC EXP1016 User manual

LOVATO ELECTRIC EXM 10 00 User manual

LOVATO ELECTRIC

LOVATO ELECTRIC EXM 10 00 User manual

LOVATO ELECTRIC EXP10 15 User manual

LOVATO ELECTRIC

LOVATO ELECTRIC EXP10 15 User manual

LOVATO ELECTRIC VLBX C Series User manual

LOVATO ELECTRIC

LOVATO ELECTRIC VLBX C Series User manual

LOVATO ELECTRIC ATL DPS1 User manual

LOVATO ELECTRIC

LOVATO ELECTRIC ATL DPS1 User manual

LOVATO ELECTRIC EXP10 05 User manual

LOVATO ELECTRIC

LOVATO ELECTRIC EXP10 05 User manual

LOVATO ELECTRIC EXM10 13 User manual

LOVATO ELECTRIC

LOVATO ELECTRIC EXM10 13 User manual

LOVATO ELECTRIC RGK900MC User manual

LOVATO ELECTRIC

LOVATO ELECTRIC RGK900MC User manual

LOVATO ELECTRIC EXM10 11 User manual

LOVATO ELECTRIC

LOVATO ELECTRIC EXM10 11 User manual

LOVATO ELECTRIC EXP10 02 User manual

LOVATO ELECTRIC

LOVATO ELECTRIC EXP10 02 User manual

LOVATO ELECTRIC EXP10 03 User manual

LOVATO ELECTRIC

LOVATO ELECTRIC EXP10 03 User manual

LOVATO ELECTRIC EXM10 00 User manual

LOVATO ELECTRIC

LOVATO ELECTRIC EXM10 00 User manual

LOVATO ELECTRIC EXP10 10 User manual

LOVATO ELECTRIC

LOVATO ELECTRIC EXP10 10 User manual

LOVATO ELECTRIC EXP10 14 User manual

LOVATO ELECTRIC

LOVATO ELECTRIC EXP10 14 User manual

Popular Control Unit manuals by other brands

American Standard Selectronic 606B.X10 installation instructions

American Standard

American Standard Selectronic 606B.X10 installation instructions

Tektronix TM 501 instruction manual

Tektronix

Tektronix TM 501 instruction manual

Whadda WPM349 user manual

Whadda

Whadda WPM349 user manual

Pignology Piglet quick start

Pignology

Pignology Piglet quick start

Haldex ILAS E 62101005 installation instructions

Haldex

Haldex ILAS E 62101005 installation instructions

Niko 05-200 manual

Niko

Niko 05-200 manual

Handson Technology MAX7218 user guide

Handson Technology

Handson Technology MAX7218 user guide

VAT 09.1 Series Installation, operating,  & maintenance instructions

VAT

VAT 09.1 Series Installation, operating, & maintenance instructions

Uponor M-76 quick guide

Uponor

Uponor M-76 quick guide

GARAN EWS-102 System setup

GARAN

GARAN EWS-102 System setup

Simply Automated SimplySmart Series Getting started

Simply Automated

Simply Automated SimplySmart Series Getting started

Ambient PowerSlot manual

Ambient

Ambient PowerSlot manual

Allmatic ACTION Instructions for installation

Allmatic

Allmatic ACTION Instructions for installation

KUSATEK K-Tec installation instructions

KUSATEK

KUSATEK K-Tec installation instructions

CALEFFI 5261 Series manual

CALEFFI

CALEFFI 5261 Series manual

ERHARD ROCO Series operating instructions

ERHARD

ERHARD ROCO Series operating instructions

INOXPA BUTTERFLY Installation, service and maintenance instructions

INOXPA

INOXPA BUTTERFLY Installation, service and maintenance instructions

Sun Microsystems Ultra 2 UltraSPARC-II Upgrade

Sun Microsystems

Sun Microsystems Ultra 2 UltraSPARC-II Upgrade

manuals.online logo
manuals.online logoBrands
  • About & Mission
  • Contact us
  • Privacy Policy
  • Terms and Conditions

Copyright 2025 Manuals.Online. All Rights Reserved.