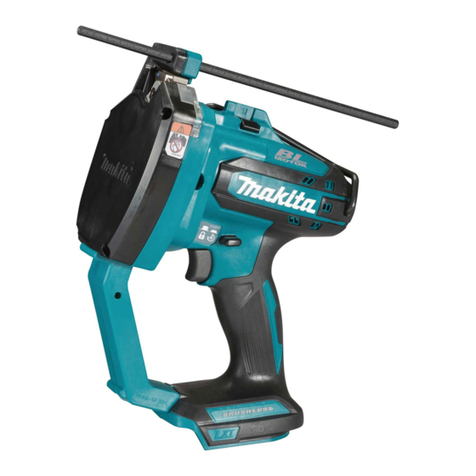
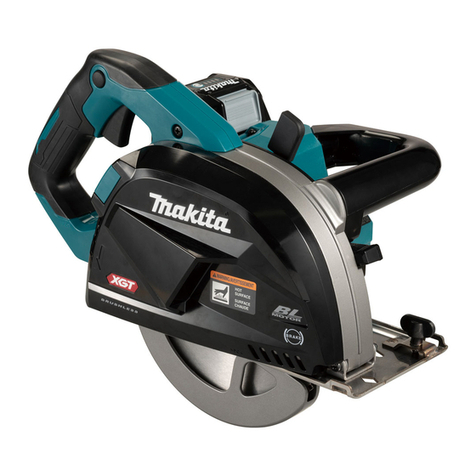
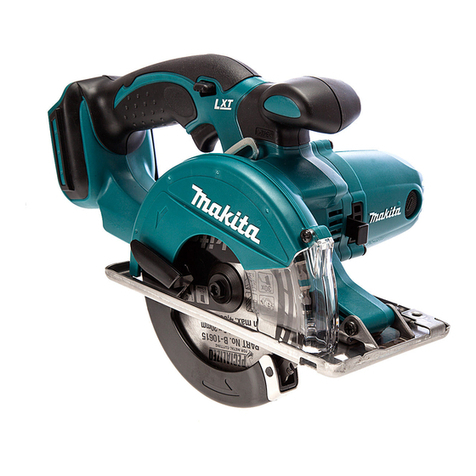
Makita DCS553 User manual

DCS553
EN Cordless Metal Cutter INSTRUCTION MANUAL 6
ID Pemotong Logam Tanpa
Kabel PETUNJUK PENGGUNAAN 16
VI Máy Cắt Kim Loại Cầm Tay
Hoạt Động Bằng Pin TÀI LIỆU HƯỚNG DẪN 28
TH 39

1
2
3
Fig.1
1
Fig.2
1
2
Fig.3
1
2
Fig.4
1
Fig.5
1
3
2
Fig.6
1
2
3
Fig.7
1
Fig.8
2

1
2
Fig.9
Fig.10
2
1
3
Fig.11
2
1
Fig.12
Fig.13
1
2
Fig.14
1
2
Fig.15
1
Fig.16
3

1
2
3
4
Fig.17
1
2
3
45
Fig.18
1
2
3
Fig.19
Fig.20
Fig.21
1
2
33
Fig.22
1
2
Fig.23
4

1
Fig.24
5

6ENGLISH
ENGLISH (Original instructions)
SPECIFICATIONS
Model: DCS553
Blade diameter 136 mm - 150 mm
Max. Cutting depth
(with 150 mm diameter blade)
57.5 mm
No load speed 4,200 min-1
Rated voltage D.C. 18 V
Overall length 267 mm
Net weight 2.8 - 3.1 kg
• Duetoourcontinuingprogramofresearchanddevelopment,thespecicationshereinaresubjecttochange
without notice.
• Specicationsmaydierfromcountrytocountry.
• Theweightmaydierdependingontheattachment(s),includingthebatterycartridge.Thelightestandheavi-
est combination, according to EPTA-Procedure 01/2014, are shown in the table.
Applicable battery cartridge and charger
Batterycartridge BL1815N / BL1820 / BL1820B / BL1830 / BL1830B / BL1840 /
BL1840B / BL1850 / BL1850B / BL1860B
Charger DC18RC / DC18RD / DC18RE / DC18SD / DC18SE / DC18SF /
DC18SH
• Someofthebatterycartridgesandchargerslistedabovemaynotbeavailabledependingonyourregionof
residence.
WARNING: Only use the battery cartridges and chargers listed above.Useofanyotherbatterycartridges
andchargersmaycauseinjuryand/orre.
Symbols
Thefollowingsshowthesymbolsusedfortheequip-
ment.Besurethatyouunderstandtheirmeaningbefore
use.
Read instruction manual.
Ni-MH
Li-ion
OnlyforEUcountries
Donotdisposeofelectricequipmentor
batterypacktogetherwithhouseholdwaste
material!
In observance of the European Directives,
on Waste Electric and Electronic
EquipmentandBatteriesandAccumulators
and Waste Batteries and Accumulators
and their implementation in accordance
withnationallaws,electricequipmentand
batteriesandbatterypack(s)thathave
reached the end of their life must be col-
lectedseparatelyandreturnedtoanenvi-
ronmentallycompatiblerecyclingfacility.
Intended use
The tool is intended for cutting in mild steel. With appro-
priateMakitagenuinesawblades,ber-cementboard
and wood can also be sawed.
SAFETY WARNINGS
General power tool safety warnings
WARNING: Read all safety warnings, instruc-
tions, illustrations and specications provided
with this power tool. Failure to follow all instructions
listedbelowmayresultinelectricshock,reand/or
seriousinjury.
Save all warnings and instruc-
tions for future reference.
Theterm“powertool”inthewarningsreferstoyour
mains-operated(corded)powertoolorbattery-operated
(cordless) power tool.
Work area safety
1. Keep work area clean and well lit. Cluttered or
dark areas invite accidents.
2. Do not operate power tools in explosive atmo-
spheres, such as in the presence of ammable
liquids, gases or dust. Power tools create sparks
whichmayignitethedustorfumes.
3. Keep children and bystanders away while
operating a power tool. Distractions can cause
youtolosecontrol.

7ENGLISH
Electrical safety
1. Power tool plugs must match the outlet. Never
modify the plug in any way. Do not use any
adapter plugs with earthed (grounded) power
tools. Unmodiedplugsandmatchingoutletswill
reduce risk of electric shock.
2. Avoid body contact with earthed or grounded
surfaces, such as pipes, radiators, ranges and
refrigerators. There is an increased risk of elec-
tricshockifyourbodyisearthedorgrounded.
3. Do not expose power tools to rain or wet con-
ditions. Water entering a power tool will increase
the risk of electric shock.
4. Do not abuse the cord. Never use the cord for
carrying, pulling or unplugging the power tool.
Keep cord away from heat, oil, sharp edges
or moving parts. Damaged or entangled cords
increase the risk of electric shock.
5. When operating a power tool outdoors, use an
extension cord suitable for outdoor use. Use of
a cord suitable for outdoor use reduces the risk of
electric shock.
6. If operating a power tool in a damp location
is unavoidable, use a residual current device
(RCD) protected supply. Use of an RCD reduces
the risk of electric shock.
7. Power tools can produce electromagnetic
elds (EMF) that are not harmful to the user.
However, users of pacemakers and other similar
medical devices should contact the maker of their
device and/or doctor for advice before operating
this power tool.
Personal safety
1. Stay alert, watch what you are doing and use
common sense when operating a power tool.
Do not use a power tool while you are tired or
under the inuence of drugs, alcohol or med-
ication. A moment of inattention while operating
powertoolsmayresultinseriouspersonalinjury.
2. Use personal protective equipment. Always
wear eye protection.Protectiveequipmentsuch
asadustmask,non-skidsafetyshoes,hardhator
hearing protection used for appropriate conditions
willreducepersonalinjuries.
3. Prevent unintentional starting. Ensure the
switch is in the o-position before connecting
to power source and/or battery pack, picking
up or carrying the tool.Carryingpowertoolswith
yourngerontheswitchorenergisingpowertools
that have the switch on invites accidents.
4. Remove any adjusting key or wrench before
turning the power tool on.Awrenchorakeyleft
attachedtoarotatingpartofthepowertoolmay
resultinpersonalinjury.
5. Do not overreach. Keep proper footing and
balance at all times. This enables better control
of the power tool in unexpected situations.
6. Dress properly. Do not wear loose clothing or
jewellery. Keep your hair and clothing away
from moving parts.Looseclothes,jewelleryor
long hair can be caught in moving parts.
7. If devices are provided for the connection of
dust extraction and collection facilities, ensure
these are connected and properly used. Use of
dust collection can reduce dust-related hazards.
8. Do not let familiarity gained from frequent use
of tools allow you to become complacent and
ignore tool safety principles. A careless action
cancausesevereinjurywithinafractionofa
second.
9. Always wear protective goggles to protect
your eyes from injury when using power tools.
The goggles must comply with ANSI Z87.1 in
the USA, EN 166 in Europe, or AS/NZS 1336
in Australia/New Zealand. In Australia/New
Zealand, it is legally required to wear a face
shield to protect your face, too.
It is an employer's responsibility to enforce
the use of appropriate safety protective equip-
ments by the tool operators and by other per-
sons in the immediate working area.
Power tool use and care
1. Do not force the power tool. Use the correct
power tool for your application. The correct
powertoolwilldothejobbetterandsaferatthe
rate for which it was designed.
2. Do not use the power tool if the switch does
not turn it on and o.Anypowertoolthatcannot
be controlled with the switch is dangerous and
must be repaired.
3. Disconnect the plug from the power source
and/or remove the battery pack, if detachable,
from the power tool before making any adjust-
ments, changing accessories, or storing power
tools.Suchpreventivesafetymeasuresreduce
theriskofstartingthepowertoolaccidentally.
4. Store idle power tools out of the reach of chil-
dren and do not allow persons unfamiliar with
the power tool or these instructions to operate
the power tool. Power tools are dangerous in the
hands of untrained users.
5. Maintain power tools and accessories. Check
for misalignment or binding of moving parts,
breakage of parts and any other condition that
may aect the power tool’s operation. If dam-
aged, have the power tool repaired before use.
Manyaccidentsarecausedbypoorlymaintained
power tools.
6. Keep cutting tools sharp and clean.Properly
maintained cutting tools with sharp cutting edges
arelesslikelytobindandareeasiertocontrol.

8ENGLISH
7. Use the power tool, accessories and tool bits
etc. in accordance with these instructions, tak-
ing into account the working conditions and
the work to be performed. Use of the power tool
foroperationsdierentfromthoseintendedcould
result in a hazardous situation.
8. Keep handles and grasping surfaces dry,
clean and free from oil and grease.Slippery
handles and grasping surfaces do not allow for
safe handling and control of the tool in unexpected
situations.
9. When using the tool, do not wear cloth work
gloves which may be entangled. The entangle-
mentofclothworkglovesinthemovingpartsmay
resultinpersonalinjury.
Battery tool use and care
1. Recharge only with the charger specied by
the manufacturer. A charger that is suitable for
onetypeofbatterypackmaycreateariskofre
whenusedwithanotherbatterypack.
2. Use power tools only with specically desig-
nated battery packs.Useofanyotherbattery
packsmaycreateariskofinjuryandre.
3. When battery pack is not in use, keep it away
from other metal objects, like paper clips,
coins, keys, nails, screws or other small metal
objects, that can make a connection from one
terminal to another.Shortingthebatterytermi-
nalstogethermaycauseburnsorare.
4. Under abusive conditions, liquid may be
ejected from the battery; avoid contact. If con-
tact accidentally occurs, ush with water. If
liquid contacts eyes, additionally seek medical
help.Liquidejectedfromthebatterymaycause
irritation or burns.
5. Do not use a battery pack or tool that is dam-
aged or modied.Damagedormodiedbatteries
mayexhibitunpredictablebehaviourresultingin
re,explosionorriskofinjury.
6. Do not expose a battery pack or tool to re or
excessive temperature.Exposuretoreortem-
peratureabove130°Cmaycauseexplosion.
7. Follow all charging instructions and do not
charge the battery pack or tool outside the
temperature range specied in the instruc-
tions.Chargingimproperlyorattemperatures
outsidethespeciedrangemaydamagethe
batteryandincreasetheriskofre.
Service
1. Have your power tool serviced by a qualied
repair person using only identical replacement
parts.Thiswillensurethatthesafetyofthepower
tool is maintained.
2. Never service damaged battery packs. Service
ofbatterypacksshouldonlybeperformedbythe
manufacturer or authorized service providers.
3. Follow instruction for lubricating and chang-
ing accessories.
Cordless Metal Cutter safety
warnings
Cutting procedures
1. DANGER: Keep hands away from cutting
area and the blade. Keep your second hand
on auxiliary handle, or motor housing. If both
handsareholdingthesaw,theycannotbecutby
the blade.
2. Do not reach underneath the workpiece. The
guardcannotprotectyoufromthebladebelowthe
workpiece.
3. Adjust the cutting depth to the thickness of
the workpiece. Less than a full tooth of the blade
teeth should be visible below the workpiece.
4. Never hold the workpiece in your hands or
across your leg while cutting. Secure the
workpiece to a stable platform. It is important to
supporttheworkproperlytominimisebodyexpo-
sure, blade binding, or loss of control.
5. Hold the power tool by insulated gripping
surfaces, when performing an operation where
the cutting tool may contact hidden wiring.
Contact with a “live” wire will also make exposed
metal parts of the power tool “live” and could give
the operator an electric shock.
6. When ripping, always use a rip fence or
straight edge guide.Thisimprovestheaccuracy
of cut and reduces the chance of blade binding.
7. Always use blades with correct size and shape
(diamond versus round) of arbour holes.
Blades that do not match the mounting hardware
ofthesawwillruno-centre,causinglossof
control.
8. Never use damaged or incorrect blade wash-
ers or bolt. The blade washers and bolt were
speciallydesignedforyoursaw,foroptimum
performanceandsafetyofoperation.
Kickback causes and related warnings
— kickback is a sudden reaction to a pinched,
jammedormisalignedsawblade,causingan
uncontrolled saw to lift up and out of the workpiece
toward the operator;
— whenthebladeispinchedorjammedtightlybythe
kerf closing down, the blade stalls and the motor
reactiondrivestheunitrapidlybacktowardthe
operator;
— if the blade becomes twisted or misaligned in the
cut, the teeth at the back edge of the blade can
dig into the top surface of the workpiece causing
thebladetoclimboutofthekerfandjumpback
toward the operator.
Kickback is the result of saw misuse and/or incorrect
operating procedures or conditions and can be avoided
bytakingproperprecautionsasgivenbelow.
1. Maintain a rm grip with both hands on the
saw and position your arms to resist kickback
forces. Position your body to either side of the
blade, but not in line with the blade. Kickback
couldcausethesawtojumpbackwards,but
kickbackforcescanbecontrolledbytheoperator,
if proper precautions are taken.

9ENGLISH
2. When blade is binding, or when interrupting a
cut for any reason, release the trigger and hold
the saw motionless in the material until the
blade comes to a complete stop. Never attempt
to remove the saw from the work or pull the
saw backward while the blade is in motion
or kickback may occur. Investigate and take
corrective actions to eliminate the cause of blade
binding.
3. When restarting a saw in the workpiece, centre
the saw blade in the kerf so that the saw teeth
are not engaged into the material. If a saw blade
binds,itmaywalkuporkickbackfromthework-
piece as the saw is restarted.
4. Support large panels to minimise the risk of
blade pinching and kickback. Large panels tend
to sag under their own weight. Supports must be
placed under the panel on both sides, near the line
of cut and near the edge of the panel.
5. Do not use dull or damaged blades.
Unsharpenedorimproperlysetbladesproduce
narrow kerf causing excessive friction, blade
binding and kickback.
6. Blade depth and bevel adjusting locking levers
must be tight and secure before making the
cut.Ifbladeadjustmentshiftswhilecutting,itmay
cause binding and kickback.
7. Use extra caution when sawing into existing
walls or other blind areas. The protruding blade
maycutobjectsthatcancausekickback.
8. ALWAYS hold the tool rmly with both hands.
NEVER place your hand, leg or any part of your
body under the tool base or behind the saw,
especially when making cross-cuts. If kickback
occurs,thesawcouldeasilyjumpbackwardsover
yourhand,leadingtoseriouspersonalinjury.
9. Never force the saw. Push the saw forward at a
speed so that the blade cuts without slowing.
Forcing the saw can cause uneven cuts, loss of
accuracy,andpossiblekickback.
Lower guard function
1. Check the lower guard for proper closing
before each use. Do not operate the saw if the
lower guard does not move freely and close
instantly. Never clamp or tie the lower guard
into the open position.Ifthesawisaccidentally
dropped,thelowerguardmaybebent.Raisethe
lower guard with the retracting handle and make
sureitmovesfreelyanddoesnottouchtheblade
oranyotherpart,inallanglesanddepthsofcut.
2. Check the operation of the lower guard spring.
If the guard and the spring are not operating
properly, they must be serviced before use.
Lowerguardmayoperatesluggishlydueto
damagedparts,gummydeposits,orabuild-upof
debris.
3. The lower guard may be retracted manually
only for special cuts such as “plunge cuts”
and “compound cuts”. Raise the lower guard
by the retracting handle and as soon as the
blade enters the material, the lower guard
must be released. For all other sawing, the lower
guardshouldoperateautomatically.
4. Always observe that the lower guard is cover-
ing the blade before placing the saw down on
bench or oor. An unprotected, coasting blade
will cause the saw to walk backwards, cutting
whatever is in its path. Be aware of the time it
takes for the blade to stop after switch is released.
5. To check lower guard, open lower guard by
hand, then release and watch guard closure.
Also check to see that retracting handle does
not touch tool housing. Leaving blade exposed
is VERY DANGEROUS and can lead to serious
personalinjury.
Additional safety warnings
1. Do not stop the blades by lateral pressure on
the saw blade.
2. Do not attempt to remove cut material when
blade is moving. Wait until blade stops before
grasping cut material.Bladescoastafterturno.
3. Place the wider portion of the saw base on
that part of the workpiece which is solidly
supported, not on the section that will fall o
when the cut is made. If the workpiece is short
or small, clamp it down. DO NOT TRY TO HOLD
SHORT PIECES BY HAND!
4. Never attempt to make a cut with the tool held
upside down in a vise. This is extremely dan-
gerous and can lead to serious accidents.
5. Wear safety goggles and hearing protection
during operation.
6. Do not use any abrasive wheels.
7. Only use the saw blade with the diameter that
is marked on the tool or specied in the man-
ual.Useofanincorrectlysizedblademayaect
the proper guarding of the blade or guard opera-
tionwhichcouldresultinseriouspersonalinjury.
8. Always use the saw blade intended for cutting
the material that you are going to cut.
9. Only use the saw blades that are marked with
a speed equal or higher than the speed marked
on the tool.
10. Before setting the tool down after completing a
cut, be sure that the guard has closed and the
blade has come to a complete stop.
11. Some material contains chemicals which may
be toxic. Take caution to prevent dust inhala-
tion and skin contact. Follow material supplier
safety data.
12. Wear a dust mask and hearing protection when
use the tool.
13. (For European countries only)
Always use the blade which conforms to
EN847-1, when cutting wood or like.
SAVE THESE INSTRUCTIONS.
WARNING: DO NOT let comfort or familiarity
with product (gained from repeated use) replace
strict adherence to safety rules for the subject
product. MISUSE or failure to follow the safety
rules stated in this instruction manual may cause
serious personal injury.

10 ENGLISH
Important safety instructions for
battery cartridge
1. Before using battery cartridge, read all instruc-
tions and cautionary markings on (1) battery
charger, (2) battery, and (3) product using
battery.
2. Do not disassemble battery cartridge.
3. If operating time has become excessively
shorter, stop operating immediately. It may
result in a risk of overheating, possible burns
and even an explosion.
4. If electrolyte gets into your eyes, rinse them
out with clear water and seek medical atten-
tion right away. It may result in loss of your
eyesight.
5. Do not short the battery cartridge:
(1) Do not touch the terminals with any con-
ductive material.
(2) Avoid storing battery cartridge in a con-
tainer with other metal objects such as
nails, coins, etc.
(3) Do not expose battery cartridge to water
or rain.
A battery short can cause a large current
ow, overheating, possible burns and even a
breakdown.
6. Do not store the tool and battery cartridge in
locations where the temperature may reach or
exceed 50 °C (122 °F).
7. Do not incinerate the battery cartridge even if
it is severely damaged or is completely worn
out. The battery cartridge can explode in a re.
8. Be careful not to drop or strike battery.
9. Do not use a damaged battery.
10. The contained lithium-ion batteries are subject
to the Dangerous Goods Legislation require-
ments.
Forcommercialtransportse.g.bythirdparties,
forwardingagents,specialrequirementonpack-
aging and labeling must be observed.
For preparation of the item being shipped, consult-
inganexpertforhazardousmaterialisrequired.
Pleasealsoobservepossiblymoredetailed
national regulations.
Tapeormaskoopencontactsandpackupthe
batteryinsuchamannerthatitcannotmove
around in the packaging.
11. When disposing the battery cartridge, remove
it from the tool and dispose of it in a safe
place. Follow your local regulations relating to
disposal of battery.
12. Use the batteries only with the products
specied by Makita. Installing the batteries to
non-compliantproductsmayresultinare,exces-
siveheat,explosion,orleakofelectrolyte.
13. If the tool is not used for a long period of time,
the battery must be removed from the tool.
SAVE THESE INSTRUCTIONS.
CAUTION: Only use genuine Makita batteries.
Use of non-genuine Makita batteries, or batteries that
havebeenaltered,mayresultinthebatterybursting
causingres,personalinjuryanddamage.Itwill
alsovoidtheMakitawarrantyfortheMakitatooland
charger.
Tips for maintaining maximum
battery life
1. Charge the battery cartridge before completely
discharged. Always stop tool operation and
charge the battery cartridge when you notice
less tool power.
2. Never recharge a fully charged battery car-
tridge. Overcharging shortens the battery
service life.
3. Charge the battery cartridge with room tem-
perature at 10 °C - 40 °C (50 °F - 104 °F). Let
a hot battery cartridge cool down before
charging it.
4. Charge the battery cartridge if you do not use
it for a long period (more than six months).
FUNCTIONAL
DESCRIPTION
CAUTION: Always be sure that the tool is
switched o and the battery cartridge is removed
before adjusting or checking function on the tool.
Installing or removing battery
cartridge
CAUTION: Always switch o the tool before
installing or removing of the battery cartridge.
CAUTION: Hold the tool and the battery car-
tridge rmly when installing or removing battery
cartridge.Failuretoholdthetoolandthebattery
cartridgermlymaycausethemtoslipoyourhands
andresultindamagetothetoolandbatterycartridge
andapersonalinjury.
►Fig.1: 1. Red indicator 2. Button 3.Batterycartridge
Toremovethebatterycartridge,slideitfromthetool
while sliding the button on the front of the cartridge.
Toinstallthebatterycartridge,alignthetongueonthe
batterycartridgewiththegrooveinthehousingandslip
itintoplace.Insertitallthewayuntilitlocksinplace
withalittleclick.Ifyoucanseetheredindicatoronthe
uppersideofthebutton,itisnotlockedcompletely.
CAUTION: Always install the battery cartridge
fully until the red indicator cannot be seen. If not,
itmayaccidentallyfalloutofthetool,causinginjuryto
youorsomeonearoundyou.
CAUTION: Do not install the battery cartridge
forcibly.Ifthecartridgedoesnotslideineasily,itis
notbeinginsertedcorrectly.

11 ENGLISH
Tool / battery protection system
Thetoolisequippedwithatool/batteryprotectionsys-
tem.Thissystemautomaticallycutsopowertothe
motortoextendtoolandbatterylife.Thetoolwillauto-
maticallystopduringoperationifthetoolorbatteryis
placed under one of the following conditions.
Overload protection
Whenthetool/batteryisoperatedinamannerthat
causesittodrawanabnormallyhighcurrent,thetool
automaticallystops.Inthissituation,turnthetoolo
and stop the application that caused the tool to become
overloaded. Then turn the tool on to restart.
Overheat protection
Whenthetool/batteryisoverheated,thetoolstops
automatically,andthebatteryindicatorblinkabout
60 seconds. In this situation, let the tool cool down
before turning the tool on again.
On Blinking
Overdischarge protection
Whenthebatterycapacitybecomeslow,thetoolstops
automatically.Iftheproductdoesnotoperateeven
when the switches are operated, remove the batteries
from the tool and charge the batteries.
Releasing protection lock
Whentheprotectionsystemworksrepeatedly,thetool
islockedandthebatteryindicatorshowsthefollowing
state.
Blinking O
In this situation, the tool does not start even if turning
thetooloandon.Toreleasetheprotectionlock,
removethebattery,setittothebatterychargerandwait
untilthechargingnishes.
Indicating the remaining battery
capacity
Whenyoupulltheswitchtrigger,thebatteryindicator
showstheremainingbatterycapacity.
►Fig.2: 1.Batteryindicator
Theremainingbatterycapacityisshownasthefollow-
ing table.
Battery indicator status Remaining
battery
capacity
On O Blinking
50% to 100%
20% to 50%
0% to 20%
Charge the
battery
Indicating the remaining battery
capacity
Only for battery cartridges with the indicator
►Fig.3: 1. Indicator lamps 2. Check button
Pressthecheckbuttononthebatterycartridgetoindi-
catetheremainingbatterycapacity.Theindicatorlamps
light up for a few seconds.
Indicator lamps Remaining
capacity
Lighted O Blinking
75% to 100%
50% to 75%
25% to 50%
0% to 25%
Charge the
battery.
Thebattery
mayhave
malfunctioned.
NOTE: Depending on the conditions of use and the
ambienttemperature,theindicationmaydierslightly
fromtheactualcapacity.

12 ENGLISH
Switch action
WARNING: Before installing the battery car-
tridge into the tool, always check to see that the
switch trigger actuates properly and returns to
the “OFF” position when released.
WARNING: NEVER defeat the lock-o button
by taping down or some other means. A switch with
anegatedlock-obuttonmayresultinunintentional
operationandseriouspersonalinjury.
WARNING: NEVER use the tool if it runs when
you simply pull the switch trigger without press-
ing the lock-o button. A switch in need of repair
mayresultinunintentionaloperationandserious
personalinjury.ReturntooltoaMakitaservicecenter
for proper repairs BEFORE further usage.
Topreventtheswitchtriggerfrombeingaccidentally
pulled,alock-obuttonisprovided.Tostartthetool,
depressthelock-obuttonandpulltheswitchtrigger.
Release the switch trigger to stop.
►Fig.4: 1. Switch trigger 2.Lock-obutton
NOTICE: Do not pull the switch trigger hard
without pressing in the lock-o button. This can
cause switch breakage.
CAUTION: The tool starts to brake the cir-
cular saw blade rotation immediately after you
release the switch trigger. Hold the tool rmly to
respond the reaction of the brake when releasing
the switch trigger. Sudden reaction can drop the tool
oyourhandandcancauseapersonalinjury.
Automatic speed change function
Thistoolhas“highspeedmode”and“hightorque
mode”.
Thetoolautomaticallychangestheoperationmode
depending on the work load. When the work load is low,
thetoolwillruninthe“highspeedmode”forquicker
cutting operation. When the work load is high, the tool
willruninthe“hightorquemode”forpowerfulcutting
operation.
►Fig.5: 1. Mode indicator
The mode indicator lights up in green when the tool is
runningin“hightorquemode”.
If the tool is operated with excessive load, the mode
indicator will blink in green. The mode indicator stops
blinkingandthenlightsuporturnsoifyoureducethe
load on the tool.
Mode indicator status Operation
mode
On O Blinking
High speed
mode
Hightorque
mode
Overload
alert
Adjusting depth of cut
CAUTION: After adjusting the depth of cut,
always tighten the lever securely.
Loosen the lever and move the base up or down. At the
desireddepthofcut,securethebasebytighteningthe
lever.
For cleaner, safer cuts, set cut depth so that no more
thanonebladetoothprojectsbelowworkpiece.Using
proper cut depth helps to reduce potential for danger-
ousKICKBACKSwhichcancausepersonalinjury.
►Fig.6: 1. Lever 2. Loosen 3. Tighten
Sighting
Placethealignmentlineofthebaseonyourintended
cutting line on the workpiece.
►Fig.7: 1. Alignment line 2. Cutting line 3. Base
Lighting the lamp
CAUTION: Do not look in the light or see the
source of light directly.
To turn on the lamp without running the tool, pull the
switchtriggerwithoutpressingthelock-obutton.
To turn on the lamp with the tool running, press and hold
thelock-obuttonandpulltheswitchtrigger.
The lamp goes out 10 seconds after releasing the
switch trigger.
►Fig.8: 1. Lamp
NOTE:Useadryclothtowipethedirtothelensof
the lamp. Be careful not to scratch the lens of lamp, or
itmaylowertheillumination.
Dust box
WARNING: Do not operate the tool without
the dust box. Direct contact with the circular saw
bladeandscatteredsawdustmaycauseserious
personalinjury.
CAUTION: Do not touch saw dust and the
dust box with bare hands immediately after the
operation.Theymaybeextremelyhotandcould
burnyourskin.
CAUTION: Do not cut the material on which
thinner, gasoline, grease, or other chemicals are
applied. The saw dust of such materials can damage
the dust box and result in breakage which can cause
personalinjury.
CAUTION: Wear eye protection or goggle
when emptying the dust box.
Sawdustiscollectedintothedustbox.Frequently
dump the saw dust in the dust box to avoid its thermal
deformation.
Push the lever on the dust box to open the lid. Dump
the saw dust while the rear of the tool faces downward.
►Fig.9: 1. Lid 2. Lever
►Fig.10

13 ENGLISH
Dust box assembly with inner cover
Optional accessory
Dustboxassemblywithinnercoveravoidsitsdeforma-
tion from the hot saw dust during continuous operation.
Use the hex wrench to loosen the bolt and remove the
original dust box.
►Fig.11: 1. Bolt 2. Hex wrench 3. Original dust box
Toattachthedustboxassemblywithinnercover,follow
the removal procedure in reverse.
NOTICE: Dispose the saw dust before it accumu-
lates over the upper end of the inner cover. Failure
todosomaycausethermaldeformationofthedust
boxassembly.
►Fig.12: 1. Inner cover 2. Upper end of the inner
cover
Hook
Optional accessory
CAUTION: Always remove the battery when
hanging the tool with the hook.
CAUTION: Never hook the tool at high loca-
tions or on the surfaces where the tool may lose
the balance and fall.
CAUTION: Do not pull the tool downward
when it is hooked.
CAUTION: Always fold the hook when operat-
ing the tool.
Thehookisconvenientforhangingthetooltemporarily.
►Fig.13
Attach the hook with the screws as illustrated.
►Fig.14: 1. Hook 2. Screw
Tousethehook,simplyturnthehookuntilitsnapsinto
the open position.
Whennotinuse,alwaysturnthehookuntilitsnapsinto
the closed position.
►Fig.15: 1. Open position 2. Closed position
Electric brake
Thistoolisequippedwithanelectricbladebrake.Ifthe
toolconsistentlyfailstoquicklystopthecircularsaw
blade after switch lever release, have tool serviced at a
Makita service center.
CAUTION: The blade brake system is not a
substitute for blade guard. NEVER USE TOOL
WITHOUT A FUNCTIONING BLADE GUARD.
SERIOUS PERSONAL INJURY CAN RESULT.
ASSEMBLY
CAUTION: Always be sure that the tool is
switched o and the battery cartridge is removed
before carrying out any work on the tool.
Hex wrench storage
When not in use, store the hex wrench as shown in the
guretokeepitfrombeinglost.
►Fig.16: 1. Hex wrench
Installing or removing the circular
saw blade
CAUTION: Use only the Makita wrench to
install or remove the circular saw blade.
CAUTION: When installing the circular saw
blade, be sure to tighten the bolt securely.
CAUTION: Be sure the circular saw blade is
installed with teeth pointing up at the front of the
tool.
►Fig.17: 1. Shaft lock 2. Hex wrench 3. Tighten
4. Loosen
To remove the circular saw blade, press the shaft lock
fullysothatthecircularsawbladecannotrevolveand
use the hex wrench to loosen the hex bolt. Then remove
thehexbolt,outerangeandcircularsawblade.
►Fig.18: 1. Hex bolt 2.Outerange3. Circular saw
blade 4.Innerange5. Cup washer
To install the circular saw blade, follow the removal
procedure in reverse.
WARNING: BE SURE TO TIGHTEN THE HEX
BOLT SECURELY. Also be careful not to tighten
the bolt forcibly. Slipping your hand from the hex
wrench can cause a personal injury.
WARNING: If the inner ange is removed,
be sure to install it on the spindle. When install-
ing, choose a correct side on which protrusion
ts into the circular saw blade hole perfectly.
Mounting the circular saw blade on the wrong side
can result in the dangerous vibration.
Blade guard cleaning
When changing the circular saw blade, make sure to
also clean the upper and lower guards of accumulated
metal chips as discussed in the Maintenance section.
Sucheortsdonotreplacetheneedtochecklower
guard operation before each use.

14 ENGLISH
Lid for vacuum cleaner
Optional accessory
WARNING: Do not use the vacuum cleaner for
metal cutting.Vacuumedsparkmaycauseinjuries,
malfunctionsorres.
Whenyouwishtoperformcleancuttingoperation,
connectaMakitavacuumcleanertoyourtoolbyusing
lid for vacuum cleaner.
Press the lever to open the lid of dust box, open the
hingebyascrewdriverandremovethelid.Attachthelid
for vacuum cleaner to the tool and close it. Remove the
cap and connect the hose of the vacuum cleaner.
►Fig.19: 1. Lid 2. Lid for vacuum cleaner 3. Cap
►Fig.20
OPERATION
This tool is intended to cut mild steel. With appropriate
Makita genuine saw blades, following materials can
also be sawed:
• Fiber-cement board
• Wood
RefertoourwebsiteorcontactyourlocalMakitadealer
for the correct circular saw blades to be used for the
material to be cut.
CAUTION: Always wear eye protection or
goggle before operation.
CAUTION: Be sure to move the tool forward
in a straight line gently. Forcing or twisting the tool
will result in overheating the motor and dangerous
kickback,possiblycausingsevereinjury.
CAUTION: Never twist or force the tool in
the cut.Thismaycausemotoroverloadand/ora
dangerouskickback,resultinginseriousinjurytothe
operator.
CAUTION: Always use the circular saw blades
appropriate for your job. The use of inappropriate
circularsawbladesmaycauseapoorcuttingperfor-
manceand/orpresentariskofpersonalinjury.
CAUTION: Do not use a deformed or cracked
circular saw blade. Replace it with a new one.
►Fig.21
Holdthetoolrmly.Thetoolisprovidedwithbothafront
grip and rear handle. Use both to best grasp the tool. If
bothhandsareholdingthetool,theycannotbecutby
the circular saw blade. Set the base on the workpiece
tobecutwithoutthecircularsawblademakingany
contact. Then turn the tool on and wait until the circular
sawbladeattainsfullspeed.Nowsimplymovethetool
forwardovertheworkpiecesurface,keepingitatand
advancingsmoothlyuntilthecuttingiscompleted.
Togetcleancuts,keepyourcuttinglinestraightand
yourspeedofadvanceuniform.Ifthecutfailsto
properlyfollowyourintendedcutline,donotattempt
to turn or force the tool back to the cut line. Doing so
maybindthecircularsawbladeandleadtodangerous
kickbackandpossibleseriousinjury.Releaseswitch,
wait for the circular saw blade to stop and then withdraw
tool. Realign tool on new cut line, and start cut again.
Attempt to avoid positioning which exposes operator to
chipsandparticlesbeingejectedfromthetool.Useeye
protectiontohelpavoidinjury.
Thesightgroovesinthebasemakesiteasytocheck
the distance between the front edge of the circular saw
blade and the workpiece whenever the circular saw
blade is set to the maximum depth of cut.
►Fig.22: 1. Cutting line 2. Base 3. Sight grooves
CAUTION: Do not stack materials when cut-
ting them.
CAUTION: Do not cut hardened steel, wood,
plastics, concrete, tile, etc. Cut only mild steel,
aluminum and stainless steel with a suitable
circular saw blade.
CAUTION: Do not touch the circular saw
blade, workpiece or cutting chips with bare hands
immediately after cutting.Theymaybeextremely
hotandcouldburnyourskin.
CAUTION: If the tool is operated continuously
until the battery cartridge has discharged, allow
the tool to rest for 15 minutes before proceeding
with a fresh battery.
Rip fence (Guide rule)
Optional accessory
CAUTION: Make sure that the rip fence is
securely installed in the correct position before
use.Improperattachmentmaycausedangerous
kickback.
►Fig.23: 1. Rip fence (Guide rule) 2. Clamping screw
Thehandyripfenceallowsyoutodoextra-accurate
straightcuts.Simplyslidetheripfenceupsnugly
against the side of the workpiece and secure it in posi-
tion with the clamping screw on the front of the base. It
also makes repeated cuts of uniform width possible.
Lanyard (tether strap) connection
Safety warnings specic for use at height
Read all safety warnings and instructions. Failure
tofollowthewarningsandinstructionsmayresultin
seriousinjury.
1. Always keep the tool tethered when working
“at height”. Maximum lanyard length is 2 m
(6.5 ft).
2. Use only with lanyards appropriate for this tool
type and rated for at least 4.0 kg (8.8 lbs).
3. Do not anchor the tool lanyard to anything on
your body or on movable components. Anchor
the tool lanyard to a rigid structure that can
withstand the forces of a dropped tool.

15 ENGLISH
4. Make sure the lanyard is properly secured at
each end prior to use.
5. Inspect the tool and lanyard before each use
for damage and proper function (including
fabric and stitching). Do not use if damaged or
not functioning properly.
6. Do not wrap lanyards around or allow them to
come in contact with sharp or rough edges.
7. Fasten the other end of the lanyard outside
the working area so that a falling tool is held
securely.
8. Attach the lanyard so that the tool will move
away from the operator if it falls. Dropped tools
willswingonthelanyard,whichcouldcauseinjury
or loss of balance.
9. Do not use near moving parts or running
machinery.Failuretodosomayresultinacrush
or entanglement hazard.
10. Do not carry the tool by the attachment device
or the lanyard.
11. Only transfer the tool between your hands
while you are properly balanced.
12. Do not attach lanyards to the tool in a way that
keeps guards, switches or lock-os from oper-
ating properly.
13. Avoid getting tangled in the lanyard.
14. Keep lanyard away from the cutting area of the
tool.
15. Use multi-action and screw gate type cara-
bineers. Do not use single action spring clip
carabineers.
16. In the event the tool is dropped, it must be
tagged and removed from service, and should
be inspected by a Makita Factory or Authorized
Service Center.
►Fig.24: 1.Holeforlanyard(tetherstrap)
MAINTENANCE
CAUTION: Always be sure that the tool is
switched o and the battery cartridge is removed
before attempting to perform inspection or
maintenance.
CAUTION: Clean out the upper and lower
guards to ensure there is no accumulated metal
chips which may impede the operation of the
lower guarding system.Adirtyguardingsystem
maylimittheproperoperationwhichcouldresultin
seriouspersonalinjury.When using compressed
air to blow metal chips out of the guards, wear a
proper eye and breathing protection.
CAUTION: After each use, clean up the inside
of the dust box and wipe o the saw dust on the
tool.Finemetallicdustmaycomeinsidethetooland
causemalfunctionorare.
NOTICE: Never use gasoline, benzine, thinner,
alcohol or the like. Discoloration, deformation or
cracks may result.
To maintain product SAFETY and RELIABILITY,
repairs,anyothermaintenanceoradjustmentshould
beperformedbyMakitaAuthorizedorFactoryService
Centers,alwaysusingMakitareplacementparts.
Inspecting the circular saw blade
• Check the circular saw blade carefully for
cracks or damage before and after each use.
Replace a cracked or damaged circular saw
blade immediately.
• Replace with a new circular saw blade as soon
as it no longer cuts eectively. Continuing to
useadullcircularsawblademaycauseadanger-
ous kickback and/or motor overload.
• Circular saw blades for metal cutter cannot be
re-sharpened.
OPTIONAL
ACCESSORIES
CAUTION: These accessories or attachments
are recommended for use with your Makita tool
specied in this manual.Theuseofanyother
accessories or attachments might present a risk of
injurytopersons.Onlyuseaccessoryorattachment
for its stated purpose.
Ifyouneedanyassistanceformoredetailsregard-
ingtheseaccessories,askyourlocalMakitaService
Center.
• Carbide-tipped circular saw blades
• Rip fence (Guide rule)
• Clamping screw
• Hook
• Hex wrench
• Safetygoggles
• Lid for vacuum cleaner
• Dustboxassemblywithinnercover
• Makitagenuinebatteryandcharger
NOTE:Someitemsinthelistmaybeincludedinthe
toolpackageasstandardaccessories.Theymay
dierfromcountrytocountry.

16 BAHASA INDONESIA
BAHASA INDONESIA (Petunjuk Asli)
SPESIFIKASI
Model: DCS553
Diameter mata pisau 136 mm - 150 mm
Kedalaman Pemotongan maks.
(dengan diameter mata pisau 150 mm)
57,5 mm
Kecepatan tanpa beban 4.200 min-1
Tegangan terukur D.C. 18 V
Panjangkeseluruhan 267 mm
Berat bersih 2,8 - 3,1 kg
• Karenakesinambunganprogrampenelitiandanpengembangankami,spesikasiyangdisebutkandisinidapat
berubah tanpa pemberitahuan.
• Spesikasidapatberbedadarisatunegarakenegaralainnya.
• Beratalatmungkinberbedatergantungperangkattambahanyangdipasang,termasukkartridbaterai.
Kombinasialatterberatdanteringan,sesuaiProsedurEPTA01/2014,ditunjukkanpadatabel.
Kartrid dan pengisi daya baterai yang dapat digunakan
Kartrid baterai BL1815N / BL1820 / BL1820B / BL1830 / BL1830B / BL1840 /
BL1840B / BL1850 / BL1850B / BL1860B
Pengisidaya DC18RC / DC18RD / DC18RE / DC18SD / DC18SE / DC18SF /
DC18SH
• Beberapakartridbateraidanpengisidayayangtercantumdiatasmungkintidaktersedia,tergantungwilayah
tempat tinggal Anda.
PERINGATAN: Hanya gunakan kartrid dan pengisi daya baterai yang tercantum di atas. Penggunaan
kartriddanpengisidayabaterailaindapatmenimbulkanrisikocederadan/ataukebakaran.
Simbol
Berikutiniadalahsimbol-simbolyangdigunakanpada
peralatan ini. Pastikan Anda mengerti makna masing-
masing simbol sebelum menggunakan alat.
Bacapetunjukpenggunaan.
Ni-MH
Li-ion
Hanyauntuknegara-negaraUE
Jangan membuang peralatan listrik atau
paket baterai bersama-sama dengan
bahan limbah rumah tangga!
DenganmemerhatikanPetunjukEropa,
tentang Limbah Peralatan Listrik dan
Elektronik serta Baterai dan Akumulator
serta Limbah Baterai dan Akumulator dan
pelaksanaannyasesuaidenganketentuan
hukum nasional, peralatan listrik dan
bateraidanpaketbateraiyangtelahhabis
umurpakainyaharusdikumpulkansecara
terpisah dan dikembalikan ke fasilitas daur
ulangyangkompatibelsecaralingkungan.
Penggunaan
Mesininidigunakanuntukpemotonganbajalunak.
DenganmatagergajiasliMakitayangsesuai,papan
seratsemendankayujugadapatdigergaji.
PERINGATAN
KESELAMATAN
Peringatan keselamatan umum
mesin listrik
PERINGATAN: Bacalah semua peringatan
keselamatan, petunjuk, ilustrasi dan spesikasi
yang disertakan bersama mesin listrik ini.
Kelalaianuntukmematuhisemuapetunjukyang
tercantumdibawahinidapatmenyebabkansengatan
listrik, kebakaran dan/atau cedera serius.
Simpanlah semua peringatan
dan petunjuk untuk acuan di
masa depan.
Istilah “mesin listrik” dalam semua peringatan mengacu
padamesinlistrikyangdijalankandengansumberlistrik
jala-jala(berkabel)ataubaterai(tanpakabel).
Keselamatan tempat kerja
1. Jaga tempat kerja selalu bersih dan
berpenerangan cukup.Tempatkerjayang
berantakan dan gelap mengundang kecelakaan.

17 BAHASA INDONESIA
2. Jangan gunakan mesin listrik dalam
lingkungan yang mudah meledak, misalnya
jika ada cairan, gas, atau debu yang mudah
menyala. Mesin listrik menimbulkan bunga api
yangdapatmenyalakandebuatauuaptersebut.
3. Jauhkan anak-anak dan orang lain saat
menggunakan mesin listrik. Bila perhatian
terpecah, anda dapat kehilangan kendali.
Keamanan Kelistrikan
1. Steker mesin listrik harus cocok dengan
stopkontak. Jangan sekali-kali mengubah
steker dengan cara apa pun. Jangan
menggunakan steker adaptor dengan mesin
listrik terbumi (dibumikan). Stekeryang
tidakdiubahdanstopkontakyangcocokakan
mengurangi risiko sengatan listrik.
2. Hindari sentuhan tubuh dengan permukaan
terbumi atau yang dibumikan seperti pipa,
radiator, kompor, dan kulkas. Risiko sengatan
listrikbertambahjikatubuhAndaterbumikanatau
dibumikan.
3. Jangan membiarkan mesin listrik kehujanan
atau kebasahan.Airyangmasukkedalammesin
listrik akan meningkatkan risiko sengatan listrik.
4. Jangan menyalahgunakan kabel. Jangan
sekali-kali menggunakan kabel untuk
membawa, menarik, atau mencabut mesin
listrik dari stopkontak. Jauhkan kabel dari
panas, minyak, tepian tajam, atau bagian
yang bergerak.Kabelyangrusakataukusut
memperbesar risiko sengatan listrik.
5. Bila menggunakan mesin listrik di luar
ruangan, gunakan kabel ekstensi yang
sesuai untuk penggunaan di luar ruangan.
Penggunaankabelyangsesuaiuntuk
penggunaan luar ruangan mengurangi risiko
sengatan listrik.
6. Jika mengoperasikan mesin listrik di lokasi
lembap tidak terhindarkan, gunakan pasokan
daya yang dilindungi peranti imbasan arus
(residual current device - RCD). Penggunaan
RCD mengurangi risiko sengatan listrik.
7. Mesin listrik dapat menghasilkan medan
magnet (EMF) yang tidak berbahaya bagi
pengguna. Namun, pengguna alat pacu
jantungatauperalatanmedissejenisnyaharus
berkonsultasi dengan produsen peralatan tersebut
dan/atau dokter mereka sebelum mengoperasikan
mesin listrik ini.
Keselamatan Diri
1. Jaga kewaspadaan, perhatikan pekerjaan Anda
dan gunakan akal sehat bila menggunakan
mesin listrik. Jangan menggunakan mesin
listrik saat Anda lelah atau di bawah pengaruh
obat bius, alkohol, atau obat.Sekejapsaja
lalai saat menggunakan mesin listrik dapat
menyebabkancederabadanserius.
2. Gunakan alat pelindung diri. Selalu gunakan
pelindung mata. Peralatan pelindung seperti
masker debu, sepatu pengaman anti-selip, helm
pengaman,ataupelindungtelingayangdigunakan
untukkondisiyangsesuaiakanmengurangirisiko
cedera badan.
3. Cegah penyalaan yang tidak disengaja.
Pastikan bahwa sakelar berada dalam posisi
mati (o) sebelum menghubungkan mesin
ke sumber daya dan/atau paket baterai, atau
mengangkat atau membawanya. Membawa
mesinlistrikdenganjariAndapadasakelarnya
atau mengalirkan listrik pada mesin listrik
yangsakelarnyahidup(on)akanmengundang
kecelakaan.
4. Lepaskan kunci-kunci penyetel sebelum
menghidupkan mesin listrik.Kunci-kunciyang
masihterpasangpadabagianmesinlistrikyang
berputardapatmenyebabkancedera.
5. Jangan meraih terlalu jauh. Jagalah pijakan
dan keseimbangan sepanjang waktu. Hal ini
memungkinkankendaliyanglebihbaikatasmesin
listrikdalamsituasiyangtidakdiharapkan.
6. Kenakan pakaian yang memadai. Jangan
memakai pakaian yang longgar atau
perhiasan. Jaga jarak antara rambut dan
pakaian Anda dengan komponen mesin yang
bergerak.Pakaianyanglonggar,perhiasan,
ataurambutyangpanjangdapattersangkutpada
komponenyangbergerak.
7. Jika tersedia fasilitas untuk menghisap dan
mengumpulkan debu, pastikan fasilitas
tersebut terhubung listrik dan digunakan
dengan baik. Penggunaan pembersih debu dapat
mengurangibahayayangterkaitdengandebu.
8. Jangan sampai Anda lengah dan mengabaikan
prinsip keselamatan mesin ini hanya karena
sudah sering mengoperasikannya dan sudah
merasa terbiasa.Tindakanyanglalaidapat
menyebabkancederaberatdalamsepersekian
detiksaja.
9. Selalu kenakan kacamata pelindung
untuk melindungi mata dari cedera saat
menggunakan mesin listrik. Kacamata
harus sesuai dengan ANSI Z87.1 di Amerika
Serikat, EN 166 di Eropa, atau AS/NZS 1336 di
Australia/Selandia Baru. Di Australia/Selandia
Baru, secara hukum Anda juga diwajibkan
mengenakan pelindung wajah untuk
melindungi wajah Anda.
Menjadi tanggung jawab atasan untuk
menerapkan penggunaan alat pelindung
keselamatan yang tepat bagi operator mesin
dan orang lain yang berada di area kerja saat
itu.

18 BAHASA INDONESIA
Penggunaan dan pemeliharaan mesin listrik
1. Jangan memaksa mesin listrik. Gunakan
mesin listrik yang tepat untuk keperluan
Anda.Mesinlistrikyangtepatakanmenuntaskan
pekerjaandenganlebihbaikdanamanpada
kecepatansesuairancangannya.
2. Jangan gunakan mesin listrik jika sakelar
tidak dapat menyalakan dan mematikannya.
Mesinlistrikyangtidakdapatdikendalikan
dengansakelarnyaadalahberbahayadanharus
diperbaiki.
3. Cabut steker dari sumber listrik dan/atau lepas
paket baterai, jika dapat dilepas, dari mesin
listrik sebelum melakukan penyetelan apa pun,
mengganti aksesori, atau menyimpan mesin
listrik. Langkah keselamatan preventif tersebut
mengurangirisikohidupnyamesinsecaratak
sengaja.
4. Simpan mesin listrik jauh dari jangkauan anak-
anak dan jangan biarkan orang yang tidak
paham mengenai mesin listrik tersebut atau
petunjuk ini menggunakan mesin listrik. Mesin
listriksangatberbahayaditanganpenggunayang
tak terlatih.
5. Rawatlah mesin listrik dan aksesori. Periksa
apakah ada komponen bergerak yang tidak
lurus atau macet, komponen yang pecah, dan
kondisi-kondisi lain yang dapat memengaruhi
pengoperasian mesin listrik. Jika rusak,
perbaiki mesin listrik terlebih dahulu sebelum
digunakan.Banyakkecelakaandisebabkanoleh
kurangnyapemeliharaanmesinlistrik.
6. Jaga agar mesin pemotong tetap tajam dan
bersih.Mesinpemotongyangterawatbaik
denganmatapemotongyangtajamtidakmudah
macet dan lebih mudah dikendalikan.
7. Gunakan mesin listrik, aksesori, dan mata
mesin, dll. sesuai dengan petunjuk ini, dengan
memperhitungkan kondisi kerja dan jenis
pekerjaan yang dilakukan. Penggunaan mesin
listrikuntukpenggunaanyanglaindariperuntukan
dapatmenimbulkansituasiberbahaya.
8. Jagalah agar gagang dan permukaan
pegangan tetap kering, bersih, dan bebas dari
minyak dan pelumas. Gagang dan permukaan
peganganyanglicintidakmendukungkeamanan
penanganan dan pengendalian mesin dalam
situasi-situasi tak terduga.
9. Ketika menggunakan mesin, jangan
menggunakan sarung tangan kain yang dapat
tersangkut.Sarungtangankainyangtersangkut
pada komponen bergerak dapat mengakibatkan
cedera pada pengguna.
Penggunaan dan pemeliharaan mesin bertenaga
baterai
1. Isi ulang baterai hanya dengan pengisi daya
yang ditentukan oleh pabrikan.Pengisidaya
yangcocokuntuksatujenispaketbateraidapat
menimbulkan risiko kebakaran ketika digunakan
untukpaketbateraiyanglain.
2. Gunakan mesin listrik hanya dengan
paket baterai yang telah ditentukan secara
khusus. Penggunaan paket baterai lain dapat
menimbulkan risiko cedera dan kebakaran.
3. Ketika paket baterai tidak digunakan, jauhkan
dari benda logam lain, seperti penjepit
kertas, uang logam, kunci, paku, sekrup
atau benda logam kecil lainnya, yang dapat
menghubungkan satu terminal ke terminal
lain. Hubungan singkat terminal baterai dapat
menyebabkanlukabakarataukebakaran.
4. Pemakaian yang salah, dapat menyebabkan
keluarnya cairan dari baterai; hindari kontak.
Jika terjadi kontak secara tidak sengaja, bilas
dengan air. Jika cairan mengenai mata, cari
bantuan medis.Cairanyangkeluardaribaterai
bisamenyebabkaniritasiataulukabakar.
5. Jangan menggunakan paket baterai atau
mesin yang sudah rusak atau telah diubah.
Bateraiyangrusakatautelahdiubahdapat
menyebabkanhal-halyangtidakdapatdiprediksi
yangdapatmenyebabkankebakaran,ledakan
atau risiko cidera.
6. Jangan membiarkan paket baterai atau mesin
dekat dengan api atau suhu yang berlebihan.
Pajananapiatausuhudiatas130°Cdapat
menyebabkanledakan.
7. Ikuti semua petunjuk pengisian daya dan
jangan mengisi daya paket baterai atau
mesin di luar rentang suhu yang ditentukan
di panduan.Mengisidayasecaratidaktepat
ataupadasuhudiluarrentangyangditentukan
dapat merusak baterai dan meningkatkan risiko
kebakaran.
Servis
1. Berikan mesin listrik untuk diperbaiki hanya
kepada oleh teknisi yang berkualikasi dengan
menggunakan hanya suku cadang pengganti
yang serupa.Haliniakanmenjaminterjaganya
keamanan mesin listrik.
2. Jangan pernah memperbaiki paket baterai
yang sudah rusak. Perbaikan paket baterai harus
dilakukanhanyaolehprodusenataupenyedia
servis resmi.
3. Patuhi petunjuk pelumasan dan penggantian
aksesori.
Peringatan keselamatan gergaji
bundar nirkabel
Prosedur pemotongan
1. BAHAYA: Jauhkan tangan dari area
pemotongan dan mata pisau. Jaga tangan
kedua Anda pada pegangan tambahan, atau
tempat motor mesin berada. Kedua tangan
tidakakanterpotongmatapisaujikakeduanya
memeganggergaji.
2. Jangan meraih bagian bawah benda kerja.
Pelindung tidak dapat melindungi Anda dari mata
pisauyangadadibawahbendakerja.
3. Setel kedalaman pemotongan terhadap
ketebalan benda kerja. Sebagian gigi mata pisau
harusterlihatdibawahbendakerja.

19 BAHASA INDONESIA
4. Jangan pernah memegang benda kerja dengan
meletakkannya dalam genggaman tangan atau
jepitan kaki Anda. Pastikan benda kerja berada
pada platform yang stabil. Sangat penting
untukmenunjangpekerjaandenganbenaruntuk
meminimalkan tubuh terpapar, mata pisau terikat,
atau kehilangan kontrol.
5. Pegang mesin listrik pada permukaan
genggam yang terisolasi saat melakukan
pekerjaan karena alat pemotong mungkin
saja bersentuhan dengan kawat tersembunyi.
Sentuhandengankabel“hidup”jugaakan
menyebabkanbagianlogampadamesinteraliri
aruslistrikdanmenyengatoperator.
6. Saat membelah, selalu gunakan pagar
pembelah atau petunjuk tepi lurus. Hal ini
meningkatkan akurasi potongan dan mengurangi
kemungkinanterikatnyamatapisau.
7. Selalu gunakan mata pisau dengan ukuran
dan bentuk yang tepat (bentuk berlian atau
lingkaran) dari lubang lengkung. Mata pisau
yangtidaksesuaiuntukdipasangpadaperangkat
kerasgergajijikadigunakanakanmelencengdari
pusatnyasehinggamengakibatkankehilangan
kontrol.
8. Jangan pernah gunakan cincin mata pisau
atau baut yang salah. Cincin mata pisau dan
bautdirancangsecarakhususuntukgergajiAnda,
untukkinerjayangoptimaldankeselamatan
pengoperasian.
Penyebab hentakan balik dan peringatan terkait
— sentakan balik adalah reaksi mendadak dari
matagergajiyangterjepit,tersangkutatautidak
sejajar,menyebabkangergajiyangtidakterkontrol
mungkinterangkatdankeluardaribendakerjake
arah operator;
— saatmatapisauterjepitatautersangkutkuatoleh
goresan tertutup, mata pisau berhenti bergerak
dan reaksi motor menggerakkan unit dengan
cepat ke arah operator;
— jikamatapisauterikatatautidaksejajarpada
potongan, gigi pada tepi belakang mata pisau
dapatmenggalikepermukaanbendakerja
menyebabkanmatapisaukeluarnaikdarigoresan
dan melompat kembali ke arah operator.
Hentakan balik merupakan akibat dari salah cara
menggunakangergajidan/atauprosedurataukondisi
pengoperasianyangsalahdandapatdihindari
denganmelakukantindakankewaspadaanyangtepat
sebagaimana diuraikan di bawah ini.
1. Pertahankan pegangan yang kuat pada
gergaji dengan kedua tangan dan posisikan
lengan Anda untuk menahan kekuatan balik.
Posisikan tubuh Anda di sisi mata pisau,
bukan sejajar dengan mata pisau. Hentakan
balikdapatmenyebabkangergajimelompatke
belakang, namun kekuatan hentakan balik dapat
dikontrololehoperator,jikadilakukantindakan
pencegahanyangtepat.
2. Saat mata pisau terikat, atau saat menyela
pemotongan, lepaskan picu dan pegang
gergaji tidak bergerak dalam bahan kerja
sampai mata pisau benar-benar berhenti.
Jangan pernah mencoba melepas gergaji
dari pekerjaan atau menarik gergaji ke
belakang saat mata pisau bergerak, jika
tidak, akan terjadi hentakan balik. Periksa dan
ambiltindakanyangtepatuntukmenyingkirkan
penyebabterikatnyamatapisau.
3. Saat memulai ulang gergaji pada benda kerja,
pusatkan mata gergaji di goresan sehingga
gigi gergaji tidak tersangkut pada benda kerja.
Jikamatagergajitersangkut,makamatagergaji
mungkinkeluarataumenyentakbalikdaribenda
kerjasaatgergajidimulaiulang.
4. Tunjang panel besar untuk meminimalkan
risiko mata pisau terjepit dan terhentak balik.
Panel besar cenderung melengkung karena
beratnya.Penunjangharusditempatkandibawah
panel pada kedua sisi, dekat garis pemotongan
dan tepi panel.
5. Jangan gunakan mata pisau yang tumpul atau
rusak.Setmatapisauyangtidakdiasahatau
tidaktepatdapatmenghasilkangoresanyang
tipisyangdapatmenyebabkangesekanberlebih,
terikatnyamatapisaudanhentakanbalik.
6. Ketajaman mata pisau dan tuas pengunci
penyetel sudut harus kencang dan aman
sebelum pemotongan.Apabilapenyetelanmata
pisau bergeser saat memotong, hal ini dapat
menyebabkanmatapisauterikatdanterhentak
balik.
7. Berhati-hatilah saat menggergaji dinding
atau area buta lain.Matapisauyangmencuat
dapatmemotongobjekyangdapatmenyebabkan
hentakan balik.
8. SELALU pegang mesin kuat-kuat dengan
kedua tangan. JANGAN PERNAH letakkan
tangan, kaki atau bagian tubuh Anda di bawah
dudukan mesin atau di belakang gergaji,
terutama saat membuat potongan menyilang.
Apabilaterjadihentakanbalik,gergajidapat
dengan mudah melompat ke balakang tangan,
dan mengakibatkan cedera serius.
9. Jangan sekali-kali menekan gergaji. Dorong
gergaji ke depan dengan satu kecepatan
sehingga mata pisau memotong tanpa
melambat.Menekangergajidapatmenyebabkan
potonganyangtidakmerata,tidakadanyaakurasi,
dankemungkinanterjadinyahentakanbalik.
Fungsi pelindung
1. Periksa apakah pelindung bagian bawah
tertutup dengan baik setiap kali akan
digunakan. Jangan mengoperasikan gergaji
jika pelindung bagian bawah tidak bergerak
bebas dan menutup dengan cepat. Jangan
pernah menjepit atau mengikat pelindung
bagian bawah ke posisi terbuka.Jikagergaji
terjatuhdengantidaksengaja,pelindungbagian
bawah dapat bengkok. Naikkan pelindung bagian
bawah menggunakan pegangan penarik dan
pastikan pelindung bergerak bebas dan tidak
menyentuhmatapisauataubagianlain,dalam
semua sudut dan kedalaman potongan.

20 BAHASA INDONESIA
2. Periksa pengoperasian pegas pelindung
bagian bawah. Jika pelindung dan pegas tidak
beroperasi dengan benar, maka pelindung
dan pegas harus diservis sebelum digunakan.
Pelindung bagian bawah dapat beroperasi dengan
lambatkarenaadabagianyangrusak,lapisan
yanglengket,atauserpihan.
3. Pelindung bagian bawah dapat ditarik secara
manual hanya untuk pemotongan khusus
seperti “potongan plunge” dan “potongan
campuran”. Naikkan pelindung bagian
bawah menggunakan pegangan penarik, dan
pelindung bagian bawah harus dilepas segera
setelah mata pisau memasuki material. Untuk
semuapenggergajianlainnya,pelindungbagian
bawah harus beroperasi secara otomatis.
4. Selalu perhatikan apakah pelindung bagian
bawah menutupi mata pisau sebelum
menempatkan gergaji pada bangku atau
lantai.Matapisauyangtidakterlindungdan
meluncurakanmenyebabkangergajiberjalan
mundur,memotongapasajayangadadijalurnya.
Perhatikanlahwaktuyangdiperlukanmatapisau
untuk berhenti setelah sakelar dilepas.
5. Untuk memeriksa pelindung bagian bawah,
buka pelindung bawah dengan tangan lalu
lepas dan perhatikan penutupan pelindung.
Periksa juga untuk melihat apakah pegangan
penarik tidak menyentuh rumah mesin.
Membiarkanmatapisauterbukaadalahhalyang
SANGATBERBAHAYAdandapatmenyebabkan
cedera serius.
Peringatan keselamatan tambahan
1. Jangan menghentikan mata pisau dengan
tekanan lateral pada mata gergaji.
2. Jangan mencoba menghilangkan material
pemotongan saat mata pisau bergerak.
Tunggu sampai mata pisau berhenti sebelum
memegang material pemotongan. Mata pisau
meluncur setelah dimatikan.
3. Tempatkan bagian yang lebih besar dari
dudukan gergaji pada bagian benda kerja yang
disokong dengan kuat, bukan pada bagian
yang akan jatuh saat pemotongan. Jepit
benda kerja jika berukuran kecil atau pendek.
JANGAN MENCOBA MEMEGANG BAGIAN
YANG PENDEK DENGAN TANGAN!
4. Jangan pernah mencoba melakukan
pemotongan dengan mesin yang dipasang
terbalik pada ragum. Hal ini sangat berbahaya
dan dapat mengakibatkan kecelakaan serius.
5. Kenakan kacamata pengaman dan pelindung
telinga selama pengoperasian.
6. Jangan gunakan roda ampelas apa pun.
7. Gunakan hanya mata gergaji dengan diameter
yang ditandai pada mesin atau ditentukan
dalam petunjuk. Menggunakan mata pisau
denganukuranyangsalahakanmemengaruhi
perlindungan mata pisau atau pengoperasian
pelindungyangdapatmengakibatkancedera
serius.
8. Selalu gunakan mata gergaji yang khusus
digunakan untuk memotong material yang
Anda inginkan.
9. Hanya gunakan mata gergaji dengan
kecepatan yang sama atau lebih tinggi dari
kecepatan yang tertera pada mesin.
10. Sebelum menyetel mesin setelah
menyelesaikan satu potongan, pastikan
pelindung telah tertutup dan mata pisau telah
benar-benar berhenti.
11. Bahan tertentu mengandung zat kimia yang
mungkin beracun. Hindari menghirup debu
dan persentuhan dengan kulit. Ikuti data
keselamatan bahan dari pemasok.
12. Gunakan masker debu dan pelindung telinga
saat menggunakan mesin.
13. (Hanya untuk negara-negara Eropa)
Gunakan hanya mata pisau yang sesuai
dengan EN847-1, saat memotong kayu atau
sejenisnya.
SIMPAN PETUNJUK INI.
PERINGATAN: JANGAN biarkan kenyamanan
atau terbiasanya Anda dengan produk (karena
penggunaan berulang) mengurangi kepatuhan
yang ketat terhadap aturan keselamatan untuk
produk yang terkait. PENYALAHGUNAAN atau
kelalaian mematuhi kaidah keselamatan yang
tertera dalam petunjuk ini dapat menyebabkan
cedera badan serius.
Petunjuk keselamatan penting untuk
kartrid baterai
1. Sebelum menggunakan kartrid baterai,
bacalah semua petunjuk dan penandaan pada
(1) pengisi daya baterai, (2) baterai, dan (3)
produk yang menggunakan baterai.
2. Jangan membongkar kartrid baterai.
3. Jika waktu beroperasinya menjadi sangat
singkat, segera hentikan penggunaan. Hal
tersebut dapat menimbulkan risiko panas
berlebih, kemungkinan mengalami luka bakar
atau bahkan terjadi ledakan.
4. Jika elektrolit mengenai mata Anda, basuh
dengan air bersih dan segera cari pertolongan
medis. Hal tersebut dapat mengakibatkan
hilangnya kemampuan penglihatan Anda.
5. Jangan menghubungkan terminal kartrid
baterai:
(1) Jangan menyentuhkan terminal dengan
bahan penghantar listrik apa pun.
(2) Hindari menyimpan kartrid baterai pada
wadah yang berisi benda logam lain
seperti paku, uang logam, dsb.
(3) Jangan membiarkan baterai terkena air
atau kehujanan.
Hubungan singkat baterai dapat menyebabkan
aliran arus listrik yang besar, panas berlebih,
kemungkinan mengalami luka bakar dan
bahkan kerusakan pada baterai.
6. Jangan menyimpan mesin dan kartrid baterai
pada lokasi dengan suhu yang bisa mencapai
atau melebihi 50 °C.
Other manuals for DCS553
8
Table of contents
Languages:
Other Makita Cutter manuals

Makita
Makita DCC501 User manual

Makita
Makita DSC250 User manual

Makita
Makita CS002G User manual

Makita
Makita 4112H User manual

Makita
Makita 3706 User manual

Makita
Makita M2402 User manual

Makita
Makita XCS06 User manual

Makita
Makita DT4000 User manual

Makita
Makita CC300D Manual

Makita
Makita DSC102 User manual

Makita
Makita EK7301 Instruction Manual

Makita
Makita 4112HS User manual

Makita
Makita 4105KB User manual

Makita
Makita CA5000 User manual

Makita
Makita 4190D User manual

Makita
Makita 4100nh3 User manual

Makita
Makita XCS04 User manual

Makita
Makita DCO140 User manual

Makita
Makita 4101RH User manual

Makita
Makita 3706 User manual