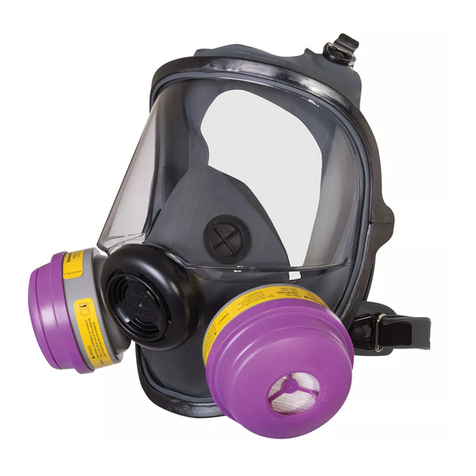
MSA OptimAir 6A User manual

TAL 804 (L) Rev. 17 © MSA 2008 Prnt. Spec. 10000005389(A) Mat. 490883
Doc. 490883
The Safety Company
For More Information, call 1-800-MSA-2222 or Visit Our Website at www.MSAnet.com
OptimAir®6A
Powered Air-Purifying Respirator
INSTRUCTIONS
T e warranties made by MSA wit respect to t e product are voided if
t e product is not used and serviced according to t e instructions in t is
manual. For any additional information relative to use or repair, write or
call 1-800-MSA-2222 during regular working ours.
See separate insert for NIOSH approval information (P/N 816882).
THIS MANUAL, INCLUDING THE WARNINGS AND CAUTIONS INSIDE,
MUST BE READ AND FOLLOWED CAREFULLY BY ALL PERSONS WHO
HAVE OR WILL HAVE THE RESPONSIBILITY FOR USING OR SERVICING THE
PRODUCT. T ese respirators will perform as designed only if t ey are
used and serviced according to t e instructions. OTHERWISE, THEY
COULD FAIL TO PERFORM AS DESIGNED, AND PERSONS WHO RELY ON
THESE RESPIRATORS COULD SUSTAIN SERIOUS PERSONAL INJURY OR
DEATH.
WARNING

INTRODUCTION
NIOSH APPROVAL INFORMATION
CAUTIONS AND LIMITATIONS
A. Not for use in atmospheres containing less than 19.5
percent oxygen.
B. Not for use in atmospheres immediately dangerous to
life or health (IDLH).
C. Do not exceed maximum use concentrations estab-
lished by regulatory standards.
H. Follow established cartridge and canister change
schedules or observe the End-of-Service-Life Indicator
(ESLI) to ensure that cartridges and canisters are
replaced before breakthrough occurs.
J. Failure to properly use and maintain this product could
result in injury or death.
K. The Occupational Safety and Health Administration
regulations require gas-proof goggles be worn with
this respirator when used against formaldehyde.
L. Follow the manufacturer’s User’s Instructions for
changing cartridges and/or filters.
M. All approved respirators shall be selected, fitted, used,
and maintained in accordance with MSHA, OSHA, and
other applicable regulations.
N. Never substitute, modify, add, or omit parts. Use only
exact replacement parts in the configuration as speci-
fied by the manufacturer.
O. Refer to User’s Instructions and/or maintenance man-
uals for information on use and maintenance of these
respirators.
P. NIOSH does not evaluate respirators for use as surgi-
cal masks.
S. Special or critical User’s Instructions and/or specific
use limitations apply. Refer to User’s Instructions
before donning.
Prot ction
HE - High Efficiency Particulate Air Filter for powered, air-
purifying respirators.
AM - Ammonia
CS - Chlorobenzylidene malononitrile
CN - Chloroacetophenone
CD - Chlorine dioxide (escape)
CL - Chlorine
FM - Formaldehyde
HC - Hydrogen chloride
HF - Hydrogen fluoride
HS - Hydrogen sulfide (escape)
MA - Methylamine
MV - Mercury vapor
OV - Organic Vapor
SD - Sulfur dioxide
SA - Supplied Air
S - SPECIAL OR CRITICAL USER’S INSTRUCTIONS
1. Special Instructions for Mersorb-P100/ Mersorb®
Cartridges —
a. Mersorb-P100/Mersorb cartridges can be used
against a mixture of chlorine and mercury that are
both present simultaneously, but cannot be used if
alternating between mercury-contaminated atmos-
pheres and chlorine-contaminated atmospheres.
b. Service Life Indicator - The Mersorb-P100 Mersorb
respirator utilizes an End of Service Life Indicator
(ESLI) for use against metallic mercury vapor. The
ESLI must be readily visible to the wearer of this
respirator without manipulation of the respirator,
cartridges, facepiece or indicator. If you cannot
readily see the indicator, do not wear the respirator.
The ESLI band around the side of each Mersorb-
P100/Mersorb cartridge consists of chemically
treated paper. In use, as the paper is exposed to
metallic mercury vapor, it changes from orange to
brown. When the indicator color changes to brown,
the cartridge is beginning to lose its effectiveness
against metallic mercury vapor and must be
replaced. Thus, the wearer has a constant, positive
check on the condition of his cartridge.
c. Do not enter any atmospheres with this respirator
unless you know that you are not colorblind and
can distinguish between the beginning and ending
colors of the End-of-Service-Life Indicator (when
using Mersorb-P100/Mersorb respirators only).
2
TAL 804 (L) Rev. 17 - 490883
TABLE OF CONTENTS
Introduction........................................................................2
Description.........................................................................5
Unpacking and Inspection.................................................7
Donning .............................................................................9
Tyvek Hood......................................................................13
Respirator Use.................................................................15
After Use..........................................................................19
Cleaning and Disinfecting................................................21
Accessories .....................................................................23
PAPR Assemblies ............................................................25
PAPR Subassemblies ......................................................26
OptimAir PAPR w/ Saranex Hood ...................................27
OptimAir 6A PAPR Facepieces .......................................28
Advantage 1000 Facepiece.............................................35
Millennium Facepiece......................................................36
Advantage 3000, (Model 3100) .......................................37

INTRODUCTION
INSTRUCTIONS FOR USE AND CARE BY PROPERLY
TRAINED AND QUALIFIED PERSONNEL
1. This d vic do s NOT supply oxyg n. Us only in
ad quat ly v ntilat d ar as containing at l ast 19.5
p rc nt oxyg n.
2. This r spirator must b us d in conjunction with
prop r ch mical or particulat cartridg s for pro-
t ction against sp cific contaminants.
3. Do not us wh n conc ntrations of contaminants
ar unknown or imm diat ly dang rous to lif or
h alth (IDLH). (S th r spirator NIOSH approval
plat P/N 816882 to d t rmin if this d vic can b
us d for scap from thos conc ntrations.)
4. Do not us wh n appropriat xposur limit
(OSHA, PEL, NIOSH REL, ACGIH TLV, tc) is not
known or wh n it is b low th odor thr shold or
any oth r stablish d warning l v l for th conta-
minant.
5. L av ar a imm diat ly if:
a. Br athing b com s difficult.
b. Dizzin ss or oth r distr ss occurs.
c. You tast or sm ll th contaminant.
d. You xp ri nc y , nos or throat irritation.
6. Us strictly in accordanc with instructions, lab ls,
and limitations p rtaining to this d vic .
7. This d vic may not s al prop rly if b ards, sid -
burns, or oth r similar physical charact ristics pr -
v nt dir ct contact b tw n th skin and th s al-
ing surfac of th fac pi c (s NFPA-1500 and
ANSI 788.2). Do not us this d vic if such condi-
tions xist.
8. Th fac -to-fac pi c s al must b t st d b for
ach us .
9. N v r r mov th fac pi c xc pt in a saf , non-
hazardous, non-toxic atmosph r .
10. N v r alt r or modify this d vic .
11. This r spirator is for us by training, qualifi d p r-
sonn l only.
Failur to follow th abov warnings can r sult in s ri-
ous p rsonal injury or d ath.
DO NOT us for ur than paints or oth r paints con-
taining diisocyanat s unl ss an appropriat cartridg
chang -out sch dul is d v lop d. Du to th ir poor
warning prop rti s, ov r xposur can occur without
us r awar n ss and r sult in s v r p rman nt dam-
ag to th r spiratory syst m. If unabl to d v lop an
appropriat chang -out sch dul , us an air-suppli d
r spirator or SCBA. Failur to follow this warning can
r sult in s rious p rsonal injury or d ath.
RESPIRATOR USE LIMITATIONS
The respirator must not be worn in atmospheres which
exceed any of the following limitations:
1. Maximum use concentrations
a. Full facepiece and hood PAPRs: 1000 times the
exposure limit for the contaminants present.
b. Half-facepiece PAPRs: 50 times the exposure limit
for the contaminants present.
c. 1000 parts per million organic vapors (for organic
vapor respirators).
2. The limitations outlined in the applicable NIOSH
approval.
3. Any applicable limitation contained in a standard
established by a regulatory agency (such as OSHA)
with jurisdiction over the wearer.
4. Do not use for respiratory protection against the fol-
lowing contaminants regardless of concentration or
time of exposure. This far-from-complete list is offered
only as a guide to proper evaluation of the many cont-
aminants found in industry. Contact MSA for further
information on other specific material.
5. This respirator can be used for protection against a
mixture of contaminants that are present simultane-
ously or alternately against one contaminant then
another (using the same cartridges or filters) if the
mixture meets the following conditions:
a. The cartridge/canister/filter must be approved for all
contaminants present.
b. Particulates (dusts, mists, fumes, asbestos,
radionuclides) can be mixed with any other particu-
late or any gas or vapor for which the car-
tridge/canister is approved.
c. Contaminants present simultaneously must be
below IDLH levels for the specific contaminants. If
any one contaminant in the mixture exceeds the
IDLH concentration then the entire mixture must be
treated as IDLH and the respirator cannot be used
(except for escape from particulates with appropri-
ate filter).
3TAL 804 (L) Rev. 17 - 490883
WARNING
Acrolein
Aniline
Arsine
Bromine
Carbon monoxide
Diisocyanates
Dimethylaniline
Dimethyl sulfate
Hydrogen cyanide
Hydrogen selenide
Methanol
Methyl bromide
Methyl chloride
Methylene chloride
Nickel carbonyl
Nitric Acid
Nitro compounds:
Nitrogen oxides
Nitroglycerin
Nitromethane
Ozone
Phosgene
Phosphine
Phosphorous
trichloride
Stibine
Sulfur chloride
Urethane or other
diisocyanate-con-
taining paints
Vinyl chloride
WARNING

INTRODUCTION
EXPOSURE LIMITS
A listing of acceptable exposure limits from the following
sources is provided in MSA’s Response®Respirator
Selector:
- American Conference of Governmental Industrial
Hygienists (ACGIH)
- Occupational Safety and Health Administration
(OSHA)
- National Institute for Occupational Safety and Health
(NIOSH)
- American Industrial Hygiene Association (AIHA)
Contact MSA at 1-800-MSA-2222 for information.
Exposur Limits for Mixtur s
The American Conference of Governmental Industrial
Hygienists (ACGIH) publishes the following information to
determine the TLV of a mixture.
First determine the total concentration of the chemical
mixture (CMixture) from the individual contaminant con-
centrations (C1, C2, C3, . . . ) using the following formula:
CMixture=C1+C2+ C3+ . . .
The TLV of the mixture is found by using the following for-
mula where T1, T2, T3, . . . are the individual contaminant
TLVs and C1, C2, C3, . . . are the individual contaminant
concentrations:
Only use these equations if the contaminants present are
actually mixed. Some substances do not mix and may be
present separately, for example, in pockets or at different
levels. In that case, the lowest TLV of the substances pre-
sent must be used to determine the appropriate respirator
category for protection against all contaminants present.
See MSA’s Response Respirator Selector for additional
information.
RESPIRATOR FIT TESTS
A qualitative or quantitative respirator fit test should be
carried out for each wearer of this respirator to determine
the amount of protection it will provide. Respirator fit tests
are explained fully in the American National Standard for
Respiratory Protection, ANSI Z88.2, which is published by
the American National Standards Institute, 11 West 42nd
Street, New York, New York 10036.
Quantitativ Fit T st
If a quantitative fit test is used, a fit factor that is at least
100 shall be obtained before that respirator is assigned to
an individual.
Qualitativ Fit T st
If a qualitative test is used, only validated protocols are
acceptable. The individual must pass a test designed to
assess a fit factor of 100.
Powered Air-Purifying Respirators (PAPR) should be quali-
tatively or quantitatively fit tested in a negative-pressure
mode (with blower off). This will cover use of the respira-
tor in the powered air-purifying mode of operation.
IMPORTANT INFORMATION CONCERNING THE RES-
PIRATORY PROTECTION PROGRAM
1. An adequate respiratory protection program must
include knowledge of hazards, hazard assessment,
selection of proper respiratory protective equipment,
instruction and training in the use of equipment,
inspection and maintenance of equipment, and med-
ical surveillance. [See OSHA regulations, Title 29 CFR,
Part 1910.134].
2. This respirator will perform as designed only if used and
maintained according to the manufacturer's instruc-
tions. The Program Administrator and the users must
read and understand these instructions before trying to
use or service this product. MSA encourages its cus-
tomers to write or call for a demonstration or any addi-
tional information on this product before using it.
4
TAL 804 (L) Rev. 17 - 490883
TMixture=
CMixture
+ + + . . .
T1T2T3
C1C2C3

DESCRIPTION
DESCRIPTION
The OptimAir 6A Powered Air-Purifying Respirator (PAPR)
is certified by the National Institute for Occupational
Safety and Health (NIOSH) as an air-purifying device
designed for use in atmospheres which are NOT immedi-
ately dangerous to life or health (IDLH).
Five models are available:
OptimAir 6A PAPR with high-efficiency particulate fil-
ter cartridges
OptimAir 6A PAPR with chemical cartridges
OptimAir 6A PAPR with combination cartridges
OptimAir 6A PAPR with CS/CN canisters
Advantage 3000 (Model 3100) full facepiece
The OptimAir 6A Particulate Filter Cartridge PAPR may be
used with the Comfo half-facepiece, Comfo Welder’s half-
facepiece, Comfo Elite half-facepiece, Comfo Elite
Welder’s half-facepiece, Ultravue full facepiece, Ultra Elite
full facepiece, Advantage 1000 full facepiece, Millennium
full facepiece, Advantage 3000 (Model 3100) full face-
piece, Tyvek, Saranex, or the Tychem QC Hoods.
The OptimAir 6A Chemical Cartridge PAPR may be used
with the Ultravue full facepiece, Ultra Elite full facepiece,
Advantage 1000 full facepiece, Millennium full facepiece,
Advantage 3000 (Model 3100) full facepiece, or Comfo-
style half-facepieces only.
The OptimAir 6A Combination Cartridge PAPR may be
used with the Ultravue full facepiece, Ultra Elite full face-
piece, Advantage 1000 full facepiece, Millennium full face-
piece, Advantage 3000 (Model 3100) full facepiece, or
Comfo-style half-facepieces only.
The OptimAir 6A CS/CN canister may be used with the
Millennium®or Advantage®1000 facepieces only.
Not : When the Advantage 1000 Facepiece is used, the
P/N 10012413 kit and P/N 96547 adapter must be
installed on the facepiece.
Not : When Millennium Facepiece is used, the P/N 96547
adapter must be installed on the facepiece.
COMBINATION CARTRIDGES
A combination cartridge consists of particulate filter media
and chemical sorbent in one cartridge package. This type
of cartridge must be used when harmful particulate matter
as well as harmful gases and/or vapors are present.
DO NOT us combination cartridg s with a PAPR
hood. Combination cartridg s ar approv d for us
with th Ultravu or Ultra Elit full fac pi c s or
Comfo-styl half-fac pi c s only. Failur to follow this
warning can r sult in s rious p rsonal injury or d ath.
CS/CN CANISTER
A CS/CN canister consists of particulate filter media and
chemical sorbent in one canister package. This type of
canister must be used when the CS/CN is present.
CS/CN canist rs ar approv d for us only with
Advantag 1000 or Mill nnium full fac pi c s. Failur
to follow this warning can r sult in s rious p rsonal
injury or d ath.
The Ultravue Facepiece and Ultra Elite Facepiece are
available with an integral welder's lens and are available
for use with the welder's adapter. All facepieces are avail-
able in small, medium, or large. Rubber or silicone materi-
al may be selected.
The motor-blower, battery pack, and filters are worn as an
assembly on the support belt. The breathing tube con-
nects the belt-mounted assembly to the facepiece or
hood.
The respirator may be used at temperatures between 0°
and 120°F, and may be worn under flame-retardant gar-
ments. If used below 40°F, a fully-charged NiCad Battery
may not operate the motor-blower for a shift.
PRINCIPLE OF OPERATION
The motor-blower draws surrounding air through cartridges
or canisters which capture the contaminants. Purified air
passes through the breathing tube to the facepiece or
hood. Air pressure in the facepiece or hood is higher than
the surrounding air. This means that if a small leak occurs,
air will flow from inside the facepiece or hood to the out-
side air. This is referred to as positive pressure. Air flow
also provides wearer comfort.
The OptimAir 6A PAPR is powered by a Nickel-Cadmium
(NiCad) or Lithium Battery Pack. The NiCad Battery Pack
only is rechargeable. The Lithium battery is NOT
rechargeable. However, the Lithium Battery has a very
long shelf life (up to 10 years).
The rechargeable Nickel-Cadmium Battery Pack and the
single-use Lithium Battery supplies 4.5 volts to the motor-
blower. The battery pack is replaceable. A fully-charged
NiCad Battery and a fresh Lithium Battery are designed to
operate for a shift. The battery pack is compatible with
both the standard and dual-rate (fast-rate) chargers.
5TAL 804 (L) Rev. 17 - 490883
WARNING
WARNING

DESCRIPTION
All NiCad Packs are equipped with a thermistor and con-
trol jack so that they may be used with the dual-rate
charger.
DO NOT r charg a Lithium Batt ry. Th Lithium
Batt ry can xplod . Failur to follow this warning can
rsult in s rious p rsonal injury or d ath.
6
TAL 804 (L) Rev. 17 - 490883
WARNING

UNPACKING AND INSPECTION
The PAPR consists of the following components:
facepiece or hood
motor-blower and battery pack as a single assembly
breathing tube
polyurethane-coated support belt
charger (for NiCad Battery only.)
Thoroughly insp ct all compon nts of th r spirator
b for th d vic is us d. R ad and obs rv all NIOSH
approval limitations as th y apply to using th PAPR.
1. Remove the facepiece (or hood), breathing tube, bat-
tery charger, and support belt from the box. Check for
signs of shipping damage.
2. Remove the motor-blower and battery pack, and the
two filters if included. Check for shipping damage.
DO NOT drop th PAPR. Th cas can b damag d by
impact. Th blow r can b loos n d or th motor
shaft can b b nt. If th unit is dropp d, ch ck th
cas for cracks. List n clos ly to th sound of th
motor. If th blow r sticks or rattl s, or if air output is
r duc d, th ntir motor-blow r must b r turn d to
MSA or an authoriz d MSA S rvic C nt r for r pair.
REMOVING AND INSTALLING PARTICULATE,
COMBINATION CARTRIDGES, AND CS/CN
CANISTERS
1. Before charging the NiCad Battery Pack, unthread and
remove the cartridges. Then separate the pack from
the motor-blower.
2. Look to see that the
gaskets located in each
cartridge receptacle on
the motor-blower are in
place.
DO NOT install th filt r, ch mical cartridg s, CS/CN
canist rs, or us th r spirator if th gask ts ar
missing or app ar damag d. If you do, th contami-
nant can b drawn into th r spirator and inhal d,
r sulting in s rious r spiratory injury or d ath.
3. Hold the PAPR in one hand.
4. Use your other hand to turn the cartridge/canister
clockwise and thread it down onto the sealing gasket.
Hand-tighten the cartridge/canister.
5. Repeat steps 2 through 4 to install the other car-
tridge/canister.
REPLACING THE CS/CN CANISTER
Use the canister immediately upon opening the bag.
Discard canister after each use. Do not exceed maximum
concentration and service life specified by governing pro-
tocol. The length of time the chemicals in the canister will
give protection depends on the concentration of the cont-
aminant(s) and the rate of breathing. When the mask is
adjusted properly, the wearer should not taste or smell the
contaminant or experience eye, nose, or throat irritation.
The wearer’s inhalation resistance should be as experi-
enced during training.
Return to fresh air immediately and attach a new canister if
you taste or smell the contaminant, experience eye, nose,
or throat irritation, or excessive inhalation resistance. Do
not use the canister after the expiration date on the label.
NICKEL CADMIUM BATTERY PACKS
Batt ry Changing
The battery pack must be fully-charged for 16 hours (8
hours with a dual-rate charger) before the respirator is first
used. Use the standard charger (P/N 463471), dual rate
charger (P/N 486614), or other recommended charger from
MSA only. Other chargers may damage the battery due to
internal wiring differences or incorrect charging rates.
DO NOT r charg a Lithium Batt ry. Th Lithium
Batt ry can xplod . Failur to follow this warning can
r sult in s rious p rsonal injury or d ath.
Not : Unthread and remove the filters, then separate the
pack from the motor-blower.
1. Separating the battery pack from the motor-blower.
a. Be sure that the power switch is in the off position.
b.
Hold the motor-blower in one hand.
c. Use the index finger
of your other hand to
pull the metal catch
down toward the
MSA logo on the
front of the battery
pack. Pull the battery
pack straight up.
7TAL 804 (L) Rev. 17 - 490883
WARNING
WARNING
CAUTION
CAUTION

UNPACKING AND INSPECTION
DO NOT charg th batt ry pack wh r th r ar
xplosiv conc ntrations of combustibl gas s,
vapors, or mists. An xplosion or fir can r sult.
R plac th charg r if th cord is damag d or worn,
or if th cas is crack d or distort d. Do not us a
damag d charg r. Doing so can r sult in s rious p r-
sonal injury or d ath, or cr at a fir hazard.
2. Charging the battery pack
a. Push the charging
plug into the charg-
ing jack. Be sure that
the plug is all the
way in.
Not : To use the dual-rate charger, insert the charging
plug in the charging jack as usual. Then insert the male
control plug into the center jack in the battery pack.
b. Plug the charger into a 115-120V, 60 Hz (standard
AC) outlet.
Voltag s low r than 110V ar not r comm nd d.
Voltag s gr at r than 120V will damag th batt ry
charg r and batt ry pack. Limit th charging tim to
24 hours maximum with th standard charg r. Tim r-
controll d outl ts may b us d. Do not charg th
batt ry pack for mor than 24 hours with th standard
charg r. Ov r-charging s riously r duc s batt ry lif ,
and could cr at an xplosion hazard, r sulting in
s rious p rsonal injury or d ath.
c. Charge the battery pack a minimum of 16 hours (8
hours for dual-rate).
Not : Do not charge partially-discharged battery packs at
the full-charge rate, which increases temperature substan-
tially. Repeated charging in this manner reduces service
life. If the standard charger is used, charge at 200% of
pack use-time (e.g., a pack used 2 hours is charged 4
hours). Charging based on use time returns the pack to
full capacity without increasing temperature. If this
method is not practical, use the dual-rate charger.
d. The battery pack can be stored for long periods at
room temperature. However, several cycles (charg-
ing followed by discharge) may be needed to
restore the pack to full capacity. If the pack has
been stored in a "charge-ready" condition, it should
be charged for 6 hours every 30 days to maintain a
capacity of 70% or greater.
e. The standard charger uses a one light emitting
diode (LED). The LED shows that proper voltage is
present. The chart below shows how to "read"
charger and battery performance for the dual-rate
charger (P/N 486614).
*Allow at least 20 minutes for the light to come on if you
are charging a severely-discharged battery pack.
3. Re-attaching the battery pack
a. Line up the dovetail
on the battery pack
with the dovetail on
the motor-blower.
b. Slide the battery pack and the motor-blower togeth-
er until the spring clip snaps into place.
c. Check for gaskets in the filter or chemical cartridge
receptacles and re-install the cartridges.
LITHIUM BATTERY PACKS
Lithium Battery Packs maintain over 85% of their original
charge for up to 10 years. This battery pack is a single-
use battery which will last for a shift under normal condi-
tions. When the pack reaches the end of its life, dispose
of it according to appropriate disposal procedures.
DO NOT r charg a Lithium Batt ry. Th Lithium
Batt ry can xplod . Failur to follow this warning can
r sult in s rious p rsonal injury or d ath.
ASSEMBLING THE SUPPORT BELT TO THE MOTOR-
BLOWER
Slip the support belt through the belt loop on the motor-
blower.
8
TAL 804 (L) Rev. 17 - 490883
Voltag Curr nt Indication
ON* ON Good pack; accepting charge.
OFF ON Bad pack; current flowing but low battery
voltage; replace pack.
ON OFF Open circuit or bad pack; check that
charging plug is clean and fully inserted in
jack; internal battery open circuit; return bat-
tery pack to MSA.
OFF OFF No power or bad pack; check that charger
is plugged in (120 VAC); check cable to
battery-pack.
WARNING
WARNING
WARNING

DONNING
DONNING THE FACEPIECE STYLE PAPR
Not : *Tyvek/Saranex/Tychem QC Hoods PAPRs are cov-
ered separately. See Tyvek/Saranex/Tychem QC Hoods
Assembly. Tyvek is trademark of the duPont Company.
DO NOT w ar this r spirator unl ss you hav r c iv d
training in its us and hav r ad and und rstood all of
th instructions.
DO NOT us this r spirator in an ar a that has l ss
than 19.5 p rc nt oxyg n. Th PAPR do s not supply
oxyg n. Do not us th r spirator as an und rwat r
d vic . Do not us th r spirator if th air contaminant
is unknown, imm diat ly dang rous to lif or h alth
(IDLH), or you cannot scap without r spiratory
quipm nt. Do not us th r spirator wh n th appro-
priat xposur limit (OSHA PEL, NIOSH REL, ACGIH
TLV, tc) is not known or wh n it is b low th odor
thr shold or any oth r stablish d warning l v l for
th contaminant.
R spirator cartridg s/canist rs ar d sign d to pro-
vid limit d prot ction from sp cific contaminants.
S th filt r, ch mical, combination cartridg , or
CS/CN canist r lab l for sp cific information.
If you ar working with a contaminant which can b
absorb d by your skin, w ar prot ctiv clothing that
will not allow th contaminant to contact your skin.
Failur to follow th abov warnings can r sult in s ri-
ous p rsonal injury or d ath.
DONNING THE SUPPORT BELT
Don the support belt and adjust the motor-blower and
cartridges to a comfortable position.
The PAPR may be worn on either side. If a Comfo
Welder's Facepiece is used, the PAPR must be worn
toward the back or on the left side so that the breathing
tube will reach.
DONNING THE FACEPIECE
Not : Check for a gasket in the facepiece coupling nut so
that it will seal with the breathing tube.
1. Connect the breathing tube to the facepiece and
hand-tighten.
2. Donning the half-mask facepiece with cradle headstraps:
a. Slip the cradle headstrap over the crown of your
head and rest the top of the facepiece on the bridge
of your nose.
b. Swing the bottom of the facepiece under your chin.
c. Pull the lower headstraps around your neck and
attach the clip to the d-ring.
d. Adjust the tension
slides for a comfort-
able fit.
e. Perform the Air-Tightness Test.
3. Donning the half-mask facepiece with elastic head-
straps:
a. Rest the top of the facepiece on the bridge of your
nose.
b. Swing the bottom of the facepiece under your chin.
c. Place the long headstraps over the crown of your
head. Attach the clip to the d-ring. Place the short
headstraps around your neck and attach the clip to
the d-ring.
d. Adjust the tension slides for a comfortable fit.
e. Perform the Air-Tightness Test.
4. Donning the full facepiece.
Cov r l ns s ar install d on th outsid of th l ns to
prot ct th plastic surfac . Do not us a cov r l ns in
a high h at nvironm nt. High h at can caus th
cov r l ns to distort or moistur can g t trapp d
b tw n th cov r l ns and th fac pi c l ns r sult-
ing in cond nsation, which can caus distort d vision.
ULTRAVUE AND ULTRA ELITE WITH ADJUSTABLE
RUBBER HARNESS
1. Adjust the facepiece headstraps so the end tabs are
at the buckles.
2. Grip the facepiece between the thumb and fingers
with both hands. Insert your chin into the chin cup.
3. Pull the facepiece headstraps over your head. Smooth
the straps flat against your head.
4. Support the facepiece by holding the speaking
diaphragm housing with one hand.
5. To tighten the lower (neck) straps, pull the straps
straight back, not out.
6. Tighten the side (temple) straps.
7. Adjust the forehead strap if needed to position the
lens for best vision.
8. Perform the Air-Tightness Test.
9TAL 804 (L) Rev. 17 - 490883
WARNING
CAUTION

DONNING
Not : A nosecup accessory is available to reduce lens
fogging. If the respirator will be used in areas of high
humidity or at temperatures below 32°F, the nosecup
accessory may be installed.
DO NOT w ar y glass s with a full fac pi c . Th
tmpl s or sid bars on y glass s will pr v nt an air-
tight s al. If you must w ar glass s, install th sp cta-
cl kit. Failur to follow this warning may caus
inhalation of contaminat d air r sulting in s rious p r-
sonal injury or d ath.
DONNING ADVANTAGE 3000(MODEL 3100)
RESPIRATOR WITH ADJUSTABLE RUBBER HARNESS
1. The mask may need to be initially donned more than
once to determine the correct adjustment of top
straps and obtain a proper fit.
2. Verify top straps are evenly located and loosen the
two bottom straps. Grip the straps by inserting
thumbs through the straps. Insert chin well into lower
part of facepiece and pull harness back over head.
3. Push the back of the harness downward toward the
neck until it is centered.
4. If necessary, hold the mask component housing with
one hand and position the harness with other hand until
obtaining a firm and comfortable fit against the face.
5. Tighten the two bottom straps so that the mask is
snug against the face. The top straps should be flat
against the top of the head.
6. If the mask does not feel snug against the face, remove
the mask, adjust the top straps and go to step 2.
To Adjust th Top Straps:
1. Remove the mask. The top straps should be adjusted
with the mask off.
2. Remove the strap from the fastener button, by pulling
the loose end of the strap away from the fastener but-
ton.
3. Move the slide away from the lens ring to allow the
strap to slide through the lens ring connection. Adjust
the length of the strap. Pull the straps to the next
hole. Secure the strap in position by pulling the strap
onto the button.
4. Smooth the straps so that they are flat. Move the
slide so that it is located at the lens ring connection.
DONNING THE RESPIRATOR WITH PLASTIC
ADVANTAGE HARNESS
Not : There are two recommended donning procedures.
Donning Proc dur A:
1. Completely loosen the two bottom straps. Spread the
straps of the head harness with both hands and place
chin into the mask. Pull harness over head all the
way, until plastic cradle lies flat on back of head.
2. Tighten neck straps evenly so that the mask is snug
against face.
3. If necessary, adjust the mask and tighten harness by
pulling loop on the back of harness.
Donning Proc dur B:
1. Completely loosen the two bottom straps, insert fin-
gers and hold the loop on the back of the harness.
2. Place chin into the mask.
3. Pull harness over head with the loop; pull harness
down to the back of the head, until plastic cradle lies
flat on back of head.
4. Tighten neck straps evenly so that the mask is snug
against your face.
FACEPIECE FIT CHECK
(Face-to-Facepiece Seal)
The Air-Tightness Test must be performed ach time the
facepiece is donned. You must know the face-to-face-
piece seal is good b for you enter any hazardous area.
1. Block off the breathing tube with either the palm of
your hand or by placing your thumb over the opening
inside the coupling nut.
2. Breathe in and hold your breath for 10 seconds. If the
seal is good, the facepiece will collapse and remain
collapsed against your face.
3. If the facepiece does not remain collapsed or if you
notice any leakage, re-adjust the straps and test
again. If this does not correct the leak, do not use the
facepiece.
4. If you cannot get a seal by adjusting the headstraps,
check the facepiece and breathing tube for leaks.
Locate the problem and correct it before using the
respirator.
This r spirator may not provid a satisfactory s al
with c rtain facial charact ristics, such as b ards or
larg sid burns, that pr v nt dir ct contact b tw n
th skin and th s aling surfac of th fac pi c . Do
not us this r spirator if such conditions xist. Th
fac -to-fac pi c s al must b t st d b for ach
us . DO NOT USE A FACEPIECE THAT DOES NOT
SEAL. Failur to follow this warning can r sult in s ri-
ous p rsonal injury or d ath.
10
TAL 804 (L) Rev. 17 - 490883
WARNING
WARNING

DONNING
FINAL HOOK-UP
1. Turn the power switch
on. Let air flow through
the motor-blower for a
few seconds.
2. Check for an o-ring on
the end of the breath-
ing tube coupling nut.
Th o-ring must b pr s nt to nsur a prop r air-tight
s al. Failur to follow this warning can caus inhala-
tion of th contaminant r sulting in s rious r spiratory
injury or d ath.
3. Thread the breathing tube onto the motor-blower and
hand-tighten the coupling nut.
Not : If you are wearing a half-mask facepiece and feel
air blowing out of the facepiece and into your eyes, the
facepiece is not fitted properly. All air should escape
through the exhalation valve. Don the facepiece again.
11 TAL 804 (L) Rev. 17 - 490883
WARNING

NOTES
12
TAL 804 (L) Rev. 17 - 490883

TYVEK/SARANEX/TYCHEM QC HOODS
ASSEMBLING THE TYVEK/SARANEX/TYCHEM QC
HOODS PAPR
1. Remove the suspension by pulling the Velcro strips
apart, then pull the suspension out of the hood.
2. Check the end of the
hood coupling nut for
an o-ring.
Th o-ring must b pr s nt to obtain an air-tight s al.
Failur to follow this warning can caus inhalation of
th contaminant r sulting in s rious r spiratory injury
or d ath.
3. Thread the breathing tube onto the hood. Hand-tight-
en the coupling nut.
ADJUSTING THE HOOD SUSPENSION
1. Loosen the Velcro strip
at the back of the sus-
pension by pulling the
strip away from the
plastic band.
2. Position the suspension so that the stitching on the
sweatband is down.
3. Place the sweatband against your forehead and wrap
the plastic band around your head for a snug but
comfortable fit.
4. Press the Velcro strips
together to secure the
suspension.
INSTALLING THE HOOD SUSPENSION
Not : If the optional chin strap will be used, install it at
this time. The chin strap must be attached to the hood
suspension before the suspension is installed in the hood.
1. To install the chin
strap, insert one end of
the strap in the slot
located at the side of
the suspension. Then
insert the remaining
end of the strap in the
slot on the other side.
2. Insert the suspension into the hood.
3. Turn the suspension so that the sweatband faces the
hood lens.
4. Attach the three Velcro
strips on the suspen-
sion to the three strips
inside the hood.
INSTALLING AN OPTIONAL PROTECTIVE CAP
Not : If a protective cap is to be worn, it must be from
MSA. Only the cap from MSA is equipped with proper
adapters to secure the hood to the cap.
1. Adjust the cap suspension to the head size desired.
Follow the instructions supplied with the cap.
2. Insert the cap into the hood.
3. Turn the cap so that the bill is pointed toward the
hood lens.
4. Attach the Velcro strips
in all three places.
13 TAL 804 (L) Rev. 17 - 490883
CAUTION

TYVEK/SARANEX/TYCHEM QC HOODS
DONNING THE TYVEK/SARANEX/TYCHEM QC
HOODS PAPR
DO NOT w ar this r spirator unl ss you hav r c iv d
training in its us and hav r ad all of th instructions.
DO NOT
DO NOT us this r spirator in an ar a that has l ss
than 19.5 p rc nt oxyg n. Th PAPR do s not supply
oxyg n. Do not us th r spirator as an und rwat r
d vic . Do not us th r spirator in an atmosph r
containing poisonous gas s or vapors. Do not us th
r spirator if th air contaminant is unknown, imm di-
at ly dang rous to lif or h alth (IDLH), or you cannot
scap without r spiratory quipm nt. R spirator car-
tridg s ar d sign d to provid limit d prot ction from
sp cific contaminants. S th filt r cartridg lab l for
sp cific information.
If you ar working with a contaminant which can b
absorb d by your skin, w ar prot ctiv clothing that
will not allow th contaminant to contact your skin.
Failur to follow th abov warnings can r sult in s ri-
ous p rsonal injury or d ath.
1. Don the support belt. Adjust the motor-blower and fil-
ter assembly to a comfortable position toward your
back.
2. Check for an o-ring on the end of the breathing tube
coupling nut.
Th o-ring must b pr s nt to nsur an air-tight s al.
Failur to follow this warning can caus inhalation of
th contaminant r sulting in s rious r spiratory injury
or d ath.
3. Thread the breathing tube onto the motor-blower and
hand-tighten the coupling nut.
4. Turn the power switch on. Let air flow through the unit
for a few seconds.
5. Grip the hood and knit collar between your fingers
with both hands. Stretch the collar and pull the hood
down over your head.
6. Put the suspension on your head.
7. Secure the chin strap (optional accessory) under your
chin.
8. Straighten the knit collar for a good fit around your
neck.
9. Check the hood inlet to make sure it is straight and
not twisted.
DO NOT w ar th hood with th n ck s al or bibs
und r your clothing. Failur to follow this warning can
caus r duc d air flow b low th r quir d minimums.
This can r duc or liminat th prot ction of th unit,
r sulting in s rious p rsonal injury or d ath.
14
TAL 804 (L) Rev. 17 - 490883
WARNING
WARNING
WARNING

RESPIRATOR USE
PARTICULATE FILTER AND CHEMICAL CARTRIDGE
AND BATTERY PACK SERVICE TIMES
The PAPR high efficiency filter cartridges and the battery
pack are designed to supply a minimum of six cubic feet
per minute (cfm) of respirable air to the facepiece (or hood)
for a shift. Actual service time may vary. However, air flow
must not drop below 4 cfm for a facepiece or 6 cfm for
hoods. The type and concentration of the contaminant, as
well as the relative humidity of the air, may affect how long
filters may be used. See the Accessories section for avail-
able flow check devices.
If the motor-blower changes speed quickly or varies as
you breathe, check the following:
1. If breathing resistance is still high after you have
installed new filters, then the NiCad Battery Pack must
be recharged or replaced with a Lithium Battery Pack.
See Battery Charging. With facepiece-equipped res-
pirators you can breathe through the respirator with
the motor-blower off. However, breathing resistance
will be greater than when the PAPR is supplying air to
the facepiece.
DO NOT us th PAPR hood mod l with th motor-
blow r off. CO2can build up in th hood and caus
asphyxiation. If motor-blow r stops, imm diat ly
r turn to fr sh air and r mov hood.
CHEMICAL AND COMBINATION CARTRIDGE SERVICE
TIMES
For r spirators with Ch mical Cartridg :
Users must follow an appropriate cartridge change-out
schedule developed by a qualified professional. The
change-out schedule must take into account all factors
that may influence respiratory protection including spe-
cific work practices and other conditions unique to the
work environment. Cartridges equipped with an End-
of-Service-Life Indicator for a specific contaminant pre-
sent must be replaced when the indicator changes to
the specified color or sooner if using the respirator
against a mixture and the cartridge change-out sched-
ule specifies an earlier replacement.
If using the respirator against substances having poor
warning properties, over exposure can occur without
user awareness. Take appropriate precaution to pre-
vent over exposure, which may include an earlier car-
tridge change-out, or using an air-supplied respirator
to SCBA. For further information refer to MSA's
Response Respirator Selector.
Replace cartridges every shift, or sooner if indicated
by change-out schedule or End-of-Service-Life
Indicator. Use beyond one shift could result in shorter
than expected service time and over exposure due to
contaminant desorption and migration through the
cartridge when not in use.
For R spirators with Combination Cartridg s (ch mi-
cal cartridg s with filt rs):
The limitations specified above for chemical cartridges
as well as the applicable filter class apply for combi-
nation cartridges.
Applicable respirator use requirement as specified in the
OSHA Respiratory Protection Regulations 29 CFR Part
1910.134 (or other requirements established by the
Regulatory Agency with jurisdiction over the wearer).
Regulations may also apply for certain contaminations
(See MSA's Response Respirator Selector).
R turn to a saf atmosph r and discard th r spira-
tor imm diat ly if th fac pi c b com s discolor d,
craz d, blist r d, crack d, or if oth r signs of d t rio-
ration of th fac pi c or br athing tub ar obs rv d.
Failur to follow this warning can r sult in s rious p r-
sonal injury or d ath.
In Case of Emergency, or if any of the following conditions
exist, leave the area immediately:
breathing becomes difficult
dizziness or other distress occurs
you taste or smell the contaminant
you experience eye, nose or throat irritation.
REPLACING THE FILTER, CHEMICAL CARTRIDGES,
OR CS/CN CANISTERS, AND THE BATTERY PACK
Filt rs, ch mical cartridg s, and CS/CN canist rs ar
not d sign d to b cl an d and th n r us d. Do not
try to cl an cartridg s and canist rs by hitting th m
against hard surfac s or by blowing compr ss d air
through th m. You could damag th insid of th car-
tridg or canist r and liminat r spirator prot ction,
r sulting s rious r spiratory injury or d ath.
15 TAL 804 (L) Rev. 17 - 490883
WARNING
WARNING
WARNING

RESPIRATOR USE
DO NOT r mov filt rs, ch mical cartridg s, or CS/CN
canist rs in a contaminat d ar a. R turn to a saf
atmosph r and cl an any contaminant from th sur-
fac of th filt rs, cartridg s, or canist rs, th motor-
blow r, and th batt ry pack.
DO NOT r mov th filt rs, ch mical cartridg s or
CS/CN canist rs whil th motor-blow r is running.
With th filt rs, ch mical cartridg s ,or CS/CN canis-
t rs r mov d, contaminants shak n from th surfac s
of th r spirator will b drawn in through th air-intak
hol s in th motor-blow r cas and will b suppli d
dir ctly to th br athing tub and fac pi c .
Failur to follow this warning can caus inhalation of
th contaminant and r sult in s rious r spiratory injury
or d ath.
Not : You can breathe through the facepiece with the
motor-blower off but breathing resistance will be greater
than when the PAPR is on and supplying air to the face-
piece.
1.
To change filters, chemical cartridges, or CS/CN canis-
ters, refer to Removing and Installing Particulate
Chemical Combination Cartridges, and CS/CN
Canisters.
2. To charge the NiCad Battery Pack, refer to Charging
the NiCad Battery Pack.
3. To install a charged NiCad or fresh Lithium Battery
Pack, refer to Reattaching the Battery Pack.
OTHER USES (NOT EVALUATED OR APPROVED BY
NIOSH)
This PAPR, when used with the Riot Control Canister
(P/N10012164) and either the Advantage 1000 or
Millennium Facepiece, also is effective against the follow-
ing chemical warfare (CW) agents, GA, GB (Sarin), GD,
VX, Mustard and Lewisite and all biological agents.
Although not evaluated or approved by NIOSH for this
application, the gas mask and canisters have been tested
by MSA and have met the requirements for effectiveness
against CW agents using the test protocol recommended
by the Chemical Agent Safety and Health Policy Action
Committee (CASHPAC). This gas mask also has been
tested by MSA and found to be effective against OC
(Oleoresin Capsicum) Riot Control Agent and HCN
(Hydrogen Cyanide). NIOSH has not evaluated or
approved this for OC or HCN.
RESPIRATOR USE LIMITATIONS IN CBA (CHEMICAL-
BIOLOGICAL WARFARE AGENT) ATMOSPHERES
The recommended work environments for this respirator
include operations where exposure to vapor or liquid
Chemical Agents or Biological Agents (CBA) is possible
but not expected, for escape from possible CBA contami-
nation and controlled low level CBA atmospheres, which
do not exceed the maximum use concentration as deter-
mined by the governing authority.
In the event a maximum use concentration has not been
established by the governing authority, MSA r com-
mnds that the use of the respirator should be limited to
atmospheres 100 times (or less) the defined permissible
Airborne Exposure Limit (AEL) or Time Weighted Average
(TWA) of the contaminate (except for Mustard and
Lewisite; for these agents the recommended use concen-
tration is to be limited to the AEL or TWA).
For us s in atmosph r s containing ch mical or bio-
logical warfar ag nts, as with all hazardous atmos-
ph r s, it is r comm nd d that a compl t r spiratory
and body prot ction program b d v lop d and full
prot ctiv ns mbl b utiliz d. This program should
as a minimum includ th following it ms:
B for nt ring a CBA Contaminat d Ar a
1. All us rs should b train d (on a r gular basis) in
th us of th prot ctiv quipm nt, th hazard,
th ff cts and physical signs of ag nt ov r xpo-
sur , gov rning protocols or r gulations conc rn-
ing th hazard, us r m dical n ds m rg ncy and
first aid proc dur s in cas of ov r xposur ,
d contamination, and handling and disposal of
contaminat d quipm nt.
2. Each us r should b quantitativ ly fit t st d in th
fac pi c th y will b using and hav a t st d fit
factor of 1000 or gr at r.
3. It is r comm nd d that ach us r should b outfit-
t d with a fac pi c with CBA canist r, a hood,
and a full ch mical prot ctiv suit including glov s
and sho cov rings.
4. Th us r would d t rmin or ch ck with th saf ty
offic to v rify that th prot ctiv quipm nt to b
us d is suffici nt for xposur to th ir particular
hazard and contamination l v l. Misus of th pro-
t ctiv quipm nt can r sult in s rious p rsonal
injury or d ath.
During th Stay in th CBA Contaminat d Ar a
1. It is r comm nd d that th ar a b r al tim d
monitor d (with alarm) for xposur l v ls of th
contaminat . If th monitor d contaminat l v l is
abov th allowabl xposur limit or maximum
us conc ntration (as d t rmin d by th gov rning
protocol), th us r should l av th ar a imm di-
at ly.
2. Th us r should not r mov any of th CBA pro-
t ctiv clothing whil in th contaminat d ar a.
This action could r sult in a s rious injury or d ath.
3. If symptoms of CBA ov r xposur ar pr s nt,
s k m dical tr atm nt and att ntion imm diat ly.
16
TAL 804 (L) Rev. 17 - 490883
WARNING
WARNING

RESPIRATOR USE
Aft r Exposur to a CBA Contaminat d Ar a
1. A d contamination proc dur for th us r and th
prot ctiv quipm nt should b d v lop d and
impl m nt d.
2. Onc th us r l av s th contaminat d ar a, th y
should nt r th d contamination ar a and follow
th s t d con proc dur . Failur to follow an
acc ptabl d con proc dur could l ad to s rious
injury or d ath.
3. Onc th us r and th prot ctiv quipm nt hav
b n d contaminat d, prop r disposal of aff ct d
quipm nt is to b p rform d. Disposal is to b
p rform d as r quir d by f d ral, stat and/or local
laws that apply to CBA contaminat d mat rials.
Failur to follow acc pt d saf ty and prot ction pro-
c dur s wh n xpos d to hazardous atmosph r s can
r sult in s rious p rsonal injury or d ath.
DECONTAMINATION
The PAPR may be used in some applications which may
require decontamination of personal and respiratory
equipment before the respirator may be removed. One
such application is asbestos exposure decontamination.
Turn the motor-blower off before entering a decontamina-
tion shower. If the PAPR is equipped with a tight-fitting
facepiece it still provides respiratory protection with the
motor-blower off because all air is still drawn through the
filters, chemical cartridges, or CS/CN canisters. However,
breathing resistance will be greater than when the motor-
blower is supplying air to the facepiece.
If you ar using a PAPR hood mod l, l av th motor-
blow r on. Do not br ath through th r spirator for
long p riods of tim with th motor-blow r shut off.
CO2 can build up in th hood causing s rious p rson-
al injury or d ath.
SERVICE LIFE INDICATOR
The Mersorb-HE combination cartridge utilizes an End-of-
Service-Life Indicator for use against metallic mercury
vapor. The small area on the end of each cartridge con-
sists of chemically treated paper. In use, as the paper is
exposed to metallic mercury vapor, it changes from
orange to brown. When the indicator color changes to
brown, the cartridge is beginning to lose its effectiveness
against metallic mercury vapor and must be replaced.
Thus, the wearer has a constant, positive check on the
condition of his cartridges.
CARTRIDGE CHANGE-OUT SCHEDULE
If a cartridge or canister with an appropriate ESLI is not
available, a change-out schedule based on objective
information or data that will ensure that the cartridge(s) or
canister is changed before the end of its service life, must
be developed and implemented.
Service time is the measured or estimated period of time
before breakthrough of an airborne contaminant (gas or
vapor) for a specific chemical cartridge under specified
conditions of the test.
The service time data presented in this investigation
applies only to MSA respirators. It should be used as a
guide only for determining an appropriate respirator car-
tridge change-out schedule as required for compliance
with OSHA’s Respirator Protection Standard (29 CFR
1910.134).
17 TAL 804 (L) Rev. 17 - 490883
WARNING

NOTES
18
TAL 804 (L) Rev. 17 - 490883
AFTER USE
REMOVING THE RESPIRATOR WITH RUBBER
HARNESS
1. Return to an uncontaminated area before removing
the respirator. Check that the respirator and your
clothing are free from contaminant before removing
the respirator.
To r mov th fac pi c :
1. Push the bottom buckles forward to loosen and fully
extend the bottom straps.
2. Insert thumbs under the bottom harness straps. Pull it
up and away from face.
REMOVING THE RESPIRATOR WITH PLASTIC
ADVANTAGE HARNESS
1. To loosen the harness, push the bottom buckles for-
ward and loosen.
2. Grasp the mask by the connector of filter and pull
mask backward off the head.
REMOVING THE HALF-MASK FACEPIECE
1. Return to fresh air and clean the outer surfaces of the
respirator before removing the facepiece.
2. Turn the power switch off.
3. On facepieces using the elastic headstrap, unfasten
the top and bottom headstrap clips. Pull the facepiece
out and away from your face to remove it.
4. On facepieces using the cradle headstrap, unfasten
the bottom headstrap. Then pull the facepiece away
from your face and up over your head.
5. Remove the support belt. Be careful that you do not
drop the motor-blower.
REMOVING THE FULL-FACEPIECE
1. Return to fresh air and clean the outer surfaces of the
respirator before removing the facepiece.
2. Turn the power switch off. Unthread the breathing
tube coupling nut from the motor-blower.
3. Place your fingertips behind the headstraps. Place
your thumbs on the buckles.
4. Pull the top of the buckles away from your head.
Repeat as needed to loosen the headstraps.
5. Grip the facepiece by the speaking diaphragm hous-
ing.
6. Pull the facepiece out, then up over your head.
DO NOT pull th Ultravu Fac pi c by th xhalation
valv ass mbly. Th fac pi c rubb r or th valv
ass mbly can b damag d.
7. Remove the support belt. Be careful that you do not
drop the motor-blower.
REMOVING THE TYVEK/SARANEX/TYCHEM QC
HOODS PAPR
1. Return to fresh air and clean the outer surfaces of the
respirator before removing the hood.
2. Place both hands under the neck seal and stretch it
open.
3. Lift the back of the hood over your head, keeping the
neck seal away from your face.
4. Turn the power switch OFF.
5. If you are finished using the hood, unthread the cou-
pling nut and remove the breathing tube from the
motor-blower. If you will be re-donning the hood soon,
you may want to keep the tube connected.
6. Remove the support belt. Be careful that you do not
drop the motor-blower.
MAINTENANCE
NIOSH certification requires that a maintenance program
be established. This program must include cleaning, com-
ponent inspection, and replacement of worn or damaged
parts. See the appropriate parts lists for correct replace-
ment part numbers.
Insp ct th r spirator aft r it has b n cl an d and
nsur all contaminant is r mov d. If you do not, you
could b xpos d to th contaminant upon r us .
19 TAL 804 (L) Rev. 17 - 490883
CAUTION
CAUTION

NOTES
20
TAL 804 (L) Rev. 17 - 490883
Table of contents
Other MSA Respiratory Product manuals

MSA
MSA AirHawk MMR User manual

MSA
MSA Advantage 200 LS User manual

MSA
MSA 3S small User manual

MSA
MSA PremAire Mask-Hood User manual

MSA
MSA alpha Series User manual

MSA
MSA Advantage 400 Series User manual

MSA
MSA PremAire Cadet Escape G1 User manual

MSA
MSA G1 SCBA User manual

MSA
MSA PremAire Combination User manual

MSA
MSA BlackHawk MMR User manual

MSA
MSA G1 SCBA User manual

MSA
MSA FireHawk M7 User manual

MSA
MSA 3S small User manual

MSA
MSA OptimAir TL PAPR User manual

MSA
MSA PremAire Escape User manual

MSA
MSA Abrasi-Blast Series User manual

MSA
MSA FSR W65 User manual

MSA
MSA Advantage 200 LS User manual

MSA
MSA SavOxCap 60 User manual

MSA
MSA G1 Industrial SCBA User manual