manuals.online logo
Brands
  1. Home
  2. •
  3. Brands
  4. •
  5. Nav TV
  6. •
  7. Automobile Accessories
  8. •
  9. Nav TV RGB-PCM3.1N User manual

Nav TV RGB-PCM3.1N User manual

BHM
06/06/16
NTV-DOC260
Agreement: End user agrees to use this product in compliance with all State and Federal laws. NAV-TV Corp. would not be held liable for
misuse of its product. If you do not agree, please discontinue use immediately and return product to place of purchase. This product is
intended for off-road use and passenger entertainment only.
1 | P a g e
3950 NW 120th Ave, Coral Springs, FL 33065 TEL 561-955-9770 FAX 561-955-9760
www.nav-tv.com i[email protected]m
RGB-PCM3.1N
(NTV-KIT749)
Overview
The RGB-PCM3.1N interfaces 2 video inputs including a backup camera with dynamic guidelines
to the factory touch screen radio in select Porsches equipped with the PCM3.1 radio. This kit
connects behind the radio following a radio modification. AUX Video Switching is performed
using the ‘NAVI’ button on the radio face (optional).
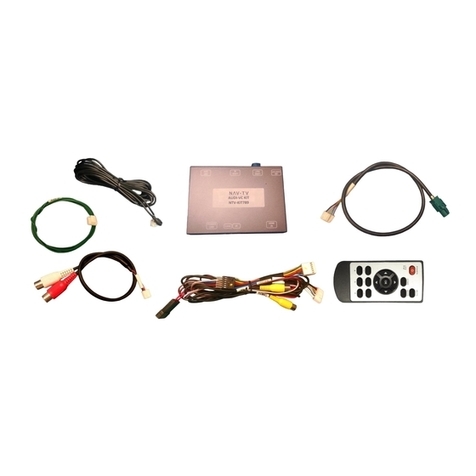
Kit Content
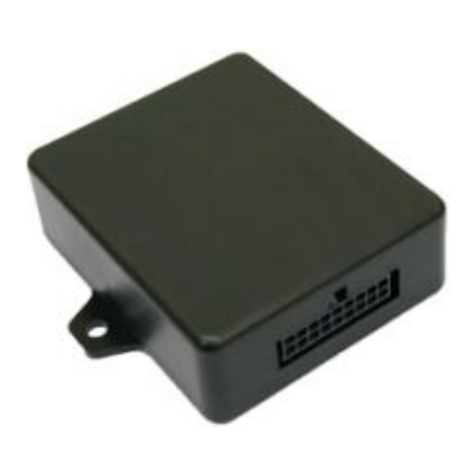
Power Harness
RGB-PCM3.1N Interface
Remote
(menu control)
IR Receiver
BHM
06/06/16
NTV-DOC260
Agreement: End user agrees to use this product in compliance with all State and Federal laws. NAV-TV Corp. would not be held liable for
misuse of its product. If you do not agree, please discontinue use immediately and return product to place of purchase. This product is
intended for off-road use and passenger entertainment only.
2 | P a g e
Interface Connectors
Dip Switch Settings
Dip SW:
1
2
3
4
5
6*
7
8
UP
KEEP
UP
Skips
V1
Skips
V2
RVC
OFF
N/A
N/A
N/A
N/A
DOWN
KEEP
UP
Enables
V1
Enables
V2
RVC
ON
N/A
N/A
N/A
N/A
*Note: Disconnect power to the interface before
adjusting dip switches or the change will not be
implemented.
NOT USED
OUOUT
Power/CAN
OUOUT
Dip Switches
RGB Input
Video I/O (cable
from MOD)
NOT USED
NOT USED
IR Receiver
Expansion Board
NOT USED
BHM
06/06/16
NTV-DOC260
Agreement: End user agrees to use this product in compliance with all State and Federal laws. NAV-TV Corp. would not be held liable for
misuse of its product. If you do not agree, please discontinue use immediately and return product to place of purchase. This product is
intended for off-road use and passenger entertainment only.
3 | P a g e
PCM3.1 Radio Modification
1. Remove the factory PCM3.1 radio. This requires
removing any vents or dash panels that hide the
radio mounting screws. Lay a protective mat down
on the dash to protect from scratches.
2. Take the PCM3.1 radio to a clean workbench for
disassembly.
1. On the top of the radio, remove
(2x) Torx screws indicated by the
arrows.
2. On the bottom of the radio, again
move 2 torx screws indicated by
the arrows.
WARNING: This process requires strict accuracy and dexterity. If you are not comfortable performing this modification,
stop now and contact NAV-TV. NAV-TV is not responsible for damage done to the radio as a result of improper installation.
By continuing to follow this guide, you agree to take responsibility for any possible damage to the radio or interface.
BHM
06/06/16
NTV-DOC260
Agreement: End user agrees to use this product in compliance with all State and Federal laws. NAV-TV Corp. would not be held liable for
misuse of its product. If you do not agree, please discontinue use immediately and return product to place of purchase. This product is
intended for off-road use and passenger entertainment only.
4 | P a g e
3. On the back of the radio,
remove 3 torx screws.
4. With the radio on its back
(like shown in last step), slide
the bottom half (on top while
the radio is upside down) back,
towards you . This will require
some force, and may require
slicing the stickers on the sides of
the radio to free the halves. Note
the locks that may need to be
depressed for this method.
5. Carefully lift the FFC connector
(connecting the disc drive) up with a flathead
or fingernail, to release the ribbon. Place the
disc drive aside in a safe place.
SLIDE
Top half remains
attached to screen
BHM
06/06/16
NTV-DOC260
Agreement: End user agrees to use this product in compliance with all State and Federal laws. NAV-TV Corp. would not be held liable for
misuse of its product. If you do not agree, please discontinue use immediately and return product to place of purchase. This product is
intended for off-road use and passenger entertainment only.
5 | P a g e
6. Using the same method from step 5, remove
the two remaining ribbons that connect the
screen to the radio. Leave the ribbons attached
to the screen.
7. Flip the radio over, and remove (2x)
more Torx screws (if not already
removed), to release the face from the
chassis of the radio.
8. Remove the screen carefully. There are
metal lock tabs on the side of the screen
which must be depressed for clearance.
9. Just like in step 6, remove the same ribbons
from the screen. Pay attention to the pin
orientation (which way the pins face). These
ribbons will not re-used, they will replaced with
provided T-Ribbons. NOTE: it’s a good idea to
hang on to these OEM Porsche PCM3.1 ribbons,
in case the kit ever needs to be removed in the
future.
BHM
06/06/16
NTV-DOC260
Agreement: End user agrees to use this product in compliance with all State and Federal laws. NAV-TV Corp. would not be held liable for
misuse of its product. If you do not agree, please discontinue use immediately and return product to place of purchase. This product is
intended for off-road use and passenger entertainment only.
6 | P a g e
10. Carefully connect the provided
ribbons to the radio as shown, with the
‘FROM RADIO’ side into the FFC
connectors on the PCB. The pins on
these should face opposite the white
lock on the FFC connector.
11. Carefully connect the other
end of the provided T-Ribbons
to the radio, just as you did to
the radio in step 10.
12. It is acceptable to place a slight crease in the ribbon to allow slack for the smaller ribbon
(you’ll notice the smaller ribbon is very tight until this is done).
BHM
06/06/16
NTV-DOC260
Agreement: End user agrees to use this product in compliance with all State and Federal laws. NAV-TV Corp. would not be held liable for
misuse of its product. If you do not agree, please discontinue use immediately and return product to place of purchase. This product is
intended for off-road use and passenger entertainment only.
7 | P a g e
13. Connect the T-ribbon and 2-
PIN connector (from second
ribbon) properly into the
provided modification PCB, and
secure down nearby using
double-sided tape (in this case,
on top of the SAT tuner)
14. Connect the provided Mini-
HDMI Cable carefully to the port
on the modification PCB, and run it
out the back of the unit. You may
need to cut a notch into the
chassis of the radio to allow for
clearance. Do so carefully.
15. Replace all Torx screws and put the radio back together. Proceed to RGB-PCM3.1
Installation to complete the install.
BHM
06/06/16
NTV-DOC260
Agreement: End user agrees to use this product in compliance with all State and Federal laws. NAV-TV Corp. would not be held liable for
misuse of its product. If you do not agree, please discontinue use immediately and return product to place of purchase. This product is
intended for off-road use and passenger entertainment only.
8 | P a g e
Wire side view of quad-lock
RGB-PCM3.1N Installation (in vehicle)
1. From the main power harness, solder the following connections
to the main radio quad-lock connector:
2. Connect the HDMI connector (LVDS standard) from the previously modified radio to
the port on the interface labeled ‘VIDEO OUT’.
3. Connect your reverse camera to the yellow RCA input among the power harness
labeled ‘CAMERA’. The purple wire from the main power harness provides 12v (+)
when in reverse only (500mA MAX).
4. Optional: if adding an AUX video/front camera, connect the source signal to the
secondary (female) RCA among the power harness (be certain this source is
connected to ACC power).
5. Optional: If using the remote to adjust ANY settings from the OSD menu, connect
the IR receiver to the port on the interface labeled ‘IR’. Refer to page 10 for menu
adjustment details.
6. Connect the main power harness to the RGB-PCM3.1N interface and proceed to
‘Operation’ for testing and validation.
Note: All other included harnesses not mentioned in this manual are not needed for most
installations. If you would like to know more about the full capability of this interface,
contact NAV-TV tech support at 561-955-9770. Additional features not mentioned in this
manual are not supported by NAV-TV at this time.
PCM3.1N Wire
Description
Connect to Radio Plug
Black
Ground (-)
PIN 12 (-)
Red
Constant 12v (+)
PIN 15 (+)
Blue
CAN HI
PIN 11 (Brown/Red)
White
CAN LO
PIN 9 (Brown)
BHM
06/06/16
NTV-DOC260
Agreement: End user agrees to use this product in compliance with all State and Federal laws. NAV-TV Corp. would not be held liable for
misuse of its product. If you do not agree, please discontinue use immediately and return product to place of purchase. This product is
intended for off-road use and passenger entertainment only.
9 | P a g e
RGB-PCM3.1N Operation
Once all connections are made, start the vehicle and place into reverse. The connected
camera will display on the main screen with dynamic guidelines for convenience.
If desired, front camera can be setup (via OSD menu) to show for the user-set amount of
time after leaving reverse gear. Forcing the AUX video/front camera is available by
pressing the NAVI button on the radio.
Press to cycle
video inputs
BHM
06/06/16
NTV-DOC260
Agreement: End user agrees to use this product in compliance with all State and Federal laws. NAV-TV Corp. would not be held liable for
misuse of its product. If you do not agree, please discontinue use immediately and return product to place of purchase. This product is
intended for off-road use and passenger entertainment only.
10 | P a g e
RGB-PCM3.1N Menu Adjustments
Before you start:
The IR-Eye must be connected, ( connects to main harness)
Make sure the car’s ignition is on and radio is on
You must be in Reverse Camera mode.

Reverse Camera Mode adjusts Reverse Camera Settings
Press the OK BUTTON 4 times (numbers will display per press),
then press POWER.
The OSD Menu will appear on screen (auto-time out in about 5
seconds if no action occurs).
Functional Parking Guidelines ON/OFF
Parking Distance Control
ON/OFF (while in reverse)
Adjust FPG Position
Adjust PDC Position
‘Safe to move?’ ON/OFF
PDC
Return
(AUX VID
menu
control)

Other Nav TV Automobile Accessories manuals

Nav TV NAV-INREN User manual

Nav TV

Nav TV NAV-INREN User manual

Nav TV MBUX-RVC User manual

Nav TV

Nav TV MBUX-RVC User manual

Nav TV NTV-KIT422 User manual

Nav TV

Nav TV NTV-KIT422 User manual

Nav TV UCT84 F-CAM User manual

Nav TV

Nav TV UCT84 F-CAM User manual

Nav TV OPV-2BMW User manual

Nav TV

Nav TV OPV-2BMW User manual

Nav TV OPTI-1 User manual

Nav TV

Nav TV OPTI-1 User manual

Nav TV TOYCAM NTV-KIT057 Manual

Nav TV

Nav TV TOYCAM NTV-KIT057 Manual

Nav TV MOST-HUR31 User manual

Nav TV

Nav TV MOST-HUR31 User manual

Nav TV GVIF-CTS User manual

Nav TV

Nav TV GVIF-CTS User manual

Nav TV BMW56-CAN User manual

Nav TV

Nav TV BMW56-CAN User manual

Nav TV MOST-H.U.R. NTV-KIT155 User manual

Nav TV

Nav TV MOST-H.U.R. NTV-KIT155 User manual

Nav TV IOT-RVC Manual

Nav TV

Nav TV IOT-RVC Manual

Nav TV GVIF-JAG User manual

Nav TV

Nav TV GVIF-JAG User manual

Nav TV MY-CUE User manual

Nav TV

Nav TV MY-CUE User manual

Nav TV AUDI A6 User manual

Nav TV

Nav TV AUDI A6 User manual

Nav TV Barracuda-CTS Installation and operating instructions

Nav TV

Nav TV Barracuda-CTS Installation and operating instructions

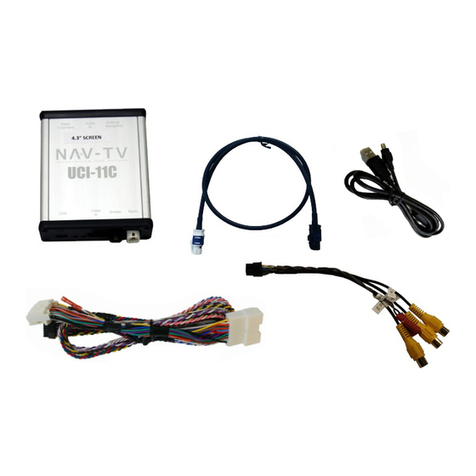
Nav TV UCI-11C NTV-KIT331 User manual

Nav TV

Nav TV UCI-11C NTV-KIT331 User manual

Nav TV V2P-II User manual

Nav TV

Nav TV V2P-II User manual

Nav TV PCM3CAM Manual

Nav TV

Nav TV PCM3CAM Manual

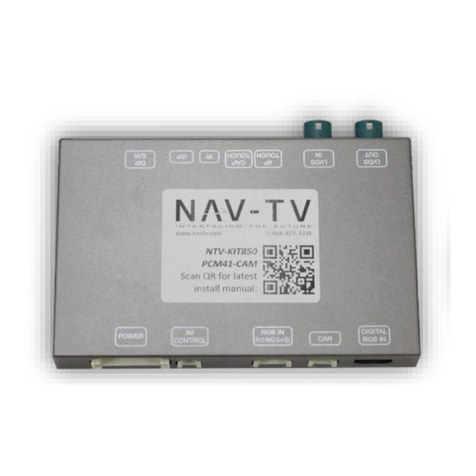
Nav TV NTV-KIT495 User manual

Nav TV

Nav TV NTV-KIT495 User manual

Nav TV Ford 4 UNI-CAM NTV-KIT600 User manual

Nav TV

Nav TV Ford 4 UNI-CAM NTV-KIT600 User manual

Nav TV BMW12-DYNAMIC KIT Manual

Nav TV

Nav TV BMW12-DYNAMIC KIT Manual

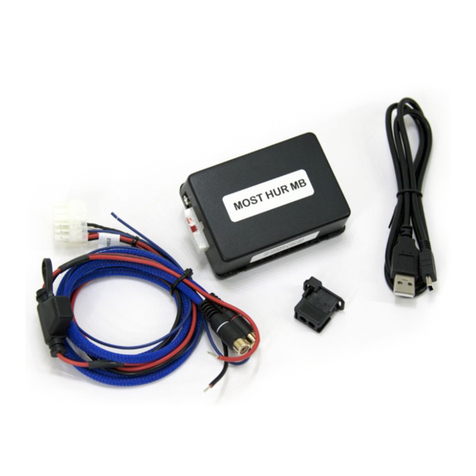
Nav TV MOST-H.U.R. MB V2 User manual

Nav TV

Nav TV MOST-H.U.R. MB V2 User manual

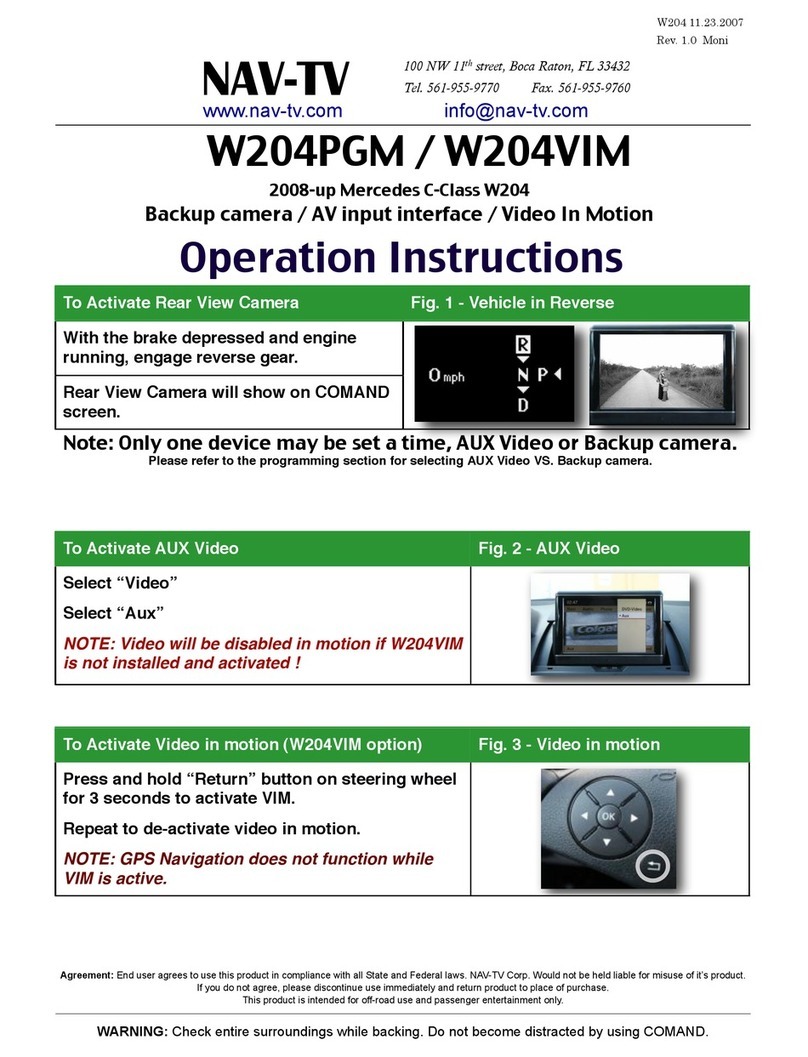
Nav TV W204PGM User manual

Nav TV

Nav TV W204PGM User manual

Popular Automobile Accessories manuals by other brands

Westin 22-1815 instructions

Westin

Westin 22-1815 instructions

Whispbar K871W Fitting instructions

Whispbar

Whispbar K871W Fitting instructions

Sysgration BSE-09T Quick installation guide

Sysgration

Sysgration BSE-09T Quick installation guide

STO N SHO SNS 92 Installation procedures

STO N SHO

STO N SHO SNS 92 Installation procedures

Kenwood KEC-301 instruction manual

Kenwood

Kenwood KEC-301 instruction manual

Blueant EzyTalk user manual

Blueant

Blueant EzyTalk user manual

Roadmaster 751428 installation instructions

Roadmaster

Roadmaster 751428 installation instructions

Mobis A40V SAFETY INSTRUCTIONS, USER MANUAL, SERVICE

Mobis

Mobis A40V SAFETY INSTRUCTIONS, USER MANUAL, SERVICE

Thule Voyager 975 Fitting & user instructions

Thule

Thule Voyager 975 Fitting & user instructions

Hama FC-10C Flex operating instructions

Hama

Hama FC-10C Flex operating instructions

Western TRI-PLOW TP-890 owner's manual

Western

Western TRI-PLOW TP-890 owner's manual

Webasto Telestart T70 installation instructions

Webasto

Webasto Telestart T70 installation instructions

Pyramid CAP SERIES RDCAP15 owner's manual

Pyramid

Pyramid CAP SERIES RDCAP15 owner's manual

Aukey CC-A3 user manual

Aukey

Aukey CC-A3 user manual

Calix M5T 237 Assembly instructions

Calix

Calix M5T 237 Assembly instructions

XZENT X-F285 user manual

XZENT

XZENT X-F285 user manual

DiabloSport Trinity T-1000 Comprehensive user manual

DiabloSport

DiabloSport Trinity T-1000 Comprehensive user manual

Whispbar K475W Fitting instructions

Whispbar

Whispbar K475W Fitting instructions

manuals.online logo
manuals.online logoBrands
  • About & Mission
  • Contact us
  • Privacy Policy
  • Terms and Conditions

Copyright 2025 Manuals.Online. All Rights Reserved.