manuals.online logo
Brands
  1. Home
  2. •
  3. Brands
  4. •
  5. Nav TV
  6. •
  7. Automobile Accessories
  8. •
  9. Nav TV ZEN-25 User manual

Nav TV ZEN-25 User manual

3950 NW 120th Ave, Coral Springs, FL 33065 TEL 561-955-9770 FAX 561-955-9760
BMW CCC, CIC, NBT & EVO Factory Amplied M.O.S.T.® 25 to 12-channel Analog & Digital sound Processor
NTV-KIT969
1
-
Model
NBT with M.O.S.T. Amplier
CIC with M.O.S.T. Amplier
CCC with M.O.S.T. Amplier except 2001-2006 7 series
EVO with M.O.S.T. Amplier
WARNING: Do not connect any RCA cables to the ZEN-25 interface or additional
processors prior to properly grounding the aftermarket amplier(s).
NTV-DOC 355
June 3, 2020
DES
The NAV-TV ZEN-25 processor seamlessly converts BMW factory amplied CCC, CIC, NBT and EVO systems to
12 channel analog RCA and single stereo Toslink output. Adding aftermarket ampliers to the OEM CCC, CIC, NBT
& EVO systems has never been so simple. This kit integrates with the OEM M.O.S.T. ® 25 bus to retain volume
control, full fade (analog only), balance, treble, bass control & 7 band eq. Note: OEM infotainment systems MUST
have a M.O.S.T. 25 factory amplied system for the ZEN-25 to work out of the box. Vehicles without a factory
M.O.S.T. 25 amplier must be programmed for an OEM amplier prior to the installation of the ZEN-25.
Programming is NOT supported by NAV-TV.
OVERVIEW
KIT CONTENTS
USB UPDATES
ZEN RCA Output Harness
NTV-HAR315
M.O.S.T. Connector
NTV-CON002
ZEN Power Harness
NTV-HAR316
USB cable
NTV-CAB009
ZEN -25 Overview
Toslink Output
ZEN DSP12A-M25
NTV-ASY297
Power
Connector Status LED M.O.S.T. 25 connector Analog RCA outputs
not used
CCC, CIC, NBT or EVO WO amp requires radio programming prior to installation
Compatibility chart YEAR MAKE
ANY
ANY
ANY
ANY
ANY
BMW
BMW
BMW
BMW
BMW
2
Fiber Installation in Vehicles with an Existing M.O.S.T. Amplier
1) Locate the factory amplifier, push down on the retaining clip and remove the harness containing the M.O.S.T.
connector from the amplifier
2) Gently pry the M.O.S.T. retaining clip towards the outside of the factory connector and pull the male fiber
optic out of the factory housing. Be careful not to leave grease or debris on the fiber optic cable ends.
3) This is what the male fiber optic should look like when removed from the factory harness
4) Insert the included M.O.S.T. Connector (NTV-CON002) over the factory male fiber optic end
5) This is what the fiber optic cable should look like once completed.
ZEN-25 Installation
If the vehicle has a factory M.O.S.T. ber optic amplier, it must be removed and the ZEN-25 can be installed in its
place. M.O.S.T. BMW ampliers are located in the left rear section of the trunk.
1 2 3 4 5
123
45
6
ZEN-25 Pin Color To Vehicle
1
3
4
6
Yellow
Violet
Black
Blue
12V+ Constant
Not Used
Ground -
remote out +*
Wire Side
1) Connect the following wires from the
provided power harness:
*This 12v+ remote output wire MUST be used for the aftermarket amplier/DSP remote turn on for proper
functionality. If installing more than one Amp/DSP, a relay must be used for reliable system turn on.
2) If using analog RCA outputs for signal to the amplier, connections are made according to the chart below.
WARNING: Do not connect RCA cables to this interface until all ampliers /DSP are properly grounded.
Failure to do this may cause damage to the interface and VOID the warranty!
3) If using Toslink for signal to the amplier, connect the cable to the Toslink port shown on page 2. NOTE: both
analog and digital ouputs are aligned to produce sound simultaneously.
4) Connect the M.O.S.T. ber optic cable to the M.O.S.T. 25 connector on the ZEN-25 interface.
ZEN-25 Power and Output Signal Wiring
1 2 3 4 5 6 7 8 9 10 11 12
Left Right Left Right Left Right Left Right Left Right Center Sub
Front Front Front Front Front Front Rear Rear Rear Rear
3
System Setup
Before setting gains on the aftermarket ampliers or DSP, you MUST follow the steps below:
1. Set the factory Bass & Treble on all sources to at (0).
2. If the vehicle has a 7 band EQ set it to at (0) as well.
3. Turn the amplier and DSP input and output gains to zero (all the way down).
4. With dynamic music playing, adjust the radio volume to MAXIMUM!
5. Adjust the amplier and DSP input and output gains to the desired maximum level.
NOTE: From the factory, some vehicle will attenuate audio when in reverse. The ZEN-25 will retain this OEM
feature. The same is true for Nav guidance and phone calls.
Multi-Color LED Status Indicator
LED Status
Solid Red
Violet
Blinking Red
Blinking Blue or Green
Indicator
M.O.S.T. Active
M.O.S.T. Trac Commands
Digital Clipping Indicator
USB connected, M.O.S.T. inactive
ZEN-25 System Layout (Analog)
The factory amp
must be removed
4
ZEN-25 System Layout (Digital)
Factory Supported Functions
Bass and Treble Control is retained Balance is retained. Fade is retained (Analog) Logic 7 controls the 2 dierent
time alignments*
Factory 7 band eq is supported Factory adjustable PDC and Gong
is supported
Factory DVD playback in 5.1 or
mixdown stereo is supported
*In systems with more than one Logic 7 option, o is preset 1and everything else is preset 2.
The factory amp
must be removed
5
ZEN Setup
To access the ZEN online conguration tool, rst connect the provided USB cable from the ZEN module to the
computer. Turn your radio on, open a browser and navigate to zen/ if using a PC or zen.local/ if using a MAC.
Wait for the conguration page to load, then adjust settings as required for the installation. NOTE: All changes
will be audible immediately. Make sure to save changes before exiting or unplugging the ZEN interface.
ZEN Setup Page
PC:
MAC:
6
“Bass controls sub”” changes the
functionality of the factory bass control
and creates a subwoofer level controller
using the analog sub output. “Bass
controls Bass”allows the factory bass
control to aect all speakers in the
system.
A thorough explanation of the
functionality of the downmix settings
is contained on the next page.
Voice gain allows you to increase
or decrease the phone volume
settings globaly.
Changes the two adjustable time
alignment settings to be measured in
inches, centimeters or miliseconds.
Global output adjustments: At -0dBFS
the unit provide a full-scale output. At
full volume, minor adjustments of the
factory bass or treble can produce
digital clipping. With the bass and treble
set to neutral the unit will not clip at full
volume. -7dB provides the ability to
adjust the factory tone controls
moderatly without clipping at full
volume and -12dB allows for maximum
adjustment of the OEM controls
without clipping.
Selecting “loudness on”will boost
low & high frequency response at low
volume. The curve will be active until
half volume where it will be completely
at
ZEN Global Output Conguration
7
5.1 Surround OFF STEREO STEREO FRONT STEREO REAR ON LFE**
CENTER MIXED
INTO FRONT
DOWNMIXED
STEREO*
5.1 Surround ON REAR SURROUND ON LFE**
2 Channel (music) OFF STEREO STEREO FRONT STEREO REAR OFF MONO (L+R)
2 Channel (music) ON STEREO STEREO FRONT STEREO REAR ON MONO (L+R)
Downmix aects the following:
ON:
1) Toslink output will downmix 5.1 (DVD etc) channels down to 2 channels.
2) Analog Center channel is active on all sources and will output a proper mix or dedicated center channel on
DTS or Dolby sources.
3) All other Analog Channels are active on all audio sources and are derived for the Left/Right channels or from
the dedicated 5.1 channels when applicable.
OFF:
1) Toslink output will NOT downmix 5.1 (DVD etc) channels down to 2 channels, only LF/RF channels are
streamed.
2) Analog Center channel is active ONLY when a 5.1 (e.g. DVD) source is playing. The Center channel WILL NOT
PLAY normal, 2-channel stereo sources.
3) All other Analog Channels are active on all sources and are derived from the Left/Right channels or from
the dedicated 5.1 channels when applicable.
Regardless of the downmix setting, the analog center channel output will always be active during a phone call
or when a 5.1 source, like a DVD, is being played. If a center channel speaker is NOT installed in the aftermarket
installation, phone calls will come from the left and right front speaker only, instead of the left, right and center.
However, if a center channel speaker is not installed, you MUST USE the Downmix ON setting to be able to hear
vocals on 5.1 encoded sources.
ZEN Downmix Scenario Examples
ZEN Downmix
Source Signal Downmix Toslink Output Analog Front Analog Rear Analog Center Analog Sub
*Mixed Stereo: (Left = Left Front + Center + Left Surround + LFE), (Right = Right Front + Center + Right Surround + LFE)
**LFE: Low Frequency Effects: Surround Subwoofer output
8
Each time alignment setting allows the user to invert the
phase of each channel by 180 degrees. To invert the phase
of each channel, click and highlight the box to the right
of the desired channel’s time alignment setting. In the
example to the left, all channels except channel one are
180 degress out of phase.
This feature is useful in case of wiring errors where one
channel may have been wired out of phase, or in situations
were signal cancellation exists due to the individual speaker’s
location or the physical characteristics of the vehicle interior.
Each time alignment setting has it’s own phase selection
and will not automatically carry over from one time
alignment selection to the other.
Time alignment 2 is activated when the factory
Logic 7 system is on or highlighted. This allows
the user to select a time alignment set to an alternative
position in the vehicle. The set up is exactly the same as
time alignment one, just measured from a dierent
position in the vehicle. If no time alignement is desired,
leave each setting at zero.
*Note: If using an external DSP DO NOT use both the ZEN
time alignment setting and the time alignment
setting of the DSP. Use one or the other.
ZEN Digital Output Conguration
9
ZEN Digital Output Conguration
The strip audio feature allows you to remove all audio from each analog output
while leaving all factory gongs, handsfree audio and audible navigation prompts.
This feature is used commonly with an external DSP that allows digital Toslink
and analog inputs to mix. An example would be using the Toslink set to
“front fading”to provide audio to the front speakers and using the analog front
channels to provide the mix in of the factory gongs, handsfree and audible
navigation prompts.
To remove audio from each individual analog channel, select and highlight the
strip audio box in the desired channels row. All channels where you wish to
remove audio must be checked.
Note: If using both digital and analog inputs to your DSP, where you wish to use
the analog channelsonly for gongs and voice , set the gong setting on the digital
output to minimum.
The“gong”setting is to control the volume of the audible gongs and to reassign
where the factory gongs are heard. To add the gong to the desired channel,
highlight the gong mix select icon. In the example to the left, all channels have
been selected to play the factory warning gongs. After selecting the desired
channel(s) the volume control slider allows you to control the mix in level
of the warning gongs. This allows full control of the alerts and is independant
of the audio stream. An example of a factory gong alert is the audible low fuel
indicator or bulb malfunction warning.
To raise or lower all channels at once that have been selected for gong mix, click
on the gong mix link icon. Please note that the link channel will only allow
simultaneous changes to all channels that have been selected for gong mix. All
channels that are not selected for gong mix will not raise or lower using the gong
link icon.
Gong Link
10
ZEN Firmware Update Process
ZEN Digital Output Conguration
The“voice”setting is to control the volume of voice prompts and to reassign
where the factory voice prompts are heard. To add voice prompts to the
desired channel, highlight the voice mix select icon. In the example to the left,
only the front channels have been selected to play voice prompts. After
selecting the desired channel(s) the volume control slider allows you to control
the mix in level of all voice prompts. This allows full control of all voice prompts
and is independant of the audio stream. An example of a voice prompt is audible
navigation turn-by-turn instructions or a handsfree phone call.
To raise or lower all channels at once that have been selected for voice mix, click
on the voice mix link icon. Please note that the link channel will only allow
simultaneous changes to all channels that have been selected for voice mix. All
channels that are not selected for voice mix will not raise or lower using the
voice link icon.
Voice mix link
To complete the set up click “SAVE”. Please note that if you do not save your
work all settings will be lost.
To reset the ZEN interface to factory default setting, click“RESET”. A pop up
will appear asking if you would like te reset. If an error has been made you may
cacel at that point. However, if you accept the pop up the unit will reset to
default settings.
The rmware update process is done online at www.navtv.com. The unit must have constant power and ground
connected on the power harness. Using the included USB cable, connect the USB to the ZEN interface and
your computer. Navigate to www.navtv.com and then select “device updater”.
11
To update to the newest rmware version, click“update”.
ZEN Firmware Update Process
Once“device updater” has been selected, the website will begin negotiating with the ZEN interface.
Be patient, this process may take up to a minute.
Once the website has linked with the Zen interface it will show you the current rmware in the unit and
if a rmware update is available.
12
ZEN Firmware Update Process
Once the update process is completed the screen will go to“searching”momentarily. Keep the device
plugged in.
The device will begin to update. Do not unplug the unit or interrupt the update process. If the unit is
unplugged or the update is interrupted repeat the previous step.
Once the update process is complete it will display the rmware update screen showing you that the
unit is up to date.
13
Windows 7, 8, 10 (64bit), MAC OS 10.11 & up, Linux with current CDC-ECM driver
M.O.S.T. 25 Fiber Optic
TOSlink
24bit/44.1kHz
12 Channels (RCA)
17V
6V
Single-Ended
114dB
18Hz - 22.05kHz
-94dB
44.1kHz 32bit
32bit Floating Point
2 time Alignments selected by Logic 7: on or o
<1 mA
350 mA MAX
7V -20V DC
Automatic
V-batt
500mA
4” x 5” x 1 3/8”
10 oz
USACountry of Origin:
Weight:
Dimensions:
Amp Turn-On Current Limit:
Amp Turn-On Voltage:
Amp Turn-On Output:
Operational Voltage:
Current Consumption Operational:
Current Consumption Standby:
Delay (Time Alignment):
DSP:
DAC:
THD+N@ -1dBFS:
Frequency Response (Analog):
S/N Ratio (Analog):
Analog Output Type:
Output Voltage RMS:
Output Voltage Peak-to-Peak:
Analog Outputs:
Supported Digital Output:
Digital Output:
Digital Input
1) PRIOR TO INSTALLATION, verify that the grounding point for your equipment does not have equal to or
more than 1 ohm between the grounding point and the battery negative terminal. NAV-TV recommends
that the ZEN shares ground and power with the rest of the aftermarket components.
2) If you are having any audio bleed over, handfree echo or other issues and you are using a third party DSP,
bypass the DSP and see if the issues continue.
ZEN Frequently Asked Questions
ZEN Technical Specications
Compatible OS:
Other
Power Supply
Output
Input
Operating System
14
NAV-TV Corp 3950 NW 120th Ave, Coral Springs, FL 33065
web: navtv.com | Int Tel: +1-561-955-9770 | Toll free USA and Canada: +1-866-477-3336 | email:sales@navtv.com
15

Other Nav TV Automobile Accessories manuals

Nav TV NTV-KIT041 User manual

Nav TV

Nav TV NTV-KIT041 User manual

Nav TV POR-PCM3BT User manual

Nav TV

Nav TV POR-PCM3BT User manual

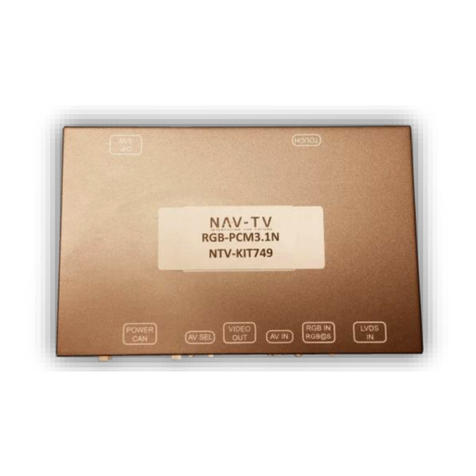
Nav TV RGB-PCM3.1N User manual

Nav TV

Nav TV RGB-PCM3.1N User manual

Nav TV NTV-KIT495 User manual

Nav TV

Nav TV NTV-KIT495 User manual

Nav TV NTV-KIT899 User manual

Nav TV

Nav TV NTV-KIT899 User manual

Nav TV MBUX-RVC User manual

Nav TV

Nav TV MBUX-RVC User manual

Nav TV PCM3CAM Manual

Nav TV

Nav TV PCM3CAM Manual

Nav TV Barracuda-CTS Installation and operating instructions

Nav TV

Nav TV Barracuda-CTS Installation and operating instructions

Nav TV MOST-H.U.R. NTV-KIT155 User manual

Nav TV

Nav TV MOST-H.U.R. NTV-KIT155 User manual

Nav TV AVBMW User manual

Nav TV

Nav TV AVBMW User manual

Nav TV AUDI A6 User manual

Nav TV

Nav TV AUDI A6 User manual

Nav TV PCM4-CAM User manual

Nav TV

Nav TV PCM4-CAM User manual

Nav TV IOB-RVC User manual

Nav TV

Nav TV IOB-RVC User manual

Nav TV OPTI-1 User manual

Nav TV

Nav TV OPTI-1 User manual

Nav TV POR-PCM3BT User manual

Nav TV

Nav TV POR-PCM3BT User manual

Nav TV GVIF-CTS User manual

Nav TV

Nav TV GVIF-CTS User manual

Nav TV MB25 User manual

Nav TV

Nav TV MB25 User manual

Nav TV MOST-HUR31 User manual

Nav TV

Nav TV MOST-HUR31 User manual

Nav TV AUDI-VC User manual

Nav TV

Nav TV AUDI-VC User manual

Nav TV POR-iPOD User manual

Nav TV

Nav TV POR-iPOD User manual

Nav TV OPV-2BMW User manual

Nav TV

Nav TV OPV-2BMW User manual

Nav TV UCI-11C NTV-KIT331 User manual

Nav TV

Nav TV UCI-11C NTV-KIT331 User manual

Nav TV AUDI-P60H Manual

Nav TV

Nav TV AUDI-P60H Manual

Nav TV NAV-INREN User manual

Nav TV

Nav TV NAV-INREN User manual

Popular Automobile Accessories manuals by other brands

Thule 1060 instructions

Thule

Thule 1060 instructions

XG Cargo Stealth Gama XG-322 user manual

XG Cargo

XG Cargo Stealth Gama XG-322 user manual

Dill 1504-572 manual

Dill

Dill 1504-572 manual

Thule Rapid System Kit 1414 Fitting instructions

Thule

Thule Rapid System Kit 1414 Fitting instructions

Westfalia 321 651 300 113 installation instructions

Westfalia

Westfalia 321 651 300 113 installation instructions

MOB MO9135 user manual

MOB

MOB MO9135 user manual

ACME CH102 user manual

ACME

ACME CH102 user manual

Rightline Gear 110M90 quick start guide

Rightline Gear

Rightline Gear 110M90 quick start guide

Volvo 091-8 installation instructions

Volvo

Volvo 091-8 installation instructions

ARB AIRLOCKER RD142 installation guide

ARB

ARB AIRLOCKER RD142 installation guide

Volvo TOW BAR-MOUNTED BICYCLE HOLDER Accessories User Guide

Volvo

Volvo TOW BAR-MOUNTED BICYCLE HOLDER Accessories User Guide

Whispbar K096W Fitting instructions

Whispbar

Whispbar K096W Fitting instructions

VDO MG 2100 owner's manual

VDO

VDO MG 2100 owner's manual

AMP Research PowerStep 76136-01A installation guide

AMP Research

AMP Research PowerStep 76136-01A installation guide

minnid e.base XT manual

minnid

minnid e.base XT manual

DriveNTalk KlaT 7 user manual

DriveNTalk

DriveNTalk KlaT 7 user manual

Discount Car Stereo BLU-C5 installation guide

Discount Car Stereo

Discount Car Stereo BLU-C5 installation guide

Cequent Performance Products 4454 installation instructions

Cequent Performance Products

Cequent Performance Products 4454 installation instructions

manuals.online logo
manuals.online logoBrands
  • About & Mission
  • Contact us
  • Privacy Policy
  • Terms and Conditions

Copyright 2025 Manuals.Online. All Rights Reserved.