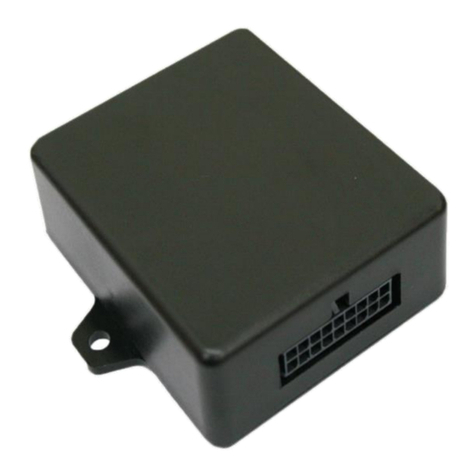
Nav TV Barracuda Manual

Barracuda
Video in Motion for select ’07-‘11 GM vehicles
NTV-KIT211
BHM
11/18/14
NTV-DOC117
3950 NW 120th Ave, Coral Springs, FL 33065 TEL 561-955-9770 FAX 561-955-9760

BHM
11/18/14
NTV-DOC117
Agreement: End user agrees to use this product in compliance with all State and Federal laws. NAV-TV Corp. would not be held liable for
misuse of its product. If you do not agree, please discontinue use immediately and return product to place of purchase. This product is
intended for off-road use and passenger entertainment only.
2 | P a g e
Overview
The NAV-TV Barracuda adds Video in Motion, Navigation control in motion, forced factory
camera and front camera add-on (only if factory camera equipped) to select 2007-2011 GM
vehicles with the 29-BIT GM-LAN radios.
Kit Contents
Barracuda pin out
PIN #
Description
Color
1
12v (+) Constant
Red
2
--NOT USED--
White
3
--NOT USED--
Pink
4
--NOT USED--
Orange
5
RX (FLIR Control)
Brown
6
RCA Signal (+) (Radio Side)
White
7
RCA SHEILD (common)
Gray
8
VSS (Radio Side)
Brown
9
GM-LAN (Radio Side)
Green
10
Ground (-)
Black
11
12v (+) OUT (for forced CAM)
Blue
12
Programmable OUTPUT A
White/Blue
13
Programmable OUTPUT B
White/Orange
14
TX (FLIR Control)
Brown/Red
15
RCA Signal (+) INPUT (front cam)
Red
16
RCA Signal (+) INPUT (rear cam)
White
17
VSS (Vehicle Side)
Blue
18
GM-LAN (Vehicle Side)
Purple
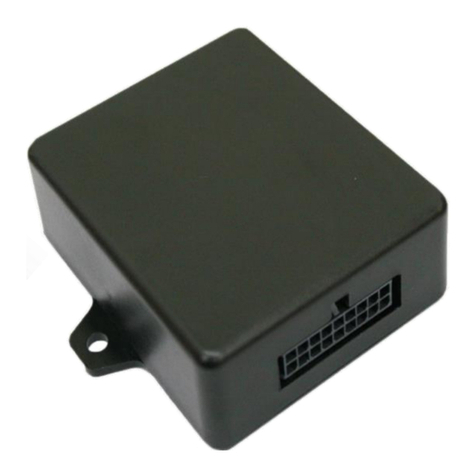
Barracuda Module
NTV-ASY166
Plug & Play T-Harness
NTV-HAR123
GPS Antenna
Extension
NTV-CAB037
USB Cable
(updates)
NTV-CAB009
GPS Antenna Relay
NTV-ASY165
Wire side view

BHM
11/18/14
NTV-DOC117
Agreement: End user agrees to use this product in compliance with all State and Federal laws. NAV-TV Corp. would not be held liable for
misuse of its product. If you do not agree, please discontinue use immediately and return product to place of purchase. This product is
intended for off-road use and passenger entertainment only.
3 | P a g e
Radio Removal (Escalade)
1. Using a soft plastic pry tool, remove the
trim panel on the passenger side just over
the glove compartment. This will allow
removal of radio trim.
2. Gently pry up on center console trim, and
disconnect cigarette lighter plug.
3. Remove the trim panel around the radio
and HVAC controls to expose radio
mounting.
4. Remove the 6) 7mm screws.
5. Remove the radio. Once the radio is
removed, unplug the radio and set to the
side.
Radio Removal (Full size SUV & Trucks)
1. Using a soft plastic pry tool, remove the trim
panel from around the radio and HVAC.
2. Remove the 4) 7mm screws holding the
radio in place.
3. Remove the radio. Once the radio is
removed, unplug the radio and set to the side.
1.
2.

BHM
11/18/14
NTV-DOC117
Agreement: End user agrees to use this product in compliance with all State and Federal laws. NAV-TV Corp. would not be held liable for
misuse of its product. If you do not agree, please discontinue use immediately and return product to place of purchase. This product is
intended for off-road use and passenger entertainment only.
4 | P a g e
Barracuda Installation
1. After the radio has been removed, locate the
factory brown and black plugs that match those
found on the provided Plug & Play T-Harness
and connect them securely to the female side.
2. On the provided GPS Antenna Relay, splice the black wire to a ground (-) source and
connect the red wire to OUTPUT A (white/blue wire) from the
Barracuda module’s harness. This wire will be labeled.
Note: Be sure to program ‘OUTPUT A’ to ‘Antenna Interrupt’ so that the GPS
antenna signal is separated when VIM is active. (See Programming)
3. Locate the factory GPS antenna cable (usually blue) and connect it to the turquoise
connector on the provided GPS Antenna Relay.
4. Connect the provided GPS Antenna Extension to the yellow
connector of the GPS Antenna Relay, and the free end back to
the radio.
5. If not adding any additional cameras, keep both the black RCA’s connected together,
otherwise you will lose the factory rear camera image.
6. If forced factory rear camera (viewing camera image at any time) is desired:
a. Locate the factory rear camera module (usually under pass seat or rear section
of vehicle) or BCM (usually mounted near the drivers firewall)
b. Locate the blue reverse 12v wire which runs to the camera module, cut it in half
c. Extend the Blue wire (PIN 12) from the Barracuda’s main harness to the camera
module/BCM
d. Connect the Barracuda’s Blue wire to the camera module side of the cut wire
e. Insulate the other end of the cut wire to prevent a short!
7. If adding an additional front camera, the RCA’s must be connected differently than
step 5 (See the diagrams on page 5 for visual aid). Power for the front camera can be
connected to OUTPUT B (white/orange wire). Be certain to program OUTPUT B for
‘Front Camera’ if using white/orange wire.
8. Connect the Barracuda module to the 18-pin plug located on the Plug & Play T-Harness.
9. Proceed to Barracuda Programming (page 6).

BHM
11/18/14
NTV-DOC117
Agreement: End user agrees to use this product in compliance with all State and Federal laws. NAV-TV Corp. would not be held liable for
misuse of its product. If you do not agree, please discontinue use immediately and return product to place of purchase. This product is
intended for off-road use and passenger entertainment only.
5 | P a g e

BHM
11/18/14
NTV-DOC117
Agreement: End user agrees to use this product in compliance with all State and Federal laws. NAV-TV Corp. would not be held liable for
misuse of its product. If you do not agree, please discontinue use immediately and return product to place of purchase. This product is
intended for off-road use and passenger entertainment only.
6 | P a g e
Forced Factory Rear Camera connection (optional)
Barracuda Programming
The Barracuda Settings Menu supports GM’s 4 Line, 2 Line, and 1 Line instrument cluster
displays. To access the Barracuda Settings Menu, press and hold the left arrow mirror button
for 2 seconds.
The following instructions will appear on the instrument cluster display.
a. Use the remote mirror Down “↓” key to cycle through the features (VIM, CIM, etc.).
b. Use the remote mirror Right “→” key to change the current setting for the selected feature.
c. Use the remote mirror Left “←” key to exit the menu.
The module stores your selection(s) into memory upon exiting the menu.
NOTE 1: Menu items 9, 10, and 11 are only available if you have item 8, FRONT CAMERA, set to
FLIR.
Please verify the following settings before starting, paying special attention to Radio Type,
connected accessories and Antenna interrupt:
1. RADIO TYPE = CADILLAC
2. VIM DEFAULT = OFF
3. BEEP = ON
4. CIM TIMEOUT = 1 MIN
5. PROGRAMMABLE OUTPUT A = ACCESSORY
6. PROGRAMMABLE OUTPUT B = ACCESSORY
7. FORCE REAR CAM = OFF
8. FRONT CAM = OFF

BHM
11/18/14
NTV-DOC117
Agreement: End user agrees to use this product in compliance with all State and Federal laws. NAV-TV Corp. would not be held liable for
misuse of its product. If you do not agree, please discontinue use immediately and return product to place of purchase. This product is
intended for off-road use and passenger entertainment only.
7 | P a g e
1. RADIO TYPE: Used to accommodate the different configurations of stock GM radios.
CADILLAC: Select this when vehicle is a Cadillac.
CHEVROLET: Select this when vehicle is a Chevrolet.
GMC: Select this when vehicle is a GMC.
NOTE 2: When either Chevrolet or GMC is selected, turning VIM ON also
enables the Control in Motion features. However, when Control in
Motion is turned on, VIM is not enabled.
2. VIM DEFAULT: Stores the default setting for Video In Motion.
ON: VIM is Always ON until the user turns it off.
OFF: VIM is Always OFF until the user turns it on. (Recommended)
LAST STATE: Instructs the module to store the last state VIM was
set when the car was turned off.
NOTE 3: To enable VIM in Chevrolet or GMC vehicles select “ANT.
INTERRUPT” for the programmable Output A or B, connected to the external antenna relay
board.
3. BEEP: Enables or disables the audible tones the Barracuda uses to
signal the user a state has changed.
ON: Audible beeps, generated by the Barracuda, are ON.
OFF: Audible beeps, generated by the Barracuda, are OFF.
4. CIM TIMEOUT: Sets the amount of time that CIM stays active after
being turned on.
1 MIN: Control in Motion is enabled for 1 Minute.
5 MIN: Control in Motion is enabled for 5 Minutes.
Programming continues on next page…

BHM
11/18/14
NTV-DOC117
Agreement: End user agrees to use this product in compliance with all State and Federal laws. NAV-TV Corp. would not be held liable for
misuse of its product. If you do not agree, please discontinue use immediately and return product to place of purchase. This product is
intended for off-road use and passenger entertainment only.
8 | P a g e
5. and 6. PROG. OUTPUT A and B: Two +12V DC outputs controlled by the Up and Down mirror
buttons, or automatically.
NOTE 4: The Barracuda menu for PROG OUTPUT A and B are identical. They operate
independently of each other, but can share the same control button (Up/Down).
Accessory: +12V is output from port A or B when the
Accessory power is on.
Engine: +12V is output from port A or B when the
Engine is on.
Front Camera: Provides +12V DC to the Front camera,
when installed and enabled.
Ant. Interrupt: Select Antenna Interrupt to enable VIM
in Chevrolet or GMC vehicles.
Toggle if “Up Arrow” is held for 2 seconds: Press and
Hold “UP Arrow” for 2 seconds turns on/off +12V output from
port A or B.
Pulse if “Up Arrow” is held for 2 seconds: Press and
Hold “Up Arrow” for 2 seconds enables a +12V pulse for
300ms.
NOTE 5: Select “FRONT CAMERA” for the programmable output connected to the camera and
select “ANT. INTERRUPT” for the output connected to the external relay board.
7. FORCE REAR CAMERA: Enables/disables Forced Rear Camera mode and the Rear Camera
output on pin 11. Selecting OFF disables the forced rear
camera function.
OFF: Disables force rear camera.
ON: Enables Force Rear Camera. The Down Arrow key
will activate/deactivate the rear camera image.
NOTE: In order to use this function with the factory camera, pin 11
of the Barracuda needs to be connected to the Rear Camera Module (see Page 8.) This is not
necessary for an aftermarket camera.
8. FRONT CAMERA: This option enables Front camera support. If a front camera (regular or
FLIR) is to be controlled then select Front Camera = ON or FLIR. The default setting is Front
Camera = OFF.
OFF: No front camera.
ON: Used when a front camera is being installed.
FLIR: FLIR camera present.

BHM
11/18/14
NTV-DOC117
Agreement: End user agrees to use this product in compliance with all State and Federal laws. NAV-TV Corp. would not be held liable for
misuse of its product. If you do not agree, please discontinue use immediately and return product to place of purchase. This product is
intended for off-road use and passenger entertainment only.
9 | P a g e
NOTE 6: Front Camera OFF disables the Front camera function.
NOTE 7: Select “FRONT CAMERA” for the Programmable Output A or B that will provide power
to the camera (see 5 & 6).
NOTE 8: Selecting “FLIR” enables menu items 9, 10, and 11. If not selected, then the settings
Menu cycles back to item 1, RADIO TYPE, after item 8.
NOTE 9: FLIR Camera communication requires Pin 5 and Pin 14 of the Barracuda Wire Harness
to be tied together and connected the controller wire of the FLIR Harness. (See diagram below.)
9. FLIR ZOOM: 2X zoom is available for the FLIR camera and can be set as follows:
Always OFF: Zoom is normally disabled.
Always ON: Zoom is always on.
On High Beam: Zoom on when high beams are active.
On High Beam or > 20MPH: Zoom is enabled on High
Beam or when the speed is greater than 20MPH. The zoom
function turns off at 15MPH.
On High Beam or > 40MPH: Zoom is enabled on High
Beam or when the speed is greater than 40MPH. The zoom
function turns off at 30MPH.
On High Beam or > 60MPH: Zoom is enabled on High
Beam or when the speed is greater than 60MPH. The zoom function turns off at 50MPH.
10. FLIR COLORS: The Barracuda module allows you to modify the
colors the FLIR camera outputs to the radio LCD.
White Hot: Black and white image, with White indicating hot.
Black Hot: Black and white image with Black indicating hot.
Sepia: Brown and black image.
Rainbow: Color image with Red indicating hot.
11. FLIR MOUNT: The FLIR Camera can be mounted 1 of 2 ways, upright
or up-side down. This setting allows you to configure the image on the screen to the mounted
position of the FLIR camera.
Normal: Select when the FLIR camera is physically mounted
right side up.
Inverted: Select when the FLIR camera is physically mounted
upside down.

BHM
11/18/14
NTV-DOC117
Agreement: End user agrees to use this product in compliance with all State and Federal laws. NAV-TV Corp. would not be held liable for
misuse of its product. If you do not agree, please discontinue use immediately and return product to place of purchase. This product is
intended for off-road use and passenger entertainment only.
10 | P a g e
Barracuda Operation
All Functions of the Barracuda are controlled
through the vehicle’s power mirror direction pad. The
Barracuda controls are only available when the left and
right mirror buttons are NOT selected (LEDs OFF).
Example: if the Left Mirror button is illuminated, press the
illuminated Left Mirror button again to turn the LED off.
Video In Motion: Momentarily pressing the left arrow will
enable/disable video in motion. This function will allow the user to
view DVD video or AUX video (if available) while the vehicle is in
motion.
Control In Motion: Momentarily pressing right arrow will
enable/disable Control in motion. Control in Motion allows the user
to access radio functions that are normally blocked while the vehicle
is moving.
Note: When activated, Control in Motion (CIM) will remain ON for 1
or 5 minutes (user selectable) and then deactivate itself.
Forced Rear Camera: Momentarily pressing down arrow
enables/disables forced rear camera (if applicable). This will allow
the user to view the back-up camera video regardless of speed or
gear.
*Requires Factory Rear Camera, Dealer programming of Radio for Rear Camera,
OR NAV-TV GMLANCAM module for compatible radios. See Glove Compartment
for a silver sticker with one of the following markings UV8, UV9, UVA, or UVB to
determine radio compatibility.
Front Camera: Momentarily pressing up arrow enables/disables
front camera (if applicable). This will allow the user to view the
front camera video regardless of speed or gear.
*Requires Factory Rear Camera, Dealer programming of Radio for Rear Camera,
OR NAV-TV GMLANCAM module for compatible radios. See Glove Compartment
for a silver sticker with one of the following markings UV8, UV9, UVA, or UVB to
determine radio compatibility.

BHM
11/18/14
NTV-DOC117
Agreement: End user agrees to use this product in compliance with all State and Federal laws. NAV-TV Corp. would not be held liable for
misuse of its product. If you do not agree, please discontinue use immediately and return product to place of purchase. This product is
intended for off-road use and passenger entertainment only.
11 | P a g e
Other manuals for Barracuda
1
Other Nav TV Car Video System manuals

Nav TV
Nav TV CHRY MULTI-CAM Manual

Nav TV
Nav TV TOYCAM 2-EXP User manual

Nav TV
Nav TV RGB-VWv2 User manual

Nav TV
Nav TV PCM3-997-Media User manual

Nav TV
Nav TV VTC-J User manual

Nav TV
Nav TV W212 VIM User manual

Nav TV
Nav TV OPV-1R User manual

Nav TV
Nav TV MAS-TV2 Manual

Nav TV
Nav TV NTV-KIT393 User manual

Nav TV
Nav TV GVIF-CTS User manual

Nav TV
Nav TV W221-10 Kit Manual

Nav TV
Nav TV W221VIM User manual

Nav TV
Nav TV W204-N RVC User manual

Nav TV
Nav TV BMWVIM User manual

Nav TV
Nav TV BENHUR User manual

Nav TV
Nav TV W204-H User manual

Nav TV
Nav TV PCM4-VIM User manual

Nav TV
Nav TV SYNC3-RVC User manual

Nav TV
Nav TV W204-12 DYNAMIC Kit User manual

Nav TV
Nav TV NTV-KIT486 User manual