2 | Page
Radio Removal and Installation (Cont.) Radio Dash Images (Cont.)
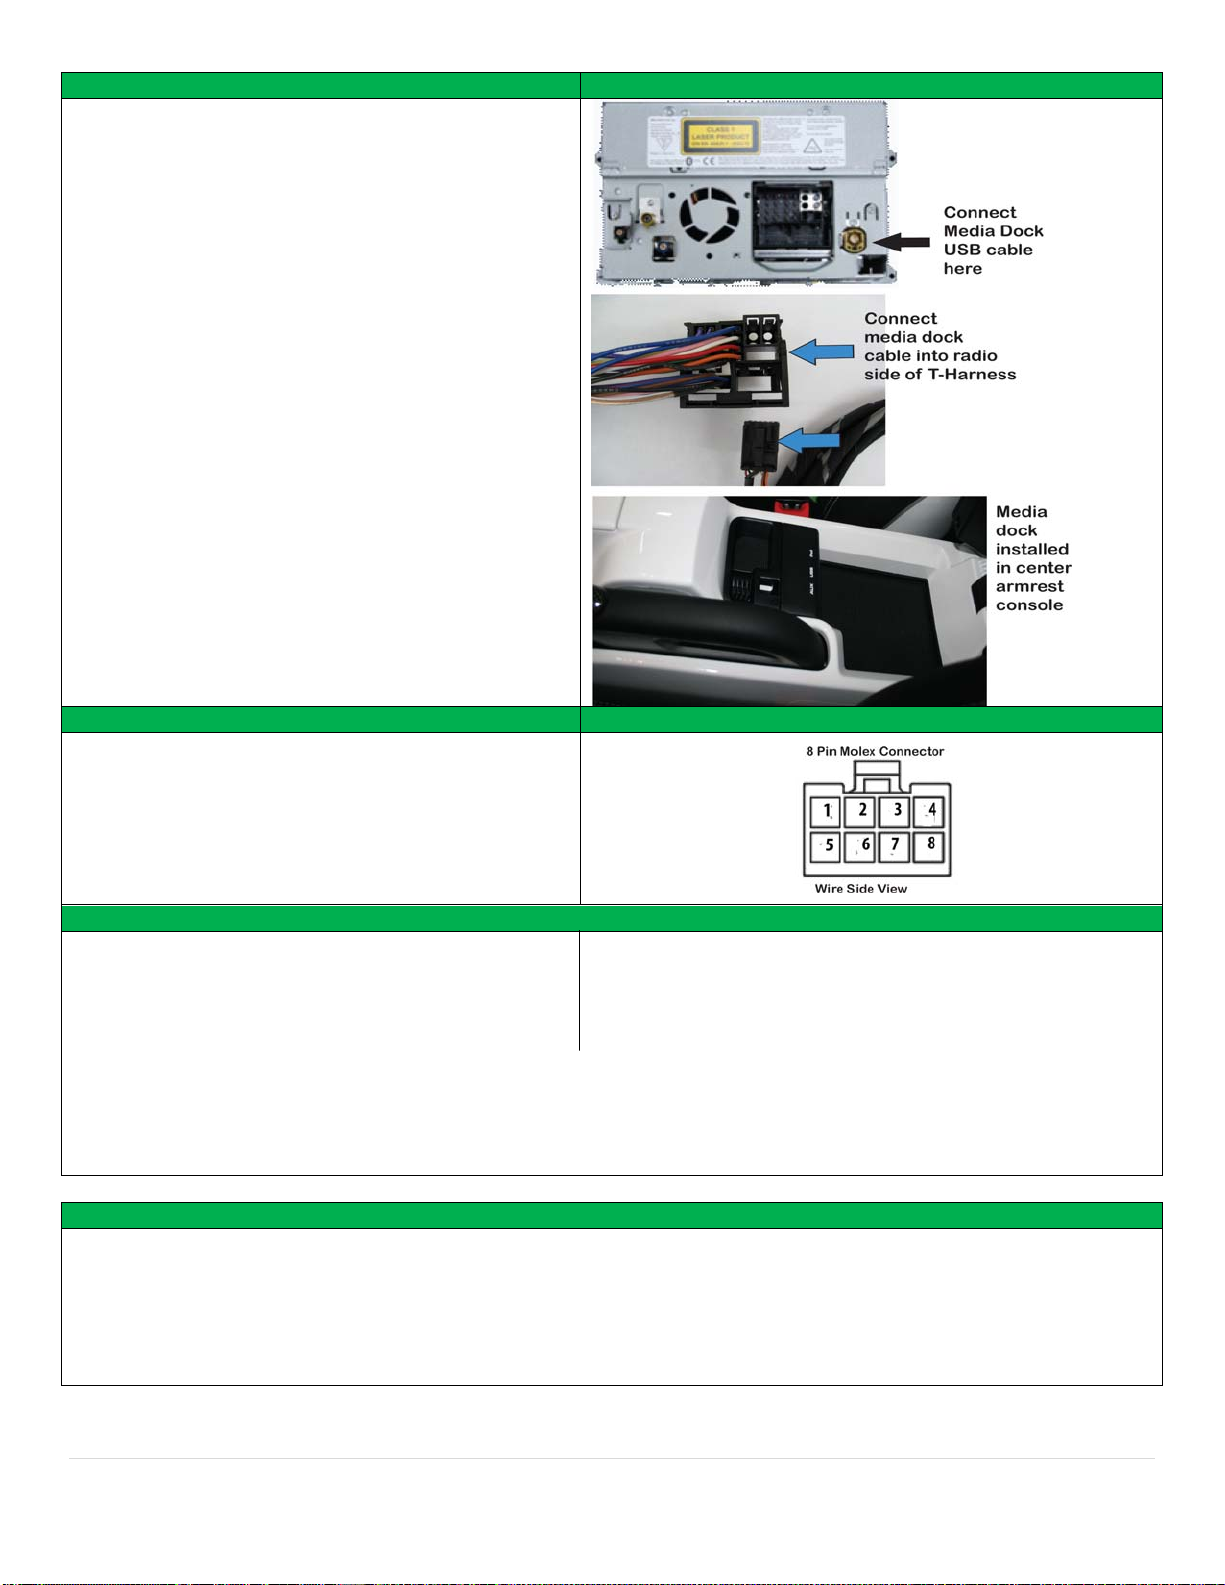
5. Connect the Media dock USB connector to the USB
connector on the back of radio.
6. Connect the Media dock cable into radio side of T-
harness.
7. Plug in the fiber connector into the radio side of the
T-harness and connect to the radio.
8. Run the Dock harness from the radio inside of the
center console, and remove the center factory
armrest tray. Connect the dock harness to the media
dock and the media dock USB cable to the media
dock and secure the new dock tray below the center
console armrest.
Note: See Mic install supplement for microphone
installation.
Reinstall Dash in reverse order.
8 Pin Molex wiring guide 8 Pin Molex connector image
1. CAN High to radio (Yellow wire)
2. CAN Low to radio (Blue wire)
3. Chassis ground (Black wire)
4. +12V output to camera (White/Red wire)
5. CAN High to vehicle (Yellow wire)
6. CAN Low to vehicle (Blue wire)
7. +12V Constant power (Red wire)
8. +12V output for camera switcher (White/Blue) Programming
Programming the interface: Deprogramming the interface:
1. Key On 1. Key On
2. Headlights On 2. Headlights On
3. Parking Brake engaged 3. Parking Brake engaged
4. Hold Brake pedal down 4. Hold Brake pedal down
5. Flash High-Beams: 5. Flash High-Beams 6 times
4 or 8 times for vehicles with navigation
10 times for vehicles without navigation
Note1:The PCM must be deprogrammed before the vehicle is taken in for service.
Note2:If the maps get disabled after programming the interface. Repeat programming steps 1-5,
substituting flashing the high-beams 8 times instead of 4 in step 5.
Operation
1. iPod, AUX, USB-Media and Bluetooth are enabled with activating the interface module in programming and are
accessed through on-screen and radio controls. Note: You cannot use the iPod and the Auxiliary input
simultaneously because they share the same audio path.
2. Initial pairing of phone to Radio Bluetooth. Accept request from phone on radio, enter any 4 digit number on radio
and press OK, enter same 4 digit number on phone and OK. Note: (Write the 4 digit number down and do not
lose it. You will need it if the phone or radio loses the pairing connection information).
Agreement: End user agrees to use this product in compliance with all State and Federal laws. NAV-TV Corp. would not be held liable for misuse of its product.
If you do not agree, please discontinue use immediately and return product to place of purchase.


