NEC XN120 Vision User manual

This guide explains the PC programming tool, Pre config files, and common areas to
customise from the Pre Config files for the XN120 Telephone System.
The guide also explains the various methods of connecting to the XN120 in order to use the
PC Programming tool.
Please keep all information supplied for future reference.
XN120
PC Pro Guide Getting Started
Rev 1.1 (March 2005)
991425-5

XN120 PCPro Getting Started Guide
2
Contents
1. Introduction ........................................................................... 3
2. XN120 PC Programming Tool .............................................. 4
Installing the XN120 programming tool .............................................................................. 4
EXIFU card and Connections for PCPro ............................................................................ 6
Setting up TCP/IP Addressing on your PC......................................................................... 8
Opening PCPro................................................................................................................ 10
Opening PCPro for the first time ...................................................................................... 10
Establish Communication with the XN120........................................................................ 11
PCPro Via Ethernet ......................................................................................................... 12
PCPro via Serial .............................................................................................................. 13
Remote Access - PCPro via DDI to 830........................................................................... 17
Remote Access - PCPro via Modem................................................................................ 21
Using the Pre Config files ................................................................................................ 26
If the XN120 has a different hardware config than the PCPro Pre Config file ................... 26
Uploading data to XN120................................................................................................. 32
Downloading data From the XN120 ................................................................................. 35
3. Overview of PCPro Programming Interface ..................... 38
Selecting and Viewing a Program .................................................................................... 38
Common Icon and Operations ......................................................................................... 42
4. Making Changes to the Configuration .............................. 44
Extension Numbering....................................................................................................... 44
Extension Naming............................................................................................................ 45
Pick up group allocations ................................................................................................. 46
Page Group Allocation..................................................................................................... 47
Department Groups ......................................................................................................... 48
Function Keys.................................................................................................................. 51
Analogue Outgoing Trunk Access.................................................................................... 55
ISDN Outgoing Trunk Access .......................................................................................... 58
Analogue Trunks Incoming Routing ................................................................................. 61
ISDN Trunks Incoming Routing........................................................................................ 64
Caller ID (CLI) Analogue Trunks ...................................................................................... 70
Caller ID (CLI) ISDN Trunks............................................................................................. 72
Toll Restriction Allocation................................................................................................. 72
Toll Restriction Edit.......................................................................................................... 73
Speed Dials .....................................................................................................................79
Appendix.................................................................................. 81
What will the Pre-Config files setup.................................................................................. 81
Alog Pre Config Changes from Factory Default................................................................ 81
ISDN Pre Config Changes from Factory Default .............................................................. 83

XN120 PC Programming Tool
3
1. Introduction
This guide explains the installation and operation of the XN120 PC programming tool (PCPro).
With PCPro you will be able to create a new customer configuration off line and upload to an
XN120 system.
You can also download whole or parts of the XN120 configuration for editing or backup.
We also provide some Pre Config files that are intended to be used by installers that are not
familiar with the XN120 system. These have the basic settings for a ‘typical customer’ and
enable the installer to quickly setup the XN120 system for either analogue trunk or ISDN DDI
working.
The guide covers the following main points.
1. Installing the XN120 PCPro programming tool
2. Connecting your PC to the XN120
3. Setting the IP address of your PC’s NIC
4. Upload/Downloading the XN120 configuration
5. Loading the Pre Config files
6. How to edit program commands from Pre Config Data.
Pre Config files
These files contain UK set up and basic operation, designed to create a starting point for all
new installs
Once uploaded the XN120 should only require minimal changes to meet the customer’s
requirements.
At the end of this guide both Pre Config files are detailed, showing the changes from a
Default XN120 system.
Changing the Pre Config Files
All commands have been changed within the Pre Config files are detailed in this guide along
with screen shots from PCPro.
The screen shots show the Pre Config data. (Starting data).
Each command details how to navigate to each program and which part should be edited
editing.
Pre Config data can be edited and saved without being connected to system (off line).
Programming numbers are also included that act as quick reference for editing the config at a
later date (or editing via the system phone as the programming numbers are the same).

XN120 PC Programming Tool
4
2. XN120 PC Programming Tool
Installing the XN120 programming tool
Minimum Requirements
The Topaz PCPro will be installed into the following PC specifications;
1 Processor Pentium II 500MHz equivalent or higher
2 RAM 128MB
3 Hard Disk Drive
Space 20MB
4 Monitor Resolution 800 X 600 pixels or higher
5 OS
(Operating System) Microsoft Windows 98SE/2000/XP
6 Drive CD-ROM Drive
Mouse
7 Others (depending on connection type)
NIC - Network Interface Card
Serial COM port
Important Points
1. Only one person is allowed in programming mode at a time. An error message will be
received if trying to log on while another user is already in programming mode.
2. When updating the PCPro software, it is recommended that you should first remove the
existing software version.
3. After connect PC with Topaz System, if nothing is carried out about 15 minutes, a session
will be cut off by Topaz main software.
Procedure
1. Insert the XN120 Technical Support CD into the CD-ROM Drive of your PC.
2. From My Computer, Click CD drive and Click“ Setup exe” to start the installation.
3. Click Next> to appear the License Agreement. Click Check box.

XN120 PC Programming Tool
5
4. Click Next> to appear the Installation Directory. Check the Installation Directory.
5. Click Next> to appear the Shortcut Folder.
6. Click Next> to appear the following dialog box. And Click Finish to complete the Installation.
7. Important Message will appear and Click Next> to show the Installation completed message.
Click Finish to complete the XN120 PCPro installation.
And XN120 PCPro Icon will appear on your Desktop screen.
Creating Customer saved files folder
You may also want to copy the Pre Config files from the CD onto your PC, this folder can also
be used use to save any XN120 customer configs.
Procedure
For example, to copy the files into a folder on your desktop.
1. Right click anywhere in desktop, select new – folder.
2. Locate “new folder” highlight – right click – rename
3. Rename to - XN120 Customer files
4. Open folder XN120 Customer files and right click new – folder
5. Locate “new folder” highlight – right click – rename
6. Rename to - XN120 Pre Config
7. Copy both Pre Config files from CD to this folder

EXIFU Card & Connections for PCPro
6
EXIFU card and Connections for PCPro
There are two methods of connecting your PC directly to the XN120 system in order to use
PCPro.
Ethernet Connection
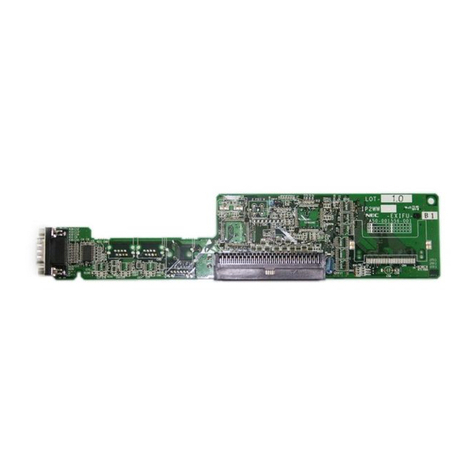
You will need the EXIFU-A card installed in the XN120.
Connect the Ethernet socket of the EXIFU-A card to a NIC card on your PC. This can be
either via LAN or directly via a LAN cross cable.
You will need to setup the NIC in your PC before you can communicate with the XN120.
Serial Connection
You will need either the EXIFU-A or EXIFU-B card installed in the XN120.
Connect the serial (RS232 9-pin) socket of the EXIFU card to a serial COM port on you PC.
You will need to setup the COM port in your PC before you can communicate with the XN120.
There are also two methods of connecting via a dial in call on one of the trunks of the XN120
(remote access).
ISDN DDI to 830
You will need a DDI number routed to a special code in Program 22-11-02. The special code
is 830, a data call to the DDI number will be able to connect to the PC Programming interface
of the XN120. You do not need an EXIFU card installed in the XN120.
You will need an ISDN terminal adapter connected to your PC in order to initiate the data call.
ISDN or Analogue trunk to a modem
You will need either the EXIFU-A or EXIFU-B card installed in the XN120.
Connect the serial (RS232 9-pin) socket of the EXIFU card to a modem. The modem is
accessed either by routing a trunk/DDI directly to it or by a transferred call from any user on
the XN120.
You will need to setup the serial port of the EXIFU card before it can be used for PCPro via a
modem. (A PC running a terminal application and connected via a serial cross cable is
required to setup the EXIFU card.)
You will need a modem connected to your PC in order to initiate the call.
BRIU Card
With DDI to
830 setup
ISDN
Terminal
Adapter
ISDN
ISDN BRI

EXIFU Card & Connections for PCPro
7
Cable pin connections
LAN Straight Cable (RJ-45)
Pin Number To Pin Number
1 1
2 2
3 3
6
6
LAN Cross Cable (RJ-45)
Pin Number To Pin Number
1 3
2 6
3 1
6
2
Serial Cross Cable (D-sub 9 pin)
Signal Name Pin Number To Pin Number Signal Name
RD 2 3 TD
TD 3 2 RD
DTR 4 6 DSR
SG 5 5 SG
DSR 6 4 DTR
RTS 7 8 CTS
CTS 8
7 RTS

Setting up TCP/IP Addressing on your PC
8
Setting up TCP/IP Addressing on your PC
You will need to setup the NIC on your PC before you can communicate with the Ethernet port
on the EXIFU card. The setting will be different, depending on your connection method; via
LAN cross cable or via the customer LAN.
If you have a new XN120 system (at default) it will have:
IP address = 172.16.0.10
Sub Net Mask = 255.255.0.0
These are set by program 10-12-01 on the XN120.
Your NIC card must have a fixed IP address within the range 172.16.0.11 to 172.16.254.254
and a suitable sub net mask.
If the EXIFU is connected to the customers LAN then the IP address of the XN120 will be
within the range of the customers LAN. You will need to confirm your NIC settings with the
network administrator.
The IP address of the XN120 is set by Program 10-12-01, you will need this when you connect
to the XN120 via PCPro.
Procedure
*The following windows are using Windows 2000 professional.
1. Click START-> SETTING-> NETWORK CONNECTIONS
(Network and Dial-up Connection). The following Windows appears.
2. Right-Click on the LOCAL AREA CONNECTION Icon and Click on PROPERTIES.

Setting up TCP/IP Addressing on your PC
9
3. In the list if items, Click on the INTERNET PROTOCOL (TCP/IP) and then Click on
PROPERTIES.
In the Internet Protocol (TCP/IP) Properties window that appears.
4. Click on USE THE FOLLOWING IP ADDRESS button
5. Enter the following: IP Address: 172.16.0.100 Subnet Mask: 255.255.0.0 if you are
connecting to a new (default) XN120.
If you are connecting via the customer LAN you should check your settings with the
network administrator.
6. Click OK. Then Click OK.
7. Close the NETWORK CONNECTIONS window.

Opening PCPro
10
Opening PCPro
1. Double click the XN120 PCPro Icon on the Desktop window
Opening PCPro for the first time
When you open PCPro for the first time the list of program numbers will not be displayed down
the right hand side. They can be enabled by selecting the Search Tree Bar as shown below.
1. Maximize screen
2. Click View
3. Click View Search Tree Bar

Establish Communication with the XN120
11
Establish Communication with the XN120
Before you can upload/download the XN120 configuration you will need to establish
communication between your PC and the XN120 system.
The method of communication depends on how you are connection to the XN120: Ethernet,
Serial, Remote via DDI to 830 or remote via a modem.
You do not need to establish communication if you want to edit/view a configuration off line.
For example, most users prefer to download the entire configuration from the XN120 and then
disconnect the communication; make any changes off line and then re-connect to upload to
the XN120.
This is especially useful for remote access, as it will save on call costs.

PCPro Via Ethernet
12
PCPro Via Ethernet
You can use PCPro to establish the communication to the XN120 if you are connected via a
LAN cross cable or the customer’s LAN.
1 Click Communication Tab, click Connect (or press F5).
2 In the Connection window, which appears, enter the XN120 user name, password, and
IP address defined in Program 10-12-01 (Default 172.16.0.10)
Installer level Password – CASE SENSITIVE
User Name – TOPAZ
Password – 12345678
3. Click CONNECT.
Communication is established between PCPro and XN120 system via the LAN connection
and Main Screen will appear. The Connect icon greys out and the Upload, Download &
Disconnect icons become available)
If there is no connection available to the
XN120 you will see an error message
indicating that PCPro is unable to connect to
the KSU. Check your cables and Network
Connection settings.

PCPro via Serial
13
PCPro via Serial
Before you can use PCPro to communicate with the XN120 you must establish a ‘dial up
session’ using the COM port of your PC.
Creating a Dial Up Session for Local Access via Serial.
1. Click Start -> Settings -> Network
Connections and select Create New
Connection
2. In the New Connection screen click Next
3. In the Network Connection Type select the
Set up an advanced connection and click
next
4. In the Advanced Connection Options screen
select Connect directly to another computer
and click Next

PCPro Via Serial
14
5. In the Host or Guest screen select Guest
and click Next
6. In the Connection Name screen enter a
name for the connection.
7. In the Select a Device screen select the
COM port that you will connect the serai cross
cable to on your PC
8. In the Connection Availability screen select
My Use only and click Next

PCPro via Serial
15
9. In the Completing the New Connection
Wizard click Finish
10. You will then be shown the
connection screen. If you want to
establish the connection then click
Connect (enter the User Name and
Password) otherwise click Cancel.
Installer level Password – CASE
SENSITIVE
User Name – TOPAZ
Password – 12345678
To connect via the Serial dial up
session at any time select the session
(eg XN120 via Serial) from the list
within the Network Connections
screen. You will see this screen.
11. When you select Connect you will
see the connection screen for a brief
time and then it will close.
12. You have now established comunication between your PC and the XN120 via the serial
cross cable.

PCPro Via Serial
16
You now need to connect to the XN120 with PCPro.
13. Go to the XN120 PCPro screen and select
Click Communication Tab, click Connect (or press F5).
14. In the Connection window, which appears, enter the XN120 user name, password, and IP
address 192.78.0.1 (this is a a fixed IP address used by PCPro to identify the serial dial up
session).
Installer level Password – CASE SENSITIVE
User Name – TOPAZ
Password – 12345678
15. Click CONNECT.
Communication is established between PCPro and XN120 system via the Serial connection
and the Main Screen will appear. The Connect icon greys out and the Upload, Download &
Disconnect icons become available)
If there is no connection available to the
XN120 you will see an error message
indicating that PCPro is unable to connect to
the KSU. Check your cables and settings.

PCPro via DDI to 830
17
Remote Access - PCPro via DDI to 830
Before you can use PCPro to communicate with the XN120 you must establish a ‘dial up
session’ using the ISDN terminal adapter connected to your PC.
You will also need to route one of the DDI numbers within the XN120 to destination 830 in
program 22-11-02.
Before creating the dial up session ensure that your ISDN terminal adapter is installed and
available on your PC.
Creating a Dial Up Session for Remote Access via DDI to 830.
1. Click Start -> Settings -> Network
Connections and select Create New
Connection
2. In the New Connection screen click Next
3. Select the Connect to the network at my
workplace and click next
4. In the Network Connection screen select
Dial up connection and click Next

PCPro Via DDI to 830
18
5. If you have more that one device available
you will be prompted to select it. Select the
ISDN terminal adapter and click Next.
6. In the connection name screen enter a
name for the dial up session and click Next
7. In the Phone Number to Dial screen enter
the number required to reach the DDI at the
remote XN120 site (the DDI routed to 830)
8. In the Connection Availability screen select
My use only and click Next
9. In the Completing the New Connection
Wizard click Finish

PCPro via DDI to 830
19
10. You will then be shown the connection
screen. If you want to establish the
connection then click Connect (enter the
User Name and Password) otherwise click
Cancel.
Installer level Password – CASE
SENSITIVE
User Name – TOPAZ
Password – 12345678
To connect via the ISDN terminal adapter
dial up session at any time select the
session (eg XN120 via DDI 830) from the
list within the Network Connections screen.
You will see the screen shown below.
11. When you select Connect you will
see the connection screen for a brief
time and then it will close.
12. You have now established comunication between your PC and the XN120 via the ISDN
terminal adapter.

PCPro Via DDI to 830
20
You now need to connect to the XN120 with PCPro.
13. Go to the XN120 PCPro screen and select
Click Communication Tab, click Connect (or press F5).
14. In the Connection window, which appears, enter the XN120 user name, password, and IP
address 192.78.0.3 (this is a a fixed IP address used by PCPro to identify the serial dial up
session).
Installer level Password – CASE SENSITIVE
User Name – TOPAZ
Password – 12345678
15. Click CONNECT.
Communication is established between PCPro and XN120 system via the ISDN Terminal
adapter and the Main Screen will appear. The Connect icon greys out and the Upload,
Download & Disconnect icons become available)
If there is no connection available to the
XN120 you will see an error message
indicating that PCPro is unable to connect to
the KSU. Check your cables and settings.
Other manuals for XN120 Vision
15
Table of contents
Other NEC Telephone System manuals

NEC
NEC DSX-160 User manual

NEC
NEC UX5000 User manual

NEC
NEC UNIVERGE SL2100 User manual

NEC
NEC Xen Master User guide

NEC
NEC Ranger AK User manual

NEC
NEC QuSL1100 User manual

NEC
NEC DSX-40 DEMO KIT User manual

NEC
NEC NEAX 2000IVS2 User manual

NEC
NEC Electra mark II User manual

NEC
NEC DSX INTRAMAIL FEATURE User manual

NEC
NEC Electra Elite 192 User manual

NEC
NEC ELECTRA ELITE IPK II Operating and installation instructions

NEC
NEC Univerge SV 9500 User manual

NEC
NEC Xen Topaz User manual

NEC
NEC AK-308 User manual

NEC
NEC TOPAZ User manual

NEC
NEC DSX User manual

NEC
NEC Electra Ellte IPK II User manual

NEC
NEC DSX PRODUCT DESCRIPTION User manual

NEC
NEC DSX-40 DEMO KIT User manual