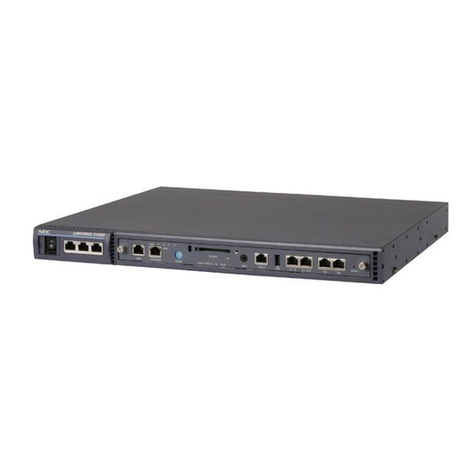
NEC NVM-2000WS Instruction Manual

NVM-2000WS and
NVM-Server XL
Windows 2000 Platform
Activating Fax Ports and Features

This manual has been developed by NEC America, Inc. It is intended for the use of its customers and service
personnel, and should be read in its entirety before attempting to install or program the system. Any comments or
suggestions for improving this manual would be appreciated. Forward your remarks to:
NEC America, Inc., Corporate Networks Group
4 Forest Parkway Shelton, CT 06484
Attention: Manager, Technical Publications
http://www.cng.nec.com
Nothing contained in this manual shall be deemed to be, and this manual does not constitute, a warranty of, or
representation with respect to, any of the Equipment covered. This manual is subject to change without notice and
NEC America, Inc. has no obligation to provide any updates or corrections to this manual. Further, NEC America,
Inc. also reserves the right, without prior notice, to make changes in equipment design or components as it deems
appropriate. No representation is made that this manual is complete or accurate in all respects and NEC America, Inc.
shall not be liable for any errors or omissions. In no event shall NEC America, Inc. be liable for any incidental or
consequential damages in connection with the use of this manual. This document contains proprietary information
that is protected by copyright. All rights are reserved. No part of this document may be photocopied or reproduced
without prior written consent of NEC America, Inc.
© 2003 by NEC America, Inc. All Rights Reserved
Printed in U.S.A.

Table of Contents
Issue 1-0 i
Table of Contents
Activating Fax Ports and Features . . . . . . . . . . . . . . . . . . . . . . . . . . . . . . . . . . . . . . . . . . . . 1
Introduction . . . . . . . . . . . . . . . . . . . . . . . . . . . . . . . . . . . . . . . . . . . . . . . . . . . . . . . . . . . . . . . . . . . . . 1
Important Note . . . . . . . . . . . . . . . . . . . . . . . . . . . . . . . . . . . . . . . . . . . . . . . . . . . . . . . . . . . . . . . . 1
Adding Expansion Cards. . . . . . . . . . . . . . . . . . . . . . . . . . . . . . . . . . . . . . . . . . . . . . . . . . . . . . . . . . . 2
Installation Overview . . . . . . . . . . . . . . . . . . . . . . . . . . . . . . . . . . . . . . . . . . . . . . . . . . . . . . . . . . . 2
Activating and Verifying New Features. . . . . . . . . . . . . . . . . . . . . . . . . . . . . . . . . . . . . . . . . . . . . . . 3
Activating New Features . . . . . . . . . . . . . . . . . . . . . . . . . . . . . . . . . . . . . . . . . . . . . . . . . . . . . . . . 3
Verifying Activation of New Feature. . . . . . . . . . . . . . . . . . . . . . . . . . . . . . . . . . . . . . . . . . . . . . . 4
Installing Fax Component in the Voice Mail. . . . . . . . . . . . . . . . . . . . . . . . . . . . . . . . . . . . . . . . . . . 7
Setting Up and Starting the Voice Mail Service . . . . . . . . . . . . . . . . . . . . . . . . . . . . . . . . . . . . . . . 11
Setting Up Fax Ports . . . . . . . . . . . . . . . . . . . . . . . . . . . . . . . . . . . . . . . . . . . . . . . . . . . . . . . . . . . . . 13
Backing Up the Feature Files . . . . . . . . . . . . . . . . . . . . . . . . . . . . . . . . . . . . . . . . . . . . . . . . . . . . . . 14
Connecting Fax Ports to the Phone System. . . . . . . . . . . . . . . . . . . . . . . . . . . . . . . . . . . . . . . . . . . 15

Table of Contents
ii Issue 1-0

Activating Fax Ports and Features
Introduction
Issue 1-0 ◆1
Activating Fax Ports and Fea tur es
Introduction
IntroductionThis supplement provides information for installing and activating Fax ports and the Fax features in
the NVM-2000WS and the NVM-Server XL.
These Voice Mails use the D/41 JCT-LS Card (P/N 17702) to provide fax ports.
To use the Fax Card, you need to install a feature activation kit (which contains a disk and a dongle)
to activate the Fax ports.
You will also need to add the Fax Mail feature to your Voice Mail. To add any of the Fax features
(Fax Mail, Fax-On-Demand or Fax Server), you will need to install feature software and a dongle.
Tools & Materials Needed for Activating Fax Ports/Features
You will need the following tools and materials:
■a NVM-2000WS or NVM-Server XL Voice Mail System installed and running.
■a Fax Card (P/N 17702-2P or 17702-4P), the corresponding Feature Activation disk and dongle
■Fax Mail Software (also Fax-On-Demand) (P/N 17725) OR Fax Server Software (Fax Server
Software includes Fax Mail) (P/N 17724) for a system that does not currently have Fax
installed. The Fax software contains a disk and dongle.
■the Voice Mail Server Software Installation CD (distributed with your Windows 2000 Voice
Mail Server)
■NEC document titled, Windows 2000 Platform Description and Installation Instructions (P/N
17700INS02 or higher) You will need to perform various procedures in this document before
you begin the instructions in this supplement.
■an ESD Wrist Strap (to beworn on the wrist and attached to a grounded metal object at all times
when handling cards)
■a Phillips-head screw driver.
Important Note
■Keep the card in its anti-static container, when it is not being used.
■Perform all card-handling on a work surface covered with (or composed of) a grounded, static-
dissipating material.
■All work must be performed by a qualified technician.

Activating Fax Ports and Features
Adding Expansion Cards
2 ◆Issue 1-0
Adding Expa nsi on Cards
Installation Overview
If you are adding a Fax Card, you must perform the following procedures before you continue
with this document. These instructions are in the Windows 2000 Platform Description and Instal-
lation Instructions (P/N 17700INS02 or higher).
Perform these procedures in the order in which they are listed:
After you have completed all of the procedures listed above, you are ready to add Fax to your Voice
Mail. Go to Activating New Features on page 3.
Procedure: In the Windows 2000 Platform Description and
Installation Instructions (P/N 17700INS02 or
higher) See Section:
1. Stop the Dialogic service and change the Voice Mail Service to
Manual Start. Changing the Services
2. Set switches SW4 and SW30 on the Fax Card. Checking the Expansion Cards
Fax Card (P/N 17702-xP)
3. Install the Fax Card. Installing Expansion Cards
4. If you removed the internal modem when you installed the card,
stop the remote services. Stopping the Remote Services
5. Start the Dialogic Configuration Manager to automatically detect
the Fax Card. Configuring the Dialogic Device Driver
(You only need to perform step 1 in this proce-
dure)

Activating Fax Ports and Features
Activating and Verifying New Features
Issue 1-0 ◆3
Activating and Veri fying New Fea tur es
Activating New Features
You are now ready to activate the Fax Card for Fax ports, as well as activate the Fax Mail (or Fax
Server) feature.
To activate the Feature File:
1. Install the feature-activation diskette that came with the Fax Card (P/N 17702-*P) in the A
drive of the Voice Mail.
2. To run the installation:
a. Click Start ➱ Run ➱ Browse ➱ A:.
b. Double-click AddUnit to open this file.
c. You see A:\AddUnit.exe in the Run window. Click OK on the Run window.
d. At the Insert system dongle then press a key when ready prompt:
Make sure that the system dongle is installed; press any key on the keyboard to continue.
e. At the Insert feature-activation dongle prompt:
Remove the system dongle, replace it with the feature-activation dongle, and press any key
on the keyboard to continue.
f. When done, press a key to exit the AddUnit program.
3. Remove the feature-activation dongle. Replace it with system dongle you removed in Step 2e.
4. Remove the feature-activation diskette from the A drive of the Voice Mail.
5. If you are also adding Fax Mail or Fax Server software, proceed to step 6. Otherwise, go to
Verifying Activation of New Feature on page 4.
6. Insert the feature-activation diskette for Fax Mail (P/N 17725) or Fax Server (P/N 17724) in
the A drive of the Voice Mail. Keep the corresponding feature-activation dongle handy.
7. Repeat Steps 2 through 4 for the Fax Mail/Fax Server software.
WARNING
Before you install the Feature File from the feature-activation
diskette onto your machine, make sure that this is the intended
machine for its use. Once installed, the Feature File is permanently
associated with the system dongle.
Activating Fax Ports and Features
Activating and Verifying New Features
4 ◆Issue 1-0
Verifying Activation of New Feature
To verify the activation of the Fax ports or Fax Mail/Fax Server fea-
ture:
1. Click Start ➱ Programs➱ Voice Mail System ➱ Registry Configuration. You see the
General page for the Voice Mail Registry, similar to the one shown below.

Activating Fax Ports and Features
Activating and Verifying New Features
Issue 1-0 ◆5
Verifying Activation of New Feature (cont’d)
2. Click the Dongle Feature Viewer tab. You see a screen similar to the one shown below:
3. On the Dongle Feature Viewer screen:
■Use the scroll bar to locate the new feature that you just activated. The example screen
shown in step 2, shows that the Fax Mail and Fax Server features were activated.
Fax Mail Feature Activated
Fax Server Activated
Fax Mail Feature Activated
(Fax-On-Demand)

Activating Fax Ports and Features
Activating and Verifying New Features
6 ◆Issue 1-0
Verifying Activation of New Feature (cont’d)
■If you activated any ports for Fax, scrolling down on the screen shows the number of Fax
ports that your system has. See the example screen below. Check to make sure that the num-
ber of AllowedFax Ports equals the number of Fax ports that your system had (if any) plus
the new Fax ports that you activated.
4. When you are finished checking the Dongle Feature Viewer, click Cancel to close the screen.
5. Go to Installing Fax Component in the Voice Mail on page 7.
Number of Fax Ports
in System

Activating Fax Ports and Features
Installing Fax Component in the Voice Mail
Issue 1-0 ◆7
Installing Fax Component in the Voice Ma il
Installing Fax Component in the Voice Mail
You must now install the Fax Component so that the Voice Mail recognizes the Fax Card.
To install the Fax Component in the Voice Mail:
1. Insert the Windows 2000 Voice Mail Software Installation CD ROM in the CD drive of the
Windows 2000 Voice Mail. The CD-ROM should automatically start, and you see a Setup
screen similar to the following:
2. On the Setup screen:
■Click to select (highlight) Voice Mail Windows NT/2000 Service (as shown in the
screen above).
■Click Install. You see a dialog screen as the Voice Mail prepares the Install program. When
the program is ready, you see:

Activating Fax Ports and Features
Installing Fax Component in the Voice Mail
8 ◆Issue 1-0
Installing Fax Component in the Voice Mail (cont’d)
3. Click Next. You see the license agreement for the Voice Mail:
4. Read the license agreement. When you are finished (and agree to the stated terms, click Yes.
You see:
5. On the SetupType screen:
■Select the Components installation radio button as shown above.
■Click Next. You see the following screen.

Activating Fax Ports and Features
Installing Fax Component in the Voice Mail
Issue 1-0 ◆9
Installing Fax Component in the Voice Mail (cont’d)
6. On the Select Components screen:
■Select the checkbox under Fax Board (as shown above).
■Select the radio button next to Dialogic JCT (as shown above).
■Click Next. You see a status screen as the Voice Mail system is upgraded:

Activating Fax Ports and Features
Setting Up and Starting the Voice Mail Service
Issue 1-0 ◆11
Setting Up and Starting the Voice Mail Service
You should now set your Voice Mail Service to start up automatically.
To set the Voice Mail Service to Automatic Start:
1. From the Windows 2000 Voice Mail desktop:
■If you have a Services shortcut on your desktop:
- Double-click the Services icon.
You see a Services window, similar to the one shown below.
■If you do not have a Services shortcut on your desktop:
-ClickStart ➱ Settings ➱Control Panel.
- Double-click the Administrative Tools icon on the Control Panel window.
- Double-click the Services icon on the Administrative Tools window.
You see a Services window, similar to the one shown below.
.

Activating Fax Ports and Features
Setting Up and Starting the Voice Mail Service
12 ◆Issue 1-0
Setting the Voice Mail Service to Automatic Start (cont’d)
2. On the Services window:
■Use the scroll bar to locate Voice Mail Service.
■Double-click Voice Mail Service.
You will see a Voice Mail Service Properties box.
3. On the General page of the Voice Mail Service Properties box:
■In the Startup type box, click Automatic as shown below.
■Click the Start button to start the Voice Mail Service as shown below.
■Click Apply, then click OK to close the Voice Mail Service Properties box.
4. When you are finished go to Setting Up Fax Ports on page 13.

Activating Fax Ports and Features
Setting Up Fax Ports
Issue 1-0 ◆13
Setting Up Fax Ports
To program Fax Ports:
1. From the desktop of the Voice Mail, locate the shortcut for the Voice Mail Graphical User
Interface (GUI). The shortcut is labeled Voice Mail System.
2. Double-click the shortcut to launch the Voice Mail GUI. You see the Voice Mail Main Menu.
3. From the Voice Mail Main Menu:
Click Customize ➱Fax on Demand ➱Fax Ports. You see a screen similar to the follow-
ing:
4. On this screen:
— Make sure that the checkboxes for In Service and Allow Fax Callouts are selected as
shown above.
—IntheExtension field:
■If you are setting up Fax Mail so that the Fax port is in parallel with the Voice Mail
port, then you need to enter the corresponding Voice Mail extension number for the
Extension field on this screen. (The Voice Mail extension number must match the
Fax port.If you do not enter the correct extension number, the Fax port will not go off
hook.)
■If you have a dedicated extension for Fax, enter this number for the Extension field.
5. Press Next to program the next Fax port.
6. Repeat steps 2 and 3 for each Fax port.
7. When you are finished click Apply and OK. you return to the Main Menu Screen for the Voice
Mail.

Activating Fax Ports and Features
Backing Up the Feature Files
14 ◆Issue 1-0
Backing Up the Feature Files
Backing Up the Feature Files and Voice Mail Database
It is recommended that you back up the changed feature files in your Voice Mail System. You
should also back up your Voice Mail Database, messages, and any fax documents (stored on the
system), if you do not have a recent backup of these items.
Backups must be directed to a valid sub-directory (for example: c:\test). If backing up to a high
density external media that is on the network, such as a super disk or tape, make sure that the corre-
sponding drive is shared with the proper permissions. Again, you must make the backup to a valid
sub-directory on the external media.
To perform a back up:
1. From the Voice Mail Main Menu:
Click Tools ➱ Local Backup to display the Backup window.
2. Click to select the check box for every item in your Voice Mail System. At a minimum, you
must select the Feature Files.
3. In the Save To box:
●If you are backing up to a hard drive on the network or a high density external media, you
must enter the exact Universal Naming Convention (UNC) designation (for example,
\\networkservername\c:\test).
●Click OK on the Backup window.
When the backup is finished, you see a Voice Mail Warning confirmation dialog box
stating that the operation was completed successfully.
4. Click OK on the Voice Mail Warning confirmation dialog box.
You return to the Voice Mail Main Menu.

Activating Fax Ports and Features
Connecting Fax Ports to the Phone System
Issue 1-0 ◆15
Connecting Fax Ports to the Phone System
Use Figures 1 and 2 to help you to connect the ports to a phone system. Figure 1 shows connecting
to a phone system without using parallel circuit adapters. Figure 2 shows using the adapters.
Figure 1: Connecting Fax Ports to a Phone System
Note: A 4-Port Expansion Card (P/N 17754) is installed in
slot 1. The Fax Card is installed in slot 2. Therefore,
the Fax port is available from the card in slot 2.

Activating Fax Ports and Features
Connecting Fax Ports to the Phone System
16 ◆Issue 1-0
Connecting Fax Ports to the Phone System cont’d)
Figure 2: Connecting Fax Ports to a Phone System, Using Parallel Circuit Adapters
This manual suits for next models
1
Table of contents
Other NEC Voicemail manuals

NEC
NEC Xen Digital Voicemail User manual

NEC
NEC ELECTRA ELITE IPK II User manual

NEC
NEC 17600SUG05 User manual

NEC
NEC NVM-2e Series User manual

NEC
NEC DS1000 Owner's manual

NEC
NEC ELECTRA ELITE IPK II User manual

NEC
NEC UM8700 Reference guide

NEC
NEC InfoSet 408 VM User guide

NEC
NEC Univerge SV9100 User manual

NEC
NEC EliteMail VMP User manual

NEC
NEC VANGARD i-Series User manual

NEC
NEC Aspire S IntraMail Parts list manual

NEC
NEC NEAXMAIL AD-8 User manual

NEC
NEC VM8000 InMail User manual

NEC
NEC NVM-DFx User manual

NEC
NEC AspireMail User manual

NEC
NEC ELITEMAIL CTI User manual

NEC
NEC SV8300 Instruction Manual

NEC
NEC IntraMail 4 Parts list manual

NEC
NEC VM8000 InMail User manual