NEC EliteMail VMP User manual


Check New Messages 4
Leave Messages 5
Review Old Messages 6
Change Setup Options 7
MMaaiinnMMeennuu
Hear Current Greeting 4
Switch Greetings 5
Edit Standard Greeting 6
Edit Alternate Greeting 7
GGrreeeettiinnggss
Add Members 4
Delete Members 5
List Members 6
Change Group name 7
EEddiittGGrroouuppss
Greetings 4
Groups 5
Transfer & Delivery 6
Personal Options 7
SSeettuuppOOppttiioonnss
Create a Group 4
Edit Your Groups 5
List Your Groups 6
Delete a Group 7
GGrroouuppss
Change Phone Numbers 4
Call Screening On/Off 5
Call Holding On/Off 6
CChhaannggeeTTrraannssffeerr
Yes 1
No 2
CChhaannggeeOOppttiioonnss
Change Call Transfer 4
Message Delivery 5
TTrraannssffeerr&&DDeelliivveerryyWork Phone On/Off 4
Home Phone On/Off 5
Mobile Phone On/Off 6
Spare Phone On/Off 7
MMeessssaaggeeDDeelliivveerryy
Change Security Code 4
Re-Record Name 5
Re-Spell Name 6
Directory Listing On/Off 7
PPeerrssoonnaallOOppttiioonnss
Change Phone Number 4
Change Schedule 5
Urgent Only On/Off 6
CChhaannggeeDDeelliivveerryy
3= Current Menu
*= Return to Main Menu
#= Step Back to Previous Menu
MMaaiinnMMeennuu
Check New Messages 4
Leave Messages 5
Review Old Messages 6
Change Setup Options 7
KKeeyyppaaddSShhoorrttccuuttss
Switch personal
greetings 745
Change your
security code 774
Change call
transfer options 764
Turn call
transfer off 7642
Turn call
transfer on 7641
Change phone number
for call transfer 76414
Turn call screening
options on/off 76415
Turn call holding
options on/off 76416
Add a
Message group 754
Edit a
Message group 755
List your
Message groups 756
Change your
record name 775
00 Record
01 Pause
02 Re-Record
03 Erase
04 End
05 Urgent Page
06 Address
07 Live Monitor
FFuunnccttiioonnCCooddeess

Table of Contents
Pages 2 & 3
General Information
Pages 4 & 5
Getting Started
Pages 6 & 7
Call Forward Settings
Calling Your Voice Mailbox
Pages 8 & 9
Checking Messages
Leaving Messages
Pages 10 & 11
Reviewing Messages
Pages 12 & 13
Changing Your Setup Options
Pages 14 & 15
Changing Your Setup Options (Continued)
Pages 16 & 17
Quick Transfer To Voice Mail
Transferring A Call Directly To A Voice Mailbox
Live Record
Pages 18
Live Monitoring
Programming Live Record Function Keys
Character Entry Codes And Quick Reference Guide

General Information Getting Started
Introduction
Welcome to EliteMail VMP digital voice mail. this guide describes the system’s features and
details the steps you need to take to make EliteMail VMP a working partner in your day-to-
day business. Throughout this guide, you will find numerous tips and shortcuts designed to
help you get the most from EliteMail VMP.
Typical system operation is presented here. Be sure to consult with your EliteMail VMP
System Manager for any special features or
functions that may apply to your particular application.
Automated Attendant
The Automated Attendant serves as a receptionist, answering and
routing incoming calls automatically. Callers hear an opening greeting for your company that
gives them instructions and options. If a caller does not know the extension number, the
Automatic Directory can route the call by the person’s name. When your extension is busy or
you are not available to answer the call, EliteMail VMP can connect the caller to your voice
mailbox automatically.
Voice Mail Access
The EliteMail VMP system can be accessed 24 hours a day from any
touchtone telephone in or out of your office. Your System Manager has assigned a Personal
ID number to you. You will need this number when calling the EliteMail VMP from any
phone but your own.
The Conversation
The NEC EliteMail VMP system is based upon a conversation about your voice mailbox.
Each time you enter your mailbox, you will be asked a series of questions relating to these
topics:
*Checking messages
*Leaving messages
*Reviewing/redirecting messages
Answer questions with a simple reply by dialing 1for YES or 2for NO. In addition, by
dialing Quick Key numbers, you may advance directly to a specific topic.
Setup Options
Once your mailbox has been opened, you may change various options, such as your Greetings,
Message Groups, Transfer and Message Delivery Options and Personal Options.

Getting Started
When you call the EliteMail VMP system for the first time, you will be asked to
personalize your mailbox. Doing this will open your mailbox and make it ready to use.
Entering Your Mailbox
*Lift handset.
*Dial EliteMail VMP.
*Dial your Personal ID, if necessary (typically 9 + your extension number).
*Follow your prompts to accomplish the following steps.
*Dial 1for YES or 2for NO to confirm each entry.
Record Your Name
*Record your first and last name.
*Dial **to end recording and review your name recording.
*Dial 1to re-record, otherwise dial 2.
Spell Your Name
*If requested, spell the first 3 letters of your llaassttnnaammeeby dialing the corresponding numbers on
your telephone dialpad.
Choose Your Directory Listing Status
*Dial 1for YES or 2for NO to chose whether or not you wish to be listed in the
EliteMail VMP directory. It is recommended that you choose to be listed, as the
directory lets outside callers reach you by your last name if they do not know your
extension number.
Record Your Outside And Internal Greetings
*Dial 1for YES if you want to record different greetings for outside and internal callers, otherwise
dial 2.
*At the prompt, record an appropriate greeting to callers who reach your mailbox. Use the handset to
record your name and a brief, descriptive message.
*Dial **to end recording and review your greeting.
*Dial 1to re-record, otherwise dial 2.
Set Your Security Code
*Dial 1for YES if you wish to enter a Security Code to safeguard your mailbox from
unauthorized access, otherwise dial 2.
*Enter a Security Code of 3 to 10 digits via your telephone dialpad.
*Dial **to complete code entry.
*Re-enter your security code, as prompted, for confirmation.
Opening Your Mailbox
*Dial 1to confirm your personalized settings and open your mailbox for use, otherwise dial 2.
NNOOTTEE::Your personalized settings can be changed at any time through Setup options.

Voice Mail Message Indication
Whenever there are new messages in your mailbox, an indication will be provided at your
telephone:
Multiline Display Telephone: Display = VM and number of new messages
Multiline Telephone: Large LED = Slow flashing red
Single Line Telephone: MW Lamp = Steady red
You may also instruct EliteMail VMP to call you at your home or pager.
Advance Dialing
At any time, you can “ dial ahead” by entering a series of responses, even before hearing the
entire question, to advance directly to the desired section of your voice mailbox quickly.
Disconnecting From Voice Mail
When you have completed your voice mail session, dial ******to immediately disconnect the
EliteMail VMP system or simply hang up. As an alternative, you will be given the option to
return to your mailbox, access Setup Options or exit voice mail and dial an
extension, if desired, after accessing various EliteMail VMP operations.
Quick Transfer Feature
The NEC EliteMail VMP systems simplify message taking by allowing you to transfer a call
directly to a user’s voice mailbox where they will hear the personal greeting and be prompted
to leave a message.
Live Record Feature
The Live Record feature is used to record a conversation in progress and then direct it to
your own or another user’s mailbox.
Live Monitoring
Live Monitoring allows you to hear a message through the speaker of your phone as the
message is being left by an outside caller.
Caller ID Call Return
While listening to a message, you can hear the telephone or extension number of a caller by
dialing 0. You can also view a caller’s name or number on the LCD panel of a Dterm
telephone. When you listen to a message that includes numeric caller ID, you can choose to
return the call.

Call Forward Settings
Call Forward Busy/No Answer (CF B/NA)
The most frequent method of utilizing voice mail is to have calls forwarded to your mailbox
when you are busy on another call or are away from your phone.
To forward your telephone:
Set Cancel
*Lift handset; hear ICM dial tone. *Lift handset, hear ICM dial tone.
*Dial the Call Forward Busy/No *Dial the Call Forward Busy/No
Answer set code 43. Answer cancel code 44.
*Dial EliteMail VMP. *Replace handset.
*Replace handset.
NNOOTTEE::A CF B/NA key may be assigned in system programming to set/cancel this feature.
A lit LED may indicate that CF B/NA is set. When setting Call Forward Busy/No
Answer, a destination station must be entered.
Call Forward All Calls (CFA)
When you plan on being away from your phone for an extended period of time, you can have
all of your calls routed directly to your mailbox. To forward your telephone:.
Set Cancel
*Press Feature (Do not lift handset). *Press Speaker (Do not lift handset).
*Dial the Call Forward All set *Dial the Call Forward All cancel
code 60. code 42.
*Dial EliteMail VMP. *Press Speaker.
*Press Feature.
NNOOTTEE::A CCFFAA//DDNNDDkey may be assigned in system programming to set.cancel this feature. A lit
LED may be indicate that Call Forward All/Do Not Disturb is set. When setting Call
Forward All, a destination station must be entered.

SWITCH Switch from the standard greeting to the alternate greeting, or from
the alternate greeting to the standard greeting.
STD Change your standard greeting.
INT Change your internal greeting.
ALT Change your alternate greeting.
CODE Change your security code.
SPELL Change the spelling of your name for the directory.
DIR Turn directory status on or off.
RCNAME Change your recorded name.
ON/OFF Turn call transfer or call delivery on or off.
CHG# Change your transfer phone number.
SCRN Turn call screening on or off.
HLDING Turn call holding on or off.
CREATE Create a message group.
EDIT Change a message group.
LIST List message group.
DEL Delete a message group.
WORK Change message delivery to your work phone.
HOME Change message delivery to your home phone.
PAGER Change message delivery to your pager.
SPARE Change message delivery to your spare phone.
PH# Change the phone number for message delivery.
SCHD Change your message delivery schedule.
URG Change urgent message delivery.
TToossccrreeeennyyoouurrccaallllss,,yyoouuccaannuussee
SOFTKEY To Do
ACCEPT Accept the incoming call.
REJECT Transfer the call to your voice mail box.
TToorreeccoorrddaaccoonnvveerrssaattiioonn,,yyoouuccaannuussee
SOFTKEY To Do
PAUSE Pause recording. Press again to resume recording.
END Stop recording and save the file.
REREC Stop the recording, delete the file and begin a new recording.
MORE See additional options (if applicable).
ERASE Stop the recording and delete the file.
URGPG Turn pager message delivery on or off.
TToommaannaaggeeaalliivveemmoonniittoorriinnggsseessssiioonn,,yyoouuccaannuussee
SOFTKEY To Do
START Begin live monitoring.
CANCEL Stop live monitoring and continue to record the message
OFF Disable live monitoring.
ON Enable live monitoring.
AUTO Set enabled live monitoring to automatic mode.
MAN Set enabled live monitoring to manual mode.
WWhhiilleelliisstteenniinnggttooaanneewwmmeessssaaggee,,yyoouuccaannuussee
SOFTKEY To Do
CID Toggle between the caller’s name and number.
CALL Return the call.
END End the returned call and go back to your message box.
ARCH Archive the message.
DEL Delete the message.
REW Repeat the previous 4 seconds of the message.
MORE See additional options (if applicable).
PAUSE Pause message playback. press again to resume playback.
FFWD Advance the message 4 seconds and resume playing.
REDIR Stop message playback and prompt to redirect the message to
another subscriber.
REPLY Stop message playback and reply to the sending subscriber.
NEXT Stop message playback and save message as a new message. Play the
next message if one exists, or return to the Main Menu.
BACK Return to the Main Menu.
WWhhiilleerreevviieewwiinnggaannoollddmmeessssaaggee,,yyoouuccaannuussee
SOFTKEY To Do
CID Toggle between the caller’s name and number.
CALL Return the call.
END End the returned call and go back to your message box.
ARCH Archive the message.
DEL Delete the message.
REW Repeat the previous 4 seconds of the message.
MORE See additional options (if applicable).
PAUSE Pause message playback. press again to resume playback.
FFWD Advance the message 4 seconds and resume playing.
REDIR Stop message playback and prompt to redirect the message to
another subscriber.
REPLY Stop message playback and reply to the sending subscriber.
NEXT Stop message playback and save message as a new message. Play the
next message if one exists, or return to the Main Menu.
BACK Return to the Main Menu.
WWhheennaacccceessssiinnggyyoouurrsseettuuppooppttiioonnss,,yyoouuccaannuussee
SOFTKEY To Do
CID Change the Caller ID display to either name or number.
GREET Create or change personal greetings.
PERS Set or change personal options.
TRF Set or change transfer options.
MORE See additional options (if applicable).
GRPS Create or change personal groups.
DELIV Set or change message delivery options.
LM Set live monitor options.
BACK Return to the previous menu level.
CURR Create or change the current greeting.

Message Delivery Options
*Dial 1for YES or 2for NO to set Message Delivery to your work phone, home phone,
mobile/ST or spare phone.
*Enter and confirm the telephone number.
*Enter and Confirm the message Delivery Schedule (time and days).
Work Phone _________ From _______ To _______ On: U M T W H F S
Home Phone _________ From _______ To _______ On: U M T W H F S
Mobile _________ From _______ To _______ On: U M T W H F S
Spare Phone _________ From _______ To _______ On: U M T W H F S
NNOOTTEE11: Message Delivery schedules may overlap.
NNOOTTEE22: It is not necessary to dial a trunk access code (i..e.. 9) when entering an outside telephone number.
NNOOTTEE33: When a ST number is programmed, the Live Record Urgent Page feature will override your
Mobile Message delivery Schedule and turn delivery to your mobile on or off.
““WWoouullddyyoouulliikkeettoocchhaannggeeyyoouurrPPeerrssoonnaallOOppttiioonnss??””
*Dial 1for YES to set your Security Code.
*Dial a new Security Code of 3 to 10 digits.
*Dial *to complete code entry.
*Re-enter your security code, as prompted, for confirmation.
*Dial *to complete code entry.
*Dial 1for YES to change your Name.
*Dial 1for YES or 2for NO to change your Recorded Name, Spelled Name or
Directory Listing Status.
*Enter and confirm new information.
Using Softkeys
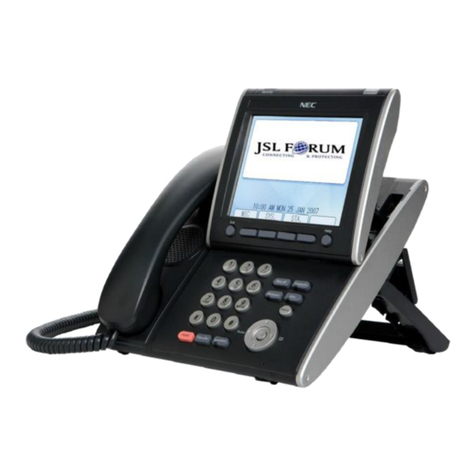
If you have a ST-Multiline Display Telephone set with softkeys, you can use your telephone’s
LCD display and the corresponding softkeys to listen to messages, manage live record ses-
sions, screen your calls and change your setup options. Respond to system questions by dial-
ing 1 for yes or 2 for no.
A
Af
ft
te
er
ry
yo
ou
uh
ha
av
ve
el
lo
og
gg
ge
ed
di
in
nt
to
ot
th
he
ev
vo
oi
ic
ce
em
me
es
ss
sa
ag
gi
in
ng
gs
sy
ys
st
te
em
m,
,y
yo
ou
uc
ca
an
nu
us
se
e
SOFTKEY To Do
NEW Check new messages..
OLD Check old messages.
LVMSG Leave a message for another subscriber.
MORE See additional options (if applicable.)
SETUP Access your setup options.
QUIT Exit softkey mode.
Calling Your Voice Mailbox

Calling Your Voice Mailbox
Use this simple procedure every time you wish to access your Voice Mailbox.
*Lift handset OR press Speaker.
*Dial EliteMail VMP; wait for answer.
NNOOTTEE::The EliteMail VMP extension number may be assigned to a OOnneeTToouucchhkey or
FFeeaattuurreeAAcccceesssskey.
When calling from yyoouurrtelephone:
*Dial your Security Code, if prompted.
When calling from aannootthheerrtelephone:
*Dial **2 # to start the main greeting. If using softkeys, dial # **2 #.
*Dial your Personal ID (typically 9 + your extension number).
*Dial your Security Code, if prompted.
When calling from outside:
*Dial your Personal ID (typically 9 + your extension number).
*Dial your Security Code, if prompted.
*Respond to each question by dialing 1for YES and 2for NO OR use Quick Keys to
step ahead to a specific topic.
Save time by advancing directly to a
specific topic:
DDiiaall
4to check new messages
5to leave messages
6to review messages
7to change your setup options
Q
Qu
ui
ic
ck
kK
Ke
ey
ys
s

Checking Messages
Quick Key 4
Call your mailbox for new messages when yo receive a Voice Mail message indication.
*Dial 1for YES when asked, ““YYoouuhhaavvee______nneewwmmeessssaaggeess..WWoouullddyyoouulliikkeettoohheeaarrtthheemm??””
*Messages marked “Urgent” are played first.
*Messages from outside callers are played in the order received.
*Messages from other EliteMail VMP users are sorted by sender. At the tone you may record a
reply, otherwise dial 2.
*The day and time recorded is announced at the end of each message.

*Dial #0 or use the softkeys while listening to a message to return a call using the
caller ID information.
*Dial #0* to end the call and return to your message box.
NNOOTTEE11: Softkeys must be enabled to receive caller ID information in the display
NNOOTTEE22: If a message received is from another user’s box, caller information is played at the beginning of
the message and can only be used to reply to the caller. the call return function does not take place.
While listening to a message, you can:
*Dial *to skip the message and save it as “new”.
*Dial #to repeat the entire message.
*Dial 1to advance to the end of the message.
*Dial 2to redirect and/or archive (save) the message.
*Dial 5to change playback volume.
*Dial 7to repeat the previous 3 seconds of the message.
*Dial 8to pause message playback. (Dial 8again to resume message playback.)
*Dial 9to advance 3 seconds within the message.
*Dial 0to hear the telephone or extension number of the caller.
NNOOTTEE11: N
NE
EW
Wmessages are those you haven’t yet heard. A N
NE
EW
Wmessage will not be deleted until
you’ve had the opportunity to listen to it.
NNOOTTEE22: Messages are OOLLDDonce you press 00for caller ID information or hear them through to the
recorded day and time. OOLLDDmessages are typically deleted at midnight of the day
received unless they have been archived.
NNOOTTEE33: While listening to a message, the CID softkey toggles the LCD between the caller’s name and
number if both are provided.
Changing Your Setup Options
Quick Key 7

Changing Your Setup Options
Quick Key 7
You may personalize your mailbox to accommodate your current schedule or plans by changing your
Setup Options.
*Dial 1for YES when asked, ““WWoouullddyyoouulliikkeettooaacccceessssSSeettuuppOOppttiioonnss??””
*Follow prompts to change the desired Setup Option.
““WWoouullddyyoouulliikkeettoocchhaannggeeyyoouurrGGrreeeettiinngg??””
*Dial 1for YES to change your Greetings.
*Listen to the playback of your current outside greeting.
*Dial 1for YES to switch between standard and alternate greetings, otherwise dial 2.
*Dial 1for YES to record a new greeting, otherwise dial 2.
*Using the handset, begin recording at the beep.
*Dial *to end recording and review greeting.
*Dial 1to re-record, otherwise dial 2.
*Repeat the internal greeting.
““WWoouullddyyoouulliikkeettoocchhaannggeeyyoouurrGGrroouuppss??””
*Dial 1for YES to change your Groups.
*Dial 1for YES when asked to create a new group, otherwise dial 2 to access group edit, list and
delete options.
*Dial the first 3 letters or digits of the group’s name or number.
*Dial 1to change group name or number, otherwise dial 2.
*Using the handset, record a group name.
*Dial *to end recording.
*Dial 1to change group name, otherwise dial 2.
*Dial 1to create an open group or dial 2for a private group.
*Add members to the group by dialing name or extension number.
*Dial 1to confirm and add member to group.
*Dial *after all members are added.
*Dial 1to record a message for this group now, otherwise dial 2to continue group
maintenance options..

““WWoouullddyyoouulliikkeettoocchhaannggeeyyoouurrTTrraannssffeerraannddDDeelliivveerryyOOppttiioonnss??””
*Dial 1for YES to change your Transfer or Delivery Options.
Call Transfer Setting
*Dial 1to change your Call Transfer setting, otherwise dial 2 to advance to Message
Delivery Options.
*Dial 1to turn Call Transfer on and leave it on, otherwise dial 2to advance to Message
Delivery Options.
*Listen to the phone number your calls are currently being transferred to.
*Dial 1and enter a new phone number (up to 9 digits), otherwise dial 2to leave the
current setting.
NNOOTTEE11: If Call Transfer to your work phone is OFF, calls are sent directly to your voice mailbox.
When Call Transfer to your work phone is ON, calls are first directed to your extension.
Electra Elite Call Forward settings will then apply.
NNOOTTEE22: For Call Screening and Call Holding features to operate, Call Transfer must be turned on and
these features must be assigned
Call Screening
*Dial 1to turn on Call Screening, or dial 2 to turn it off.
NNOOTTEE: When you answer your phone and Call Screening is turn on, you will hear a beep and
announcement “Call from (caller’s name).” Dial 1 to take the call or 2 to transfer the caller to
your mailbox.
Call Holding
*Dial 1to turn on Call Holding, or dial 2 to turn it off.
NNOOTTEE: If Call Holding is turned on and your line is busy, a caller is prompted to hold or leave a
message. The system will tell the caller how many calls are already holding.
Transferring A Call Directly To A Voice Mailbox

Quick Transfer To Voice Mail
When transferring a call to a user who is away from their phone, bust or declines a Voice Announcement, the
Quick Transfer to Voice Mail feature simplifies and speeds message taking. You can easily redirect the call to
the EliteMail VMP user’s mailbox, where they will hear the personal greeting and be prompted to leave a
message.
With an outside call in progress:
*Press Transfer.
*Dial station number or press programmed DSS.
*Determine called party is unavailable.
*Dial 7to transfer call to the called party’s mailbox.
*Replace handset immediately, or hangup.
*VMail Answers
With a recall in progress:
*Press Line key.
*Press Feature and dial 86.
*Replace handset immediately, or hangup.
*VMail Answers.
NNOOTTEE: Your Quick Transfer Access Codes may differ from the above based on system programming.
Transferring A Call Directly To A Voice Mailbox
To simplify message taking, outside callers can be transferred directly into an EliteMail VMP user’s mailbox,
where they will hear the personal greeting and be prompted to leave a message.
With an outside call in progress:
*Press Transfer.
*Dial EliteMail VMP, wait for answer.
*Dial the mailbox number of the user the call is to be transferred to.
*Dial 2.
*Replace handset immediately, or hangup.

Leaving Messages
Quick Key 5
Send messages to other EliteMail VMP users directly from your mailbox.
*Dial 1for YES when asked, ““WWoouullddyyoouulliikkeettoolleeaavveeaannyymmeessssaaggeess??””
*Dial the first 3 letters of the nnaammeeof the person or the group you want to send a
message to OR dial ## and the mailbox number.
*Dial 1to confirm, otherwise dial 2.
*Record your message at the beep.
*Dial *to end recording, otherwise dial #to re-record.
*Dial 1for YES for Special Delivery options, otherwise dial 2.
NNOOTTEE::Dial ####to switch between choosing by mailbox number or by name.
When you leave a message, you can mark it for special delivery.
There are four special delivery options available:
Urgent Heard first before regular messages.
Private Cannot be redirected.
Return Receipt EliteMail VMP tells you when the person has heard
this message.
Future Delivery The message is sent at the time and day you specify.
You can mark a message for more than one special delivery option. You can
also change or add to the special delivery settings of a message you’ve
already sent.
S
Sp
pe
ec
ci
ia
al
lD
De
el
li
iv
ve
er
ry
yO
Op
pt
ti
io
on
ns
s
Reviewing Messages
Quick Key 6

Reviewing Messages
Quick Key 6
Messages you’ve already listened to (old messages) can be reviewed for a short while (typically until
midnight), be redirected to another mailbox or archived for a longer time.
Review
*Dial 1for YES when prompted, ““YYoouuhhaavvee__________mmeessssaaggeessttoorreevviieeww..WWoouullddyyoouu
lliikkeettoocchheecckktthheemm??””
*Listen to old messages followed by day and time recorded.
Redirect (Copy To Another Mailbox)
*Dial 2while listening to a new or old message.
*Dial 1for YES to Redirect the message being reviewed.
*Dial the mailbox or group to receive the redirected message. (For more details, see
Leaving Messages.)
*Dial 1to confirm your entry.
*Dial 1for YES if you want to record an introduction, otherwise dial 2.
*Record your introduction when prompted.
*Dial **to end recording.
*Dial 1for YES to set Special Delivery options, otherwise dial 2.
*Dial 1for YES to redirect the message onto an additional mailbox, otherwise dial 2.
NNOOTTEE::You can redirect the same message as many times as you wish.
Archive (Save)
*Dial 1for YES to Archive the new or old message being reviewed.
NNOOTTEE::Once you listen to an old or archived message, you must archive it again to keep it from
being deleted immediately.

Live Record
Live Record allows you to record a conversation with an outside caller and direct it to your own or another
user’s mailbox.
With an outside call in progress:
*Press Record to begin recording the conversation
*A tone burst may be provided and the Record key will light red to indicate that
recording is in progress. Display telephones will indicate recording functions.
*Dial the mailbox number to which the recording should be addressed.
*Replace handset to terminate the call. The recording will be sent to the
appropriate mailbox.
NNOOTTEE11::The mailbox number may be dialed at any time during the conversation before the
recording party releases the call. If a mailbox number is not entered, the recording
will be sent to your mailbox.
NNOOTTEE22::If Automatic Recording is assigned, the recording begins immediately upon answering
an outside call.
NNOOTTEE33::If a mailbox number has not been entered, and if Automatic Callback is assigned,
EliteMail VMP will call you back to ask you if you want to delete the call,
address it, add an introduction or send it.
NNOOTTEE44::To send a Live Recording to multiple mailboxes, first send the recording to your own
mailbox and then redirect it accordingly.
Live Record Options
The following Live Record function keys may be programmed:
PPRREESSSS
Pause To stop recording. Press Pause again to resume recording.
Re-Record To erase the Live Recording and automatically begin re-recording.
enter a new mailbox number.
Erase To erase the Live Recording without interrupting ST conversation.
Press Record and dial a mailbox number to begin recording again.
End To terminate the recording and continue the conversation.
Address To delete, address or record an introduction prior to ending a Live
Recording session.
Erase Toggles Message Delivery on/off. After entering a mailbox number,
a *in the display will indicate that the Page Message Delivery option
is currently on.
NNOOTTEE::Once you listen to an old or archived message, you must archive it again to keep it from
being deleted immediately.

Live Monitoring
Live monitoring allows you to hear a message through the speaker of your phone as the message is being left
by an outside caller. Only one call is monitored at a time, and live monitoring is available only when your
phone is idle. New outside calls received during a live monitoring session are sent to your voice mailbox.
Enable Live Monitor
*Press Live Monitor Feature Access key.
*Dial station number password. (Same as station lockout (password) code).
*Once Live Monitor is set the corresponding LED lights red.
*Dial 7to transfer call to the called party’s mailbox.
*Replace handset immediately.
NNOOTTEE: By default, password is set at 0000000000 (10 zeros).
Live Monitor A Conversation
*A live monitoring session starts as an outside caller begins leaving a message for you. To be connected
to the caller anytime during the live monitoring session, pick up the handset or press Speaker.
*When you connect to the caller during a live monitoring session, the portion of the message that was
recorded before you connected is saved as a voice message in your mailbox.
Programming Live Record Function Keys
Feature Access Keys
*Press Feature.
*Press Redial.
*Press Feature Access key to be programmed.
*Dial 2.
*Dial Function Code (see next page).
*Press Feature.
One Touch Keys
*Press Feature.
*Press Redial.
*Press One Touch key to be programmed.
*Dial 2.
*Dial Function Code (see next page).
*Press Feature.
NNOOTTEE: Refer to the Electra Elite Multiline Telephone User Guide for additional information on
programming Feature Access keys and O
On
ne
eT
To
ou
uc
ch
hkeys.

Name ____________________________________________________________
Extension Number _________________________________________________
Personal ID _______________________________________________________
To reach EliteMail VMP
From Inside, dial _________________________________________________
From Outside, dial ________________________________________________
System Manager ____________________________________________________
Extension Number __________________________________________________
To simplify recording, write down your Greeting here:
Sample: “Hi, this is ____________. I’m away from my phone now, but I check
my mailbox regularly. Leave me a message, and i’ll return your call as soon
as possible. Thanks.”
__________________________________________________________________
__________________________________________________________________
__________________________________________________________________
__________________________________________________________________
__________________________________________________________________
__________________________________________________________________
__________________________________________________________________
Remember, Dial 1
1for Y
YE
ES
S, 2
2for N
NO
O
E
El
li
it
te
eM
Ma
ai
il
lV
VM
MP
PI
In
nf
fo
o
Table of contents
Other NEC Voicemail manuals

NEC
NEC ELECTRA ELITE IPK II User manual

NEC
NEC ELITEMAIL FMS-VMS User manual

NEC
NEC Aspire S IntraMail Parts list manual

NEC
NEC SL1100 User manual

NEC
NEC Univerge SV8100 User manual

NEC
NEC 17600SUG05 User manual

NEC
NEC VM8000 InMail User manual

NEC
NEC NVM-2000WS Instruction Manual

NEC
NEC AspireMail User manual

NEC
NEC ELECTRA ELITE IPK II User manual

NEC
NEC VM8000 InMail User manual

NEC
NEC Univerge UM8000 User manual

NEC
NEC IntraMail 4 Parts list manual

NEC
NEC InfoSet 408 VM User guide

NEC
NEC NEAXMAIL IM-16 Instruction Manual

NEC
NEC Univerge UM8000 User manual

NEC
NEC Univerge SV9100 User manual

NEC
NEC NVM-DFx User manual

NEC
NEC Univerge SV8100 User manual

NEC
NEC ELITEMAIL CTI User manual