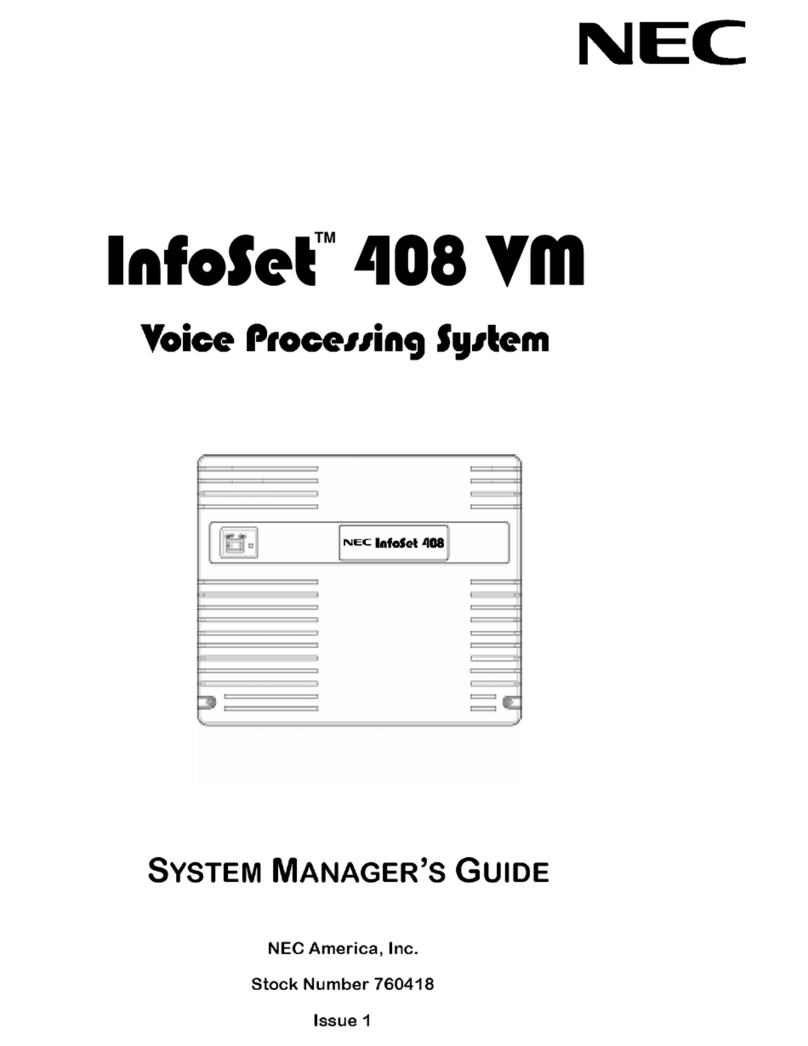
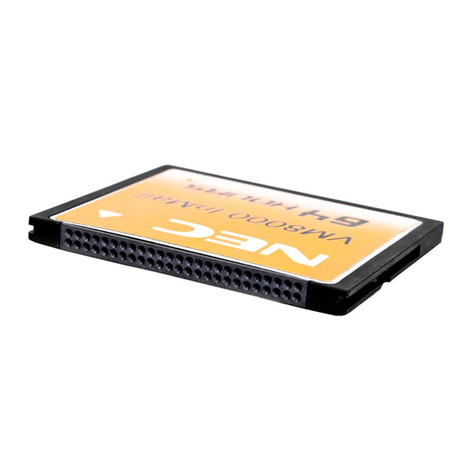
NEC NVM-DFx User manual

Empowered by Innovation
User’s Guide
P/N 1770082
July 2006
Printed in U.S.A.

This manual has been developed by NEC Unified Solutions, Inc. It is intended for the use of its customers and service
personnel, and should be read in its entirety before attempting to install or program the system. Any comments or suggestions
for improving this manual would be appreciated. Forward your remarks to:
NEC Unified Solutions, Inc.
4 Forest Parkway
Shelton, CT 06484
www.necunifiedsolutions.com
Nothing contained in this manual shall be deemed to be, and this manual does not constitute, a warranty of, or representation
with respect to, any of the equipment covered. This manual is subject to change without notice and NEC Unified Solutions,
Inc. has no obligation to provide any updates or corrections to this manual. Further, NEC Unified Solutions, Inc. also reserves
the right, without prior notice, to make changes in equipment design or components as it deems appropriate. No
representation is made that this manual is complete or accurate in all respects and NEC Unified Solutions, Inc. shall not be
liable for any errors or omissions. In no event shall NEC Unified Solutions, Inc. be liable for any incidental or consequential
damages in connection with the use of this manual. This document contains proprietary information that is protected by
copyright. All rights are reserved. No part of this document may be photocopied or reproduced without prior written consent
of NEC Unified Solutions, Inc.
©2006 by NEC Unified Solutions, Inc. All Rights Reserved.
Printed in U.S.A.

i
Table of Contents
Introducing the Voice Mail System
About Your Voice Mail System . . . . . . . . . . . . . . . . . . . . . . . . . . . . . . . . . . . . . . . . . . . .1
About the Automated Attendant . . . . . . . . . . . . . . . . . . . . . . . . . . . . . . . . . . . . . . . . . . .1
About Messaging . . . . . . . . . . . . . . . . . . . . . . . . . . . . . . . . . . . . . . . . . . . . . . . . . . . . . .1
About Voice Mail Networking . . . . . . . . . . . . . . . . . . . . . . . . . . . . . . . . . . . . . . . . . . . . .2
About FAX Mail . . . . . . . . . . . . . . . . . . . . . . . . . . . . . . . . . . . . . . . . . . . . . . . . . . . . . . . .3
About the Voice Prompts. . . . . . . . . . . . . . . . . . . . . . . . . . . . . . . . . . . . . . . . . . . . . . . . .4
Numbers to Remember. . . . . . . . . . . . . . . . . . . . . . . . . . . . . . . . . . . . . . . . . . . . . . . . . .4
Calling the Voice Mail System
Calling the Automated Attendant . . . . . . . . . . . . . . . . . . . . . . . . . . . . . . . . . . . . . . . . . .5
Calling Your Subscriber Mailbox . . . . . . . . . . . . . . . . . . . . . . . . . . . . . . . . . . . . . . . . . . .6
The Main Menu . . . . . . . . . . . . . . . . . . . . . . . . . . . . . . . . . . . . . . . . . . . . . . . . . . . . . . . .7
Calling an Announcement Mailbox . . . . . . . . . . . . . . . . . . . . . . . . . . . . . . . . . . . . . . . . .8
Calling a Guest Mailbox . . . . . . . . . . . . . . . . . . . . . . . . . . . . . . . . . . . . . . . . . . . . . . . . .8
Calling a Message Center Mailbox . . . . . . . . . . . . . . . . . . . . . . . . . . . . . . . . . . . . . . . . .9
Calling a Future Delivery Mailbox . . . . . . . . . . . . . . . . . . . . . . . . . . . . . . . . . . . . . . . . . .9
Calling a Network Mailbox . . . . . . . . . . . . . . . . . . . . . . . . . . . . . . . . . . . . . . . . . . . . . . .10
About Your Incoming Call Options
About Call Queuing. . . . . . . . . . . . . . . . . . . . . . . . . . . . . . . . . . . . . . . . . . . . . . . . . . . . .11
About Call Announcing . . . . . . . . . . . . . . . . . . . . . . . . . . . . . . . . . . . . . . . . . . . . . . . . . .11
About Call Waiting. . . . . . . . . . . . . . . . . . . . . . . . . . . . . . . . . . . . . . . . . . . . . . . . . . . . . .11
About Paging and the Paging Message . . . . . . . . . . . . . . . . . . . . . . . . . . . . . . . . . . . . .12
Exiting the Voice Mail System
Exiting the Automated Attendant . . . . . . . . . . . . . . . . . . . . . . . . . . . . . . . . . . . . . . . . . .13
Exiting a Mailbox. . . . . . . . . . . . . . . . . . . . . . . . . . . . . . . . . . . . . . . . . . . . . . . . . . . . . . .13
Getting Help and the Time and Date
Getting Recorded Help . . . . . . . . . . . . . . . . . . . . . . . . . . . . . . . . . . . . . . . . . . . . . . . . . .14
Getting the Time and Date . . . . . . . . . . . . . . . . . . . . . . . . . . . . . . . . . . . . . . . . . . . . . . .14

ii
Listening to Messages
How You Know You Have Messages . . . . . . . . . . . . . . . . . . . . . . . . . . . . . . . . . . . . . . 14
Listening to Your Messages . . . . . . . . . . . . . . . . . . . . . . . . . . . . . . . . . . . . . . . . . . . . . 15
Using the Listening Options . . . . . . . . . . . . . . . . . . . . . . . . . . . . . . . . . . . . . . . . . . . . . 16
Recording and Checking Messages
Recording and Sending a Message . . . . . . . . . . . . . . . . . . . . . . . . . . . . . . . . . . . . . . . 19
Recording and Sending a Future Delivery Message. . . . . . . . . . . . . . . . . . . . . . . . . . . 20
Using the Recording Options . . . . . . . . . . . . . . . . . . . . . . . . . . . . . . . . . . . . . . . . . . . . 21
Checking/Deleting a Message. . . . . . . . . . . . . . . . . . . . . . . . . . . . . . . . . . . . . . . . . . . . 22
Requesting a Return Receipt . . . . . . . . . . . . . . . . . . . . . . . . . . . . . . . . . . . . . . . . . . . . 22
Recording Urgent Messages. . . . . . . . . . . . . . . . . . . . . . . . . . . . . . . . . . . . . . . . . . . . . 23
Recording Confidential Messages. . . . . . . . . . . . . . . . . . . . . . . . . . . . . . . . . . . . . . . . . 23
Recording a Mailbox Greeting and Name
Recording a Mailbox Greeting. . . . . . . . . . . . . . . . . . . . . . . . . . . . . . . . . . . . . . . . . . . . 24
Recording a Mailbox Name . . . . . . . . . . . . . . . . . . . . . . . . . . . . . . . . . . . . . . . . . . . . . . 24
Using Mailbox Options
Using Message Notification . . . . . . . . . . . . . . . . . . . . . . . . . . . . . . . . . . . . . . . . . . . . . . 25
Changing Auto Help . . . . . . . . . . . . . . . . . . . . . . . . . . . . . . . . . . . . . . . . . . . . . . . . . . . 27
Changing the Auto Forward Option. . . . . . . . . . . . . . . . . . . . . . . . . . . . . . . . . . . . . . . . 27
Changing the Auto Time-Stamp Option. . . . . . . . . . . . . . . . . . . . . . . . . . . . . . . . . . . . . 28
Changing Your Security Code . . . . . . . . . . . . . . . . . . . . . . . . . . . . . . . . . . . . . . . . . . . . 28
Changing the Call Waiting Option . . . . . . . . . . . . . . . . . . . . . . . . . . . . . . . . . . . . . . . . . 28
Changing the Call Announcing Option . . . . . . . . . . . . . . . . . . . . . . . . . . . . . . . . . . . . . 29
Sending Calls to a Mailbox
Transferring a Call to a Mailbox. . . . . . . . . . . . . . . . . . . . . . . . . . . . . . . . . . . . . . . . . . . 30
Forwarding Your Calls to Your Mailbox . . . . . . . . . . . . . . . . . . . . . . . . . . . . . . . . . . . . . 30
Accessing the Voice Mail User Interface
To Access the Web-Based User Interface. . . . . . . . . . . . . . . . . . . . . . . . . . . . . . . . . . . 31
To Set Your Mailbox Options . . . . . . . . . . . . . . . . . . . . . . . . . . . . . . . . . . . . . . . . . . . . . 32

NVM-DFx User’s Guide 1
Introducing the Voice Mail System
About Your Voice Mail System
The Voice Mail system connects to your telephone system and provides an Automated Attendant plus
messaging.
About the Automated Attendant
The Automated Attendant answers your company’s incoming calls, then plays a recorded “greeting” usually in
the form of a Welcome Message and Instruction Menu. For example, an outside caller may hear:
Thank you for calling ABC company. If you are calling from a Touch Tone phone, please dial the
extension number you wish to reach or dial 0 for assistance. If you are calling from a rotary dial
phone, please stay on the line for assistance.
The caller dials a code from a Touch Tone phone to route the call. If the caller is using a rotary dial phone, he
simply waits on the line. The Voice Mail system can connect him to a live company operator or give him an
opportunity to leave a message; it depends on how the system has been programmed.
About Messaging
The Voice Mail system lets outside callers leave recorded messages for you when they can’t get through to
your extension. Very handy when you are out of the office. And it lets you leave recorded messages for your
co-workers. The messages get stored in each person’s voice mailbox. To listen to your messages or use
other Voice Mail features, you call your Subscriber Mailbox.

2NVM-DFx User’s Guide
About Voice Mail Networking
If your Voice Mail system is equipped with the Voice Mail Networking option, you will be able to exchange
messages with any other Voice Mail system that allows AMIS Networking. This means that you can call your
mailbox and record a message for someone who is using another Voice Mail system. Your Voice Mail system
collects all the recorded “network messages” and sends them to the other Voice Mail system at the pre-
programmed time. In addition, you can receive messages from other Voice Mail systems. This makes it easy
to transfer messages between you and your company’s branch offices, corporate offices, vendors,
customers, etc.
Your Voice Mail system lets you record a message for two types of Network Mailboxes:
■Remote Network Mailbox
This mailbox is associated with a particular Voice Mail system - perhaps the Voice Mail system
installed at your corporate offices. To have your Voice Mail system send your message to someone
at the corporate office, you would enter the Remote Network Mailbox number, then the person’s
mailbox number (called the “destination mailbox”).
■Alias Network Mailbox
This mailbox is for a particular person at one of the other Voice Mail systems - perhaps a customer or
client you call several times a day. To have your Voice Mail system send your message to this
person, you enter their Alias Mailbox number. That’s it. Just as easy as sending a message to
someone in your own company. If necessary, the remote Alias Mailbox user can call their Alias
Mailbox and listen to the messages before they are sent (see
Calling an Alias Network Mailbox
).
While you are listening to a message from another Voice Mail system, you can:
■Record a reply. Your Voice Mail system will deliver your reply to the message sender at the
programmed time.
■Make an immediate call to the message sender. No need to exit your mailbox and make the call.
■Forward the message to another mailbox.
To find detailed instructions for recording and listening to network messages, simply look for the recording
and listening topics in the Table of Contents. All the instructions in this guide apply to network messages as
well as non-network messages with a few exceptions, which are noted.
The Voice Mail Networking option may not be available in your Voice Mail system.

NVM-DFx User’s Guide 3
About FAX Mail
The FAX Mail option lets a caller send a FAX to your mailbox. The Voice Mail system stores the FAXed
document as if it were a message, hence the name FAX Message. What’s nice about FAX Mail is that FAX
Messages, unlike regular FAXed documents, stay private until you are ready to print them.
To send a FAX Message to your mailbox, callers must call you from a FAX telephone (i.e., a phone connected
to a FAX machine). When the Automated Attendant answers, or when the caller hears your Mailbox
Greeting, he presses the codes that allow them to leave a FAX Message, then presses the START key on his
FAX machine when he hears the FAX tone. Depending on how the Voice Mail system is set up, the caller
may be able to record an explanatory comment just before sending the FAX.
To see if you have a FAX Message, simply call your mailbox and press L to listen. If there is a FAX Message,
the Voice Mail system plays the recorded comment (if there is one), then says
This X-page FAX Message arrived on (date/time) from (caller’s number, if known). The message has
been saved.
You have the following options:
■Leave it in your mailbox until you are ready to print it out
■Erase it
■Use the MF command to forward it to another person’s mailbox (Subscriber, Guest, Message Center)
■Print it out. To do this, use the MF command to forward the Message to a FAX Delivery Mailbox,
which in turn sends the document to a FAX Machine. A FAX Delivery Mailbox can send the FAX to a
pre-designated FAX Machine or to any FAX number you enter. It depends on how the FAX Delivery
Mailbox is set up.
■Use the MC command to make a call to the person who sent the FAX as long as the FAX was sent
from an inside extension.
■Use the RE command to record a reply to the person who sent the FAX Message as long as it was
sent from an inside extension.
Notes: The Fax Mail option is not available on some Voice Mail systems.
Your System Administrator can give you the FAX Delivery Mailbox numbers and let you know how
FAX Mail is set up; through the Automated Attendant, through your mailbox, or both. If it is set up
through your mailbox, your Mailbox Greeting will have to tell the caller how to leave a FAX Message.
The Voice Mail system saves FAX Messages even if your mailbox is set up for auto erase.
You can receive Message Notification calls for FAX Messages.
Your Auto Forward partner will receive a copy of the FAX Message.
4NVM-DFx User’s Guide
About the Voice Prompts
The voice prompts are step-by-step recorded instructions that tell you what codes to press on a Touch Tone
phone to access the Voice Mail system features. In this guide, voice prompts will look like this:
To listen to
your messages, press L. To record and send a message, press R S.
You’ll notice that the codes are
easy to remember because they match some letter(s) in the feature name. And you do not have to listen to
the entire voice prompt before dialing a code.
If you forget what code to press or you press a code and hear,
That is an invalid entry
, you should wait a few
seconds without pressing anything. The Voice Mail system will repeat your choices or play the voice prompt:
For a help message, press zero
. Pressing zero gives you a recorded help message.
When you become familiar with the Voice Mail system, you can turn off some of the voice prompts, if you
want, and dial zero for recorded help if you need it. For more information, see
Changing Auto Help
.
Numbers to Remember
Your System Administrator can give you these numbers.
The Voice Mail system’s outside telephone number
The Voice Mail system’s extension number
Your mailbox number and security code
Mailbox Log-On Code (by default, it is #)
Remote Network Mailboxes
Remote Destination Mailboxes
Alias Network Mailboxes
FAX Delivery Mailboxes

NVM-DFx User’s Guide 5
Calling the Voice Mail System
Calling the Automated Attendant
To call the Automated Attendant from outside the company
1. Call the Voice Mail system’s outside telephone number. The Automated Attendant answers.
2. Follow the dialing instructions.
To return to the Automated Attendant after you call an extension through the Automated Attendant
and can’t get through (for example, when the extension is busy)
If you hear:
To leave a message, press 1. For other options, press 2
:
➱Press 2 to return to the Automated Attendant immediately.
OR
➱Press 1, follow the recorded instructions. If you leave a message, you can press # when you
are done to return to a set of dialing instructions. The set you return to depends on how the
extension’s Next Call Routing Mailbox is programmed.
If you hear:
To leave a message, press 1. To wait for the extension to become available
or,
To
have the person paged, press 2
.
For other options, press 3
:
➱Press 3 to return to the Automated Attendant immediately.
OR
➱Press 1 or 2 and follow the recorded instructions. If you leave a message, you can press #
when you are done to return to a set of dialing instructions. The set you return to depends on
how the extension’s Next Call Routing Mailbox is programmed.
If you hear one of the following:
■The greeting and a beep
■The message -
Start recording at the tone. When you are done, press the pound key or hang
up
followed by a beep
■The message -
At the tone, you can leave a message
followed by a beep
➱Press # to return to the Automated Attendant immediately.
OR
➱Leave a message after the tone, then press # to return to the Automated Attendant.
If you you hear a greeting and no beep:
➱Follow the instructions in the greeting. If you decide to record a message, you can press #
when you are done to return to a set of dialing instructions. The set you return to depends on
how the extension’s Next Call Routing Mailbox is programmed.
To return to the Automated Attendant after exiting a mailbox
See
Exiting a Mailbox
.
To return to the Automated Attendant after you leave a “quick message”
See page 19.

6NVM-DFx User’s Guide
Calling Your Subscriber Mailbox
Calling your Subscriber Mailbox gives you access to the Voice Mail system’s Main Menu of features and your
messages. When you call, the Voice Mail system:
■Plays an Announcement Message and/or tutorial, but only the first time you call and only if these
options are enabled in system programming. The Announcement Message typically welcomes you
as a new user of the Voice Mail system. The tutorial lets you know how to record a Mailbox Name, a
Mailbox Greeting, and how to assign a Mailbox Security Code. If you choose not to use the tutorial,
you can later access these features by using the Mailbox Options Menu. You access this menu by
dialing OP after you call your mailbox. These features are described in detail in this User’s Guide.
■Plays the Broadcast Message (if recorded)
■Tells you how many messages you have
■Plays a “mini” Main Menu of features, then
Ready.
(Or just plays
Ready
if the mini menu is off.)
If your mailbox is almost full or full, the Voice Mail tells you to erase some messages.
When the Voice Mail plays a recorded message, press the code for the feature you want. You do not have to
wait for
Ready
. For the full Voice Main Menu, see page 7.
To call your mailbox
If your Message Lamp is flashing, you have messages in your mailbox.
1. From an extension:
➱Get the intercom dial tone and dial the Voice Mail extension. If your extension has a Message
Key, pressing it may access your mailbox (depending on the phone system).
2. From outside:
➱Dial the Voice Mail telephone number.
3. If you hear the company greeting, dial # (or other log-on code).
4. If a mailbox number is requested, dial your mailbox number.
5. If a security code is requested, dial the code or press * to return to the prompt
Please enter your
mailbox number.

NVM-DFx User’s Guide 7
The Main Menu
You can access the Voice Mail system’s Main Menu by calling your mailbox.
■Listen to Messages
■Record and Send a Message
■Check on a Message You Sent
■Record Mailbox Greeting
■Record Mailbox Name
■Record and Send a Future Delivery Message
■Record a Paging Message
■Mailbox Options
Security Code
Message Notification
Auto Help
Auto Forward
Auto Time-Stamp
Call Waiting
Call Announcing
■Hear Time and Date
■System Administrator Options
■Select List of New Messages
■Select List of Saved Messages
■Select List of Held Messages
■Select List of All Messages
■Exit Mailbox

8NVM-DFx User’s Guide
Calling an Announcement Mailbox
An Announcement Mailbox is an “information only” type of mailbox. Typical Announcement messages
include monthly sales figures, a weekly business schedule, daily interest rates, insurance claim information,
movie schedule, etc. You can call an Announcement Mailbox from outside the company and listen to the
Announcement message.
To call an Announcement Mailbox from outside the company
1. Dial the Voice Mail system’s telephone number.
2. Wait for the company greeting.
3. Press # (or other log-on code) during the greeting, then dial the Announcement Mailbox number.
OR
Listen to the dialing instructions and dial the code for the Announcement.
4. Dial the Announcement Mailbox security code (if required).
See your System Administrator for the security code. The announcement may play more than once. After it
plays, the Voice Mail system is programmed to hang up or send you back to the Automated Attendant.
Calling a Guest Mailbox
A Guest Mailbox is a mailbox that your System Administrator can reserve for an outside party, perhaps a
vendor you frequently do business with. You can record messages for the Guest Mailbox and the Guest can
retrieve them through the Auto Attendant or from an inside extension.
Your System Administrator can program a Guest Mailbox in one of two ways: with access to all features in
this guide or with access to all features except; record and send a message and forward a message. When a
Guest calls his Guest Mailbox, he will hear exactly what you hear when you call your Subscriber Mailbox.
To call a Guest Mailbox
If the Message Lamp at the Guest extension is flashing, there are messages in the Guest Mailbox.
1. From an extension:
➱Get an intercom dial tone and dial the Voice Mail system’s extension. (If the Guest extension
has a Message Key, pressing it may access the Guest Mailbox mailbox, depending on the
phone system).
2. From outside:
➱Dial the Voice Mail system’s telephone number.
3. If you hear the company greeting, dial # (or other log-on code).
4. If a mailbox number is requested, dial the Guest Mailbox number.
5. If a security code is requested, dial the Guest Mailbox security code or dial * to return to the prompt
Please enter your mailbox number
.

NVM-DFx User’s Guide 9
Calling a Message Center Mailbox
Your System Administrator usually sets up a Message Center Mailbox for callers who dial the Automated
Attendant from a rotary dial phone. A Message Center Mailbox is a “catch-all” type of mailbox that lets rotary
dial callers leave a message without dialing any codes. At some point in the day, someone in your company
must call the Message Center Mailbox, listen to the messages, then forward them to the appropriate
mailboxes (see
Listening to Messages
and
Using the Listening Options
).
There are four features in this guide not applicable to a Message Center Mailbox; record and send a
message (by pressing R S), record a reply (by pressing R E), record a Mailbox Greeting (by pressing G),
record and send a Future Delivery Message (by pressing F D).
The Voice Mail system plays the same set of prompts that it plays for a Subscriber Mailbox.
To call a Message Center Mailbox
If the Message Lamp at the Message Center extension is flashing, this means there are messages in the
Message Center Mailbox.
1. From an extension:
➱Get an intercom dial tone and dial the Voice Mail system’s extension.
If the Message Center extension has a Message Key, pressing it may access the mailbox (this
depends on the phone system).
2. From outside:
➱Dial the Voice Mail system’s telephone number.
3. f you hear the company greeting, dial # (or other log-on code).
4. If a mailbox is requested, dial Message Center Mailbox number.
5. If a security code is requested, dial the Message Center Mailbox security code or dial * to return to
the prompt
Please enter your mailbox number.
Calling a Future Delivery Mailbox
A Future Delivery Mailbox stores Future Delivery Messages (for information on Future Delivery Messages,
see page 20). The Voice Mail system sends a Future Delivery Message to other mailboxes on the
programmed date and time for delivery.
If necessary, you can call the Future Delivery Mailbox to listen to and erase a Future Delivery Message before
the Voice Mail system sends it. You can also access all the other listening options except: record a reply (by
pressing R E), have the message forwarded (by pressing M F), and make a call to the message sender (by
pressing M C). Besides listening to the Future Delivery Message, the only other feature you can access after
calling a Future Delivery mailbox is Getting the Time and Date.
To call a Future Delivery Mailbox
1. From an extension:
➱Get an intercom dial tone and dial the Voice Mail system’s extension.
2. From outside:
➱Dial the Voice Mail system’s telephone number.
3. If you hear the company greeting, dial # (or other log-on code).
4. If a mailbox is requested, dial the Future Delivery Mailbox number.
5. If a security code is requested, dial the Future Delivery Mailbox security code or dial * to return to the
prompt
Please enter your mailbox number
.

10 NVM-DFx User’s Guide
Calling a Network Mailbox
You can call an Alias or Remote Network Mailbox and listen to the stored messages before your Voice Mail
system sends them to other Voice Mail systems. Your Voice Mail system lets the caller use the listening
options and all the other features explained in this User’s Guide except:
■Record and Send a Message (RS)
■Record a Paging Message (PG)
■Message Notification (OP N)
■Call Waiting (OP CW)
■Call Announcing (OP CA)
■Call Queuing
Someone logging on to a Network Mailbox will probably be the remote Alias Mailbox user. Perhaps that
person is visiting your company for the day and wants to check his messages without calling his mailbox at
his company. The Voice Mail system plays the same prompts that it plays for a Subscriber Mailbox.
For more information on Voice Mail Networking, see page 2.
To call an Alias Network Mailbox
1. From an extension:
➱Get an intercom dial tone and dial the Voice Mail system’s extension.
2. From outside the company:
➱Dial the Voice Mail system’s telephone number.
3. If the company greeting plays, dial # (or other log-on code).
4. If a mailbox number is requested, dial the Network Mailbox number.
5. If a security code is requested, dial that code or dial * to return to the prompt
Please enter your
mailbox number
.

NVM-DFx User’s Guide 11
About Your Incoming Call Options
About Call Queuing
With Call Queuing, the Voice Mail system lets your Automated Attendant callers queue (“wait in line”) for your
extension when you are busy on a call.
It works like this:
When your line is busy, a caller hears this message:
Extension XXX is busy. To leave a message, press 1.
To wait for the extension to become available, press 2. For other options, press 3
.If the caller presses
2, the Voice Mail system queues the caller. When you hang up your call, the Voice Mail system puts the first
waiting call through. Callers choosing to abandon the wait have these options: they can leave you a
message, return to the Automated Attendant, or hang up.
If you would like your Automated Attendant callers to have this queuing option, see your System
Administrator.
Notes: The Voice Mail system will not queue callers if the required number of idle Voice Mail ports is not
available. The Voice Mail system activates Call Waiting instead, if Call Waiting is on.
The Voice Mail system will not activate Call Queuing if Auto Attendant Do Not Disturb or the Paging
Message is on.
Call Queuing may not be available on your Voice Mail system.
About Call Announcing
With Call Announcing, the Automated Attendant lets you know who is calling. For more information, see
Changing the Call Announcing Option
. Your mailbox must be programmed for Call Announcing in system
programming. Call Announcing may not be available on your Voice Mail system.
About Call Waiting
With Call Waiting, the Voice Mail system lets Automated Attendant callers send a signal (beeps) to your
extension while you are busy on a call. For more information, see
Changing the Call Waiting Option
. Your
mailbox must be programmed for Call Waiting in system programming. Call Waiting may not be available on
your Voice Mail system.

12 NVM-DFx User’s Guide
About Paging and the Paging Message
If you record a Paging Message, the Voice Mail system will page you when an Automated Attendant caller
tries to reach you. The Voice Mail system places the caller on Hold, then plays your Paging Message over a
page zone in your phone system. You can pick up the call from any extension by dialing the Meet-Me Paging
code for your telephone system (in some phone systems, this code may be referred to as a Pickup Code or
something similar). A Paging Message is very useful if you are frequently away from your desk.
The Voice Mail system handles Automated Attendant callers one way if your Paging Message is on and
another way if it is off:
■If your Paging Message is on, Automated Attendant calls will not ring your extension. The Voice Mail
system immediately pages you.
■If your Paging Message is off, an Automated Attendant call rings your extension as usual. If you do
not answer after a certain number of rings, the Voice Mail system gives the caller the paging option.
If you do not want the Voice Mail system to page you, be sure to erase your Paging Message.
The Voice Mail system is initially set up to page the All Call Page Zone. To have the Voice Mail system page
a different zone, see your System Administrator.
Notes: If Auto Attendant Do Not Disturb is on, the Voice Mail system will not page you.
The Paging feature may not be available on your Voice Mail system.
If you do not want to be paged, erase your Paging message.
To record a Paging Message
1. Call your mailbox
2. Press P G (7 4).
3. Follow the voice prompts.
To hear the Recording Options while recording, press zero.

NVM-DFx User’s Guide 13
Exiting the Voice Mail System
Exiting the Automated Attendant
To exit the Automated Attendant
Hang up.
Exiting a Mailbox
After you call a mailbox to listen to its messages or use other Voice Mail system features, you exit the mailbox
as described below. The instructions apply to Subscriber, Guest, Message Center, Future Delivery, and
Network Mailboxes. To exit an Announcement Mailbox, see
Calling an Announcement Mailbox
.
To exit a mailbox
Press X X (9 9) or hang up.
To exit a mailbox, then return to it
Press X (9).
To exit a mailbox and return to the Automated Attendant
You cannot return to the Automated Attendant after you dial 9 to exit a Guest or Future Delivery Mailbox from
an inside extension.
1. Press X (9).
Listen for the message:
To go to the Automated Attendant, press the star key
(if you do not hear
this message, you cannot call the Automated Attendant). You will not hear it if you exit a Subscriber
or Message Center Mailbox from an inside extension and that mailbox is not programmed with a
Next Call Routing Mailbox.
2. Press *
If exiting from outside the company, this step calls the Automated Attendant (Instruction Menu) that
originally handled your call.
If exiting a Message Center or Subscriber Mailbox from an inside extension, this step calls the
Automated Attendant (Welcome Message and Instruction Menu) that is set up for the Subscriber’s
or Message Center’s Next Call Routing Mailbox (which may be different than the Automated
Attendant that answers your company’s incoming calls).

14 NVM-DFx User’s Guide
Getting Help and the Time and Date
Getting Recorded Help
If you forget what codes to press, or you press a code and the Voice Mail system responds with the message
That is an invalid entry
,you can:
■Wait a few seconds without dialing anything. The Voice Mail system will repeat your choices or play
the prompt,
For a help message, press 0
.At this point you can press zero to hear your options.
■Press zero right away to get a recorded help message (if you are in your mailbox).
Getting the Time and Date
After you call your mailbox, you can get the time and date.
To get the time and date
1. Call your mailbox
2. Press T I (84)
Listening to Messages
How You Know You Have Messages
The Voice Mail system can flash the Message Lamp at your extension when you have unread messages in
your mailbox (if your phone system allows Message Lamps).
If you receive new messages while your are using your mailbox, the Voice Mail system will not light the
Message Lamp right away. Instead, the Voice Mail system says
You have received new messages
. The
Voice Mail system plays this voice prompt if you dial 9 to exit your mailbox or if you return to the Main Menu of
features before exiting. This way, you can listen to the new message before exiting. If you do not listen to the
new message(s), the Voice Mail system will light the Message Lamp after you exit.
If you wish, you can also have the Voice Mail system call you when you receive messages (see
Message
Notification
).

NVM-DFx User’s Guide 15
Listening to Your Messages
You can listen to your messages after you call your mailbox. If you listen to a message all the way through,
the Voice Mail system will automatically erase or save it, depending on programming. To override the
automatic erase/save, press S A to save or E to erase the message. If you listen to only part of a message,
the Voice Mail system leaves it in your mailbox. This type of message is classified as a “Held” message.
In addition, the Voice Mail system assigns a pre-programmed listen mode to your mailbox. A listen mode
determines the type of messages that play when you press L to listen. There are four listen modes: New
messages, Saved messages, Held messages, and All messages. By default, the Voice Mail system will play
all of your messages when you press L to listen. To change the pre-programmed listen mode, see your
System Administrator.
You can, however, override the pre-programmed listen mode, on a per call basis, right after you call your
mailbox or while your messages are playing. The Voice Mail system reverts back to using the pre-
programmed listen mode after you hang up. For details on what to press to override the listen mode, see
Using the Listening Options
.
If your Voice Mail system has the Networking option and a network message was returned to you for some
reason, the Voice Mail system plays this prompt before the message:
The following network message
was returned to you because ____
. To see the list of reasons why a network message can be returned,
see page 20. To find out when it was returned and the Voice Mail system that could not accept it, press T I
during or after the message.
If your Voice Mail system has the FAX Mail option, callers can send a FAX to your mailbox. If your mailbox
has a FAXed document (called a “FAX Message”), you will hear the caller’s recorded comment, if any, then
the voice prompt:
This X-page FAX Message arrived on (date/time) from (caller’s number, if known).
The message has been saved
.To print it out, you use the MF command to forward the message to a FAX
Delivery Mailbox, which in turn sends the document to a FAX Machine. A FAX Delivery Mailbox can send the
FAX to a pre-designated FAX Machine or to any FAX number you enter. It depends on how the FAX Delivery
Mailbox is set up. You also have the following options:
■Leave the FAX Message in your mailbox until you are ready to print it out. The Voice Mail system
always saves FAX Message even if your mailbox is set up for auto erase.
■Erase it
■Use the listening options MF, RE, or MC. You can use RE and MC as long as the caller sent the FAX
from an inside extension. For more information on FAX Mail, see page 3.
To listen to your messages
1. Call your mailbox.
2. Press L (5).
The first or last message plays (depending on programming). When it finishes you hear
The
message will be erased when you exit your mailbox
or
The message has been saved
, then a
mini menu. To turn the menu on or off, see
Changing Auto Help
.
3. Press L (5) to listen to the next message.
If it is the last message, the Voice Mail system says,
Going to the first message
, then plays it. If
you are listening in reverse order, the Voice Mail system says,
Going to the last message
, then
plays it.

16 NVM-DFx User’s Guide
Using the Listening Options
You can use the options that follow while listening to a message in a Subscriber, Message Center, Guest,
Network, or Future Delivery Mailbox. You can also activate an option while the message is playing or right
after it finishes playing. To hear the options while listening to a message, press zero. See also
Listening to
Your Messages
.
Some of the listening options are not available to Message Center, Guest, and Future Delivery Mailboxes.
You can activate four options (Select list of New, Saved, Held, or All messages) directly after you call your
mailbox.
To record a reply to a message
The Voice Mail system sends your reply to the mailbox that sent the message (including network mailboxes).
1. Press R E (7 3) or press R V (7 8) to reply to a Fax message
2. Follow the voice prompts.
If the mailbox that sent the message is not known, the Voice Mail system lets you enter the
extension number that should receive your reply.
If you press R E in the middle of a message and the sender is known, the Voice Mail system will
erase the message when you exit your mailbox unless auto save is enabled or you save the
message.
You can use the R E command to record a reply to the person who sent a FAX message as long as
it was sent from an inside extension.
To have the message forwarded to another mailbox (including Network Mailboxes
and FAX Delivery Mailboxes).
1. Press M F (6 3).
2. Follow the voice prompts.
You can first record a comment to explain why you are forwarding the message. If you re-forward a
message that has been forwarded to you, the Voice Mail system erases the previous forwarder’s
comment, if any, and replaces it with yours.
You can forward the message to a maximum of 10 mailboxes. You can enter the following types:
Subscriber, Guest, Message Center, Distribution, Alias Network, Remote Network. (The Remote
Network Mailbox and the accompanying destination mailbox count as one mailbox toward the
maximum of 10.)
You can enter mailbox numbers or names for all mailbox types except a remote destination mailbox.
For that mailbox, you must enter the mailbox number. Just follow the voice prompts. If you press
M F in the middle of a message, the Voice Mail system will erase it when you exit your mailbox
unless it gets saved.
Forwarded Network Messages can be returned to you. For a list of reasons, see page 20.
If you record a comment for a network message and forward it to a non-network mailbox, the
message is no longer considered a network message. That is, if the recipient presses TI during the
message, the Voice Mail system will say that the message is from you. If the recipient records a
reply, the reply will be sent to you. So if you want the message to retain its network status, do not
record a comment before forwarding it.
And regarding Distribution Mailboxes: When you enter a Distribution Mailbox number, the Voice
Mail system sends the message to all the mailboxes on the partner Distribution List. See the
System Administrator for the Distribution Mailbox number or name.
To have the Voice Mail system automatically forward all of your messages to another mailbox, see
Changing the Auto Forward Option
.
To have the Voice Mail system notify you as soon as a recipient listens to the forwarded message,
make sure you record a comment. When you are finished recording, press * R for a return receipt.
Other manuals for NVM-DFx
2
Table of contents
Other NEC Voicemail manuals

NEC
NEC ELECTRA ELITE IPK II User manual

NEC
NEC VM8000 InMail User manual

NEC
NEC ELITEMAIL FMS-VMS User manual

NEC
NEC 17600SUG05 User manual

NEC
NEC Univerge SV8100 User manual

NEC
NEC NEAXMAIL IM-16 Instruction Manual

NEC
NEC SV8300 Instruction Manual

NEC
NEC IntraMail 4 Parts list manual

NEC
NEC IntraMail User manual

NEC
NEC Xen Digital Voicemail User manual

NEC
NEC Xen Alpha User manual

NEC
NEC VANGARD i-Series User manual

NEC
NEC Univerge SV9100 User manual

NEC
NEC NVM-DFx User manual

NEC
NEC Aspire S IntraMail Parts list manual

NEC
NEC VM8000 InMail User manual

NEC
NEC DS1000 Owner's manual

NEC
NEC NVM-2e Series User manual

NEC
NEC ELECTRA ELITE IPK II User manual

NEC
NEC VM8000 InMail User manual