Ness IQ-MDVR-4 User manual

Quick Start Guide
for
Ness IQ-MDVR-4
Mobile Digital Video Recorder

Quick Start Guide
Ness IQ-MDVR-4 – Mobile Black Box Recorder.
2
MENU TREE STRUCTURE......................................................................................................................3
SYSTEM START UP.................................................................................................................................. 4
LOG IN TO THE SYSTEM ........................................................................................................................ 6
1. DATE / TIME............................................................................................................................................7
2. REGISTER INFO....................................................................................................................................8
3. FORMAT.................................................................................................................................................. 9
RECORD MENU.......................................................................................................................................10
4. OPTIONS............................................................................................................................................... 10
5. CAMERA SETTINGS...........................................................................................................................12
6. RECORD SETTINGS........................................................................................................................... 13
7. SUB-STREAMING................................................................................................................................ 14
NETWORK SETTINGS MENU............................................................................................................... 16
8. SERVER................................................................................................................................................. 16
9. LOCAL NETWORK .............................................................................................................................. 17
10. WIFI SETUP........................................................................................................................................ 18
11. MOBILE NETWORK ..........................................................................................................................19
PERIPHERAL............................................................................................................................................20
12. EXT COM SETUP..............................................................................................................................19

Quick Start Guide
Ness IQ-MDVR-4 – Mobile Black Box Recorder.
3
MENU TREE STRUCTURE
Quick Start Guide
Ness IQ-MDVR-4 – Mobile Black Box Recorder.
4
User default password is 22222222, and Admin password is 88888888.
When the OPERATOR PASSWORD IS CORRECTLY entered permissions are limited to video,
sensor menu.
When the ADMIN PASSWORD IS CORRECTLY entered permissions are full access to MDVR.
SYSTEM START UP
Install the HDD/SD card first and then lock it in front panel.
For testing, just connect the red wire and yellow wires together to Power + (8~36V DC) and connect the
black wire to GND.
However when installed in a vehicle, please connect red wire to power +, yellow wire to Ignition, black
GND wire to power -.
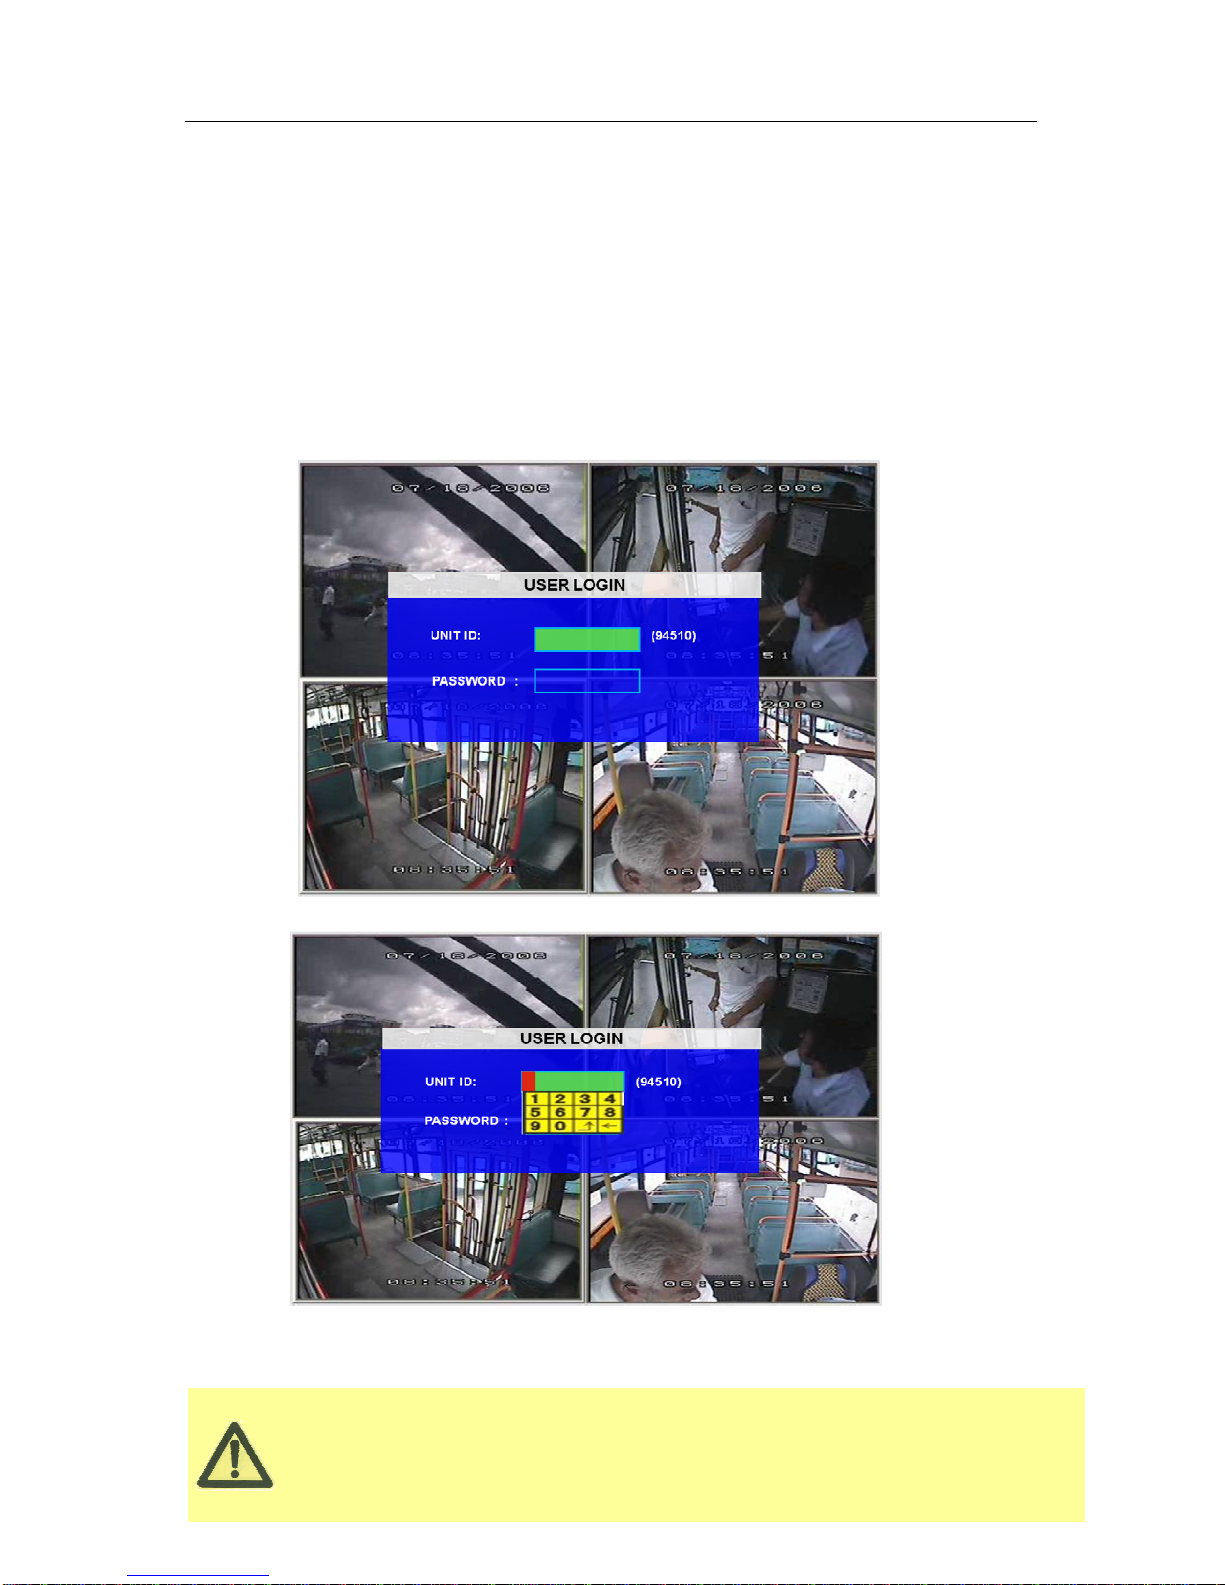
SYSTEM LOGIN FOR SETUP
UNIT ID: The unit ID of MDVR. Default = 0
PASSWORD: Enter the admin password or user password.

Quick Start Guide
Ness IQ-MDVR-4 – Mobile Black Box Recorder.
5
Keyboard: Press 【Enter】to use keyboard to type device ID and password.
1)0~9, number key, press【Enter】to select the number.
2)123: Input type shift key. (Number, capital, small letter)
3)【
←
】delete, 【】Exit.
Quick Start Guide
Ness IQ-MDVR-4 – Mobile Black Box Recorder.
6
Essential Steps for Setting up the IQMDVR
This section will provide essentials details required to setup the Ness IQ-MDVR only.
For a more detailed guide PLEASE refer to the User Manual
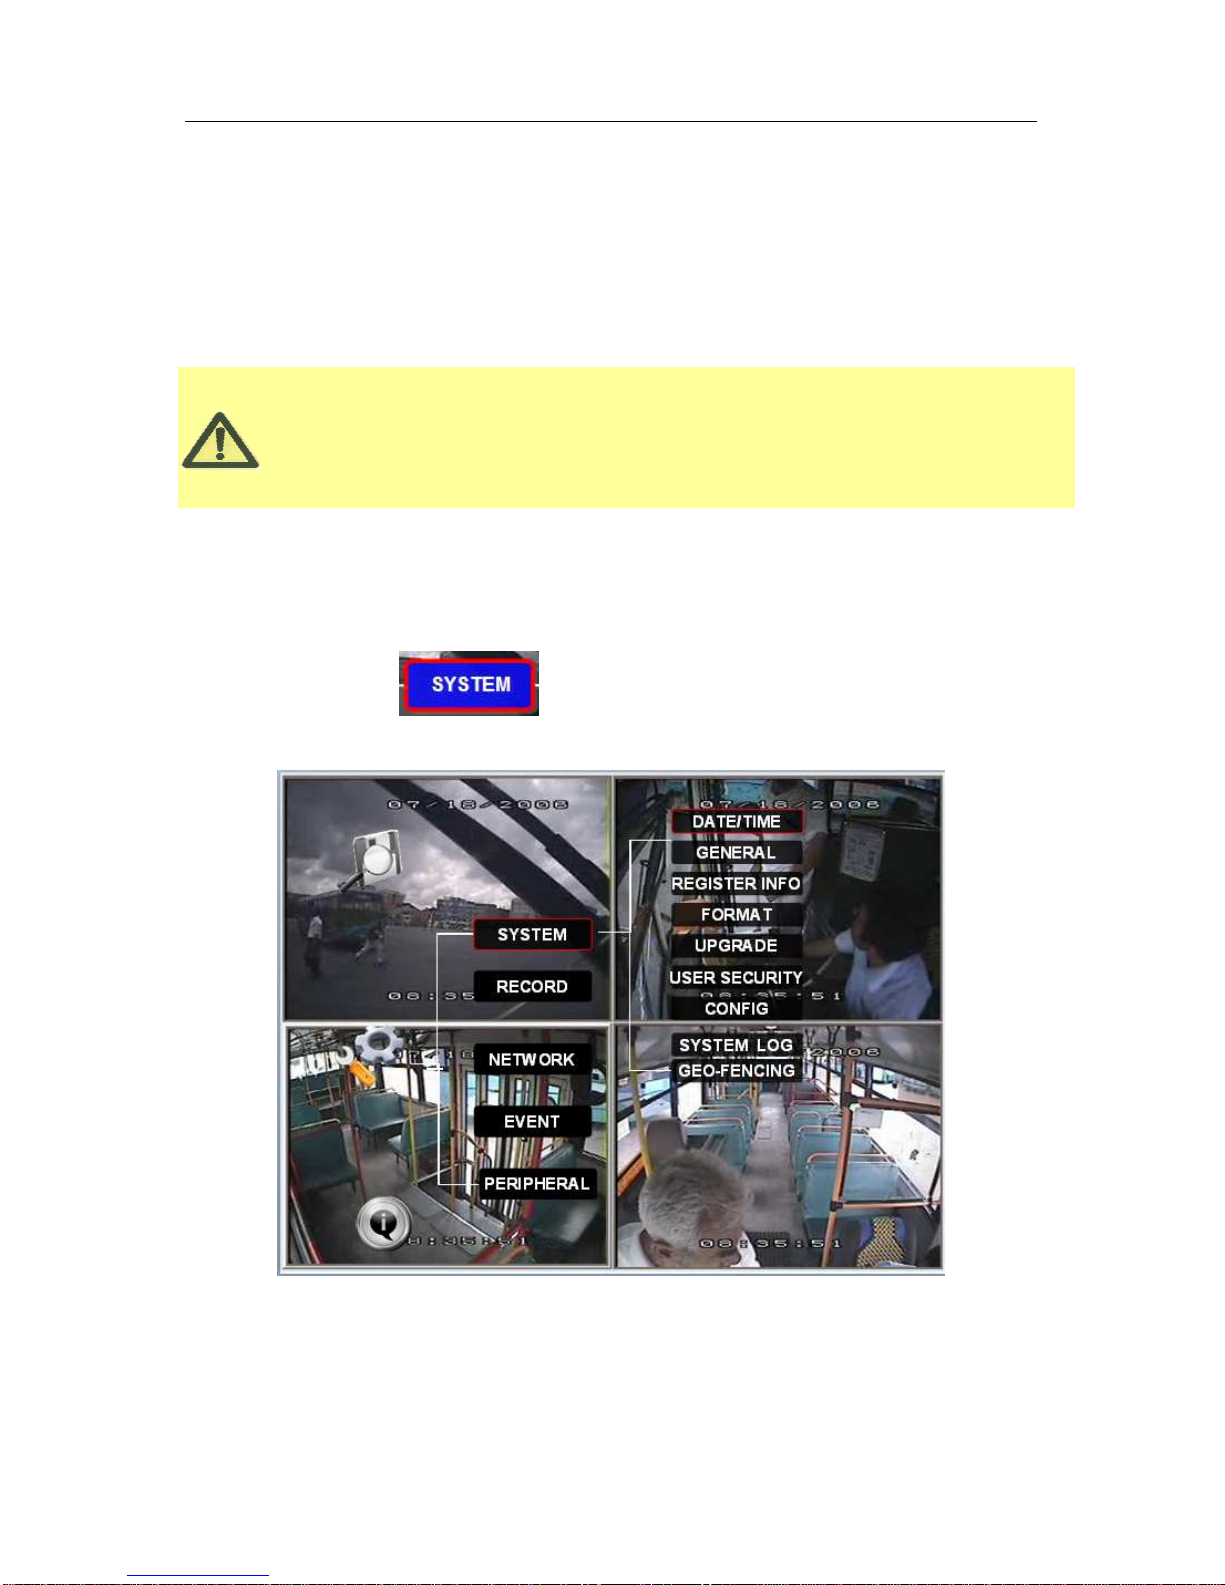
Log in to the SYSTEM menu
Use the ARROW to select and then press ENTER. The screen will show the menu as shown
below:
Once a setting is made press SAVE to make all the setting valid. Once saved, you will be provided with
confirmation the setting has been applied. If a Network setting change is made, once you exit to live view
the MDVR will automatically reboot to allow the settings to take effect.
The MDVR will stop recording when it is placed into the MDVR configuration GUI / OSD.
Quick Start Guide
Ness IQ-MDVR-4 – Mobile Black Box Recorder.
7
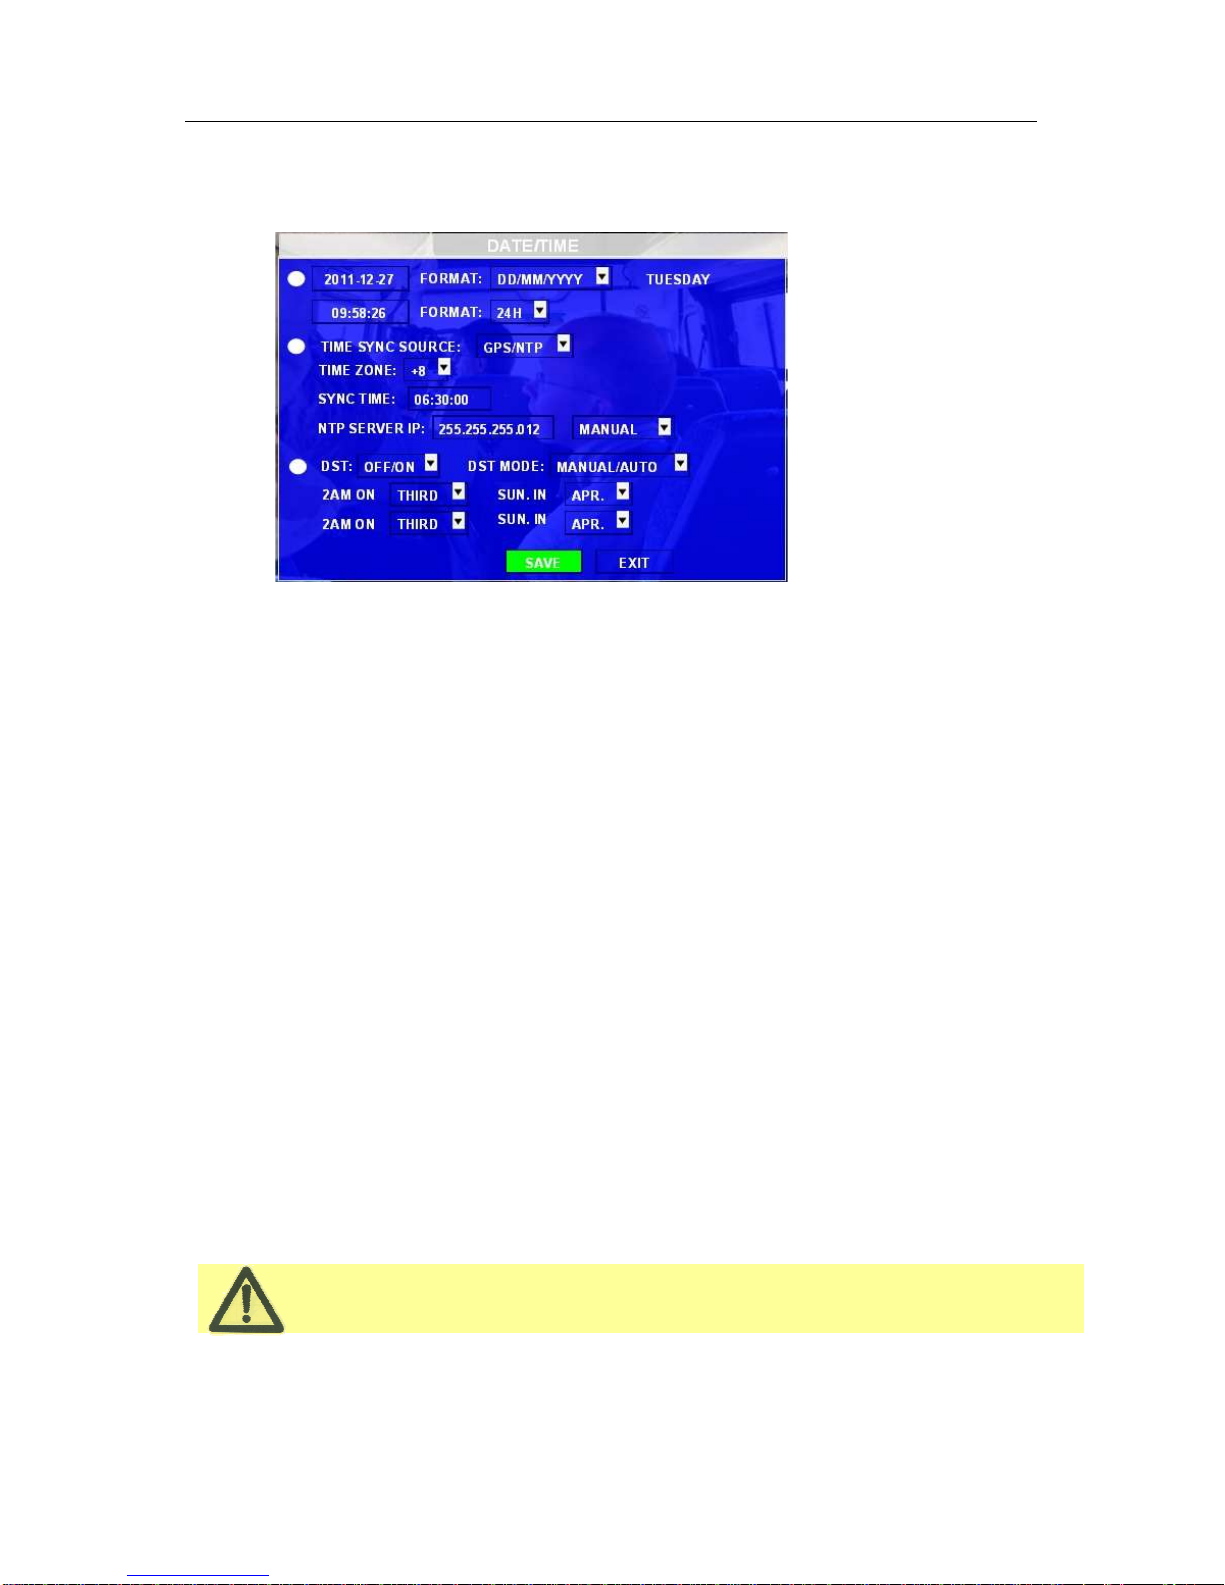
While setting the DST, the start date must be earlier than the end date.
1. Set DATE/TIME
DATE FORMAT: Press 【ENTER】to select different format MM/DD/YYYY, DD/MM/YYYY, or YYYY-MM-DD
TIME FORMAT: 12H or 24H, Press【ENTER】to select different formats.
TIME SYNC SOURCE: The system allows you to have the time synchronized via by either “GPS” or “NTP”.
A: If you select “GPS”, the IQ-MDVR must have GPS connected and GPS signal must be present. To
set the sync time in this menu, and unit will record the time difference-GMT offset, when the
system time signal arrives the sync time, unit will synchronize with GPS time.
B: While selecting the “NTP” (Network Time Protocol), the device must have network access
connection and assign the NTP IP location. This process runs at 6:30am local time while the
system has network connection;
TIME ZONE: Please choose the correct time zone where vehicle is.
SYNC TIME: This is the time when the unit will sync the system time every day. The method depends on the
setting on the TIME SYNC SOURCE option:
NTP SERVER IP: Input the IP server which supports NTP protocol, in order to allow the system have time
synchronization through the network. [Example: "192.43.244.18", "129.6.15.28",
"211.22.55.116", "194.88.2.60"]
DST: Daylight Saving Time. If this is set on, the following settings will be available for when DST will take effect.
DST MODE: There are two modes: Auto / Manual.
Auto: According to the international DST, i.e.: valid only between 2AM on Second Sun in March and
2AM on First Sun in NOV.
Manual: When set to manual it allows you to manually set to Australian DST which is (at the time of
producing this manual) Start ‘first Sunday in October’ and finishes ‘first Sunday in April’
Scroll to【SAVE】to make the setting valid.

Quick Start Guide
Ness IQ-MDVR-4 – Mobile Black Box Recorder.
8
NOTE: When you connect MDVR to PC software, make sure vehicle NO and DEVICE ID is
not blank, otherwise, it can’t connect to the message server.
2. Set
REGISTER INFO
UNIT S/N: The serial Number of the MDVR.
UNIT ID: Device ID. Use the NUMERIC keypad to enter the system ID from 00000 to 99999.
This ID is used when logging in to the unit locally (if security is enabled).
COMPANY NAME: The name of company, Press the arrow key on the remote control to highlight this Option
and then input the name of the company.
VEHICLE NO.: The number of the vehicle. eg Rego plate
DRIVER/ROUTE NAME: The driver’s name and the route name
DEVICE ID: This ID should be unique and it is very important for the message server of CMS, WCMS, and
ADS. Only this number can be recognized by message server.
Scroll to【SAVE】to make the setting valid
Quick Start Guide
Ness IQ-MDVR-4 – Mobile Black Box Recorder.
9
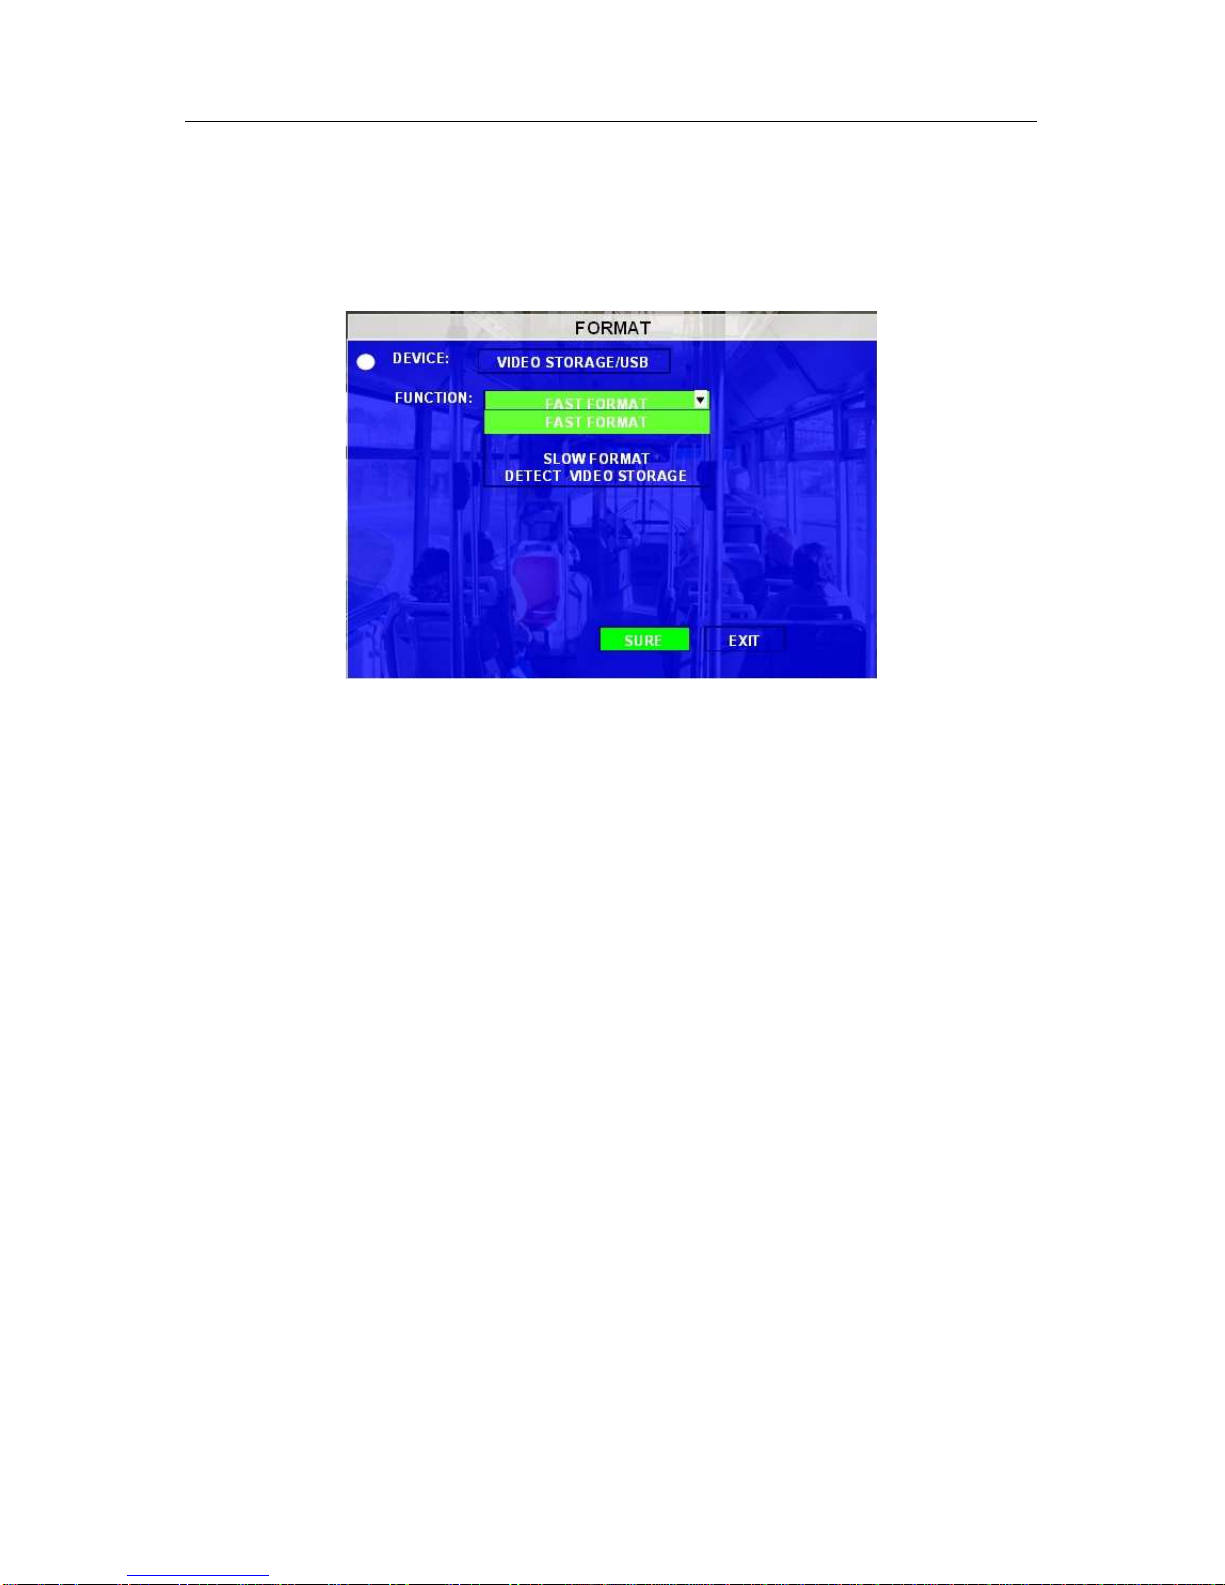
3. FORMAT the HDD and/or SD card
Any newly fitted HDD (and SD Card) must be formatted before it can be successfully used.
Select the device you want to format, Video Storage, SD card or USB.
DEVICE: Press【ENTER】to select the target device to format. There are 2 options: Video Storage/ SD/USB.
Then choose format method, there are three methods optional:
FAST FORMAT: MDVR would clear all the video data directly.
SLOW FORMAT: MDVR will scan and detect the device before formatting. If there are bad blocks, it will tag
them and bypass them when recording.
Detect Video Storage: MDVR just detect the media for recorded video storage media and no format will
occur.
After format is successful the MDVR will restart.
Quick Start Guide
Ness IQ-MDVR-4 – Mobile Black Box Recorder.
10
RECORD MENU
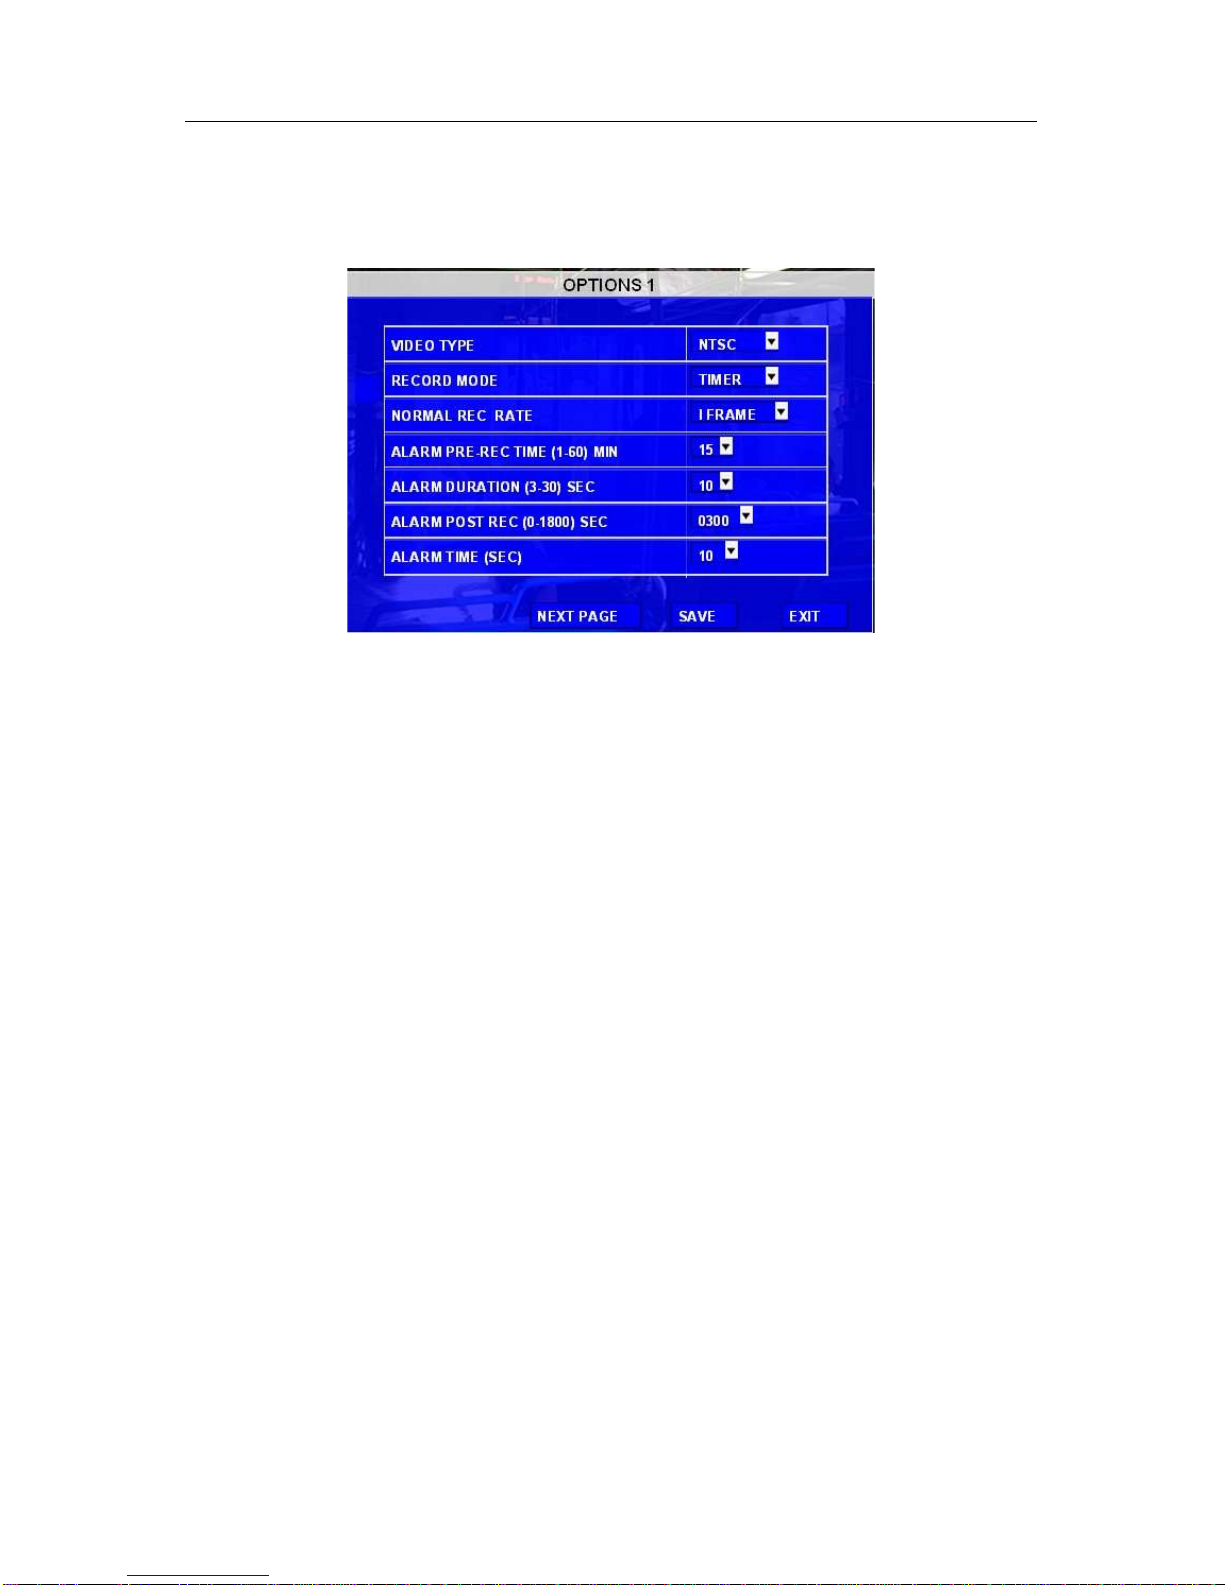
4. Set OPTIONS
Setup the basic parameters.
VIDEO TYPE:. The default setting is NTSC. Set to PAL
RECORD MODE: Record mode, three modes as following:
GENERAL: When MDVR is power on and start up, the MDVR will start to record automatically.
TIMER: record according to schedule in SETUP--RECORD-SCHEDULE.
EVENT: When event trigged, MDVR will start to record.
NORMAL REC RATE: normal record rate, two option:
NORMAL: MDVR will start to record according to the setup of RECORD SETTINGS.
I FRAME: MDVR will only record at one frame per second, in order to take less space of hard drive, but
when an event is trigged, MDVR will record according to setup of RECORD SETTINGS.
ALARM PRE-REC TIME(
((
(1-60)
))
)MIN: Pre-record time setting is from 1 to 60 minutes. For example: If the setting
for pre-record is 30min, when an alarm trigger at 10:30, then the record file start from 10:00 to 10:30
will pack as alarm record.
(Make sure the Pre-recording switch is ‘ON’ as set in next page when you want to use this function)
ALARM DURATION(
((
(3-30)
))
)SEC: Sets the alarm duration time. Any alarm of the same type is considered to be
one alarm during the setting for alarm duration and the MDVR resets the duration time automatically.
For example, if the setting for the alarm duration is 10 sec and during this 10 sec, anther same type
alarm is triggered then MDVR will consider them to be one alarm event. The alarm start time will be
reset based on the second alarm.
ALARM POST REC(
((
(30-1800)
))
)SEC: Sets the time the recording will continue after the alarm event.
ALARM TIME: Sets the ‘buzzer’ alarm duration for when an alarm is triggered.
Other manuals for IQ-MDVR-4
1
Table of contents
Other Ness DVR manuals

Ness
Ness IQ-SDI-4 User manual

Ness
Ness EDSR400M User manual

Ness
Ness IQ-MDVR-4 User manual

Ness
Ness Premium H.264 DVR User guide

Ness
Ness PowerPlex EDR400 User manual

Ness
Ness IQ User manual

Ness
Ness Ultimate Premium H.264 User manual

Ness
Ness Pro series User manual

Ness
Ness 104-440 User manual

Ness
Ness 104-005 User manual

Ness
Ness HD-960H User manual

Ness
Ness Ultimate Series User manual

Ness
Ness IQ-MDVR-8 User manual

Ness
Ness 104-305 User manual

Ness
Ness Pro 4/1 User manual

Ness
Ness Ultimate Premium H.264 User manual

Ness
Ness 8-channel models User manual

Ness
Ness 104-460 Auto-IP NVS User manual

Ness
Ness EDSR100 User manual

Ness
Ness H.264 HD-SDI User manual


