Ness Premium H.264 DVR User guide

Ness Ultimate Premium H.264 DVR
OSD Setup Manual
REV1.1 Sep11

User’s Manual
2
Table of Contents
Menu System Overview.....................................................................................................9
< Username and Password > .......................................................................................9
< Key Usage >............................................................................................................10
Key Usage in OSD Setup Menu...................................................................10
Key Usage in Virtual Keyboard.....................................................................10
System Setup...................................................................................................................12
< System/Version Info >..............................................................................................12
Model Name.................................................................................................12
Video System...............................................................................................12
Hardware......................................................................................................12
Software.......................................................................................................13
DSP..............................................................................................................13
MAC Address 1 ............................................................................................13
MAC Address 2 ............................................................................................13
Software Upgrade via Local Device .............................................................13
Software Upgrade via Internet......................................................................14
< Language > .............................................................................................................14
< Date / Time > ...........................................................................................................14
Date / Time...................................................................................................14
Time Zone....................................................................................................15
Date / Time Display......................................................................................15
Date Display Mode.......................................................................................15
Time Display Mode.......................................................................................16
Date/Time Order...........................................................................................16
Daylight Saving Time
Setup .........................................................................16
-Daylight Saving Time ......................................................................16
-DST Start / End ...............................................................................16
-DST Bias.........................................................................................16
Network Time Protocol Setup.......................................................................17
< Unit Name > ............................................................................................................17
< Show Unit Name >...................................................................................................18
< User Management > ................................................................................................18
Password Protection ....................................................................................18
Account Setup..............................................................................................18
Authority Setup.............................................................................................19
Load Default Setting.....................................................................................19
< Network Setup >......................................................................................................19

User’s Manual
3
LAN Select ...................................................................................................20
LAN Setup....................................................................................................20
-DHCP..............................................................................................21
-IP ....................................................................................................21
-Netmask..........................................................................................21
-Gateway..........................................................................................21
-DNS ................................................................................................22
-PPPoE Account...............................................................................22
-PPPoE Password............................................................................23
-PPPoE Max Idle..............................................................................23
-Connect At Booting .........................................................................23
-Network Restart ..............................................................................23
Wireless Network Setup...............................................................................23
-Operating Mode ..............................................................................24
-Choose A Wireless Network............................................................24
-Network Name (ESSID) ..................................................................25
-Network Authentication ...................................................................26
-Data Encryption ..............................................................................26
-Data Encryption Level .....................................................................27
-Key Index ........................................................................................27
-Enter Network Key ..........................................................................27
-Network Setting...............................................................................28
-Connect...........................................................................................28
Modem Setup...............................................................................................28
-Dial-in Setup ...................................................................................28
Dial-in Service.................................................................................29
Dial-in Account ................................................................................29
Dial-in Password .............................................................................30
Server IP.........................................................................................30
Client IP ..........................................................................................30
Dial-in Idle Time ..............................................................................31
Dial-in Max Time .............................................................................31
-Dial-out Setup .................................................................................31
Dial-out DHCP ................................................................................32
Dial-out IP .......................................................................................32
Dial-out Netmask ............................................................................32
Dial-out Gateway ............................................................................32
Dial-out DNS ...................................................................................33
Phone Number................................................................................33
Dial-out Account..............................................................................33

User’s Manual
4
Dial-out Password...........................................................................34
Dial-out Idle Time ............................................................................34
Dial-out Max Time ...........................................................................34
Connect...........................................................................................34
- Dial Port Selection ..........................................................................34
Trigger Port...................................................................................................35
Email Address ..............................................................................................35
SMTP Setup .................................................................................................35
-Email via SMTP..............................................................................35
- SMTP Server ..................................................................................35
- SMTP Port ......................................................................................36
- SMTP Account................................................................................36
- SMTP Password.............................................................................37
DDNS Setup.................................................................................................37
- Enable DDNS..................................................................................37
- Host Name ......................................................................................37
-DDNS Port ......................................................................................38
- Submit/ Update ...............................................................................38
- ezDDNS..........................................................................................39
< UPnP > ....................................................................................................................39
UPnP............................................................................................................39
UPnP NAT Traversal.....................................................................................39
< RS485 Setup > ........................................................................................................40
Unit ID ..........................................................................................................40
Baud Rate ....................................................................................................40
Bits ...............................................................................................................40
Stop ..............................................................................................................40
Parity ............................................................................................................40
< Audio Output/ Key Beep > .......................................................................................40
Audio Output................................................................................................41
Key Beep......................................................................................................41
Monitor Setup...................................................................................................................42
< Show Camera Title > ...............................................................................................42
< Title Position> ..........................................................................................................42
< Main Monitor Output Select > ..................................................................................43
< Simultaneous Output >............................................................................................43
< Monitor Brightness >................................................................................................43
< Monitor Contrast >...................................................................................................44
< Monitor Chrominance > ...........................................................................................44

User’s Manual
5
< Screen Center Adjust >............................................................................................44
< VGA Resolution > ....................................................................................................44
< VGA Frequency >....................................................................................................45
< Show Color Bar >....................................................................................................45
Camera Setup...................................................................................................................46
< Analog Camera >.....................................................................................................46
Analog Camera Select.................................................................................46
Dome Protocol..............................................................................................46
Dome ID.......................................................................................................46
Camera Title.................................................................................................47
Covert...........................................................................................................47
Termination...................................................................................................48
Brightness ....................................................................................................48
Contrast........................................................................................................48
Saturation .....................................................................................................48
Hue...............................................................................................................48
Audio Association.........................................................................................48
Record Setup...................................................................................................................54
< Record Mode Setup >..............................................................................................54

User’s Manual
6
Record Resolution........................................................................................54
Record Format .............................................................................................55
Max Rec PPS...............................................................................................55
< Schedule Setup > ....................................................................................................55
Day / Night Time Start/ End..........................................................................55
Weekend Schedule ......................................................................................55
Weekend Start / End ....................................................................................55
< Preset Record Configuration > ................................................................................56
< Per Camera Configuration >....................................................................................57
Camera Select..............................................................................................57
Normal PPS..................................................................................................57
Normal Qlty ..................................................................................................57
Event Max PPS............................................................................................57
Event Qlty.....................................................................................................58
Event Active .................................................................................................58
< ezRecord Setup >....................................................................................................58
< Data Lifetime > ........................................................................................................59
< Pre-Alarm Recording > ............................................................................................59
< Circular Recording >................................................................................................59
< Audio Recording > ...................................................................................................60
< Purge Data > ...........................................................................................................60
Purge All Data ..............................................................................................60
Purge All Event Data....................................................................................60
Purge Event Before......................................................................................60
Start To Purge...............................................................................................60
Sequence Setup...............................................................................................................61
< Main / Call Monitor Dwell >......................................................................................61
< Main / Call Monitor Schedule >................................................................................61
Event Setup......................................................................................................................62
< Internal Buzzer > .....................................................................................................62
< Event Icon > ............................................................................................................62
< Email Notice > .........................................................................................................62
< Email Attachment >..................................................................................................63
< SMS Setup > ...........................................................................................................63
SMS Notice ..................................................................................................63
PIN Authentication........................................................................................63
PIN Code Setup ...........................................................................................64
Receiver Number .........................................................................................64
Send Test Message......................................................................................64
Port Selection...............................................................................................64

User’s Manual
7
< Alert Notification Setup > .........................................................................................64
Alert Configuration Set .................................................................................64
Alert Notification...........................................................................................65
Alert IP .........................................................................................................65
Alert Port ......................................................................................................65
Alive Interval.................................................................................................65
< Event Full Screen > .................................................................................................65
< Event Duration >......................................................................................................65
< Per Channel Config > ..............................................................................................66
Channel Select.............................................................................................66
Video Loss Detect ........................................................................................66
Motion Detect...............................................................................................66
Detection Config...........................................................................................66
-Detected Area Setup.......................................................................67
-Sensitivity........................................................................................67
-Area Threshold ...............................................................................67
Alarm In........................................................................................................68
Alarm Out.....................................................................................................68
Database Setup................................................................................................................69
< Total / Free Size of HDD > .......................................................................................69
< Avail. Rec Time >.....................................................................................................69
< Internal / External Disks >........................................................................................69
< NAS Devices > ........................................................................................................70
Configuration...................................................................................................................71
< Load Factory Default > ............................................................................................71
< Import Configuration > .............................................................................................71
< Export Configuration >.............................................................................................72
Copy Destination..........................................................................................72
Configuration Name .....................................................................................72
Begin Export.................................................................................................72
Video Export.....................................................................................................................73
< Select Device >........................................................................................................74
< Select Channel > .....................................................................................................74
< From / To Time >......................................................................................................75
< Select Events >........................................................................................................75
< Data Type > .............................................................................................................75
< Export Format >.......................................................................................................75
< Digital Signature > ...................................................................................................76
< Erase Disc > ............................................................................................................76
< Begin Export >.........................................................................................................76

User’s Manual
8
Text Setup.........................................................................................................................77
< Text Function > ........................................................................................................77
< Text Overlay >..........................................................................................................77
< Exception Text Setup >............................................................................................77
Exception No................................................................................................78
Trigger..........................................................................................................78
Exception String ...........................................................................................78
By Numerals.................................................................................................78
< Input Setup > ...........................................................................................................79
Port Selection...............................................................................................79
Input source..................................................................................................80
Camera Selection.........................................................................................80
Text Filter......................................................................................................80
Manual Filter Setup......................................................................................81
Input Process ...............................................................................................81
Text Baud Rate.............................................................................................81
Text Bit .........................................................................................................81
Text Stop ......................................................................................................81
Text Parity ....................................................................................................81
Shutdown .........................................................................................................................82
Power Off .....................................................................................................82
Reboot..........................................................................................................82
Appendix A: Record Duration.........................................................................................83
Appendix B: Dial-up Connections via Modem ..............................................................85
Establishing Dial-in Connection ..................................................................................85
Establishing Dial-out Connection ................................................................................90
Appendix C: DVR Player .................................................................................................95
Appendix D: ezRecord Diagram Sample......................................................................100
Appendix E: HDD COPY TOOL (EXT2IFS) ...................................................................103

User’s Manual
9
MenuSystemOverview
The detailed functions and settings of the Premium H.264 DVR can be set by entering the
intuitive Graphical User Interface (GUI) OSD setup menu. Collaborating with a USB mouse,
setting up the DVR can be easy as operating on a PC. This chapter particularizes the items
and options in the OSD setup menu.
<UsernameandPassword>
Press MENU and input a valid username. A preset username “admin” can be inputted via
pressing the hot key MENU. Move to <OK> and press ENTER to proceed.
Input Username
A B C D E F G H I J K L M
NOPQRSTUVWXYZ
a b c d e f g h i j k l m
n o p q r s t u v w x y z
0 1 2 3 4 5 6 7 8 9 .!@
# −_ , “ + = *
◄►Backspace Delete
Cancel OK
The next step is to enter a corresponding password. The preset password for “admin” is
“1234”.
Password Verification
____________
Press Channel Keys To Enter Password
(4-8 Digits)
Press ◄Key To Delete
NOTE: It is strongly suggested to change the preset password to prevent
unauthorized access to the unit.
An icon displayed at the center-bottom of the screen will show the authority level of the
account. Under logout condition, the icon will show “N”. When an account is logged in, its
authority level number (1~8) will be shown.
Before completely logout, other functions can also be accessed without having to login
again. There are two ways to logout: manually logout by pressing ESC key at Live mode, or
auto logout when keys are not pressed for 5 minutes at Live/ Menu mode.

User’s Manual
10
<KeyUsage>
The key usage differs under the OSD setup menu and in the Virtual keyboard. The
difference can be seen while setting some items, such as Unit Name and IP Address, in the
OSD setup menu.
Key Usage in OSD Setup Menu
Below introduce some keys used frequently to set up the unit via the OSD
setup menu.
<Direction Key>
In the OSD setup menu, Direction keys are used to move the cursor to
previous or next fields. UP / DOWN are used to change the value in the
selected field.
<ENTER>
In OSD setup menu or selection interface, press the key to make selection or
save settings.
<ESC>
Press to cancel or exit from certain OSD setup menu without saving any
changes.
Key Usage in Virtual Keyboard
A virtual keyboard shows when edit the settings, such as camera title, e-mail
address, etc. The virtual keyboard displays as follows.
A B C D E F G H I J K L M
NOPQRSTUVWXYZ
a b c d e f g h i j k l m
n o p q r s t u v w x y z
0 1 2 3 4 5 6 7 8 9 .!@
# −_ , ” + = *
◄►Backspace Delete
Cancel OK

User’s Manual
11
<To input characters>
Press Direction keys to select characters, and press ENTER to confirm the
selection.
<To move the cursor in title entry field>
Select <◄> / <►> and press ENTER, or press MODE and LEFT / RIGHT
simultaneously to move the cursor to left / right in the title entry field.
<To delete previous character>
Select <Backspace> and press ENTER, or press DOME.
<To delete current character>
Select <Delete> and press ENTER.
<To exit the virtual keyboard>
Select <OK> and press ENTER to save the settings and exit, otherwise press
ESC or select <Cancel> and press ENTER to exit without saving changes.

User’s Manual
12
SystemSetup
Select <System Setup> from Main Menu and press ENTER to enter System Setup menu.
The items in the System Setup menu are described in the following sections.
System Setup
1. System/Version Info
2. Language
3. Date/Time
4. Unit Name
5. Show Unit Name
6. User Management
7. Network Setup
8. RS485 Setup
9. Audio Output/Key Beep
10. IP Camera Support
English
DVR
0
< System/Version Info >
The System/Version Info menu allows user to view system information such as hardware
and software version. From the System Setup menu, select <System/Version Info> and
press ENTER. The following menu is displayed. The first seven items are “read only”, for
users’ information only. The items in this menu are described in the following subsections.
System/Version Info
Model Name
Video System
Hardware
Software
DSP
MAC Address 1
MAC Address 2
Software Upgrade via Local Device
Software Upgrade via Internet
****
NTSC
**-**-**
****-****-****-****
****-****-****-****
**:**:**:**:**:**
**:**:**:**:**:**
Model Name
This item shows the model name of the unit.
Video System
This item show the current video system of the unit.
Hardware
The item identifies the hardware version for this unit.

User’s Manual
13
Software
The item identifies the software version installed on this unit.
DSP
This item identifies the digital signal processor (DSP) number of the unit.
MAC Address 1
This item identifies the first Media Access Control (MAC) address of the unit.
MAC Address 2
This item identifies the second MAC address of the unit.
Software Upgrade via Local Device
This item is used for upgrading software of the Premium H.264 DVR by local
device. The menu is displayed as follows.
Software Upgrade via Local Device
Upgrade Version
xxxx-xxxx-xxxx-xxxx
Select
No
Connect an USB drive containing upgrade software to the unit, then the
available upgrade files will be listed in the menu. To update the system, select
a file and use UP / DOWN keys to choose <Yes>. Press ENTER to confirm
the selection and start the upgrade process. The Premium H.264 DVR loads
the software, updates the system files, and reboots automatically.
The upgrade may take several minutes to save the changes in the memory of
the system. After the unit is rebooted, please check the software version
again.
NOTE: No power interruption is allowed during the software update.
Ensure that no power interruption can occur until the unit is completely
rebooted.
NOTE: Do not remove the external USB ThumbDrive®/ DVD+RW
before the unit has completely shut down (hard drive and fan are off).
Removing the external USB ThumbDrive® / DVD+RW before shut
down can cause the system to update improperly.

User’s Manual
14
Software Upgrade via Internet
The item is used to upgrade the unit’s software via the internet. Select one of
the listed software versions and choose <Yes>. The Premium H.264 DVR
downloads the software, updates the system files, and reboots automatically.
< Language >
The Language item allows user to select the language for the OSD setup menu and screen
messages. Language selection takes effect immediately when the selection is done. Press
UP / DOWN to select from listed languages and press ENTER to confirm.
< Date / Time >
Users can set the current date, time and other OSD parameters in this menu. In System
Setup menu, select <Date/Time> and press ENTER; the Date/Time menu displays as
follows.
Date/Time
1. Date
2. Time
3. Time Zone
4. Date/Time Display
5. Date Display Mode
6. Time Display Mode
7. Date/Time Order
8. Daylight Saving Time Setup
9. Network Time Protocol Setup
2008/02/21
PM10:39:26
OFF
1 Row
Y/M/D
24 HR
Date First
NOTE: The reset of date / time settings only applies to new videos. The date and
time of previously recorded video will not be changed.
NOTE: To avoid record database corruption, clearing the database is recommended
after changing Date / Time setting.
Date / Time
Select <Date> or <Time> and press ENTER for adjusting the settings. LEFT /
RIGHT keys are used to move the cursor to previous or next field, ENTER is
for selecting, and UP / DOWN are used to change the value in the selected
field.

User’s Manual
15
Time Zone
Select <Time Zone> to enter the time zone setting. To find out your local time
zone, please visit wwp.greenwichmeantime.com or refer to the following
picture for your information.
NOTE: The <Time Zone> must be set to your local time zone or the
<Network Time Protocol Setup> will not be accessible.
Date / Time Display
Users are allowed to set the date / time OSD displays in 1 or 2 rows. Use the
UP / DOWN keys to change the setting.
Date Display Mode
This function allows user to set the OSD display type of the date. There are
three options to select from: <Y/M/D>, <M/D/Y> or <D/M/Y>. “Y” represents
“Year”, “M” represents “Month” and “D” represents “Day”. Use UP / DOWN
keys to change the setting.

User’s Manual
16
Time Display Mode
User can set the time format to <12 hour> or <24 hour>. Use the UP / DOWN
keys to change the format.
Date/Time Order
The item is used to set the order of Date/Time display to <Date First> or
<Time First>. Select this item and press ENTER, then use UP / DOWN keys
to change the setting.
Daylight Saving Time
Setup
This menu is for people who live in certain regions to observe Daylight Saving
Time (DST).
- Daylight Saving Time
Select <ON> to enable, or <OFF> to disable the function.
If the function is disabled, the DST Start/ End time and DST Bias will
be grayed out and cannot be accessed. If this function is enabled,
the date/time information will be shown on the screen with a DST
icon when playing back recorded video or searching video in the
event list. “S” indicates summer time and “W” indicates wintertime.
- DST Start / End
These items are used to set the daylight saving duration. Use LEFT /
RIGHT to move the cursor to the next or previous field, UP / DOWN
to change the settings.
- DST Bias
This item allows the user to set the amount of time to move forward
from the standard time for daylight saving time. Available options are
<30>, <60>, <90> and <120> minutes.

User’s Manual
17
Network Time Protocol Setup
After entering the time zone, the <Network Time Protocol Setup> option will
appear. Select the <Network Time Protocol Setup> to set the time server.
The default time server is time.nist.gov, but the user can change it to other
time servers when desired. A list of IP addresses of the time servers is listed
below.
129.6.15.28 129.6.15.29 132.163.4.101
132.163.4.102 132.163.4.103 128.138.140.44
192.43.244.18 131.107.1.10 69.25.96.13
206.246.118.250 208.184.49.9 64.125.78.85
207.200.81.113 64.236.96.53 68.216.79.113
After the time server is set, select <Manually Time Sync> to sync the time.
The time sync can also be updated periodically. Select <Automatically Time
Sync>, and choose a desired time interval to sync the time.
< Unit Name >
Users are allowed to assign a name, up to 11 characters, to the Premium H.264 DVR.
Follow the steps to edit the unit name.
•Select <Unit Name> from System Setup menu and press ENTER. A virtual keyboard
displays.
Unit Name
A B C D E F G H I J K L M
NOPQRSTUVWXYZ
a b c d e f g h i j k l m
n o p q r s t u v w x y z
0 1 2 3 4 5 6 7 8 9 .!@
# −_ , ” + = *
◄►Backspace Delete
Cancel OK
•Use Direction keys to move the cursor to the wanted character.
•Press ENTER to add the character to the entry field (up to 11 characters).
•When done, move the cursor to <OK> and press ENTER to save the settings and exit.

User’s Manual
18
< Show Unit Name >
This item enables the unit name of the Premium H.264 DVR to be shown on the monitor.
Select <Yes> to show or select <No> to hide.
< User Management >
The DVR provides the option to create up to seven sets of usernames and passwords with
customized authority, excluding the preset “admin” account. The menu is as the following.
User Management
1. Password Protection
2. Account Setup
3. Authority Setup
4. Load Default Setting
ON
No
Password Protection
Select <ON> to request for username and password for accessing functions
listed in Authority Setup menu, or select <OFF> to allow free access.
Account Setup
Setup customized username, password, and authority level in this menu.
Press Direction keys and ENTER to select items. The username(ID) is case
sensitive. The authority level rank from level 1~8, and level 8 has highest
authority. Alternatively, select <Disable> to stop using the account.
Account Setup
Account
admin
user
user1
user2
user3
user4
user5
user6
user7
ID
Edit
Edit
Edit
Edit
Edit
Edit
Edit
Edit
Edit
PWD
Edit
Edit
Edit
Edit
Edit
Edit
Edit
Edit
Edit
Authority
Level 8
Level 4
Level 4
Level 4
Level 4
Level 4
Level 4
Level 4
Level 4
NOTE: The username and authority level of the preset “admin”
account cannot be changed.

User’s Manual
19
Authority Setup
Setup permitted authority level for accessing the functions listed in this menu.
The functions include: Playback/Search, Dome Control, Call Control, Export
Data, Menu Access, System Setup, Monitor Setup, Camera Setup, Record
Setup, Sequence Setup, Event Setup, Database Setup, Configuration, Text
Setup, and Shutdown. Press Direction keys and ENTER to select items. The
authority level rank from level 1~8, and level 8 has highest authority.
Alternatively, select <Disable> to allow free access.
Authority Setup
FIRST PAGE
Item
Playback/Search
Dome Control
Call Control
Export Data
Menu Access
System Setup
Monitor Setup
Camera Setup
Record Setup
Authority
Level 4
Level 4
Level 4
Level 4
Level 4
Level 4
Level 4
Level 4
Level 4
NOTE: The “Menu Access” cannot be set to <Disable>.
When the account does not have authority to access certain functions, an
error message will be displayed on the screen.
Load Default Setting
This item is for restoring the default settings. Select <Yes> to load default
setting or select <No> to exit.
< Network Setup >
The Network Setup menu allows users to setup the network by specifying the network
related settings, such as IP address, Netmask, etc. Check with the network administrator
and/or network service provider for specific information. The menu is as the following.
Network Setup
1. LAN Select
2. LAN Setup
3. Wireless Network Setup
4. Modem Setup
5. Trigger Port
6. Email Address
7. SMTP Setup
8. DDNS Setup
LAN
80

User’s Manual
20
Items in this menu are described in the following sections.
LAN Select
This item allows you to select your service type among <LAN>, <PPPoE>,
<WLAN>, and <None>. If you are using a wired or wireless local area network
communication, please select <LAN> or <WLAN>. If you are using a
broadband medium, such as DSL Line or cable modem, please select
<PPPoE>.
PPPoE stands for Point-to-Point Protocol over Ethernet. It is a specification
for connecting the users on an Ethernet to the Internet through a common
broadband medium.
If <None> is selected, then there is no need to set further LAN/ PPPoE/
WLAN settings. Therefore, the second item <LAN Setup> and third item
<Wireless Network Setup> will be inaccessible.
LAN Setup
The network related settings in the LAN Setup menu should be associated
with the network service type. If you select <LAN> for <LAN Select>, then the
6th to 8th item will not be available.
Select <LAN Setup> in Network Setup menu and press ENTER for setting the
parameters; the menu displays as follows.
LAN Setup
1. DHCP
2. IP
3. Netmask
4. Gateway
5. DNS
6. PPPoE Account
7. PPPoE Password
8. PPPoE Max Idle
9. Connect At Booting
10. Network Restart
OFF
192.168.1.150
255.255.255.0
192.168.1.1
0.0.0.0
35min
Yes
No
Table of contents
Other Ness DVR manuals

Ness
Ness EDSR400M User manual
Ness
Ness IQ-MDVR-8 User manual

Ness
Ness Ultimate Premium H.264 User manual
Ness
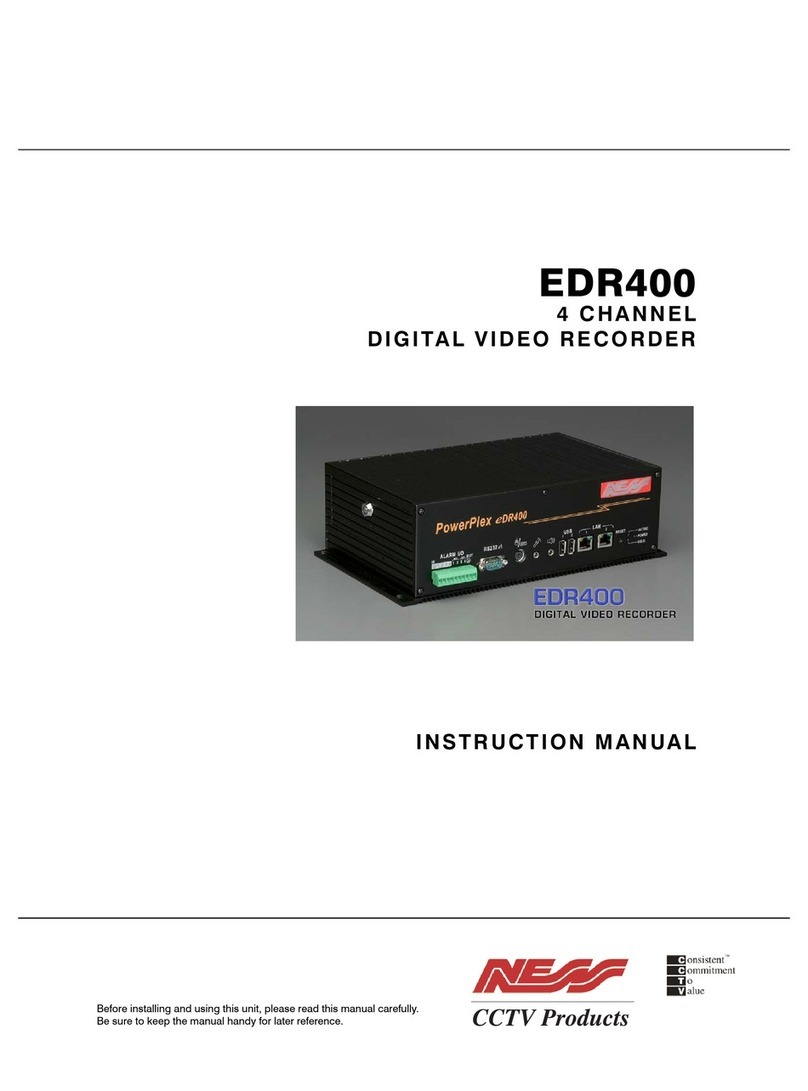
Ness PowerPlex EDR400 User manual
Ness
Ness H.264 HD-SDI User manual
Ness
Ness 104-005 User manual
Ness
Ness EDR1640 User manual
Ness
Ness IQ User manual
Ness
Ness 104-424 Nano Use and care manual
Ness
Ness 8-channel models User manual
