NSK Varios 750 User manual

OPERATION MANUAL
Please read this Operation Manual carefully
before use, and file for future reference.
Multi Function Ultrasonic Scaler
(Optic)(Non-Optic)
OM-E0144E 003
’10.03.005 B

1
English
· Use by medical professional, such as doctor or dental hygienist, is intended.
· Do not unplug the power cord with wet hands to avoid electric shock.
· Be sure to prevent water on the Control Unit, because it may result in short circuit and electric shock.
·
Do not give a strong impact to the handpiece/Control Unit, nor drop onto a hard surface. This could result in electric shock.
· Do not touch the handpiece backend, where electrical connections are attached to the cord. It might result in electric
shock.
· Do not disassemble or alter the handpiece/Control Unit.
· Keep away from patients with cardiac pacemakers.
·
Keep away from explosive substances and flammable materials. Do not use for patients anesthetized under laughter gas.
· Use the Fuse of specified rating. (120V : T1.25AL/125V, 230V : T400mAL/250V)
· Sterilize the Tip, handpiece, Tip Wrench, Tip Cover S, and Tip Holder by autoclaving and the Control Unit, Power Cord, Foot
Control, Handpiece Cord including the cover by alcohol disinfection after treatment for every patient.
· This product is Medical Electrical equipment Electromagetic compatable (EMC). As described in the accompanying
documentation.
WARNING
Read these cautions carefully and use only as intended or instructed.
Safety instructions are intended to avoid potential hazards that could result in personal injury or damage to the device. Safety
instructions are classified as follows in accordance with the seriousness of the risk.
Cautions for handling and operation
WARNING
CAUTION
NOTICE
A hazard that could result in bodily injury or damage to the device if the safety instructions are not
followed.
A hazard that could result in light or moderate bodily injury or damage to the device if the safety
instructions are not followed.
General information needed to operate the device safely.
Class Degree of Risk
Original Operation Manual
Thank you for purchasing the Varios Ultrasonic Scaler (Varios 750 / Varios 750 LUX).
This product is used in dental office only.
This device generates ultrasonic waves intended for use in dental applications such as scaling, root canal
treatment, periodontal and cavity preparation. Read this operation manual carefully before use, and keep
it within user's reach.
Classifications of equipment
· Type of protection against electric shock :
– Class I equipment
· Degree of protection against electric shock :
– Type BF applied part:
· Method of sterilization or disinfection recommended by the manufacture :
– See 12. Sterilization
· Degree of protection against ingress of water as detailed in the current edition of IEC 60529:
– Foot Control (Option) : IPX1 (Protected against vertically falling water drops)
· Degree of safety of application in the presence of a flammable anaesthetic mixture with air or with oxygen or nitrous oxide :
– EQUIPMENT not suitable for use in the presence of a flammable anaesthetic mixture with air or with oxygen or nitrous
oxide.
· Mode of operation :
– Continuous operation

Fig. 1
2 3
· This product needs special precautions regarding EMC and needs to be installed and put into service according to the
EMC information.
· Portable and mobile RF communications equipment can affect this product.
· The use of ACCESSORIES, transducers and cables other than those specified, with the exception of transducers and
cables sold by the manufacturer of the product as replacement parts for internal components, may result in increased
EMISSIONS or decreased IMMUNITY of it.
· This product should not be used adjacent to or stacked with other equipment and that if adjacent or stacked use is
necessary, it should be observed to verify normal operation in the configuration in which it will be used.
· Use an electrical outlet that is grounded. It may cause electrical shock, if it may not use it.
· When operating the handpiece always consider the safety of the patient.
· The handpiece is designed only for dental clinical use.
· Check the vibration outside the patient´s oral cavity before use. If any abnormalities are found, stop using immediately
and contact your dealer.
· Should this product function abnormally, cease operation immediately and returen it to the dealer for repair.
· Do not force or pull on Power Cord and/or Handpiece Cord. It could cause disconnection.
· Do not exceed Maximum Power Level for Tips. It could damage tooth structure and Tips.
· Check if the Tip has no flush, damages, bending and rust before use. Use new one.
· Always use with pouring enough water, or it may damage tooth plane and overheat the handpiece.
· Do not hit metal or prosthetic crown etc., except for removing them. Tips could break and fall into mouth.
· Do not sharpen and/or bend the Tip. Tips may damage and not generate enough vibration during scaling.
· Do not hit gingiva, mucosa and/or skin directly. It could cause damage and burn.
· During cutting, Tip will gradually wear away, as the Tip wears the stroke will get smaller and cutting power level will
decrease. When level drops too far, change the Tip.
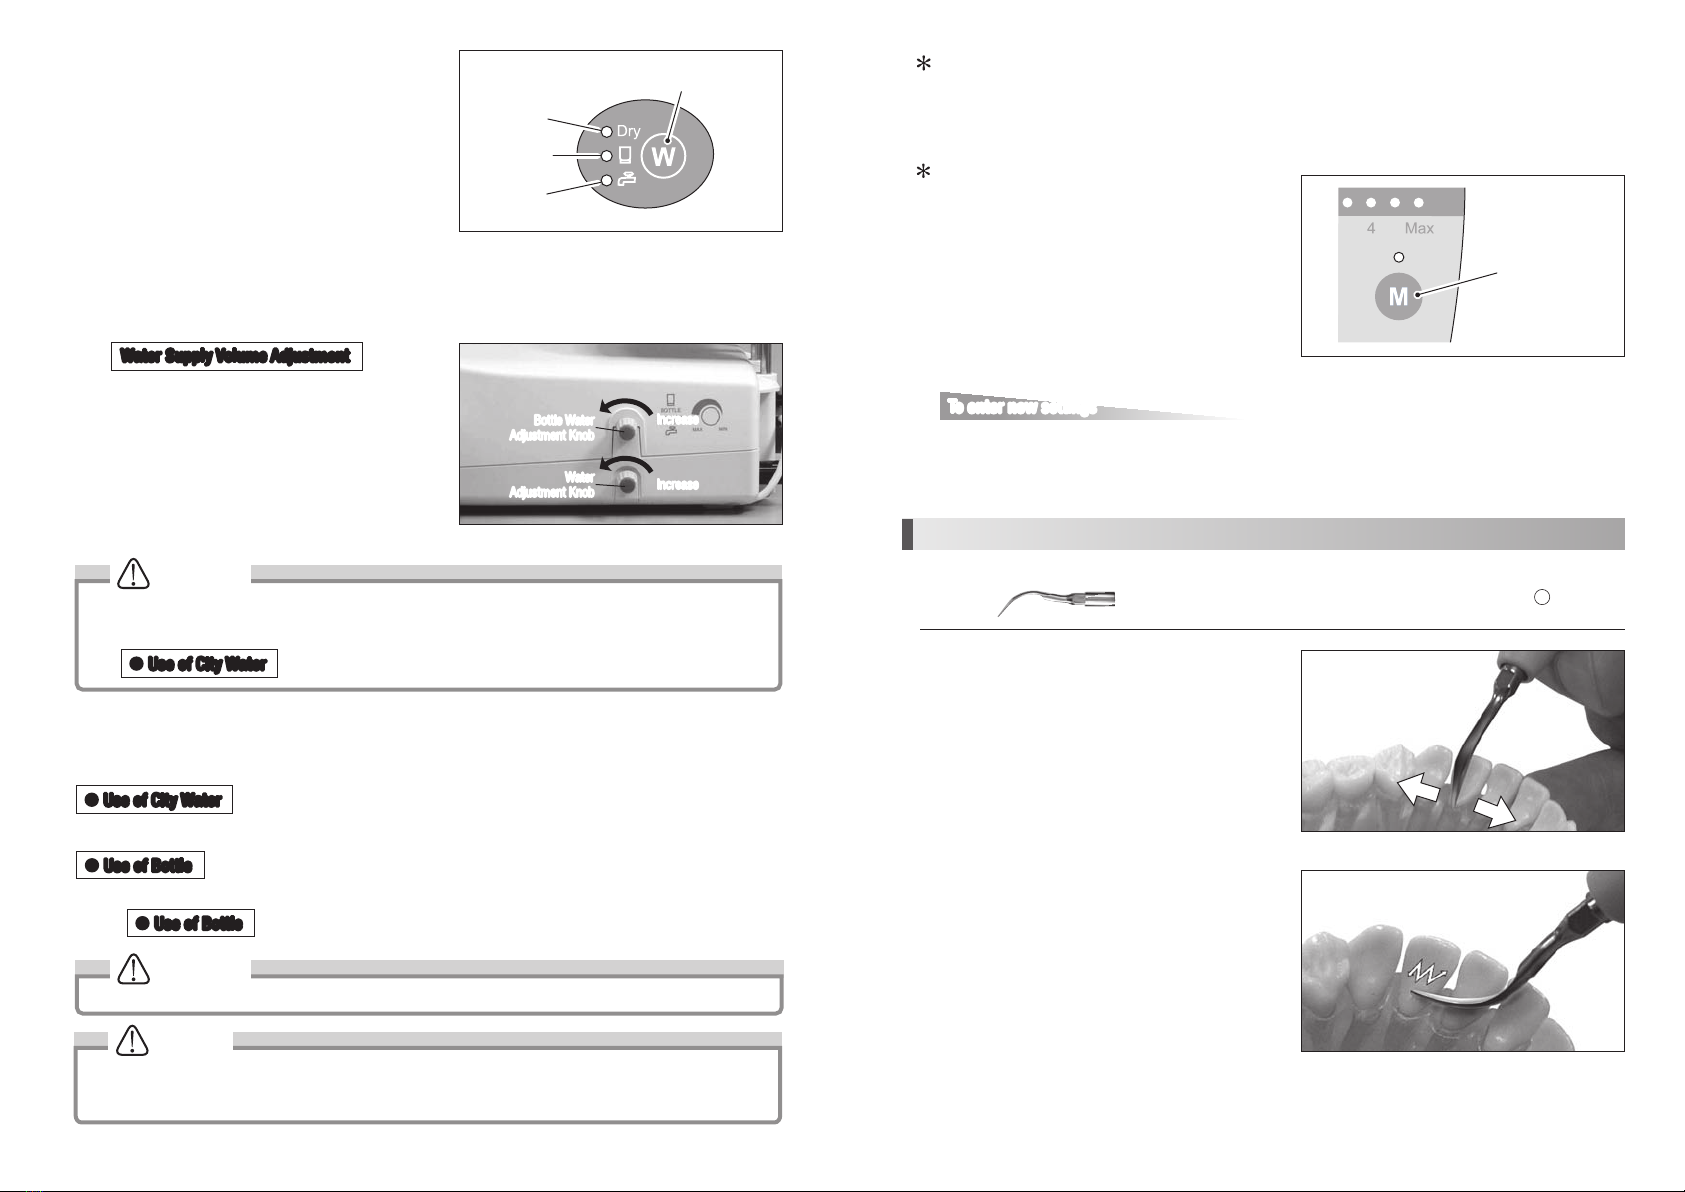
· Be sure to firmly mount the Tip with provided Wrench, or the Tip will not generate enough vibration.
· Check to see if dust does not stick on the screw of the Tip before use. If not clean, Tips will not generate enough vibration.
· Be sure to turn the Power Switch after mounting the handpiece.
· Be sure to attach NSK genuine Tips when using NSK Varios Ultrasonic Scaler (Varios 750 or Varios 750 LUX) The
problems such as damage, failure and accident of Handpieces resulting from use of Non-NSK Tips are not included in the
warranty. The following are the possible failuer that could happen when using the Non-NSK Tips.
· Vibration failure caused by using nonconformable screws.
· Patients’ accidental ingestion of damaged Tips.
· Damage of thread ridge of handpiece.
· Do not sterilize by ultraviolet light. Handpiece could discolor.
· If chemical, solvent or antiseptic solution is deposited on this product, immediately wipe it away. Discoloration or
deformation may occur if left as it is.
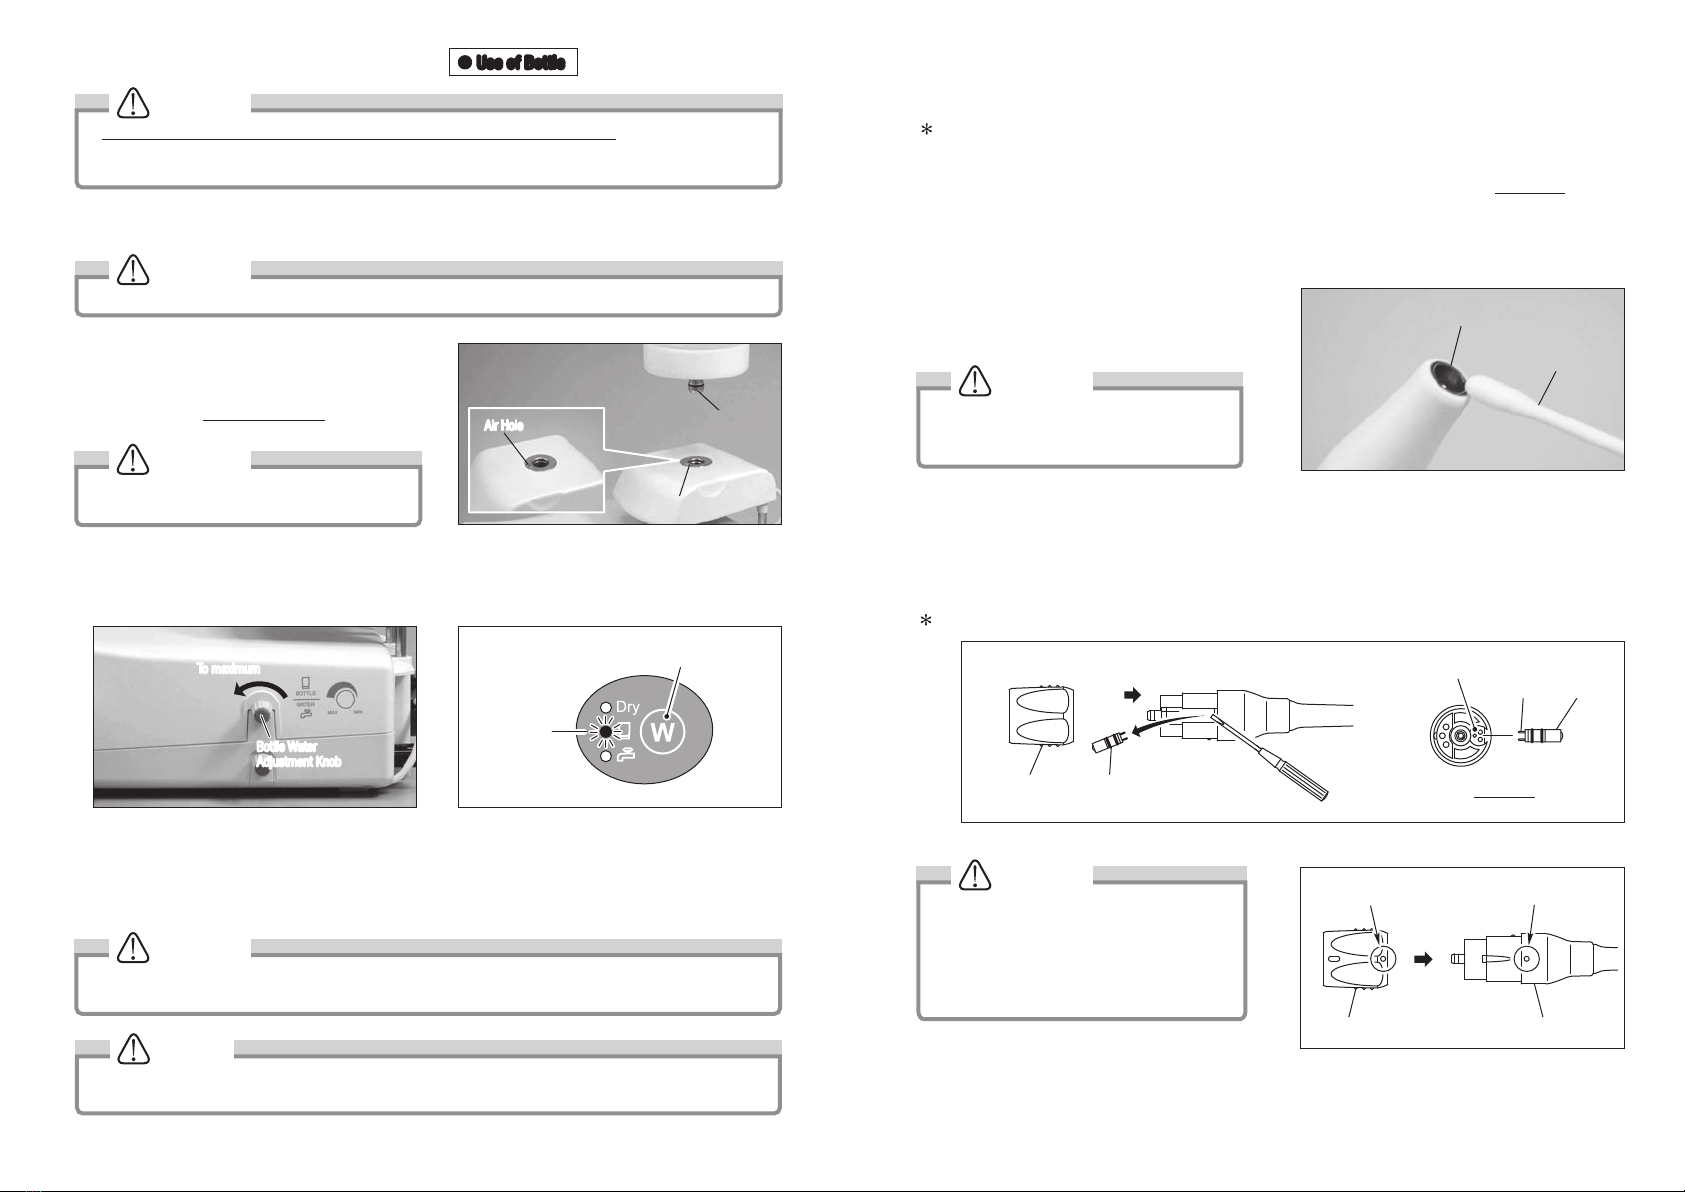
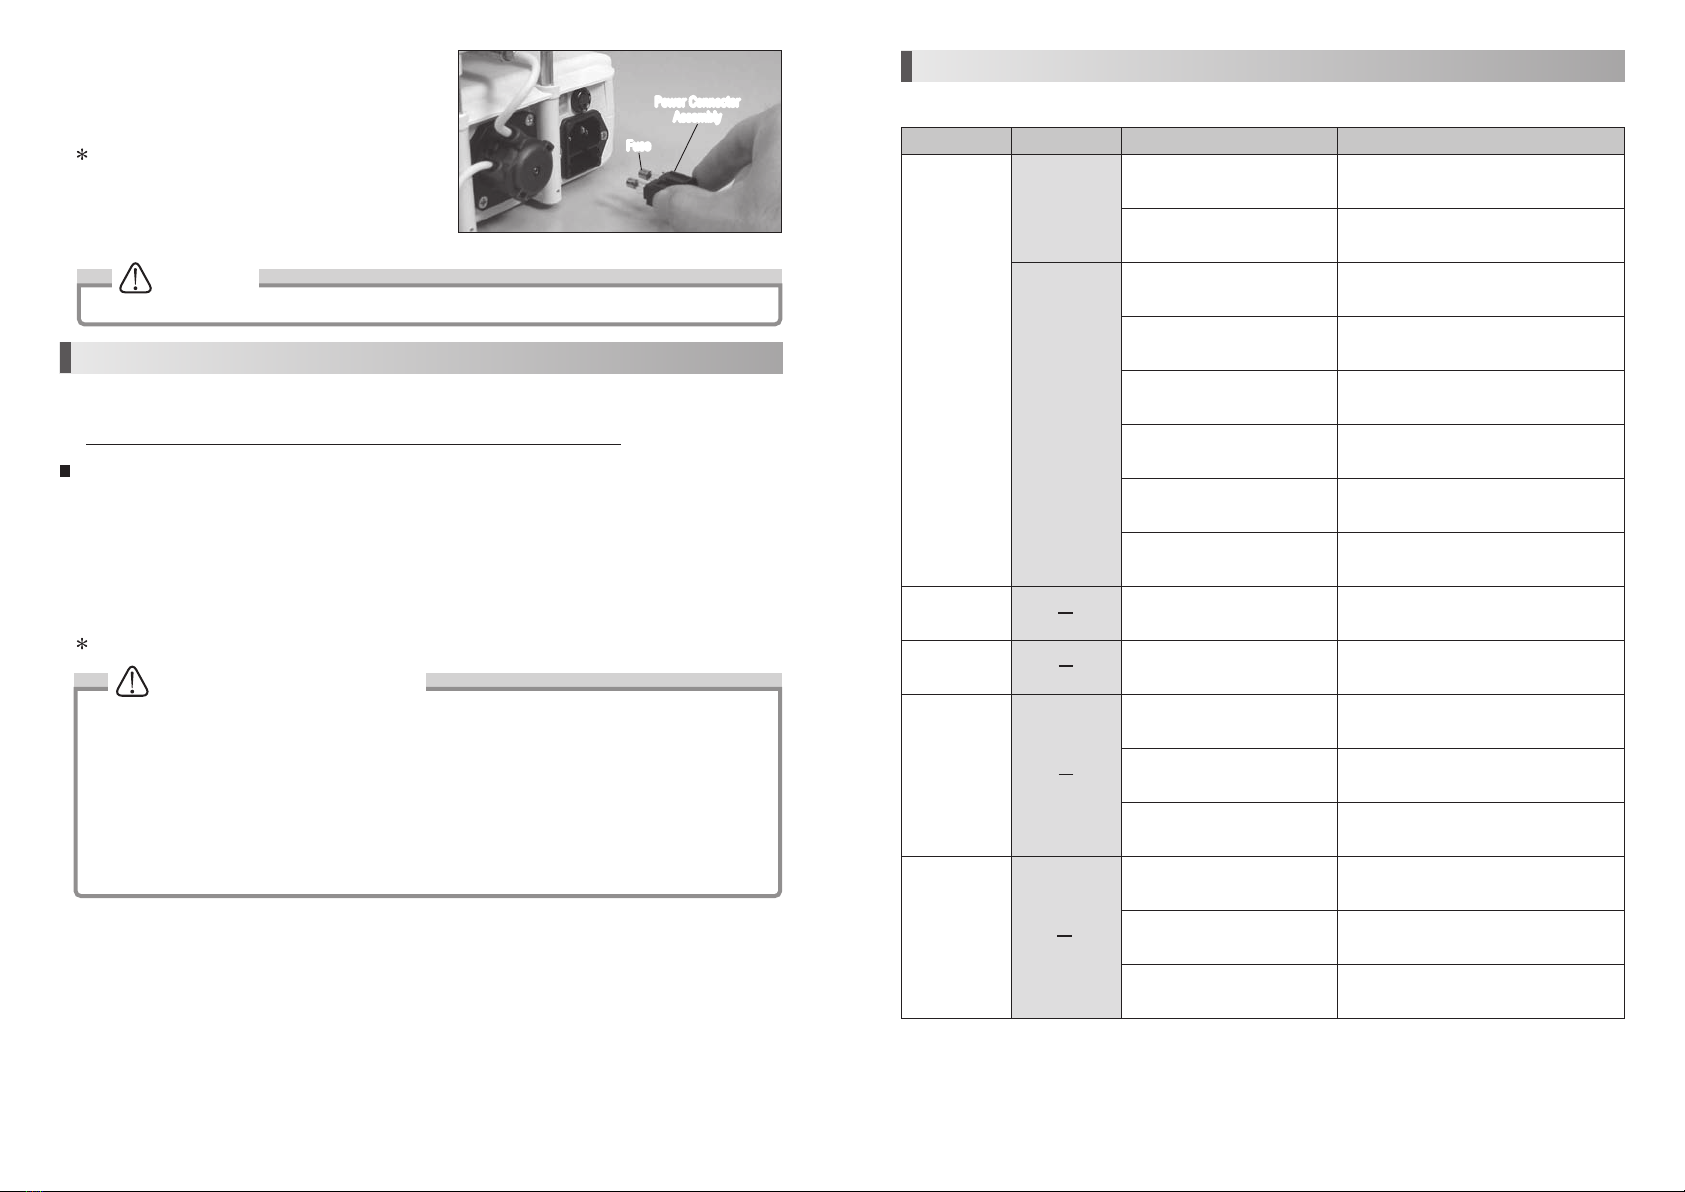
· If water is spilled on the irrigation pump, please wipe it off thoroughly and allow to dry completely prior to use. If water
gets inside the irrigation pump the roller may slip and fail to pump irrigation.
· Remove the handpiece after Tip is taken off.
· Do not put liquid such as high acid water in the bottle.
· Implant maintenance scaler tips should be inspected for proper resin coating prior to use and any possible exposure of
the metal core to a dental implant should warrant replacement of the scaler tip.
CAUTION
· During vibration, the handpiece and the handpiece cord may affect computer and LAN cable. Noise could be heard during
operation near a radio receiver.
· Be sure to turn off the Power Switch after use. Remove the power plug and water inside of the control unit if not used for
a long time.
· Users are responsible for operational control, maintenance and inspection.
· When trouble is found, send to dealer.
· This product does not consider patient’s age (except infants), gender, weight or nationality.
· No special training is required for this device.
NOTICE
· Applied parts for patient and/or operator are/ is tip and handpiece.
· There is the judgment that applies this product to a patient in the user side.
· The system is capable wide range from low power for periodontal procedures to high power for excavating procedures.
· Use supplied bottle for saline and other irrigant.
· The Control Unit can simply be wiped off so spills are very easy to clean up, and the Front Control Panel is extremely easy
to read.
· Three modes of irrigation system operation are available : irrigation from dental unit or city water, irrigation from bottle and
no irrigation.
· The Irrigation Tube from the pump is exposed outside of the Control Unit, and solution could not enter the Control Unit.
· Various operation presets can be input into the system memory.
· The handpiece ring light is extremely bright for easy viewing of the operating area. (Varios 750 LUX)
· The Control Unit has provision to operate the handpiece with light or the one without.
· The handpiece is autoclavable at 135°C
1. Features
2. Component Names
Control Unit
Bottle 2pcs Water Connecter
(AC120V Only)
Tip Wrench
Tip Cover S
Water Tube
Tip G1
Tip G4
Tip G6
Spanner Wrench (5x8) 2pcs Power Cord
Handpiece Cord
Handpiece Lamp
Handpiece Cord
Handpiece O-ring
2pcs
Foot Control
O-ring for Bottle 4pcs
Tip Holder
<Varios 750LUX>
<Varios 750>

4 5
Fig. 3
Water Tube
Water Filter Case
Connector for Water
Fig. 2
Cover
1) Remove the Dust Cover from the Bottle Base. (Fig. 5)
2) Remove the cap of the Irrigation Bottle and fill solution to
the desired level.
3) Close the cap of the Irrigation Bottle, check the Air Hole
is clean and insert the Joint into the Bottle Base
Connector until it clicks into place. (Fig. 6)
Use of BottleUse of Bottle
Fig. 5
Fig. 6
Make sure the connector and surrounding area
is completely clean before installing the Irrigation
Bottle. Wipe the Irrigation Bottle and Connector
Area thoroughly prior to inserting the Irrigation
Bottle.
CAUTION
Dust CoverDust Cover
Air HoleAir Hole
Bottle BaseBottle Base
Joint Hole
Joint
Fig. 7
(1) Water System Setup
1) Remove the Cover from the Connector for Water. (Fig. 2)
2) Connect the filter side of the Water Tube deep into the
water connector on the Varios Control Unit. (Fig. 3)
3) Connect the provided water tube to the water outlet on
the dental unit.
3. Prior to Operating System
Use of City WaterUse of City Water
· Insert the Water Tube deep into the connector on
the Control Unit.
· If water has not been used at the water outlet of
the dental unit for a long time, brownish water
may come out but wait until clean water comes
out. Then connect it.
CAUTION
Fig. 4
NOTICE
· Pushing the White Ring, (the Quick Connector
Release Ring) on the Water Connector, gently
remove the Tube. (Fig. 4)
· When the water tube is not connected, mount
the cover on the connector on the Control Unit.
NOTICE
· To remove the bottle, pull up the bottle gently.
· The Irrigation Bottle graduations are printed on both
sides of the bottle and can be read accurately from
the fill position or mounted on the Control Unit.
· Mount the Dust Cover when not in use.
White Ring
Push
Push
(2) Foot Control Connection
Connect the Foot Control Plug to the Foot Control Connector
at the back of the Control Unit, take care in properly align all
the pins. Push the Plug gently into the Connector. (Fig. 7)
Fig. 8 Fig. 9
Fig. 10
1) Align the Marks on the Handpiece Plug and the Control Unit. Gently insert.
2) Loosen and remove the Cap. (Fig. 9)
3) Insert firmly the Irrigation Tube deep into the Connector. (Fig. 10)
Align the Marks on the Control Unit and the Handpiece Plug. Gently push the Plug into the Connector. (Fig. 8)
(3) Handpiece Connection
(4) Mounting Power Cord
Insert the Power Cord into the Inlet at the back of the Control
Unit. (Fig. 11)
Use of City WaterUse of City Water
Use of BottleUse of Bottle
Mount the Cap when the Irrigation Tube is not
connected.
NOTICE
Fig. 11
Power Cord
Inlet
Mark
Handpiece Cord
Connector
Handpiece Plug CapCap
Irrigation TubeIrrigation Tube
ConnectorConnector
Foot Control ConnectorFoot Control Connector MarkMark
Foot Control Plug
Foot Control Plug

6 7
Fig. 15
Power SwitchPower Switch
Front PanelFront Panel
Fig. 12
Picture shows Varios 750 LUX Fig. 13
Picture shows Varios 750 LUX
Fig. 14
Picture shows Varios 750 LUX
Mount the Tip by fastening it lightly by hand. (Fig. 12)
Insert the Tip through the hole of the Tip Wrench, align the four cornered tip's base into the hole of the Tip Wrench. Turn it
clockwise until the wrench clicks. (Fig. 13)
To remove the Tip, turn counterclockwise with the Tip Wrench.
4. Mounting and Removing Tip
When mounting the handpiece, align the positioning Marks
on the handpiece and the Handpiece Cord. Push straight
inmost.
When removing the handpiece, grip the Front and the Rear
of the handpiece firmly. Pull to separate. (Fig. 14)
5. Mounting and Removing the Handpiece
· Detach Tip before removing handpiece.
· Push handpiece against handpiece plug inmost to connect.
· When removing the handpiece, grip the plug of the Handpiece Cord.
CAUTION
· When mounting the tip, always use groves, tip wrench. Handpiece that have been sterilized.
· Tip Wrench is consumable For reliable operation replace annually.
CAUTION
Do not touch the handpiece backend. (where
Electrical Connections are made to the cord.)
It might result in electrical shock.
WARNING
(1) Water System Setup
Carefully check all water supply connections prior to starting procedure.
Open the dental unit's water valve.
Set water pressure between 0.1~0.5MPa (1~5 kgf/cm2).
Check that the Bottle is filled to the proper level.
6. Operating Procedures
Use of City WaterUse of City Water
Use of BottleUse of Bottle
Tip Tip WrenchTip Wrench
Tighten
Tighten
Tighten
Tighten
Loosen
Loosen Loosen
Loosen
Mark
Mark MarkMark
JointJoint
HandpieceHandpiece Handpiece PlugHandpiece Plug
Fig. 16Tip Case Label
Set to PSet to ESet to G
Mode Selection Key
Fig. 17
(3) Power Range Setting
Check the case the selected Tip came in for proper power.
You can check Maximum Power on the Tip Case Label. Check
your model.
1) Select the Operating Mode with the Mode Selection Keys on the Front Panel. The light over the selected mode will
illuminate. (Fig. 17)
(2) Power On
Connect the Power Cord to the wall outlet.
Turn on the Power Switch of the Control Unit.
Front Panel will light up.
Power Level Key
Decrease Increase
Power Display Panel
Fig. 18
2) Set the power level with the Power Level Key on the
Front Panel. The lamps in the Power Display Panel will
indicate the selected power level. Make sure the
power level is set in the appropriate range for the
selected Tip. (Fig. 18)
Do not exceed Muximun power level for the Tip. It could damage teeth plane and the Tip could be broken.
CAUTION
· Continuous pushing of the Power Level Key will cause the Power Level Display to climb.
· When only water is desired without oscillating the Tip, keep pressing “Decrease” key to extinguish Power Display
Pannel Lamp.
NOTICE
POWER RANGE
Low High
Model
Maximum Power

8 9
Fig. 20
Fig. 19
Water Selection Mode Key
Dry
Bottle
City Water
(4) Water Mode Selection
Select the mode with the Water Selection Key on the
Front Panel. Bottle, City Water or Dry mode(No Irrigation
Mode) is available. (Fig. 19)
(5) Operate Varios750/750LUX
Depress the Foot Control. Tip will vibrate. In case of the Varios 750 LUX, the handpiece donut -shape light will illuminate.
Adjust the power level to the proper range. Adjust the water spray as follows.
Turn the Water Adjustment Knob counterclockwise
gradually to increase the supply volume. (Fig. 20)
Water Supply Volume AdjustmentWater Supply Volume Adjustment
· Always use the water supply unless you are doing procedure requiring dry mode. If water supply is insufficient,
handpiece will overheat patient´s tooth surface can be injured.
· Prior to starting the procedure, verify that the water spray is clean and at adequate volume.
( )
CAUTION
When using medicated solutions, clean the entire Irrigation System thoroughly.
CAUTION
(6) When Treatment is Finished.
Close the dental unit's water valve.
Thoroughly wash the Bottle Water Supply system. Refer to the 11. (4) Auto Cleaning (Cleaning of Irrigation Tube
( ) ).
Release the Foot Control and power off the Control Unit by turning off the Power Switch.
Use of City WaterUse of City Water
Use of BottleUse of Bottle
When the Control Unit is shut down, the last mode settings in use are automatically retained in memory. When you
power on the system for the next procedure, the system will reactivate in the same configuration as when shut
down.
NOTICE
Use of City WaterUse of City Water
IncreaseIncrease
Water
Adjustment Knob
Water
Adjustment Knob
Bottle Water
Adjustment Knob
Bottle Water
Adjustment Knob
IncreaseIncrease
Memory Button
Fig. 21
Fig. 23
Fig. 22
Safety Function
If you operate more than 10 minutes and operate mode set to “G”, also power setting to maximum, the Control Unit
automatically reduce power. (The output display moves 3 lamps from “Max” to “4”. )
To increase power again after auto reduction, release the Foot Control completely and depress it again.
Memory Function
The Control Unit can be preset for water spray mode,
power setting and operating mode. To set the desired
preset conditions into memory follow the procedure
below.
1) Set the desired levels.
2) Push the Memory Button for about 2 seconds or
more, the Memory Light will illuminate and the
Control Unit will produce a beep. The memory is set.
(Fig. 21)
To enter new settingsTo enter new settings
After confirming the settings of Water Spray Mode, Power Setting and Operating Mode, push the Memory Button for
approx. 2 seconds. (The Memory light will illuminate.) The old memory is cleared and new settings are programmed.
Removing
tartar on the
neck of tooth
Apply the top of the Tip on the
tooth plane and move it
sideways finely along the neck
of tooth. (Fig. 22)
7. Provided Scaler Tips
Place the side of the Tip parallel
with the tooth plane and finely
move it up and down. (Fig. 23)
Insert the Tip between the teeth
vertically and move it slightly.
Always touch the tip on the
tooth.
G1 This Tip is designed for removing tartar on the neck of tooth (the tooth plane),
between teeth, and below the gum margin. Set the level less than “ 3”.
Removing
tartar on the
tooth plane
Removing
interdental
calculus
···
···
···
G

10 11
Fig. 24
G4 Designed for removing tartar on the neck of tooth (subgingival) and interdental
calculus. Set the level less than “ 3”.
Apply the top of the tip on the tooth plane and
move it sideways finely in the same way as G1
Tip. (Fig. 24)
Fig. 28
Slit
Slit
Tip
Tip Cover S
Tip-Handpiece Joint
Fig. 25 Picture shows Varios 750
Hold the Tip Cover S as shown and insert it all the way to the Tip-Handpiece Joint.
To remove, hold the Tip Cover S and the handpiece as shown and pull straight out. (Fig. 28)
8. How to Use Tip Cover S
G6 Designed for removing subgingival calculus and cleaning periodontal pocket. Set
the level less than “ 1”.
Insert the top of the Tip into the periodontal
pocket and move it slowly. The top of the Tip is
sharp so that it could remove tartar on long
corone and retracted gingival. (Fig. 25)
Clean periodontal pocket at low power. (Set
the level less than “ 2”.)
Carefully insert the
scaler Tip into the
Tip Cover S. Avoid
injuring the fingers.
WARNING
Do not use the Tip Cover S as a Tip change tool.
CAUTION
G
G
P
CAUTION
How to use the Tip Card
1) Place the neck of the Tip in the cut out.
2) Check wear of the Tip.
3) See the green, yellow and red line to check wear of the Tip. *See below what each color means. At NSK we recommend
to replace a Tip when the Tip meets the yellow line (wear of 1mm) to guarantee safe and effective use.
Green: No wear - Tip is OK
Tip replacement is not necessary.
Yellow: Wear of 1mm - Tip is showing some wear
Tip replacement is recommended.
Red: Wear of 2mm - Tip is badly worn
Tip replacement is necessary.
Fig. 26
Fig. 27
OK
NO
Tip Card
Handpiece
Neck
Efficiency
*The Tip Card can be used to check the following tips : G1, G4,
G5, G6, G8, P1/P1D, P10, and P20
1mm 2mm
25%
50%
Decrease
Decrease
Tips are consumables. The efficiency of dental scaling
decreases approximately 25% when the top of the Tip
wears 1 mm and approximately 50% when it wears 2 mm.
In addition, the vibration condition changes owing to the
wear, which may damage a patient’s tooth surface. Check
the Tip wear condition with the Tip Card periodically, and
replace the Tip with a new one in good time.
Fig. 29Picture shows Varios 750
Mount the Tip Cover S onto the Tip and put the handpiece
in the Handpiece Holder while the handpiece is not used.
The Handpiece Holder direction is adjustable. (Fig. 29)
9. Handpiece Holder
Whenever the handpiece is mounted in the Handpiece Holder, always cover The tip with the Tip Cover S to prevent
accidental injury.
CAUTION
Handpiece Holder

1312
Fig. 32
(1) Changing O-ring
· Handpiece (Varios 750)
An O-ring is located between the handpiece and the
Handpiece Cord Connector. Use a pointed tool to remove,
and mount a new one in the groove. (Fig. 31)
Optional O-ring : Order No. 0312012100
11. Care and Maintenance
· Use the Tip Holder for Tips removed from the handpiece.
· The Tip Holder is autoclavable and can hold up to 5
types at once. To autoclave, tilt the Tips in the direction
of the arrow in fig.30.
· Bottle ( )
Remove two O-rings at the Bottle Joint with a pointed
tool, and mount new ones into the grooves. (Fig. 32)
Optional O-ring : Order No. 0312090100
Use of BottleUse of Bottle
O-ringO-ring
O-ring
for Bottle
O-ring
for Bottle
Fig. 30
10. Tip Holder
Fig. 31
Fig. 34
2) When the Water Filter case is separated, the Water
Filter can be removed as shown in Fig. 34.
Replace with a new one and reassemble the filter in
the reverse order.
Optional Water Filter : Order No. U387042
(3) Changing the Irrigation Pump ( )
1) Remove the Bottle in straight up motion.
2) Push the Joint Ring in to release the Tube Connector and disconnect the Irrigation Tube. (Fig. 35)
3) Remove the Irrigation Tube from connector. (Fig. 36)
4) Remove the Irrigation Tube from the groove on the reverse side of the Control Unit. (Fig.37)
5) Turn the Irrigation Pump counterclockwise until it clicks. Pull out. Align the replacement Irrigation Pump with the drive
shaft at the same released position and turn clockwise until it clicks. (Fig. 38)
6) Insert the Irrigation Tube into the Groove on the reverse side with slack between pump and groove.
7) Connect the Irrigation Tube to the connector on the handpiece cord connector.
8) Insert the Tube Connector to the Joint Ring until it clicks.
Optional Irrigation Pump : Order No. U424061
Assemble the Water Filter in the correct direction as
shown in Fig. 34.
CAUTION Water Filter
Control Unit Side
O-ring
Use of BottleUse of Bottle
Fig. 35 Fig. 36
Fig. 37 Fig. 38
Joint RingJoint Ring
Tube ConnectorTube Connector
PushPush
Groove
Irrigation Tube
Irrigation PumpIrrigation Pump
Lock
Lock
Release
Release
Irrigation TubeIrrigation Tube
ConnectorConnector
Fig. 33
(2) Changing Water Filter ( )
1) Close the water valve of the dental unit to which Varios
750 or Varios 750 LUX is connected. Mount two
Spanner Wrenches (5X8) as shown in Fig. 33, and turn
in the directions shown. When water tube is getting
twisted by this, relieve the twist by turning it, as its end
on the Control Unit side is free to turn.
Water Filter CaseWater Filter Case
Use of City WaterUse of City Water
· Before replacing the Irrigation Pump, wipe off excess water on pump and Drive Shaft. The wet Drive Shaft
and rollers can be slippery and cause improper operation.
·
Insert the replacement Irrigation Pump into the Drive Shaft straight (slow and soft) to prevent damaging rollers in
pump.
· Run the replaced Irrigation Pump about 10 seconds on largest setting of Water Volume before operation to adopt
Irrigation Tube to new pump.
CAUTION
Tip
Tip Holder

14 15
(4) Auto Cleaning (Cleaning of Irrigation Tube ( )
1) Remove the bottle from the Bottle Base by pulling straight.
2) Fill the spare Bottle over half full with clear water.
After each use, remove all the disinfectant solution and perform "Auto Cleaning" procedure.
If you have not cleaned the system, there is a good chance that dried disinfectant is stuck in the tubing or some of
the metal parts may be rusted.
CAUTION
Use only distilled water for cleaning.
CAUTION
Fig. 40 Fig. 41
Water Selection Mode Key
Fig. 39
4) Turn the Bottle Water Adjustment Knob to maximum. (Fig. 40)
5) Use the Water Selection Mode Key to select Bottle Water. (The Bottle Lamp will light.) (Fig. 41)
3) Install the cap on the Bottle, check the Joint Hole
and surrounding area and clean as needed. After
cleaning install the Bottle Joint into the Joint Hole
and press down until it click into place. (Fig. 39)
Before installing the Bottle, make sure the Air Hole
and surrounding area are clean and free of debris.
CAUTION
Air HoleAir Hole
Joint Hole
Joint
Bottle Water
Adjustment Knob
Bottle Water
Adjustment Knob
To maximumTo maximum
Bottle Lamp
Use of BottleUse of Bottle 7) When the Auto Cleaning sequence completes the Control Unit will revert to the settings prior to cleaning.
Remove the Bottle from the Bottle Base by pulling straight.
After cleaning thoroughly clean and dry both Bottles prior to use.
Fig. 42
Fig. 43
Cover Lamp
Socket
View from A
Lamp Pin Lamp
A
(6) Changing Lamp (Varios 750 LUX)
Refer to 5. Mounting and Removing the Handpiece. Disassemble the handpiece from the Handpiece Cord. Remove the cover.
Use a prevision screw driver and push lamp out. Align the lamp pins of a new lamp with the holes, and push the lamp into.
(Fig. 43) Align the mark on the cover with the same on the Handpiece Cord. Push the cover to the cord unit it clicks. (Fig. 44)
Assemble the handpiece and the Handpiece Cord.
Optional Lamp : VA Bulb Set (A Set consist of 3 pieces) Order No. Y900107
(5) Cleaning of Donut-Shape Light (Varios750LUX)
Wipe the debris off the end of the Optic Fibers at the
handpiece with alcohol soaked cotton swab.(Fig. 42)
Following method is also available for cleaning. (Manual Cleaning)
1) Remove the Bottle from the Bottle Base.
2) Open the cap of the Bottle and fill the with solution.
3) Close the cap firmly and insert the joint part on the Bottle Cap into Joint Hole on the Bottle Base until it clicks.
(Make sure air hole located on the Bottle Cap is not closed with dirt.)
4) Operate the Control Unit about 20 seconds with water supply at maximum setting.
Do not use any sharp pointed tools to clean the
Optic Fiber End. In case the light becomes dim,
contact dealer.
CAUTION
End Face Optic Fiber
Cotton Swab
6)
Press and hold the Water Selection Mode Key for 2 seconds. The Control Unit will emit a beep, all the lamps except the
Bottle Lamp will shut off and the auto cleaning sequence will start. The auto cleaning sequence takes about 30 seconds.
After the auto cleaning sequence commences pushing the water Selection Mode Key will stop the sequence.
If you press the Mode Selection Key and the Power Key during auto cleaning, the Tip will vibrate. Make sure power
setting does not exceed the maximum recommended power for the Tip.
CAUTION
Setting the Bottle Water Adjustment Knob at less than maximum during cleaning, Result in incomplete cleaning in
the 30 seconds cycle.
NOTICE Fig. 44
Alignment Mark
Cover Handpiece Cord
Alignment Mark
· Make sure that the bulb is sufficient cooled,
when it is replaced.
· Do not touch glass part of new lamp.
· Care needs to be execised when mounting a
new lamp to avoid the O-ring off from the
groove or being twisted.
CAUTION

16 17
Fig. 45
· Autoclave sterilization is recommended.
· Autoclave sterilization required first time you use and after each patient as noted below.
· The Tip (except diamond coated scaler Tip), handpiece, Tip Wrench, Tip Cover S, and Tip Holder can be autoclaved.
Autoclave Procedure
1) Remove the Tip after use. ( Refer to 4 Mounting and Removing Tip)
2) Wipe dirt and debris from the handpiece, and wipe clean with alcohol-immersed cotton swab or cloth. Do not use a
wire brush.
3) Insert into an autoclave pouch. Seal the pouch.
4) Autoclavable up to max. 135˚C.
ex.) Autoclave for 20 min. at 121˚C, or 15 min. at 132˚C.
5) Keep the products in the autoclave pouch to keep it clean until you us
Sterilization at 121°C for more than 15 minutes is recommended by EN13060 or EN ISO17665-1.
12. Sterilization
(7) Fuse Replacement
Release ratched clamp located on the right and left of the Inlet
and pull it out to chage.(Fig. 45)
Optional Fuse : T1.25AL/125V (120V) Order No. U424151
T400mAL/250V (230V) Order No. U459151
Use the Fuse of specified rating. (120V : T1.25AL/125V, 230V : T400mAL/250V)
WARNING
· This products can not be cleaned and disinfected with a Thermo-Disinfector.
· Do not sterilize by ultraviolet ray. The handpiece could discolor.
· If autoclaved with other instruments stained with chemical solution, it could strip the plating and make the
surface black.
· Since the bottom shelf of the sterilizer is close to the heat source, it can be too hot. Place instruments in the
middle or top shelves.
· Do not autoclave any parts (the Control Unit, Power Cord, Bottle, Foot Control, Water Tube, Water Connector,
Handpiece Cord including the Cover, Lamp, O-ring, and Spanner Wrench (5 X 8) ). Other than those that can be
subjected to autoclave sterilization. Perform alcohol disinfection to the Control Unit, Power Cord, Foot Control,
Handpiece Cord including with reference after every patient.
WARNING ON STERILIZATION
Fuse
Power Connector
Assembly
Power Connector
Assembly
Fuse
When trouble is found, check the followings prior to consulting dealer.
13. Troubleshooting
No / Poor
vibration.
The Tip is bent
or broken.
The Tip fly away.
Noise from the
handpiece.
The handpiece is
overheating.
The Power Lamp
does not light,
even if the Power
Switch is ON.
The Tip does not
generate
vibration, in spite
of depressing the
Foot Control.
The Power Cord or the Jack is
disconnected.
The Fuse is burned out.
The Tip is not tightened firmly.
Worn Tip.
Output has not been correctly
adjusted for the Tip.
The Foot Control is disconnected.
Failure of vibrator in the handpiece.
Failure of internal components of
the Foot Control.
Output has not been properly
adjusted for the Tip.
The Tip is not tightened firmly.
Output has not been properly
adjusted for the Tip.
The Tip is not tightened firmly.
Failure of vibration in the
handpiece or the Control Unit.
Output has not been properly
adjusted for the Tip.
The Tip is not tightened firmly.
Failure of vibration in the
handpiece or the Control Unit.
Correctly insert the Power Cord or the Jack.
Replace the Fuse.
120V : T1.25AL/125V/230V : T400mAL/250V
Tighten the Tip until the Tip Wrench stops.
Replace the Tip.
Adjust the power on the Tip Case. Do not
exceed.
Connect the Foot Control correctly.
Contact dealer.
Contact dealer.
Adjust the power on the Tip case. Do not
exceed.
Tighten the Tip until the Tip wrench stops.
Adjust the power on the Tip Case. Do not
exceed.
Tighten the Tip until the Tip Wrench stops.
Contact dealer.
Adjust the power on the Tip Case. Do not
exceed.
Tighten the Tip until the Tip Wrench stops.
Contact dealer.
Problem
Probable Cause
Cause Solution

18 19
The water does
not reach to the
Control Unit.
Check to see if
water reaches
the Control Unit.
The Irrigation
Pump is running.
The Irrigation
Pump is stopping.
Water is leaking
from the joint
between the
Irrigation Tube
and the Irrigation
Connector.
Water is leaking
from the joint
between the
handpiece and
the core.
Water is leaking
from the Control
Unit.
Tip oscillates, but
donut light turns
on and off.
Tip oscillates, but
light does not
turn on.
Lamp is correctly
and securely
mounted in the
socket, but light
does not turn on.
Power output is
set at maximum
at G mode.
The water adjustment knob is
closed.
Disconnected Irrigation supply at low
volume range. (less than 10cc/min.)
The water filter is clogged.
The Irrigation Tube is kinked.
Time to replace Irrigation Pump.
(Applox. 500hours after used.)
The Irrigation Tube is not
connected correctly.
O-ring at the back of the
handpiece is worn or damaged.
The water circuitry in the Control
Unit is damaged.
The handpiece is not connected
into the Handpiece Cord
correctly.
The lamp pins are not correctly
engaged in the socket.
Has the lamp burned out?
Disconnection in the Handpiece
Cord, or failure in the Control Unit.
Safety function is activated.
Check the water circuitry and supply to the
Control Unit. Water pressure : 0.1~0.5MPa
(1-5kgf/cm2)
Turn the Water Adjustment Knob and adjust to
the appropriate volume.
No problem. Turn the Water Adjustment Knob
and increase the Irrigation volume.
Replace with new Water Filter (Refer to 11. (2)
Changing Water Filter
( ) ).
Straighten the kinked tube.
Replace with new Irrigation Pump (Refer to 11.
(3) Changing the Irrigation Pump
( ) ).
Firmly insert the Irrigation Tube into the Irrigation
Connector inmost.
Replace with new O-ring (Refer to 11 (1)
Changing O-ring · Handpiece (Varios 750) ).
Contact your dealer.
Firmly insert the handpiece into the Handpiece
Cord inmost.
Mount the Lamp correctly and securely.
Replace with new lamp (Refer to 11 (6)
Changing Lamp (Varios 750 LUX) ).
Contact dealer.
Power output will weaken autom atically while
continuous operation is over 10min at the setting
of Maximum power at G mode. Releasing the
foot from the Foot Control will reset the safety
function. Stepping on the Foot Control then will
resume the previous function.
Problem
Probable Cause
Cause Solution
No / Poor water.
No Irrigation
supply and/or
unstable
Irrigation supply
Water leakage.
Donut light does
not illuminate.
(Varios 750 LUX)
Loss of power
output without
operation.
Beeping while
power on.
Beeping while
stopping
vibration of Tips.
Depress Foot Control.
Abnormal heating of the Control
Unit.
Turn the Power Switch on after release of the
Foot Control.
Stop the operation and leave until Control Unit
becomes cool.
Problem
Probable Cause
Cause Solution
Start Beeping
14. Spare Parts
Consult with dealer from whom you purchased it about waste disposal.
15. Disposing product
Manufacturer warrants its products to the original purchaser against defects in material and workmanship under normal
practices of installation, use and servicing. Such expendable items as O-rings and lamps are not covered by this warranty.
16. Warranty
Model Products Order cord
Irrigation Bottle Set
Water Filter
Irrigation Pump Set
VA Bulb
(Pack of 3)
Bottle Hanger Set
Bottle Hanger
Irrigation Needle
(3 pcs.)
U424060
U387042
U424061
Y900107
Y900136
U424514
Y900137
Use of City WaterUse of City Water
Use of BottleUse of Bottle
Use of City
Water
Use of City
Water
Use of BottleUse of Bottle

20 21
Guidance and manufacturer's declaration - electromagnetic emissions
The Varios750 / Varios750LUX is intended for use in the electromagnetic environment specified below. The customer or the user of the Varios750 / Varios750LUX
should assure that is used in such an environment.
Emissions test Compliance Electromagnetic environment - guidance
RF emissions
CISPR11
RF emmissions
CISPR11
Harmonic emissions
IEC61000-3-2
Voltage fluctuations/flicker emissions
IEC61000-3-3
Group 1
class B
class A
Complies
The Varios750 / Varios750LUX uses RF energy only for its internal function. Therefore, its RF
emissions are very low and are not likely to cause any interference in nearby electronic equipment.
The Varios750 / Varios750LUX is suitable for use in all establishments, including domestic
establishments and those directly connected to the public low-voltage power supply network that
supply network that supplies buildings used for domestic purposes.
Guidance and manufacturer's declaration - electromagnetic immunity
The Varios750 / Varios750LUX is intended for use in the electromagnetic environment specified below. The customer or the user of the Varios750 / Varios750LUX
should assure that it is used in such an environment.
NOTE: Ut is the a.c. mains voltage prior to application of the test level.
Immunity test IEC60601 test level Electromagnetic environment - guidance
Electrostatic discharge (ESD)
IEC61000-4-2
Electrical fast transient/burst
IEC61000-4-4
Surge
IEC61000-4-5
Voltage dips, short
interruptions and voltage
variations on power supply
input lines
IEC61000-4-11
Power frequency (50/60Hz)
magnetic field
IEC61000-4-8
±6kV contact
±8kV air
±2kV for power supply lines
±1kV for input/output
±1kV line(s) to line(s)
±2kV line(s) to earth
<5% Ut (>95% dip in Ut)
for 0.5 cycle
40% Ut (60% dip in Ut)
for 5 cycles
70% Ut (30% dip in Ut)
for 25 cycles
<5% Ut (>95% dip in Ut)
for 5 secs
3 A/m
Compliance level
±6kV contact
±8kV air
±2kV for power supply lines
±1kV for input/output
±1kV line(s) to line(s)
±2kV line(s) to earth
<5% Ut (>95% dip in Ut)
for 0.5 cycle
40% Ut (60% dip in Ut)
for 5 cycles
70% Ut (30% dip in Ut)
for 25 cycles
<5% Ut (>95% dip in Ut)
for 5 sec
3 A/m
Floors should be wood, concrete or ceramic tile. If floors are
covered with synthetic material, the relative humidity should be
at least 30%.
Mains power quality should be that of a typical commercial or
hospital environment.
Mains power quality should be that of a typical commercial or
hospital environment.
Mains power quality should be that of a typical commercial or
hospital environment. If the user of the Varios750 / Varios750LUX
requires continued operation during power mains interruptions, it
is recommended that the Varios750 / Varios750LUX be powered
from an uninterruptible power supply or a battery.
Power frequency magnetic fields should be at levels
characteristic of a typical location in a typical commercial or
hospital environment.
Type
Power Source
Vibration Frequency
Maximum Output
Power Consumption
Water Pressure
Lighting
Specifications
Bottle Volume
Dimensions
Use Environment
Store Environment
350mL
W162 X D274 X H120mm
Temperature 0 - 40 ˚C
(The liquid must not freeze up)
Humidity 30 - 75 %
Atmospheric pressure 700 - 1060 hPa
Temperature -10 - 60 ˚C
Humidity 10 - 85 %
Atmospheric pressure 500 - 1060 hPa
NE134
AC120V 50/60Hz
AC230V 50/60Hz
28~32kHz
8W
Max. 42VA
0.1~0.5MPa (1~5kgf/cm2)
Varios750 : No
Varios750LUX : Yes
Guidance and manufacturer's declaration - electromagnetic immunity
The Varios750 / Varios750LUX is intended for use in the electromagnetic environment specified below. The customer or the user of the Varios750 / Varios750LUX
should assure that it is used in such an environment.
NOTE 1 At 80MHz and 800MHz, the higher frequency range applies.
NOTE 2 These guidelines may not apply in all situations. Electromagnetic propagation is affected by absorption and reflection from structures, objects and people.
a Field strengths from fixed transmitters, such as base stations for radio (cellular/cordless) telephones and land mobiles radios, amateur radio, AM and FM radio
broadcast and TV broadcast cannot be predicted theoretically with accuracy.To assess the electromagnetic environment due to fixed RF transmitters, an
electromagnetic site survey should be considered. If the measured field strength in the location in which the Varios750 / Varios750LUX is used exceeds the
applicable RF compliance level above, the Varios750 / Varios750LUX should be observed to verity normal operation. If abnormal performance is observed,
additional measures may be necessary, such as reorienting or relocating the Varios750 / Varios750LUX.
b Over the frequency range 150kHz to 80MHz, field strengths should be less than 3 V/m.
Immunity test IEC60601 test level Electromagnetic environment - guidance
Conducted RF
IEC61000-4-6
Radiated RF
IEC61000-4-3
3Vrms
150 kHz to 80MHz
3V/m
80MHz to 2.5 GHz
Compliance level
3Vrms
3V/m
Portable and mobile RF communications equipment should be used no
closer to any part of the Varios750 / Varios750LUX, including cables,
than the recommended separation distance calculated from the
equation applicable to the frequency of the transmitter.
Recommended separation distance
d= 1.2 P
d= 1.2 P80MHz to 800MHz
d= 2.3 P800MHz to 2.5GHz
Where Pis the maximum output power rating of the transmitter in
watts (W) according to the transmitter manufacturer and d is the
recommended separation distance in meters (m).
Field strengths from fixed RF transmitters as determined by an
electromagnetic site survey, should be less than the compliance level
in each frequency range.
Interference may occur in the vicinity of equipment
marked with the following symbol:
TUV Rhineland of North America is a Nationally Recognized Testing Laboratory (NRTL) in the United States and is accredited by
the Standards Council of Canada to certify electro-medical products with Canadian National Standards.
Follow the waste of electric and electronic equipment (WEEE) Directive (2002/96/CE) to dispose of the product and accessories.
Consult operation instructions.
This conforms to CE European Directive of “Medical equipment directive 93/42/EEC.”
Symbols
Protected against vertically falling water drops.
Manufacturer.
Type BF applied part. Authorised representative in the European community.
Marking on the outside of Equipment or Equipment parts that include RF transmitters or that apply RF electromagnetic energy
for diagnosis or treatment.
Autoclavable up to Max.135°C. *for detail see Sterilization.

22
Complies withMaximum lengthCables and accessories
RF emissions, CISPR11,
Harmonic emissions,
Voltage fluctuations/ flicker emission,
Electrostatic discharge (ESD)
Electric fast transient / burst
Surge
Voltage dips, short interruptions and voltage variations on power supply input lines
Power frequency(50/60Hz) magnetic field
Conducted RF
Radiated RF
2.0 m
2.5 m
Shield
Unshielded
Unshielded
Handpiece Cord
Foot Control
Class B/ Group 1
IEC61000-3-2
IEC61000-3-3
IEC61000-4-2
IEC61000-4-4
IEC61000-4-5
IEC61000-4-11
IEC61000-4-8
IEC61000-4-6
IEC61000-4-3
150kHz to 80MHz
d=1.2 P
Recommended separation distances between portable and mobile RF communications equipment and the Varios750 / Varios750LUX.
The Varios750 / Varios750LUX is intended for use in an electromagnetic environment in which radiated RF disturbances are controlled. The customer or the user of the
Varios750 / Varios750LUX can help prevent electromagnetic interference by maintaining a minimum distance between portable and mobile RF communications
equipment (transmitters) and the Varios750 / Varios750LUX as recommended below, according to the maximum output power of the communications equipment.
For transmitters rated at a maximum output power not listed above, the recommended separation distance d in meters (m) can be estimated using the equation
applicable to the frequency of the transmitter, where P is the maximum output power rating of the transmitter in watts (W) according to the transmitter manufacturer.
Rated maximum output power of transmitter
W800MHz to 2.5GHz
d =2.3 P
80MHz to 800MHz
d=1.2 P
NOTE 1 At 80 MHz and 800 MHz, the separation distance for the higher frequency range applies.
NOTE 2 These guidelines may not apply in all situations. Electromagnetic propagation is affected by absorption and reflection from structures, objects and people.
Separation distance according to frequency of transmitter
m
0.01
0.1
1
10
100
0.12
0.38
1.2
3.8
12
0.12
0.38
1.2
3.8
12
0.23
0.73
2.3
7.3
23
This manual suits for next models
1
Table of contents
Other NSK Medical Equipment manuals

NSK
NSK M40 XS User manual

NSK
NSK Varios Combi Pro User manual

NSK
NSK Ti-Max Z Z-SG45L User manual

NSK
NSK Osseo 100+ User manual

NSK
NSK SGL70M User manual

NSK
NSK SGS Series User manual

NSK
NSK Osseo 100 User manual

NSK
NSK VarioSurg 3 User manual

NSK
NSK Varios 560 LUX User manual

NSK
NSK Ti-Max X450L User manual