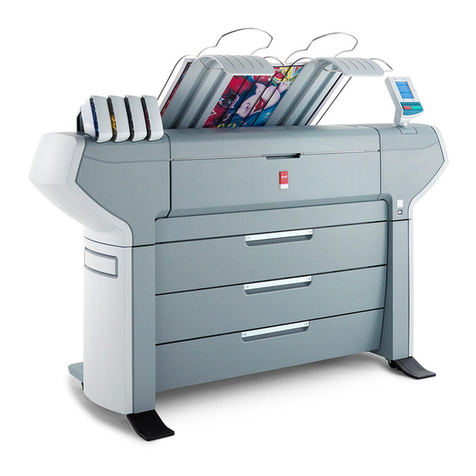
Oce CPS800 User manual

Océ CPS800®
Océ User manual
Job Manual

Edition 03-2006 US
Océ-Technologies B.V.
Copyright
2006, Océ-Technologies B.V. Venlo, The Netherlands.
All rights reserved. No part of this work may be reproduced, copied, adapted, or
transmitted in any form or by any means without written permission from Océ.
Océ-Technologies B.V. makes no representation or warranties with respect to the
contents hereof and specifically disclaims any implied warranties of
merchantability or fitness for any particular purpose.
Further, Océ-Technologies B.V. reserves the right to revise this publication and to
make changes from time to time in the content hereof without obligation to notify
any person of such revision or changes.

3
Trademarks
Trademarks
Océ, Océ CPS800®and Océ Image Logic®are registered trademarks of
Océ-Technologies B.V..
Adobe®, Acrobat®, Reader®and Distiller®are registered trademarks of Adobe®
Systems Incorporated.
PostScript®3is a registered trademark of Adobe®Systems Incorporated.
Apple®, Mac®, Mac OS®and Macintosh®are registered trademarks of Apple®
Computer, Inc.
Fiery®, Command WorkStation®and EFI®are registered trademarks of Electronics
for Imaging (EFI®), Inc.
Microsoft®, Windows®, Windows NT®, Windows 98®, Windows 2000®, Windows
XP®, Windows Server 2003®are either registered trademarks or trademarks of
Microsoft® Corporation in the United States and/or other countries.
Products in this publication are referred to by their general trade names. In most, if
not all cases, these designations are claimed as trademarks or registered trademarks
of their respective companies.

4
Notes for the reader
Introduction
This manual helps you to use the Océ CPS800®. The manual contains a description
of the Océ CPS800®and guidelines to use and operate the Océ CPS800®. There are
also tips to increase your knowledge of the Océ CPS800®and to help you manage
the workflow even better.
Definition
Attention Getters
Parts of this manual require your special attention. These parts provide important,
additional information or are about the prevention of damage to your properties.
Note, Attention and Caution
The words Note, Attention and Caution indicate these important parts.
■The word Note comes before additional information about the correct operation
of the Océ CPS800®or a tip.
■A part marked with Attention contains information to prevent damage to items,
for example the Océ CPS800®, an original or a file.
■A part marked with Caution contains information to prevent personal injury.
Caution is found only in manuals that describe physical products.
Safety information
The safety information for this product is included in a separate manual with the title
Safety manual. This manual is part of the documentation set that you received with
your product.

5
Table of Contents
Table of Contents
Chapter 1
Introduction . . . . . . . . . . . . . . . . . . . . . . . . . . . . . . . . . . . . . . . . . . . . . . . . . . . . . . . 9
General Information . . . . . . . . . . . . . . . . . . . . . . . . . . . . . . . . . . . . . . . . . 10
Available Documentation . . . . . . . . . . . . . . . . . . . . . . . . . . . . . . . . . . 10
About the Océ CPS800® . . . . . . . . . . . . . . . . . . . . . . . . . . . . . . . . . . 11
General Printer/Copier Concepts . . . . . . . . . . . . . . . . . . . . . . . . . . . . 12
The User Interface Concept . . . . . . . . . . . . . . . . . . . . . . . . . . . . . . . . 15
The paper manager concept. . . . . . . . . . . . . . . . . . . . . . . . . . . . . . . . 19
The 'Paper adjustments' Concept . . . . . . . . . . . . . . . . . . . . . . . . . . . . 23
The Océ CPS800® System . . . . . . . . . . . . . . . . . . . . . . . . . . . . . . . . . . . 24
The Configuration of the Océ CPS800®. . . . . . . . . . . . . . . . . . . . . . . 24
The screen of the operator panel . . . . . . . . . . . . . . . . . . . . . . . . . . . . 27
The Keys on the Operator Panel. . . . . . . . . . . . . . . . . . . . . . . . . . . . . 30
The Operator Attention Light (optional). . . . . . . . . . . . . . . . . . . . . . . . 33
The Copy Control Device (optional) . . . . . . . . . . . . . . . . . . . . . . . . . . 35
Getting Started. . . . . . . . . . . . . . . . . . . . . . . . . . . . . . . . . . . . . . . . . . . . . 37
The power modes of the Océ CPS800®. . . . . . . . . . . . . . . . . . . . . . . 37
Turn on and off the Océ CPS800® . . . . . . . . . . . . . . . . . . . . . . . . . . . 40
Adjusting the System Manager Settings . . . . . . . . . . . . . . . . . . . . . . . 42
About the set memory. . . . . . . . . . . . . . . . . . . . . . . . . . . . . . . . . . . . . 47
Controlling the backlight of the screen . . . . . . . . . . . . . . . . . . . . . . . . 48
Chapter 2
Printing With the Océ CPS800®. . . . . . . . . . . . . . . . . . . . . . . . . . . . . . . . . . . . . . 49
Print workflow. . . . . . . . . . . . . . . . . . . . . . . . . . . . . . . . . . . . . . . . . . . . . . 50
About the printer driver . . . . . . . . . . . . . . . . . . . . . . . . . . . . . . . . . . . . . . 52
Dynamic and Classic Quality Modes . . . . . . . . . . . . . . . . . . . . . . . . . . . . 55
About the job capacity of the Océ CPS800®. . . . . . . . . . . . . . . . . . . . . . 57
About job management on the controller. . . . . . . . . . . . . . . . . . . . . . . . . 59
Create a print job . . . . . . . . . . . . . . . . . . . . . . . . . . . . . . . . . . . . . . . . . . . 61
Manage print jobs on the Océ CPS800®. . . . . . . . . . . . . . . . . . . . . . . . . 63
Chapter 3
Print Jobs on the Océ CPS800® . . . . . . . . . . . . . . . . . . . . . . . . . . . . . . . . . . . . . 65
Printing from Mailbox and Memory (scan now, print later). . . . . . . . . . . . 66
About the mailbox . . . . . . . . . . . . . . . . . . . . . . . . . . . . . . . . . . . . . . . . 66
Printing from the mailbox . . . . . . . . . . . . . . . . . . . . . . . . . . . . . . . . . . 69
The Memory (scan now, print later) . . . . . . . . . . . . . . . . . . . . . . . . . . 72
Printing from memory . . . . . . . . . . . . . . . . . . . . . . . . . . . . . . . . . . . . . 75
Editing a Job in the Mailbox or Memory . . . . . . . . . . . . . . . . . . . . . . . 78

6
Table of Contents
Deleting a Job from the Mailbox or Memory . . . . . . . . . . . . . . . . . . . . 80
General Print Actions . . . . . . . . . . . . . . . . . . . . . . . . . . . . . . . . . . . . . . . . 82
Defining Extended Print Settings. . . . . . . . . . . . . . . . . . . . . . . . . . . . . 82
Combine print jobs . . . . . . . . . . . . . . . . . . . . . . . . . . . . . . . . . . . . . . . 91
Use the special feeder. . . . . . . . . . . . . . . . . . . . . . . . . . . . . . . . . . . . . 93
Chapter 4
The Job Queue. . . . . . . . . . . . . . . . . . . . . . . . . . . . . . . . . . . . . . . . . . . . . . . . . . . . 95
About the job queue . . . . . . . . . . . . . . . . . . . . . . . . . . . . . . . . . . . . . . . . . 96
Actions in the Job Queue . . . . . . . . . . . . . . . . . . . . . . . . . . . . . . . . . . . . 100
Chapter 5
The Copy Function . . . . . . . . . . . . . . . . . . . . . . . . . . . . . . . . . . . . . . . . . . . . . . . 103
Making a Copy . . . . . . . . . . . . . . . . . . . . . . . . . . . . . . . . . . . . . . . . . . . . 104
Making a basic copy . . . . . . . . . . . . . . . . . . . . . . . . . . . . . . . . . . . . . 104
Postponed Copying (scan now, print later) . . . . . . . . . . . . . . . . . . . . 106
Making an Extended Copy (original settings) . . . . . . . . . . . . . . . . . . 108
Making an Extended Copy (print settings) . . . . . . . . . . . . . . . . . . . . 113
Combine different sets of originals . . . . . . . . . . . . . . . . . . . . . . . . . . 121
Make a copy with the special feeder . . . . . . . . . . . . . . . . . . . . . . . . . 124
Copying special originals and non-standard size originals . . . . . . . . 125
Creating a Custom Template . . . . . . . . . . . . . . . . . . . . . . . . . . . . . . 127
Chapter 6
Stopping a Job. . . . . . . . . . . . . . . . . . . . . . . . . . . . . . . . . . . . . . . . . . . . . . . . . . . 129
How to stop a job . . . . . . . . . . . . . . . . . . . . . . . . . . . . . . . . . . . . . . . . . . 130
Chapter 7
Accounting. . . . . . . . . . . . . . . . . . . . . . . . . . . . . . . . . . . . . . . . . . . . . . . . . . . . . . 133
About accounting . . . . . . . . . . . . . . . . . . . . . . . . . . . . . . . . . . . . . . . . . . 134
Configure the accounting settings . . . . . . . . . . . . . . . . . . . . . . . . . . . . . 138
Set the account number . . . . . . . . . . . . . . . . . . . . . . . . . . . . . . . . . . . . . 140
Chapter 8
Maintenance. . . . . . . . . . . . . . . . . . . . . . . . . . . . . . . . . . . . . . . . . . . . . . . . . . . . . 141
How to get information about the supplies . . . . . . . . . . . . . . . . . . . . . . . 142
Load the paper . . . . . . . . . . . . . . . . . . . . . . . . . . . . . . . . . . . . . . . . . . . . 145
Chapter 9
Problem Solving . . . . . . . . . . . . . . . . . . . . . . . . . . . . . . . . . . . . . . . . . . . . . . . . . 149
How to handle contradictions on the Océ CPS800® . . . . . . . . . . . . . . . 150
How to handle errors on the Océ CPS800® . . . . . . . . . . . . . . . . . . . . . 152
How to handle paper jams on the Océ CPS800® . . . . . . . . . . . . . . . . . 154
Problem Solving . . . . . . . . . . . . . . . . . . . . . . . . . . . . . . . . . . . . . . . . . . . 156

7
Table of Contents
Appendix A
Overview and Tables. . . . . . . . . . . . . . . . . . . . . . . . . . . . . . . . . . . . . . . . . . . . . . 159
Product specifications . . . . . . . . . . . . . . . . . . . . . . . . . . . . . . . . . . . . . . 160
Originals that the Océ CPS800® can use . . . . . . . . . . . . . . . . . . . . . . . 161
Paper tray information . . . . . . . . . . . . . . . . . . . . . . . . . . . . . . . . . . . . . . 162
Appendix B
Miscellaneous . . . . . . . . . . . . . . . . . . . . . . . . . . . . . . . . . . . . . . . . . . . . . . . . . . . 165
Reader's comment sheet . . . . . . . . . . . . . . . . . . . . . . . . . . . . . . . . . . . . 166
Addresses of local Océ organisations . . . . . . . . . . . . . . . . . . . . . . . . . . 168

8
Table of Contents

9
Chapter 1
Introduction

10 Chapter 1 Introduction
Available Documentation
General Information
Available Documentation
Contents of the Manuals
The user documentation set includes the following documents.
[1]
Note: The manuals can be downloaded as a PDF file from the Océ website. The
controller manuals are also available on the Océ website.
[1] Contents of the Manuals
Manual title Target audience Description of the contents
Job manual Operator ■Printing documents
■Copying documents
■Scanning documents
■Editing the job settings
■Managing the jobs
■Using the mailbox
■Using the memory
■Loading the paper
■Solving errors
Key operator
Configuration
and
Maintenance
Manual
Key operator ■Changing the default settings
■Performing image adjustments
■Adding the toner (operator)
■System maintenance
■Clearing paper jams in the process
paper path
Safety manual Operator This multilingual manual contains
instructions for safe use and the safety
data sheets.
Key operator
The controller
manuals
Operator There are six controller documents
available from the manufacturer
(copyright by electronics for Imaging).
■Configuration guide
■Fiery Controller Reference
■Job Management Guide
■Printing Guide
■QuickStart Guide
■User Software Install
Key operator
System administrator

11
About the Océ CPS800®
Introduction
The Océ CPS800®is a production printer/copier with a focus on productivity and
A3/12x18” paper formats.
Proven technologies like Océ Color Copy Press and Océ Image Logic® are a
guarantee for a stable, high print quality.
System Features
The Océ CPS800®has the following features and characteristics:
[2]
[2] System Features
Features Description
Configuration Printer/copier
Resolution 600 dpi
ADF scan speed 20 ppm
Print speed 30 ppm
Workflow A4 / Letter 8.5x11-workflow
Output 1000 A4 / Letter 8.5x11, 400 A3/Tabloid Extra 12x18
Finishing A4 / Letter 8.5x11 stacking option
In-line stapling 40 sheets A4 / Letter 8.5x11
Off-line stapling 40 sheets
Controller Mid end (Océ 960C) + High end (Océ 1000C)
Appearance Copier-look
Media 2 Customer adjustable input trays supporting A3/Tabloid
Extra 12x18"

12 Chapter 1 Introduction
General Printer/Copier Concepts
Definition
The user interface
The user interface supports several features which affect print quality, but the real
value is the added advantage in terms of productivity.
Advantages:
■“Green Button” support for most of the jobs.
■The user interface supports productive printing via the 'Job queue'.
■The user interface supports multiple processes on the machine simultaneously.
■The system enables the operator to be in control all of the time. The operator can
easily monitor the machine status and the jobs running on it.
The machine offers the look and feel of a Océ
- Most functions offered in current Océ machines are presented in a similar way.
- Untrained operators can easily perform less complex jobs.
Print quality modes
Image processing and color screening are optimized in order to achieve maximum
print quality. On job-level you can choose between the Dynamic Mode or Classic
Mode. The Dynamic mode gives the best image quality, however in certain
circumstances the Classic Mode could be preferable.
Dynamic Mode
The dynamic mode provides smoother continuous tone images, a greater rendition
of details and less (not) visible screens. The quality is especially good for true-to-life
images and continuous tones. For example, the level of graininess is greatly reduced.
Classic Mode
The Classic Mode uses the color mixing and screening methods that we were used
to until now, including the 5 options for screening (very coarse to very fine). The
Classic mode delivers maximum uniformity and stability, less noise and graininess
in the less saturated areas and more visible details (especially in dark areas).
Copy templates
The copy templates of the Océ CPS800®enable you to easily create copy jobs. The
templates contain default settings for various copy jobs. You can select one of the
standard templates or you can define custom templates. You can define up to 5
custom templates that contain your custom-made settings.

13
General Printer/Copier Concepts
Tray chaining
When one of the paper trays runs empty, the system will automatically switch to
another paper tray that contains the same paper type. Tray chaining is a productivity
feature that cannot be switched on and off.
Printer on/off
You can program the machine to start-up each day at time X and shut down each day
at time Y. The printer on/off control will not interrupt running jobs.
Paper adjustments
The 'Paper adjustment' setting determines which image registration and image
enlargement values are used for the media type selected. In order to guarantee high
output quality, fine tune the Océ CPS800®to take into account a number of special
media characteristics. Only use this setting if you are not satisfied with the output
quality.
Keep going/keep sequence
You can put the machine into two different modes for processing jobs in the job
queue.
'Keep sequence' or 'Keep going') The system will always print the jobs in the same
order as displayed in the job queue. If a job cannot start printing, the system will
stop. No jobs will be printed. In the second setting, the system will always try to keep
producing. If a job in the job queue cannot start printing, because the job is on hold
or has a start contradiction, other jobs in the job queue may overtake that job and be
sent to print.
Error handling
Error handling on the Océ CPS800®is based on transparent, step-by-step scenarios
on the operator panel. The error screen indicates the problem area, gives instructions
on how to continue and uses photos and images to illustrate how to solve a problem.

14 Chapter 1 Introduction
General Printer/Copier Concepts
Counters
Total print counters
One hardware counter is present to count all printed sides. The other counters are
software counters.
In the hardware counter an A3/Tabloid-like image will be counted as two
A4/letter-standard images.
An A4/letter-standard SEF (short edge feed) will be counted as one image.
The following software counters are available:
■Counter for color A4/Letter-like 1
■Counter for color A3/Tabloid-like 2
■Counter B/W A3/Tabloid-like
■Counter B/W A4/Letter-like
■Total counter
The total print counters and four day counters are available in the 'System
manager' on the operator panel.
1A4/Letter-like. A print that does not belong to the class of A3/Tabloid-like listed
below.
2A3/Tabloid-like. A print printed on one of the following formats: A3, RA3,
305x457, Tabloid 11x17, Tabloid Extra 12x18.
Accounting information
Account Log
Print jobs can have an account number that must be entered before the job is printed
on the system. The account number is used to create a logging record in the account
log file on the controller. This record stores the accounting information of the print
job. You can access this data from the file on the controller.
Note: Accounting is not the same as access control to the printer.
Time to finish
The printer shows the estimated time to complete each job in the job queue
cumulatively (when the production is not interrupted).

15
The User Interface Concept
Definition
The features of the printer can best be described in three parts. The screen layout of
the user interface consists of three parts which represent the three main categories of
use:
■job preparation
■job management
■system management.
Job preparation
For the job preparation, the user interface presents a collapsed network mailbox by
default.
The jobs last submitted are on top in the mailbox.
Job management
The part related to job management is always visible in the user interface. In this part
of the screen (the job queue) all jobs processed by the system are visible and
accessible.
The rest of the screen is occupied either by a field related to system management or
a screen related to job preparation.
System management
The system information is visible above the collapsed mailbox (load of paper trays,
toner level, etc.).
Job preparation > original settings
You can change several settings for a copy job or a job in the mailbox (memory).
Besides the number of prints, the following settings can be applied to documents.
Note: You can not edit images.

16 Chapter 1 Introduction
The User Interface Concept
[3]
Job preparation > print settings
[4]
[3] Original Settings for Job Preparation
Menu Setting
'Basic settings' ■'Print sides'
■'Paper'
'Original' >
'Source'
■'Type'
■'Orientation'
'Original' > 'Sheet' ■'Size' (read only)
■'Short edge' (read only)
■'Long edge' (read only)
'Original' >
'Layout'
■'Original'
■'Document type'
■'Margin erase'
'Original' > 'Image' ■'Image type'
'Workflow' ■'Set account number'
■'Check first set'
■'Save settings'
[4] Print Settings for Job Preparation
Menu Setting
'Print' > 'Target' ■'Type'
'Print' > 'Output' ■'Destination'
'Print' > 'Sheet' ■'Paper'
■'Size'
■'Type'
■'Weight'
■'Medium'
'Print' > 'Layout' ■'Print'
■'Document type'
■'Image shift'
■'Shift to center'
'Print' > 'Image' ■'Zoom'
■'Saturation / Exposure'
■'Black/White'
■'Color balance'

17
The User Interface Concept
Job management
The system helps the operator to be as productive as possible by:
■productive job preparation
■productive processing of jobs
■input tray chaining
In the context of job management, the term preparation means not only defining the
settings, but also importing information into the system.
Basic job types are:
■automatic print job (job is sent by controller and executed immediately)
■interactive print job (job is sent by controller to mailbox or job queue).
Productive job preparation
■Next job: To efficiently prepare jobs, it is possible to start preparing the next job
as soon as the current job is submitted.
■View job settings: When preparing a job you get a quick overview of the changed
settings of the selected job.
■Save settings: After the job preparation the changed settings can easily be saved.
The second time the job is printed exactly the same as the first print. Number of
prints, check first set and account number are not stored.
■Combine originals: The 'Set-build' key enables you to combine several sets of
originals into one job (analog and digital).
Productive processing of jobs
You can constantly monitor all jobs that are present on the system. You are able to
select a job, then start, stop or even delete the job from the system.
The most prominent tools are:
■'Move to top': this function enables you to put the selected job at the top of the
job queue, just after the current job.
■'Check first set': this will stop the printer after the first set is ready (ready to start
production, you are in control of confirming the quality of the job). Please note
that the length of the job should be longer than one page.
■Print from mailbox: to preview a job and to check whether the settings lead to the
desired output, it is possible to print a job from the mailbox. The printer prints
the job and keeps the job in the mailbox. You can make proof prints this way.

18 Chapter 1 Introduction
The User Interface Concept
[5]
Tray chaining
If one of the paper trays runs empty, the system automatically switches to another
paper tray that contains the same type of paper. Tray chaining is a productivity
feature that cannot be switched on and off.
System management
The Océ CPS800®provides system information in the system management area.
For example:
■in the message / queue area: paper change needed or user interaction required.
■error occurred (e.g. paper jam)
The system monitor displays:
■type and amount of paper present in trays
■toner empty indication of seven colors
■usage of set memory
■KOM action required.
The system manager displays:
■language selection.
The KOS menu displays:
■set switch times
■operator passwords.
Energy save mode
After a certain time (to be defined by the key operator) the printer will go into energy
save mode. When you press a key of the operator panel (or the on/off button when
the printer “sleeps”) the printer will go to stand-by again. The controller can also
activate the printer with a print job when the printer is in sleep mode.
[5] Information Displayed for Monitoring Jobs
Information Description
Status Paused, Waiting, Printing, Error
Job identification file name, user name, job number

19
The paper manager concept
Definition
The Océ CPS800®has a special workflow. To accomplish more in less time, create
new jobs while the system is printing. When defining a new job, you can select a
paper type that is currently not available in the paper trays. The system does not limit
the choice of paper types to the number of available paper trays and you can select
any number of paper types for the jobs.
If a job requires a paper type that is not in one of the four paper trays, a warning is
displayed. The operator can then put the needed paper type into a paper tray. In other
words, the new workflow requires you to select a paper type, not a paper tray.
When creating a job on the Océ CPS800®, you can select a unique paper type on
which to print. This unique paper type can, for example, be used for programming
the next job or within set-building (combining subsets).
This way, you are sure that a job is printed on the right paper type.
You can divide your paper selection into two categories:
■Normal
■Type 1-5
In the normal category you can have lots of combinations of paper sizes, paper
weights and media types (standard media types are transparencies, coated paper,
plain paper and color copy). In some situations you might need to categorize more
than the "standard" combinations and therefore should use "Type 1-5".
Two examples for assigning Type 1-5:
■Company (logo) paper is not available in the standard list. Assign the company
paper to Type 1etc.
■You use 20 lb. bond Océ color copy paper. The same paper, from a different
supplier, is available. Store the second supplier's paper type in the category Type
2 etc.
For example, load paper in the following instances.
■If the job queue displays an alarm bell , the job needs a type of paper that is
not currently in the paper trays.
■If the trays are almost empty.
This chapter explains the function of the 'Paper manager' in the form of an example.
The example describes the workflow if a job needs a type of paper that is not in the
paper trays.
General information about how to fill and define the paper trays is described in a
separate chapter (see ‘Load the paper’ on page 145).

20 Chapter 1 Introduction
The paper manager concept
Illustration
[1]
[1] Paper Manager Settings
Paper manager settings
[6]
[6] Paper Manager Settings (1 – 2)
Component Function
'Type' Contains a list of custom paper types: Normal, Type 1, Type 2, Type 3,
Type 4 and Type 5.
The 'Type' setting can be used to uniquely identify a specific paper
(because there are too many possible properties for paper e.g. color,
orientation, material).
Default selection in list: 'Normal'
Table of contents
Other Oce Printer manuals

Oce
Oce WP36/50 User manual

Oce
Oce CS9350 User manual

Oce
Oce LightJet 430 Operating instructions

Oce
Oce CS9360 User manual

Oce
Oce CS9065 User manual

Oce
Oce CS 5090 User manual

Oce
Oce CS6410 Assembly instructions

Oce
Oce 3121 Operating manual

Oce
Oce VarioStream 8000 User manual

Oce
Oce Arizona 440 GT User manual

Oce
Oce sx1481 User manual

Oce
Oce TCS400 Installation instructions

Oce
Oce 9400 User manual

Oce
Oce ColorWave 810 Installation and operating manual

Oce
Oce ColorWave 650 User manual

Oce
Oce BLM550+ Installation and operating manual

Oce
Oce OP1018 User manual

Oce
Oce TDS400 User manual

Oce
Oce TDS750 User manual

Oce
Oce im4511 User manual