manuals.online logo
Brands
  1. Home
  2. •
  3. Brands
  4. •
  5. Ogawa
  6. •
  7. Massager
  8. •
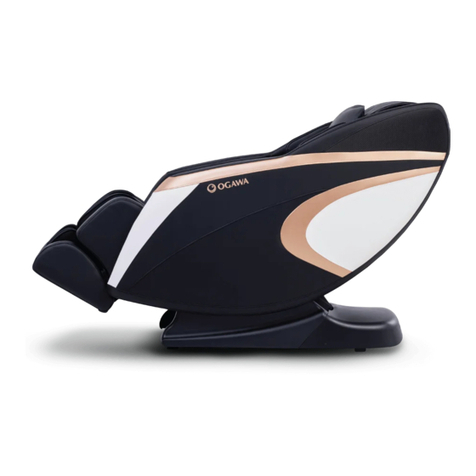
  9. Ogawa OG6250 User manual

Ogawa OG6250 User manual

OG6250
OG6250
INSTALLATION MANUAL / MANUEL D'INSTALLATION
Assembly Instructions / Instructions de montage
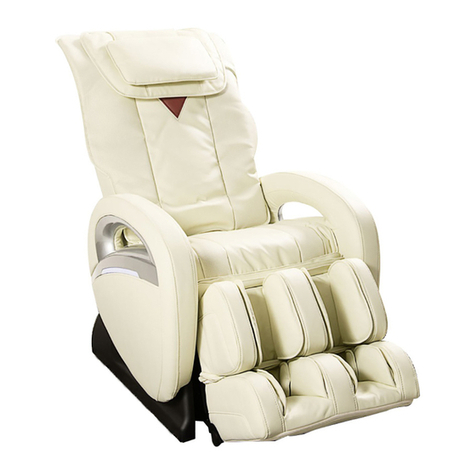
The OG-6250 Massage chair arrives in 3 boxes.
Le fauteuil de massage OG-6250 est livré en 3 morceaux.
Open box 1 and remove all contents. Remove the packing materials. Take the chair out of the box.
Collect all the accessories and put them aside.
Ouvrez la boîte 1 et retirez son contenu. Enlevez les matériaux d'emballage. Retirez le fauteuil de sa boite
et ensuite ramassez tous les accessoires et placez-les de côté.
2
1
OG62 50F- 2929
1
OGAWA OG-6250.
OGAWA
Alors commencons.
Chez Ogawa, nous savons que chaque corps est unique et en avons tenu compte pour concevoir notre fauteuil de
massage. Mais assez à propos de nous, nous sommes là pour vous. Apprendre à utiliser votre nouveau fauteuil
est très simple (on l'a conçu ainsi!).
Nous vous félicitons d'avoir fait l'acquisition d'Ogawa OG6250.
Hello. Bonjour.
Remove cotter pins and bolts from the chair base. Locate the two cotter pins and bolts on the chair base.
Locate the cotter pin and bolt on the link rod. Take them off and put them aside.
Retirez les goupilles et les boulons du fauteuil. Identifiez les deux goupilles et les boulons sur la base du
fauteuil. Repérez la goupille et le boulon sur la barre de liaison. Enlevez-les et placez-les de côté.
4
Open box 3 with footrest. Move footrest close to the chair. Engage the link rod with footrest joint, and then
insert the bolt and lock with the cotter pin.
Ouvrez le troisième emballage contenant le repose-pieds. Alignez le repose-pied près de la chaise et
engager la barre de liaison avec le joint du repose-pieds. Insérez ensuite le boulon et verrouillez-le avec en utilisant
la goupille.
5
Connect wires in footrest. Connect both footrest wire connectors and screw the caps tight. Then connect the
air hose.
Caution: After the wire connectors have been connected the cap must be screwed tight.
Branchez les fils au repose-pieds. raccordez les deux connecteurs de câble du repose-pieds et vissez les
capuchons. Branchez ensuite le tuyau à air.
Attention: le bouchon doit être vissé lorsque les connecteurs auront été raccordés.
6
Adjust chair position. Use the power cord to connect the chair to the power supply and turn on the power
switch. The chair will go back to home position. Then disconnect the power cord.
Ajustez la position du fauteuil. Utilisez le cordon d'alimentation pour connecter le fauteuil à une source
d'alimentation et ensuite activez l'interrupteur. Le fauteuil s'ajuster à sa position par défaut. Débranchez ensuite le
cordon d'alimentation.
3
Here is what the eight pin connectors look like.
Voici à quoi ressemblent les connecteurs à huit broches.
Here is what the four pin connectors look like.
Voici à quoi ressemblent les connecteurs à quatre broches.
2 3
Here are the cotter pins and bolts you are to remove.
Voici les goupilles que vous devez enlever.
Here is what it will look like after the cotter pins and bolts have
been removed
Voici une illustration après que les goupilles auront été enlevées.
Fully connect the footrest to the base. Move the footrest close to the chair. Engage the joints of the footrest
and the base. Lift footrest up to align the holes on the joints, then insert the bolt and lock it with cotter pin (that you
had set aside).
Raccordez complètement le repose-pieds à la base. Ramenez le repose-pieds à proximité du fauteuil.
Insérez les articulations du repose-pieds et de la base.Soulevez ensuite le repose-pieds afin d'aligner les trous
aux articulations, ensuite insérez le boulon et verrouillez-le avec la goupille (mise de côté).
7
Open box 2 with side boards. Take out the side boards. Unzip the zippers of the board.
Ouvrez la deuxième boite contenant les panneaux latéraux. Sortez les planches latérales. Ouvrez les
fermetures éclair du panneau.
8
Unzip the zippers here.
Ouvrez les fermetures éclair ici.
Here is what it should look like with all wires connected.
Voici une illustration avec tous les fils connectés.
4 5
Attach the side board. Use the two socket hexagon head screw to fix the side board. Then zip the zipper.
Fixez le panneau latéral. Utilisez la vis à tête hexagonale à deux douilles pour fixer le panneau latéral. Fermez
ensuite la fermeture éclaire.
11
Hardware.
Quincaillerie
Locate the screw holes.
Localisez les trous pour les vis.
Attach the side board. Move the side boards close to the chair and connect the air hose.
Fixez le panneau latéral. Déplacez les panneaux latéraux près du fauteuil et branchez le tuyau à air.
9
This is what the air hose looks like when connected.
Voici à quoi ressemble le tuyau à air lorsqu'il est connecté.
Locate the bolt on the rear of theside board and the clip on the backrest.
Engage the bolt into the clip; meanwhile let the pothooks of the side board catch the frame on the base, then slide
the sideboard onto the chair.
Repérez le boulon à l'arrière du panneau latéral et le clip sur l'appui dos.
Engagez le boulon dans le clip; Entre-temps, déposez les crochets du panneau latéral et engagez le cadre sur la base,
ensuite faites glisser le panneau sur le fauteuil.
10
Locate the “clip”
Localiser le "clip"
Locate the pothooks.
Localisez les crochets
Locate the bolt.
Repérez le boulon
6 7
12 Attach the remote control holder. Remove the screw from the remote control holder. Insert the remote
control holder into the base support, and then lock it with the screw. Now insert the touch pad remote control
into the holder.
Attachez le support de la télécommande. Retirez la vis du support de la télécommande Insérez le support
de la télécommande contrôle dans le support de base ensuite serrez et verrouillez avec la vis. Insérez la
télécommande du pavé tactile dans le support.
Connect the chair to power supply and turn on the power switch. Now your massage chair is ready to go!
Connectez le fauteuil à l'alimentation électrique et allumez l'interrupteur d'alimentation. Votre fauteuil de massage
est maintenant prêt à utiliser!
13
8

Other Ogawa Massager manuals

Ogawa Master Drive AI 2.0 User manual

Ogawa

Ogawa Master Drive AI 2.0 User manual

Ogawa omknee OGCF2002A User manual

Ogawa

Ogawa omknee OGCF2002A User manual

Ogawa OG8100 User manual

Ogawa

Ogawa OG8100 User manual

Ogawa ISPA OF 3006 User manual

Ogawa

Ogawa ISPA OF 3006 User manual

Ogawa EC-802A User manual

Ogawa

Ogawa EC-802A User manual

Ogawa KEVATOUCH OL0359 User manual

Ogawa

Ogawa KEVATOUCH OL0359 User manual

Ogawa Mobile Shiatsu LITE OG2015 User manual

Ogawa

Ogawa Mobile Shiatsu LITE OG2015 User manual

Ogawa OG-7010 User manual

Ogawa

Ogawa OG-7010 User manual

Ogawa OGF 8299 User manual

Ogawa

Ogawa OGF 8299 User manual

Ogawa OG5020 User manual

Ogawa

Ogawa OG5020 User manual

Ogawa OG7500 User manual

Ogawa

Ogawa OG7500 User manual

Ogawa SMART RELUXE OG6383 User manual

Ogawa

Ogawa SMART RELUXE OG6383 User manual

Ogawa mobile seat iBACK 2 User manual

Ogawa

Ogawa mobile seat iBACK 2 User manual

Ogawa estiloLITE PLUS User manual

Ogawa

Ogawa estiloLITE PLUS User manual

Ogawa iModa User manual

Ogawa

Ogawa iModa User manual

Ogawa OG5020 User manual

Ogawa

Ogawa OG5020 User manual

Ogawa OG-8800 User manual

Ogawa

Ogawa OG-8800 User manual

Ogawa Active XL User manual

Ogawa

Ogawa Active XL User manual

Ogawa Master Drive LE User manual

Ogawa

Ogawa Master Drive LE User manual

Ogawa SMART VOGUE PLUS User manual

Ogawa

Ogawa SMART VOGUE PLUS User manual

Ogawa Caree Touch User manual

Ogawa

Ogawa Caree Touch User manual

Ogawa OT-5179 User manual

Ogawa

Ogawa OT-5179 User manual

Ogawa OG8020 User manual

Ogawa

Ogawa OG8020 User manual

Ogawa Acu Therapy User manual

Ogawa

Ogawa Acu Therapy User manual

Popular Massager manuals by other brands

EDM Product 07479 instruction manual

EDM Product

EDM Product 07479 instruction manual

Prorelax TENS Back Pain operating instructions

Prorelax

Prorelax TENS Back Pain operating instructions

truMedic InstaShiatsu + MC-4500 instruction manual

truMedic

truMedic InstaShiatsu + MC-4500 instruction manual

MAXXMEE C37-MP004-BL manual

MAXXMEE

MAXXMEE C37-MP004-BL manual

HoMedics SoleMates MS -1SM Instruction manual and  warranty information

HoMedics

HoMedics SoleMates MS -1SM Instruction manual and warranty information

Soehnle VITA-DUO operating instructions

Soehnle

Soehnle VITA-DUO operating instructions

Beurer MG 134 Instructions for use

Beurer

Beurer MG 134 Instructions for use

Panasonic Wedeatsu Wave EP1272 operating instructions

Panasonic

Panasonic Wedeatsu Wave EP1272 operating instructions

UFESA BH5614 operating instructions

UFESA

UFESA BH5614 operating instructions

Enabling Devices Skin Massager 3123 user guide

Enabling Devices

Enabling Devices Skin Massager 3123 user guide

HoMedics HAVEN MR-100 Instruction manual and  warranty information

HoMedics

HoMedics HAVEN MR-100 Instruction manual and warranty information

Seecode Shiatsu operating instructions

Seecode

Seecode Shiatsu operating instructions

HYKKER 612734 user manual

HYKKER

HYKKER 612734 user manual

Beurer MG 145 Instructions for use

Beurer

Beurer MG 145 Instructions for use

HoMedics ShiatsuMAX CBS-1000-EU instruction manual

HoMedics

HoMedics ShiatsuMAX CBS-1000-EU instruction manual

MPM MMS-03 user manual

MPM

MPM MMS-03 user manual

Sanyo HECSR1000K - Stiffness Sensor - Multi Roller Massage... instruction manual

Sanyo

Sanyo HECSR1000K - Stiffness Sensor - Multi Roller Massage... instruction manual

Sharper Image HF757 instructions

Sharper Image

Sharper Image HF757 instructions

manuals.online logo
manuals.online logoBrands
  • About & Mission
  • Contact us
  • Privacy Policy
  • Terms and Conditions

Copyright 2025 Manuals.Online. All Rights Reserved.