NORM ⇔TEST
ON
123456
Conformité
Zur Beachtung
Conformità
Conformidade
Conformidad
Unit: mm (inch)
Dimensions
Abmessungen
Dimensioni
Dimensões
Dimensiones
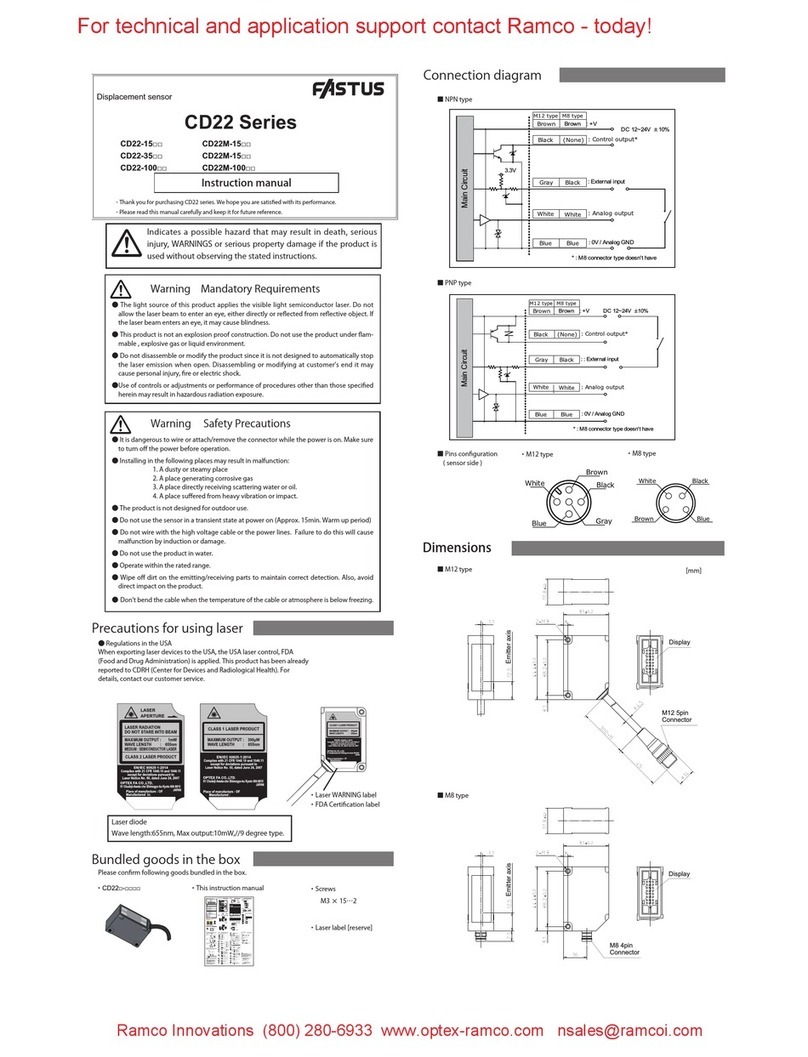
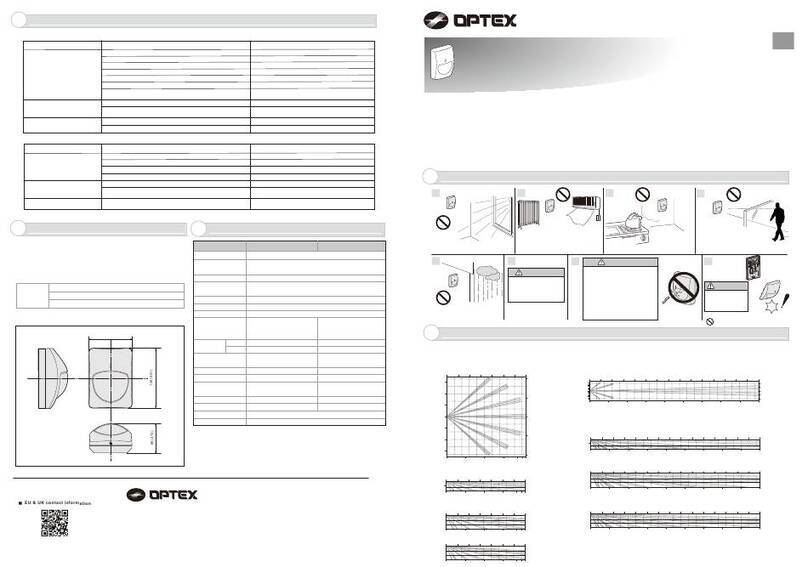
9DIMENSIONS
65.2 (2.6)
97.8 (3.9)
78.5 (3.1)
8SPECIFICATIONS
Caractéristiques
Technische Daten
Specificazioni
Especificações
Especificaciones
Specifications and design are subject to change without prior notice.
Conception et spécifications sont sujettes à changement sans préavis.
Spezifikationen und Design können sich ohne vorherige Ankündigung ändern.
Le specificazioni e il design sono soggetti a cambiamenti senza notifica anticipata.
Especificações e modelos estão sujeitos à mudanças sem aviso prévio.
Las especificaciones y diseño están sujetos a cambios sin aviso previo.
IT
PT
Modello
Modalità di rilevamento
Copertura
Zone di rilevazione
Altezza allestimento
LED allarme indicatore
Periodo allarme
Output allarme
Sensibilità/portata
Periodo di riscaldamento
Tenzione di alimentazione
Dimensioni
Peso
Temperatura in funzione
Umidità ambientale
Interferenza RF
Infrarossi passivi e Microonde
78 zone
da 1,5 a 2,4 m
Interruttore ON/OFF
Appross. 2,5 sec
0,01 A massimi (Tensione di funzionamento)
Impostabile su LOW/MID/HI/SuperHI
Appross. 60 sec (Il LED lampeggia)
da 3 a 3.6 V
97.2 mm x 65.2 mm x 78.5 mm <AxLxP>
Appross. 160 g
Da -10°C a +45°C
Massimo 95%
Nessun allarme 10 V/m
Modelo
Método de Detecção
Cobertura
Zonas de Detecção
Altura de Montagem
Indicador de alarme LED
Período do alarme
Saída do alarme
Sensibilidade/alcance
Período de ambientação
Alimentação
Dimensões
Peso
Temperatura de funcionamento
Umidade ambiental
Interferência RF
Infravermelho Passivo e Microondas
78 zonas
1,5 à 2,4 m
Selecionável Liga/Desliga
Aprox. 2,5 seg.
0,01 A máx. (Tensão de funcionamento)
LOW/MID/HI/SuperHI Permutável
Aprox. 60 seg. (LED pisca.)
3 à 3.6 V
97.2 mm x 65.2 mm x 78.5 mm <Alt.xLar.xDim.>
Aprox. 160 g
De -10°C à +45°C
95% máx.
Nenhum alarme até 10 V/m
Uscita guasto
0,01 A massimi (Tensione di funzionamento)
Saída problemas 0,01 A máx. (Tensão de funcionamento)
RXC-RDT
RXC-RDT
Assorbimento di corrente
14 μA (a riposo), 3 mA (In prova di movimento, LED acceso)
14 μA (Em standby), 3 mA (Em walktest, com LED ligado)
12 m x 12 mapertura 85°
Consumo atual de corrente
12 m x 12 m 85° largura
6WALK TEST
Test de marche
Gehtest
Test camminata
Teste de funcionamento
Prueba de funcionamiento
Detect
7-1 HOW TO REPLACE BATTERY
The detector shares the battery with the
transmitter. Check that the 2.5 – 3.8 VDC
power battery is used for the transmitter.
7BATTERY
7-2 BATTERY LIFE
The values indicated are only for reference on
condition that the detector is exceptionally
operated by the sole battery.
It is impossible to indicate the battery life under
the normal operation as the battery in the
transmitter is shared with the detector.
RXC-RDT
CR123A (3 VDC, 1300 mAh)
Approx. 5 years
COMPLIANCE
10
EN
EN FR
Model
Detection method
Coverage
Detection zones
Mounting height
LED alarm indicator
Alarm period
Alarm output
MW sensitivity/range Switchable LONG/SHORT
Sensitivity/range
Warm up period
Power input
Current draw
Dimensions
Weight
Operating temperature
Environment humidity
RF interference
RXC-RDT RXC-RDT
Modèle
Méthode de détection
Couverture
Zones de détection
Hauteur de montage
Indicateur LED pour alarme
Période d'alarme
Sorties alarme
Sensibilité/étendue
Préchauffage
Alimentation
Consommation de courant
Dimensions
Poids
Température de régime
Humidité ambiante
Interférence en Radio-Fréquence
Infrarouge passif et micro-ondes
12 m sur 12 m 85° de largeur
78 zones
1,5 à 2,4 m
Commutateur ON/OFF
Env. 2,5 s
0,01 A max. (Tension de fonctionnement)
Commutateur LO/MID/HI/SuperHI
Env. 60 s (La LED clignote.)
3à 3.6 V
14 μA (En veille), 3 mA (En Test de marche, LED ON)
97.2 mm x 65.2 mm x 78.5 mm (HxLxP)
Env. 160 g
-10°C à +45°C
95% max.
Pas d'alarme à 10 V/m
Trouble output
Passive Infrared and Micro Wave
12 m x 12 m (40 ft x 40 ft) 85°wide
78 zones
1.5 to 2.4 m (5 to 8 ft)
Switchable ON/OFF
Approx. 2.5 sec
0.01 A max. (Operating voltage)
Switchable LOW/MID/HI/SuperHI
Approx. 60 sec. (LED blinks.)
3 to 3.6 V
14 μA (In Stand by), 3 mA (In Walktest,LED on)
97.2 mm x 65.2 mm x 78.5 mm <HxWxD>
Approx.160 g
-10°C to +45°C (+14°F to +113°F)
95% max.
No alarm 10V/m
0.01 A max. (Operating voltage) Sortie problème 0,01 A max. (Tension de fonctionnement)
DE
RXC-RDT
Modell
Erfassungsmethode
Erfassungsbereich
Erfassungszonen
Montagehöhe
LED-Alarmanzeige
Alarm-Periode
Alarmausgang
Empfindlichkeit/Reichweite
Aufwärmperiode
Betriebsspannung
Stromaufnahme
Abmessungen
Temperaturbereich
Betriebstemperatur
Umgebungsfeuchte
HF-Störfestigkeit
Passiv-Infrarot und Mikrowelle
12 m x 12 m 85° breit
78 Zonen
1,5 bis 2,4 m
EIN/AUS-umschaltbar
Ca. 2,5 Sek.
0,01 A max. (Betriebsspannung)
LOW/MID/HI/SuperHI einstellbar
Ca. 60 Sek. (LED blinkt.)
3 bis 3.6 V
14 μA (In Standby), 3 mA (Im Gehtest, LED ein)
97.2 mm x 65.2 mm x 78.5 mm (HxBxT)
Ca. 160 g
-10°C bis +45°C
95 % max.
Kein Alarm bei 10 V/m
Fehlerausgang 0,01 A max. (Betriebsspannung)
ES
Modelo
Método de detección
Cobertura
Zonas de detección
Altura de montaje
LED indicador de alarma
Periodo de alarma
Salida alarma
Sensibilidad/alcance
Periodo de calentamiento
Entrada corriente
Dimensiones
Peso
Temperatura de trabajo
Humedad del entorno
Interferencia RF
Infrarrojo Pasivo y Microondas
78 zonas
De 1,5 a 2,4 m
Seleccionable ON/OFF
Aprox. 2,5 seg.
0,01 A máx. (Voltaje de funcionamiento)
Cambiar LOW/MID/HI/SuperHI
Aprox. 60 seg. (Parpadeo del LED)
De 3 a 3.6 V
97.2 mm x 65.2 mm x 78.5 mm <AlxAnxPr>
Aprox. 160 g
De -10°C a +45°C
95% máx.
No alarma 10 V/m
Salida de problemas 0,01 A máx. (Voltaje de funcionamiento)
RXC-RDT
Consumo de corriente
14 μA (En modo espera), 3 mA (En modo prueba de paso, LED iluminado)
12 m x 12 m 85º ancho
DE
IT
PT
ES
FR
DE
IT
PT
ES
FR
DE
IT
PT
ES
FR
DE
IT
PT
ES
FR
DE
IT
PT
ES
FR
EN
NOTE
This unit is designed to detect movement of an
intruder and activate an alarm control panel.
Being only a part of a complete system, we can not
accept responsibility for any damages or other
consequences resulting from an intrusion.
HINWEIS
Dieses Gerät dient zur Erfassung von Eindringlingen
und es aktiviert einen Alarm über das
Steuerungspanel.
Da es nur ein Teil eines kompletten Systems ist,
können wir keine Haftung für Schäden oder für die
Konsequenzen übernehmen, die aus einem Einbruch
resultieren.
NOTA
Esta unidad ha sido diseñada para detectar el
movimiento de cualquier intruso y activar un panel de
control de alarmas. Es solo una parte de un completo
sistema, por lo que nosotros no podemos hacernos
responsables de ningún daño u otras consecuencias
que se pudieran producir como resultado de una
intrusión.
NOTE
Cet appareil est fait pour détecter les mouvements
intrus et activer un panneau d'alarme.
N'étant n'est qu'une partie d'un système complet,
nous rejetons toute responsabilité pour tout dommage
ou autres conséquences suite à une intrusion.
NOTA
Questa unità è progettata per rilevare i movimenti di
eventuali intrusi ed attivare un pannello di controllo
per l'allarme. Essendo semplicemente un parte di un
sistema completo, non possiamo assumerci alcuna
responsabilità per eventuali danni o altri incovenienti
derivati da un'intrusione.
NOTA
Esta unidade foi desenhada para detectar movimento
de um intruso e activar um painel de controlo de
alarme.
Sendo apenas uma parte de um sistema completo,
não podemos aceitar a responsabilidade por
quaisquer danos ou outras possíveis consequências
EN FR
DE
IT
PT
ES
Batterie
Batterie
Batteria
Bateria
Batería
DE
IT
PT
ES
FR
Sensibilité/étendue de MW
Commutateur LONG/SHORT
MW-Empfindlichkeit/Reichweite
LONG/SHORT einstellbar
Sensibilità/portata MW
Impostabile su LONG/SHORT
Sensibilidad/alcance MW
Cambiar LONG/SHORT
Sensibilidade/alcance MW
LONG/SHORT Permutável
WALK TEST MODE ON
DIP switch 1
Refer to chapter 3-1 and 3-2.
Note>>
Note the polarity of the battery.
Conduct a walk test after replacing the
battery.
The following list indicates the areas of intended use of the equipment and any known restrictions.
For countries not included in this list, please consult the responsible Spectrum Management Agency.
FCC ID: DC9OPMWWL
IC: 4012A-OPMWWL
This device complies with Part 15 of the FCC Rules. Operation is subject to the following two
conditions:
(1) This device may not cause harmful interference.
(2) This device must accept any interference received, including interference that may cause
PD6662: 2010
Note>>
Conduct a walk test at least once a year.
After completing a walk test, always set the unit to
NORM position for operation.
Using the unit in TEST mode will shorten the battery life.
Caution>>
CE Statement:
This equipment complies with EU radiation exposure limits set forth for an uncontrolled
environment. This equipment should be installed and operated with minimum distance
20 cm between the radiator & your body.
We declare the DC power source provided to the product is DC 9.5~18V and
must be limited power source complied IEC 60950-1 chapter 2.5.
10.525 GHz: Belgium, Denmark, Finland, Greece, Italy, Luxembourg, The Netherlands,
Spain, Sweden, Iceland, Norway, Switzerland
10.587 GHz: France, Ireland, United Kingdom, Belgium, The Netherlands, Luxembourg
Microwave emission Frequency and Power
EU contact information
Manufacturer:
OPTEX CO., LTD.
5-8-12 Ogoto, Otsu, Shiga, 520-0101 JAPAN
Authorised representative in Europe:
OPTEX (EUROPE) LTD. / EMEA HEADQUARTERS
Marandaz House 1 Cordwallis Park, Clivemont Road,
Maidenhead, Berkshire, SL6 7BU U.K.
RXC-RDT-X5 : 10.525 GHz 24.15 mW e.i.r.p.
RXC-RDT-X8 : 10.587 GHz 18.88 mW e.i.r.p.
Hereby, OPTEX declares that the radio equipment type RXC-RDT-X5 and RXC-RDT-X8 are in
compliance with RED 2014/53/EU. The full text of the EU DoC is available at the following internet
address; www.optex.net
OPTEX INC. (U.S.)
URL: http://www.optexamerica.com
OPTEX DO BRASIL LTDA. (Brazil)
URL: http://www.optex.net/br/es/sec
OPTEX (EUROPE) LTD. / EMEA HQ (U.K.)
URL: http://www.optex-europe.com
OPTEX TECHNOLOGIES B.V. (The Netherlands)
URL: http://www.optex.eu
OPTEX SECURITY SAS (France)
URL: http://www.optex-security.com
OPTEX SECURITY Sp.z o.o. (Poland)
URL: http://www.optex.com.pl
OPTEX PINNACLE INDIA, PVT., LTD. (India)
URL: http://www.optex.net/in/en/sec
OPTEX KOREA CO.,LTD. (Korea)
URL: http://www.optexkorea.com
OPTEX (DONGGUAN) CO.,LTD.
SHANGHAI OFFICE (China)
URL: http://www.optexchina.com
OPTEX (Thailand) CO., LTD. (Thailand)
URL: http://www.optex.net/th/th
Copyright (C) 2016 OPTEX CO.,LTD.
