REF. 530 - REF. 520: Gehschuh mit (zwei) aufblasbaren Luftpolster
REF. 505: Diabetic-Set
KONFORMITÄTSERKLÄRUNG
Die ORTHOSERVICE AG erklärt, in seiner Funktion als Hersteller, in alleiniger Verantwortung, dass dieses
vorliegende Medizinprodukt der Klasse I angehört und gemäß den Anforderungen der EU-Verordnung 2017/745
(MDR) hergestellt wurde. Die vorliegende Anleitung wurde unter Anwendung der vorgenannten Verordnung
erstellt. Sie dient dazu, den ordnungsgemäßen und sicheren Gebrauch des Medizinprodukts zu gewährleisten.
WARENMARKEN DER MATERIALIEN
Velcro®ist eine eingetragene Warenmarke von Velcro Industries B.V.
VORSICHTSMASSNAHMEN
Es wird empfohlen, dass der vom Produkt ausgeübte Druck nicht auf die Teile des Körpers einwirkt, die Verletzungen,
Schwellungen oder Tumeszenzen aufweisen. Es ist ratsam, das Produkt nicht zu fest anzuziehen, um keine übermäßigen,
lokalen Druckstellen zu erzeugen und keine Kompression der darunterliegenden Nerven und/oder Blutgefäße auszulösen.
Es ist ratsam, ein Kleidungsstück zu tragen, das den direkten Kontakt mit der Haut vermeidet. Bei Bedenken zur Anwendung
des Produkts bitte an einen Arzt, Physiotherapeuten oder Orthopädietechniker wenden. Bitte sorgfältig das Innenetikett
mit der Material-Zusammensetzung des Produkts lesen. Es ist ratsam, das Produkt nicht in der Nähe von offenen Flammen
oder starken elektromagnetischen Feldern verwendet werden. Nicht bei direktem Kontakt mit offenen Wunden auftragen.
HINWEISE
Es ist ratsam, dass das Produkt, das für die unten aufgeführten spezischen Indikationen bestimmt ist, von einem Arzt oder
Physiotherapeuten verschrieben und von einem Orthopädietechniker entsprechend den individuellen Bedürfnissen
angepasst wird. Um die Wirksamkeit, Verträglichkeit und korrekte Funktionalität zu gewährleisten, muss die Applikation
mit größter Sorgfalt durchgeführt werden. Keinesfalls darf die vom Arzt/Physiotherapeuten/Orthopädietechniker
vorgenommene Einstellung verändert werden. Bei nicht bestimmungsgemäßer Anwendung oder Einstellung
erlischt die Haftung des Herstellers. Die Orthese ist nur für den Gebrauch durch einen einzigen Patienten bestimmt,
andernfalls übernimmt der Hersteller keine Haftung gemäß der Verordnung für Medizinprodukte. Bei überempndlichen
Personen kann es bei direktem Hautkontakt zu Rötungen oder Reizungen kommen. Bei Auftreten von Schmerzen,
Schwellungen, Tumeszenzen oder anderen anormalen Reaktionen bitte sofort an den eigenen Arzt wenden und, in
besonders schwerwiegenden Fällen, die Tatsache dem Hersteller und der zuständige Behörde in eigenen Land melden. Die
orthopädische Wirksamkeit des Produktes ist nur dann gewährleistet, wenn alle seine Komponenten verwendet werden.
AUSWAHL/GRÖSSEN
PFLEGE
Nicht bleichen Keine chemische Reinigung
Nicht bügeln Nicht im Trockner trocknen
Nur für eine Person Waschanweisung:
• Polster: Von Hand in handwarmem Wasser (max. 30°C) mit neutraler Seife waschen, gründlich
ausspülen. Nicht in der Nähe von Wärmequellen trocknen lassen
• Feste Teile: Mit einem Schwamm mit handwarmem Wasser (max. 30°C) und neutraler Seife abreiben. Mit
einem Lappen trocknen
Das Produkt und seine Bestandteile nach dem Gebrauch sachgerecht entsorgen.
ZWECKBESTIMMUNG:
Das Diabetic Set ist ausschließlich für die Anwendung in Kombination mit den Produkten
Airstep Walker Diabetic und Airstep tight Walker Diabetic zur orthetischen Versorgung des Fußes und Wadenbeins
zu verwenden.
MATERIALIEN:
Einlegesohle aus stoßdämpfendem Schaumstoff und Spezialstrümpfe aus weichem Gewebe.
INDIKATIONEN
• Speziell für die Anwendung bei Patienten mit Empndungsstörungen geeignet, zum Beispiel bei Diabetes
Mellitus und dem damit einhergehenden Diabetischen Fußsyndrom
• Ulcera am Mittelfuß, Malleolus, Hallux oder Ferse
• Charcot Fuß
KONTRAINDIKATIONEN
REF.505: Keine bekannt
REF.520-530: Die Anwendung dieser Orthese wird nur empfohlen, wenn dokumentiert ist, dass die Fraktur stabil
ist und akzeptable Grenzen in Bezug auf Achs- und Drehfehlstellung nicht überschritten werden
EIGENSCHAFTEN UND MATERIAL
REF.505
• Anpassbare Schaumstoffeinlagen zur partiellen Druckentlastung der Fußsohle
• Spezialstrümpfe für Diabetes mellitus und dem damit einhergehenden Diabetischen Fußsyndrom
• Das Diabetic Set ist für die Anwendung mit den Produkten Airstep Walker und Airstep tight Walker konzipiert
REF.520
• Anpassbare Schaumstoffeinlagen zur partiellen Druckentlastung der Fußsohle
• Spezialstrümpfe für Diabetes mellitus und das damit einhergehende Diabetische Fußsyndrom
• Vordere Verstärkungsschale für einen stabilen Halt des Fußes
• Optimaler Tragekomfort durch zwei individuell aufblasbare Luftkammern im Innenschuh
• Grundkörper aus widerstandsfähigem, leichtem Kunststoff
• Komfortabler Sitz durch komplette Schaumstoffauspolsterung
• Korrekte Fixierung durch zirkulären Klettverschluss
• Optimale Abrolleigenschaften der Sohle
• Optionale Polster zur zusätzlichen Anpassung an das Bei
REF.530
• Anpassbare Schaumstoffeinlagen zur partiellen Druckentlastung der Fußsohle
• Spezialstrümpfe für Diabetes mellitus und das damit einhergehende Diabetische Fußsyndrom
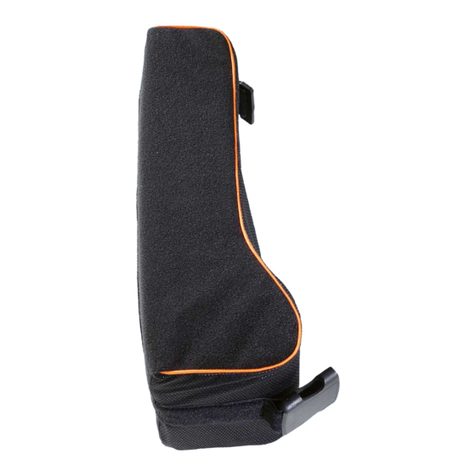
• Verstärkungsschalen vorne und hinten für eine bessere Stabilität
• Aufblasbares Luftpolster für optimalen Tragekomfort und einen besseren Halt
• Grundkörper aus leichtem, widerstandsfähigem Kunststoff
ANPASSEN FÜR DEN ARZT / TECHNIKER REF. 520/530
1 Alle Bänder öffnen und provisorisch hinter dem Schuh schliessen. Die Polsterung aus der Kunststoffschale
herausziehen und öffnen.
2 Die Polsterung anziehen, so dass die Ferse gut am hinteren Teil anliegt, und danach mit dem Klettverschluss
schließen (Abb. A).
3 Die Plastikschiene weiten und den Gehschuh von unten auf das Bein ziehen (Abb. B).
4 Die Schiene muss senkrecht verlaufen und an den Knöcheln zentriert sein (Abb. C).
5 Beim Verschliessen der Klettbänder ist zu beachten, dass beim Untersten begonnen (in Zehennähe) (Abb. D)
und nach oben hin fortgesetzt wird (Abb. E).
6 Die Luftpolster aufpumpen (Abb. F und G) und einen bequemen Sitz herstellen.Aufpumpen: Die Pumpe (Abb.
F) mit der Seite IN in das gewünschte Ventil einsetzen und damit Luft zuführen. Luft ablassen: Die Pumpe
fest mit der Seite OUT in das gewünschte Ventil einsetzen. Nun kann durch das Betätigen der Pumpe oder
durch das Zusammendrücken des Polsters die Luft abgelassen werden. Der zuständige Orthopädietechniker
muss dem Patienten erklären, wie Sitz, Bequemlichkeit und Druck angemessen eingestellt werden können,
damit der Patient den Schuh später selbst anziehen kann.
7 Wenn nötig, kann man die beigelegten Zusatzpolster verwenden, um die Orthese noch genauer dem Bein des
Patienten anzupassen (Abb. H).
Achtung: Die Orthese darf nur mit der Zustimmung des zuständigen Orthopädie-technikers abgenommen werden
(um die Orthese abzunehmen, führt man das oben beschriebene Verfahren in umgekehrter Reihenfolge aus).
ANPASSEN FÜR DEN ARZT / TECHNIKER REF. 505 (Einlegen der Einlage)
1 Das Innenpolster entfernen und die Einlage zur Einpassung zunächst in die Innensohle des Gehschuhs
einlegen, ohne die Klebeschutzfolie abzuziehen (Abb. 1).
2 Einlegesohle gemäß Bedarf des Patienten anpassen.
3 Die Klebeschutzfolie entfernen (Abb. 2) und die Einlage passgenau in die Innensohle des Gehschuhs
einkleben und fest andrücken (Abb. 3).
ANLEGEN FÜR DEN PATIENTEN REF. 505 (Anlegen des Spezialstrumpfes)
1 Wenden Sie den Strumpf bis zur Ferse auf links (Abb. 4).
2 Den eingeschlagenen Strumpf bis zur Ferse über den Fuß ziehen (Abb. 5).
3 Streifen Sie den Strumpf Stück für Stück über Spann, Ferse und Wadenbein (Abb. 6) und ziehen Sie ihn
glatt, so dass er faltenfrei anliegt (Abb. 7).
REF. 530 - REF. 520: Walker with (two) inatable air padding
REF. 505: Diabetic Set
DECLARATION OF CONFORMITY
As the manufacturer, ORTHOSERVICE AG declares, under its sole responsibility, that this is a class I medical
device that has been manufactured and assessed, according to the EU Regulation 2017/745 (MDR). These
instructions have been drawn up in application of the aforementioned Regulation. They are intended to ensure an
adequate and safe use of the medcal device.
TRADEMARKS OF MATERIALS
Velcro®is a registered trademark of Velcro Industries B.V.
SAFETY PRECAUTIONS
We recommend that the pressure exerted by the device does not act on parts of the body with wounds, swelling,
or welts. It is advisable to not over tighten the device so as to avoid generating areas of excessive local pressure
or the compression of underlying nerves and/or blood vessels. Furthermore, we recommend wearing a garment
to avoid direct contact with the skin. If in doubt on how to apply the device, contact a doctor, physiotherapist, or
an orthopedic technician. Read the product composition on the internal label carefully.
We recommend to not wear the device in the proximity of free ames or strong electromagnetic elds.
Do not apply in direct contact with open wounds.
WARNINGS
It is advisable that the device, designed for the specic indications as set out below, be prescribed by a doctor
or a physiotherapist and applied by an orthopedic technician, according to the specic needs of the patient.
To ensure effectiveness, tolerability, and proper functioning, the application must be carried out with the
utmost care. Never alter the adjustment made by the doctor/physiotherapist/ or orthopedic technician. The
responsibilities of the manufacturer shall lapse in case of inappropriate use or adaptation. The orthosis is made
and to be used by only one patient. Should the orthosis be inappropriately used, the manufacturer declines all
responsibility, as provided by the regulation for medical devices.In hypersensitive individuals, direct contact
with the skin may cause redness and irritation. In case of pain, swelling, welts, or any other adverse reaction,
contact your doctor immediately, and in case of a particularly severe adverse event, report the incident to the
manufacturer and the competent authority of your country. The effectiveness of the orthopedic product is only
guaranteed when all the components are properly in use.
SELECTION/SIZE
MAINTENANCE
Do not bleach No chemical cleaning
Do not iron Do not tumble-dry
One patient only Washing instructions:
• Padding: Wash by hand in lukewarm water (max. 30°C) with neutral soap; rinse thoroughly. Dry away from
heat sources
• Rigid parts: Clean with a sponge soaked in lukewarm water (max. 30°C) and neutral soap. Dry with a cloth
Do not dispose of the product or any of its components into the environment.
INDICATIONS
• Particularly suited for use with patients with sensitivities, for example, diabetes mellitus and the associated
diabetic foot syndrome
• Ulcer on the metatasus, malleolus, hallux or heel
• Charcot foot
CONTRAINDICATIONS
REF.505: No known
REF.520-530: The application of this brace is advised only when it is documented that the fracture is stable and
there are acceptable limits of angular and rotational misalignments
CHARACTERISTICS AND MATERIALS
REF.505
• Adaptable foam inserts for partial pressure relief of the foot sole
• Special stockings for diabetes mellitus and the associated diabetic foot syndrome
• The diabetic set is designed for use with the Airstep Walker and Airstep tight Walker products
REF.520
• Adaptable foam inserts for partial pressure relief from the sole
• Special stockings for diabetes mellitus and the associated diabetic foot syndrome
• Front reinforcement shell for stable hold of the foot
• Optimum wearing comfort thanks to two individual inatable air pads in the inner shoe
• Basic body made of durable, light plastic
• Comfortable wear, thanks to the foam padding
• Correct xing thanks to the circular Velcro®fastening
• Optimized tilting sole
• Optional padding for further adaptation to the leg
REF.530
• Adaptable foam inserts for partial pressure relief from the sole
• Special stockings for diabetes mellitus and the associated diabetic foot syndrome
• Reinforcing shells on the front and back, for increased stability
• Inatable air pads for optimum t to the limb and improved stability
• Structure in lightweight, sturdy plasti
ADAPTING FOR THE DOCTOR / TECHNICIAN REF.520/530
1 Open all the straps and spread them apart (on the back). Fasten them temporarily on themselves. Remove
the padding inside the plastic boot and open it.
2 Put on the padding so that the heel rests rmly up against the rear section and then close using the Velcro®
fastening (Fig. A).
3 Put the plastic boot on the leg from the bottom, spreading the plastic splint (Fig. B).
4 Position it so that the splint is vertical and centered on the ankle (Fig. C).
5 Close the Velcro®straps, starting from those closest to the toes (Fig.D) and moving upward (Fig. E).
6 Inate the air pads (Fig. F and G) and ensure comfortable t.
To inate: Insert the small pump (Fig. F) with the opening IN into the desired valve and inject air by using the
pump. To deate: Insert the small pump with the opening OUT into the desired valve. It is then possible to
use the pump actively to pump the air out or leave it in place and press on the padding until it is completely
deated. The healthcare personnel assigned should teach the patient how to obtain adherence, comfort and
adequate compression, for when the boot is reapplied later by the patient.
7 If necessary, use the additional padding supplied to adapt the splint to the patient’s leg (Fig. H).
Important: Remove the boot only when prescribed by the healthcare operator (to remove the boot follow the
above sequence in reverse).
ADAPTING FOR THE DOCTOR / TECHNICIAN REF.505 (Inserting the insert)
1 Remove the inner padding and the place the insert into the inner sole of the walker for t without removing
the adhesive protection foil (Fig.1).
2 Adapt the insert to the patient as required.
3 Remove the adhesive protective foil (Fig.2) and stick to t into the inner sole of the walker and press
rmly into place (Fig.3).
PUTTING ON THE APPLIANCE FOR THE PATIENT REF. 505 (Putting on the special stockings)
1 Turn the special stocking inside out up to as far as the heel (Fig.4).
2 Pull the stocking up to the heel over the foot (Fig.5).
3 Pull the special stocking bit for bit over the foot, heel and calf (Fig.6) and smooth until it has no creases (Fig.7).
REF. 530 - REF. 520: Botte tuteur rigide avec (deux) coussins à air gonables
REF. 505: Diabetic Set
DÉCLARATION DE CONFORMITÉ
En qualité de fabricant, ORTHOSERVICE AG déclare sous sa responsabilité exclusive que ce produit est un
dispositif médical de Classe I et qu’il a été réalisé conformément aux conditions requises par le Règlement UE
2017/745 (MDR). Ces instructions ont été rédigées en accord avec ledit règlement et ont pour but de garantir
l’utilisation correcte et sûre du dispositif médical.
MARQUES COMMERCIALES DES MATÉRIAUX
Velcro®est une marque enregistrée de Velcro Industries B.V.
PRÉCAUTIONS D’UTILISATION
Veiller à ce que la pression exercée par le dispositif n’agisse pas sur les parties du corps présentant des lésions,
enures ou tuméfactions. Il est conseillé de ne pas trop serrer le produit, an de ne générer aucune zone de pression
locale excessive et d’éviter la compression des nerfs et/ou des vaisseaux sanguins. Il est préférable de porter
l’orthèse sur un vêtement, en évitant le contact direct avec la peau. En cas de doute sur les modes d’application,
contacter un médecin, un kinésithérapeute ou un technicien orthopédiste. Lire attentivement la composition du
produit sur l’étiquette située à l’intérieur. Il est recommandé de ne pas porter le dispositif à proximité de ammes
nues ou à des champs magnétiques importants. Ne pas appliquer en contact direct avec des plaies ouvertes.
AVERTISSEMENTS
Le produit étant spéciquement conçu pour les indications reportées ci-dessous, il est conseillé de l’utiliser sur
prescription d’un médecin ou d’un kinésithérapeute et de le faire appliquer par un technicien orthopédiste, conformément
aux exigences individuelles. An de garantir son ecacité, sa capacité à être toléré et son bon fonctionnement, le
produit doit absolument être appliqué avec le plus grand soin. Ne modier en aucun cas le réglage effectué par le
médecin/kinésithérapeute/technicien orthopédiste. En cas d’utilisation ou d’adaptation inappropriée, le fabricant ne
sera pas tenu responsable. L’utilisation de l’orthèse est prévue pour un seul patient à la fois; dans le cas contraire, le
fabricant décline toute responsabilité, conformément aux dispositions du règlement relatif aux dispositifs médicaux.
Pour les sujets hypersensibles, le contact direct avec la peau pourrait causer des rougeurs ou des irritations. En cas
d’apparition de douleurs, enures, tuméfactions ou en cas de toute autre réaction anormale, s’adresser immédiatement
à son médecin et, en cas de problème particulièrement grave, signaler le fait au fabricant et à l’autorité compétente de
son pays. L’ecacité orthopédique du produit n’est garantie que lorsqu’il est utilisé avec tous ses composants.
SÉLECTION/TAILLES
ENTRETIEN
Ne pas blanchir Pas de nettoyage chimique
Ne pas repasser Ne pas sécher en séchoir
Seulement un patient Instructions de lavage :
• Rembourrage : laver à la main à l’eau tiède (max. 30°C) du savon neutre , bien rincez.
Sécher loin de toute source de chaleur.
• Pièces xes: Essuyer avec une éponge à l’eau tiède (max. 30°C) du savon neutre.
Sécher avec un chiffon.
Le produit et ses composants doivent être éliminés en conformité avec les impératifs écologiques.
INDICATIONS
• Spécialement appropriée aux clients souffrant de troubles de la perception, p. ex. d’un diabète
insulinodépendant et du syndrome du pied diabétique en découlant
• Ulcères du métatarse, de la malléole, du gros orteil ou du talon
• Pied Charcot
CONTRE-INDICATIONS
REF. 505: Aucune connue
REF. 520-530: L‘application de ce tuteur est conseillée uniquement dans les cas où il a été démontré que la
fracture est stable et que les limites de difformité angulaire et rotatoire sont acceptables
CARACTÉRISTIQUES ET MATÉRIAUX
REF. 505
• Inserts de mousse adaptables pour une réduction partielle de la pression agissant sur la plante du pied
• Bas spéciaux pour la maladie du diabète et le syndrome du pied diabétique associé
• Le Diabetic Set est conçu pour une application ensemble avec les produits Airstep Walker et Airstep tight Walker
REF. 520
• Inserts de mousse adaptables pour une réduction partielle de la pression agissant sur la plante du pied
• Bas spéciaux pour la maladie du diabète et le syndrome du pied diabétique associé
• Valve de renforcement antérieure pour un maintien stable du pied
• Confort de port optimal via deux chambres à air gonables individuellement à l’intérieur de la botte
• Structure en matière plastique légère et résistante
• Ajustement confortable via un rembourrage complet en mousse
• Fixation correcte via une bande Velcro®circulaire
• Déroulement optimal de la semelle
• Rembourrage en option pour une adaptation supplémentaire à la jamb
REF. 530
• Inserts de mousse adaptables pour une réduction partielle de la pression agissant sur la plante du pied
• Bas spéciaux pour la maladie du diabète et le syndrome du pied diabétique associé
• Valves de renforcement antérieure et postérieure pour plus de stabilité
• Rembourrage gonable à air donnant une adhérence optimale au corps et une meilleure stabilisation
• Structure en matière plastique, légère et résistante
ADAPTATION POUR LE MÉDECIN / L’ORTHOPÉDISTE - ORTHÉSISTE REF.520/530
1 Ouvrir toutes les bandes et les fermées provisoirement derrière la chaussure. Sortir et ouvrir le
rembourrage de la coque en plastique.
2 Enler le rembourrage de manière a ce que le talon soit bien positionné a l’arrière. Fermer ensuite a l’aide
de la fermeture Velcro®(Fig. A).
3 Élargir la gouttière en plastique et mettre la botte tuteur rigide par le bas sur la jambe (Fig. B).
4 L’attelle doit être verticale et centrée sur la cheville (Fig. C).
5 Fermer les bandes Velcro®en commancant par le bas (Fig. D) puis vers le haut (Fig. E).
6 Goner les coussins à air (Fig. F et G) et réaliser un port confortable. Gonage: placer la pompe (Fig. F)
avec le côté IN dans la soupape souhaitée et goner.dépressurisation : placer la pompe fermement avec le
côté OUTdans la soupape souhaitée. Il sut ensuite d’actionner la pompe ou d’appuyer sur le coussin pour
purger l’air. L’orthopédiste-orthésiste est tenu d’expliquer au patient ce qu’il doit faire pour régler la mise
en place, le confort et la pression de sorte que le patient puisse mettre la botte tout seul à l’avenir.
7 Si nécessaire, utiliser le coussin additionnel fourni pour adapter l’orthèse à la jambe du patient (Fig. H).
Attention: Enlever l’attelle uniquement au moment préscrit par le personnel médical. (Pour enlever l’attelle
suivre les indications dans le sens inverse).
ADAPTATION POUR LE MÉDECIN / L’ORTHOPÉDISTE - ORTHÉSISTE REF.505 (Insertion de l’insert)
1 Retirer le rembourrage intérieur et placer l’insert à adapter dans la semelle intérieure de la botte tuteur
rigide pour un premier temps, sans retirer la pellicule protectrice adhésive (Fig. 1).
2 Adapter l’insert aux besoins du patient.
3 Retirer la pellicule protectrice adhésive (Fig. 2) et coller l’insert exactementdans la semelle intérieure
de la botte tuteur rigide et appuyer fort (Fig. 3).
ENFILAGE POUR LE PATIENT REF. 505 (Comment mettre le bas speciaux)
1 Retournez le bas jusqu’à la cheville à l’envers (Fig. 4).
2 Glissez le bas retourné par-dessus le pied jusqu’au talon (Fig. 5).
3 Glissez le bas progressivement par-dessus le cou-de-pied, le talon et le mollet (Fig. 6) et tirez-le jusqu’à
ce qu’il soit lisse et sans plis (Fig. 7).
BITTE DIE VORLIEGENDE ANLEITUNG SORGFÄLTIG LESEN UND AUFBEWAHREN PLEASE READ THESE INSTRUCTIONS CAREFULLY AND KEEP THEM LIRE ATTENTIVEMENT CES INSTRUCTIONS ET LES CONSERVER
Artikelnummer REF.520 - REF.530 - REF.505
Größen SM L
Schuhgröße
35/39 39/44 >44
Farbe grau
beidseitig anwendbar
Item REF.520 - REF.530 - REF.505
Size SM L
Shoe size
35/39 39/44 >44
Colour grey
ts right and left
Code REF.520 - REF.530 - REF.505
Mesure SM L
Mesure soulier
35/39 39/44 >44
Couleur gris
ambidextre
2
B
5
E
1
A
4
D
7
G H
3
C
6
F
RADIO
LUCENT
AIR PAD
airstep tight walker
diabetic diabetic set
