manuals.online logo
Brands
  1. Home
  2. •
  3. Brands
  4. •
  5. Panasonic
  6. •
  7. Conference System
  8. •
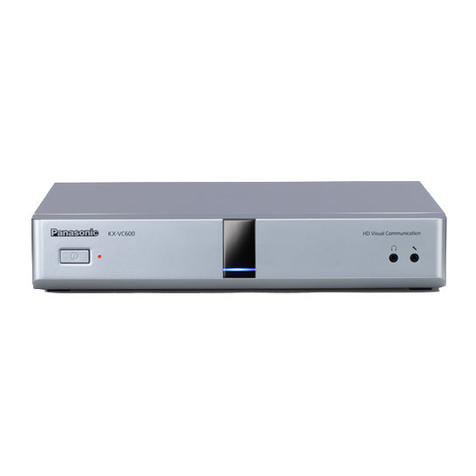
  9. Panasonic KX-VC1300 User manual

Panasonic KX-VC1300 User manual

Model No.
KX-VC1300/KX-VC1600
User Manual
Thank you for purchasing this Panasonic product.
Please read this manual carefully before using this product and save this manual for future use.
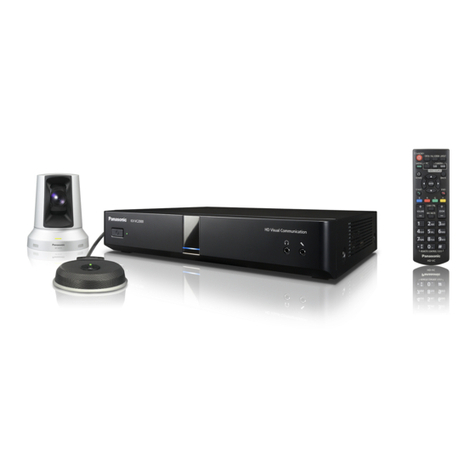
KX-VC1300/KX-VC1600: Software File Version 4.25 or later
Document Version: 2015-12
In this manual, HD Visual Communication is abbreviated as "HDVC".
In this manual, the suffix of each model number (e.g., KX-VCA001XX) is omitted unless necessary.
KX-VC1300SX/KX-VC1600SX
KX-VC1300A/KX-VC1600A
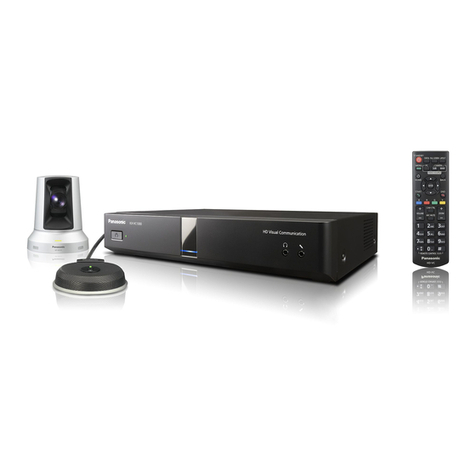
HD Visual Communication Unit
Introduction
Feature Highlights
Display
Video
camera
Display
Intranet
Microphone
Microphone
Video
camera
Display Display
Microphone
Video
camera
Computer
Internet
Router
NAT Traversal
Service
Router
Computer
Lifelike Video Conference Call
You can experience lifelike video conference calls with smooth, high-quality video and clear stereo*1 sound.
*1 If using 2 or more Digital Boundary Microphones, stereo output can be enabled through system settings (Page 115). When using
Digital Boundary Microphones and an Analogue Boundary Microphone together, stereo output may be unavailable depending on the
connection configuration (Page 28, Page 30).
Home Electronics-style Remote Control Operation and Simple, Easy to
Understand Graphical User Interface
You can make settings and perform operations using familiar remote control operations and a simple, easy to
understand interface.
Stabilised Communication Quality
In periods of network congestion, automatic packet transmission rate quality control prevents packet loss to
maintain a video conference call’s image and sound quality. This allows video conference calls with stabilised
communication quality even over an Internet connection or mobile communication.
2 User Manual Document Version 2015-12
Introduction
Dual stream (2 screens) compatible
You can send the image of your video camera and the image of your computer’s screen or a sub video camera
at the same time to the other party.
You can view the other party and check shared data at the same time to hold more realistic and interactive
meetings.
Dual network compatibility (KX-VC1600 only)
You can connect to different networks at the same time, such as your company’s internal network and the
Internet. This allows seamless connectivity with units both inside and outside of your company.
Multi-party connections
The KX-VC1300 has a built-in MCU and can establish multiple connections with a maximum of 4 parties. The
KX-VC1600 can establish multiple connections with a maximum of 6 parties standard, and is expandable to a
maximum of 10 parties. All devices have MCU functions built-in, allowing for flexible connectivity.
Note
•In this manual, 1 unit with a built-in MCU which connects to multiple sites simultaneously is referred
as to the "Main Site", and the sites connecting to the Main Site are referred to as "Sub Sites". A site
that establishes connections to multiple sites using a Profile Call (Page 50), or a site that adds a site
to the call during a 2-party video conference call with another site (Page 62) becomes the "Main
Site".
Selectable Video Source
By connecting your computer or video camera to the unit, you can show your computer’s screen or video
camera image to video conference call participants (Page 78).
Encrypted Communication
Packets sent for video conference calls can be encrypted to prevent packet leaks, tampering, or
eavesdropping.
KX-VC Series NAT Traversal Service
"KX-VC Series NAT Traversal Service" is a service that allows you to easily and affordably set up and operate
a communication environment for the HD Visual Communication Unit.*1*2*3 Also, complicated router
configuration is unnecessary, which allows even people who are not network administrators set up a
communication environment. Furthermore, you can assign the unit a unique number (Terminal ID), which
allows the unit to be called not by IP address, but with the unique 7-digit number. This means communication
can be initiated as if calling a telephone. Communication can also be encrypted, so that you can communicate
over the Internet safely and securely.
For details about KX-VC Series NAT Traversal Service, refer to the following web site:
Document Version 2015-12 User Manual 3
Introduction
http://panasonic.net/psn/products/hdvc/nat_traversal/index.html
*1 This service may be unavailable depending on the country/area of use. For details, contact your dealer.
*2 This service may be unavailable depending on your router’s type or your Internet connection environment. For details, contact your
dealer.
*3 IPv6 addresses cannot be used.
Making Video Conference Calls via SIP Server
By using a SIP server, you can establish video conference calls not just by IP address, but also by specifying
a SIP URI (SIP user name@SIP domain name) instead. If the other party uses the same SIP domain name
as you, you can make a video conference call by specifying only the SIP user name. For information about
supported SIP servers, contact your dealer.
Calling via an H.323 Gatekeeper
Going through an H.323 Gatekeeper allows communication of not just the IP address, by the H.323 extension
and the H.323 name as well. Contact your dealer regarding the gatekeepers that can be used.
Enhanced Features through the Use of Activation Keys
By using an activation key (sold separately), you can upgrade the features of the unit (Page 18). This allows
enrollment in the KX-VC Series NAT Traversal Service, and enables Mobile Connection and Multicast features.
If using the KX-VC1600, multiple connections can be made with up to 10 parties simultaneously.
Remote Video Camera Operation via Remote Control
You can move your own video camera up, down, left, and right as well as zoom in and out (Page 81). You
can also register up to 9 preset patterns of video camera direction and zoom level which allows you to easily
change the video camera’s direction and zoom level by selecting a preset (Page 84, Page 86). Additionally,
you can also use your remote control to control the other party’s video camera.*1
*1 To be able to control another party’s video camera, settings must be configured on the other party’s unit (Page 117).
IPv6 Address
Communication can be made using IPv6 addresses. IPv6 addresses can also be used for SIP Servers and H.
323 Gatekeepers.
4 User Manual Document Version 2015-12
Introduction
Trademarks
•HDMI is a trademark or registered trademark of HDMI Licensing, LLC in the United States and other
countries.
•Polycom® is a trademark owned by Polycom, Inc. in the US and other countries.
•Microsoft, Windows and Internet Explorer are either registered trademarks or trademarks of Microsoft
Corporation in the United States and/or other countries.
•Mozilla and Firefox are registered trademarks of the Mozilla Foundation.
•All other trademarks identified herein are the property of their respective owners.
Licences
•THIS PRODUCT IS LICENSED UNDER THE AVC PATENT PORTFOLIO LICENSE FOR THE
PERSONAL USE OF A CONSUMER OR OTHER USES IN WHICH IT DOES NOT RECEIVE
REMUNERATION TO (i) ENCODE VIDEO IN COMPLIANCE WITH THE AVC STANDARD (“AVC
VIDEO”) AND/OR (ii) DECODE AVC VIDEO THAT WAS ENCODED BY A CONSUMER ENGAGED IN A
PERSONAL ACTIVITY AND/OR WAS OBTAINED FROM A VIDEO PROVIDER LICENSED TO PROVIDE
AVC VIDEO. NO LICENSE IS GRANTED OR SHALL BE IMPLIED FOR ANY OTHER USE. ADDITIONAL
INFORMATION MAY BE OBTAINED FROM MPEG LA, L.L.C. SEE HTTP://WWW.MPEGLA.COM
•This product incorporates G.722.1 and G.722.1 Annex C licensed by Polycom®.
•This product incorporates Qt library licenced by Digia Plc. Please read "EULA" of system settings of this
product.
Open Source Software
Parts of this product use Open Source Software supplied based on the conditions of the Free Software
Foundation’s GPLs and/or LGPLs and other conditions. Relevant conditions apply to this software. Therefore,
please read license information about GPLs and LGPLs, and "License Info." of system settings of this product
before using this product. Also, some software parts of this product are licensed under the MOZILLA PUBLIC
LICENSE (MPL). At least three (3) years from delivery of products, Panasonic will give to any third party who
contacts us at the contact information provided below, for a charge of no more than the cost of physically
distributing source code, a complete machine-readable copy of the corresponding source code and the
copyright notices covered under GPL, LGPL, and MPL. Please note that software licensed under GPL, LGPL,
and MPL is not under warranty.
Contact Information
http://www.panasonic.net/corporate/global_network/
Miscellaneous
About the Screen Shots and Illustrations in this Manual
The screen shots, illustrations and descriptions in this manual are based on using the KX-VC1600 (when used
with enhanced features). If you are using the KX-VC1300 or KX-VC1600 (without using the enhanced features),
please note that some displayed features will not be available for your model.
Copyright
The software used in this product uses source code from Radvision Ltd.
Document Version 2015-12 User Manual 5
Introduction
Portions of this software are © 1996-2012 RADVISION Ltd. All intellectual property rights in such portions of
the Software and documentation are owned by RADVISION and are protected by United States copyright laws,
other applicable copyright laws and international treaty provisions. RADVISION and its suppliers retain all rights
not expressly granted.
6 User Manual Document Version 2015-12
Introduction
Table of Contents
For Your Safety ......................................................................................11
For Your Safety ...............................................................................................................11
Before Operation ....................................................................................13
Notes about Operation ...................................................................................................13
Data Security ...................................................................................................................14
Privacy and Right of Publicity .......................................................................................14
Precaution ...............................................................................................15
Precaution ........................................................................................................................15
Preparation .............................................................................................17
Accessory/Optional Accessory Information ................................................................17
Optional Accessory ........................................................................................................17
Part Names and Usage ...................................................................................................19
Main Unit (Front) ............................................................................................................19
Main Unit (Back) .............................................................................................................20
Remote Control ..............................................................................................................22
LED Indication ................................................................................................................24
Screen Standby ..............................................................................................................24
Connection and Preparation ..........................................................................................26
Device and Network Connection ....................................................................................26
Connecting the Unit ........................................................................................................27
Network Configuration Example .....................................................................................34
Preparing the Remote Control ........................................................................................36
Turning the Power On/Off ..............................................................................................37
Screen Display ................................................................................................................38
Home Screen (Idle Screen) ............................................................................................38
Menu Screen (Idle Screen) ............................................................................................40
Video Conference Call Screen .......................................................................................41
Entering characters ........................................................................................................43
About IPv6 Addresses ....................................................................................................43
Initial Settings ..................................................................................................................44
Starting a Video Conference .................................................................47
Making a Video Conference Call ....................................................................................47
Calling Using One-Touch Connection Numbers From the Home Screen ......................47
Calling from the Contact List (2-party Conference) ........................................................48
Calling Using Profile (Multiple-party Video Conference Calls) .......................................50
Calling by Entering an Address Directly .........................................................................52
Calling from the Call History ...........................................................................................55
Answering a Video Conference Call ..............................................................................58
Connecting to an MCU ....................................................................................................60
During Video Conference Calls ............................................................62
Adding Parties to an Existing Video Conference Call (Except Sub Sites) ................62
Disconnecting Parties During Video Conference Call .................................................64
Changing the Contents Sharing Method During Communication ..............................65
Changing the Screen Layout during a Video Conference Call ...................................66
Changing the Other Party’s Screen Display Layout ....................................................66
Changing the MCU Mode (Main Site Only) ...................................................................69
Changing the Setting of the Main Display (Main Site only) .........................................70
Document Version 2015-12 User Manual 7
Table of Contents
Changing the Site Name Display (Main Site only) .......................................................72
Changing the Audio Settings for Other Parties (Main Site only) ................................72
Changing the Settings for Audio Mixing Sites (Main Site Only) .................................73
Adjusting the Volume .....................................................................................................74
Muting the Microphone ...................................................................................................75
Reducing Microphone Noise ..........................................................................................77
Displaying a Computer’s Screen and the Sub Video Camera’s Image ......................78
Controlling a Video Camera ..................................................................81
Controlling a Video Camera ...........................................................................................81
Registering a Preset .......................................................................................................84
Recalling a Registered Preset ........................................................................................86
Changing Video Camera Settings .................................................................................87
Displaying the Connection Status ........................................................92
Displaying the Connection Status .................................................................................92
Displaying Unit Information ...........................................................................................93
Contacts and Settings ...........................................................................94
Adding Contacts to the Contact List .............................................................................94
Registering a New Contact .............................................................................................94
Editing Contact Information ............................................................................................95
Deleting a Contact ..........................................................................................................95
Registering a Contact from the Call History ...................................................................96
Registering a Profile .......................................................................................................97
Registering a New Profile ...............................................................................................97
Editing Profile Information ............................................................................................100
Deleting a Profile ..........................................................................................................100
Making Local Site Settings ...........................................................................................101
Registering a Local Site ...............................................................................................101
Selecting a Local Site ...................................................................................................101
Deleting Local Site Information ....................................................................................102
Changing System Settings/Performing System Maintenance ..................................103
Setting the Unit Name ..................................................................................................106
Setting the Date and Time ............................................................................................106
Making Network Settings ..............................................................................................106
Making Connection Settings .........................................................................................109
Setting the MCU ...........................................................................................................111
Setting One-touch Connection Numbers ......................................................................113
Making Screen Standby Settings .................................................................................113
Making Sound Settings ................................................................................................114
Setting the MIC Position ...............................................................................................114
Making Remote Control Settings ..................................................................................116
Changing Video Camera Settings ................................................................................117
Making Language Settings ...........................................................................................117
Using Multicast .............................................................................................................118
Display Unit Information ...............................................................................................118
Checking Enhanced Features ......................................................................................118
Performing a Network Test ...........................................................................................119
Performing Self Diagnosis ............................................................................................119
Displaying the Licence Information ..............................................................................119
Displaying the End-User Licence Agreement ...............................................................119
Performing Remote Maintenance .................................................................................120
Making Administrator Menu Settings ..........................................................................121
Administrator Menu List ................................................................................................121
8 User Manual Document Version 2015-12
Table of Contents
Making Administrator Password Settings .....................................................................125
Making Encryption Settings ..........................................................................................125
Making Software Update Settings ................................................................................126
Making Connection Mode Settings ...............................................................................127
Making NAT Settings ....................................................................................................127
Making Call Type Settings ............................................................................................128
Making SIP Settings .....................................................................................................128
Making H.323 Settings .................................................................................................130
Making Codec Settings ................................................................................................131
Making Video Output Settings ......................................................................................132
Making Audio Input/Output Settings .............................................................................134
Making GUI Settings ....................................................................................................135
Making HDMI Settings ..................................................................................................135
Setting Shortcuts ..........................................................................................................136
Setting Local Site Selection ..........................................................................................136
Setting Multicast Tree ...................................................................................................136
Exporting Data ..............................................................................................................136
Importing Data ..............................................................................................................137
Activating Enhanced Features .....................................................................................138
Updating Software ........................................................................................................139
Initialising a Video Camera ...........................................................................................140
Performing System Initialisation ...................................................................................140
Using the KX-VC Series NAT Traversal Service ................................141
Using the KX-VC Series NAT Traversal Service .........................................................141
Preparations for Connections .......................................................................................141
KX-VC Series NAT Traversal Service Setup Procedure ..............................................141
Connect to the Internet .................................................................................................143
Obtain a Registration Key ............................................................................................143
To check the MPR ID (using the unit) ........................................................................143
To obtain a Registration Key (using a computer) ......................................................144
To display the Registration Key again (using a computer) ........................................145
Using Mobile Connection Enhanced Features ..................................149
Using Mobile Connection Enhanced Features ...........................................................149
Using Multicast .....................................................................................150
Using Multicast ..............................................................................................................150
About Multicast .............................................................................................................150
Multicast Operation ......................................................................................................151
Starting Multicast .......................................................................................................151
Ending the Multicast ..................................................................................................151
Handling of Trouble During a Multicast .....................................................................151
The Multicast Tree .........................................................................................................152
About the Network ........................................................................................................152
Setting the System ........................................................................................................153
Setting Multicast ...........................................................................................................153
Making Administrator Menu Settings ..........................................................................153
Registering the Multicast Tree ......................................................................................153
Starting a Multicast .......................................................................................................157
Starting a Multicast by Selecting the Multicast Target ..................................................157
Confirming the Transmission Status During a Multicast (Multicast Terminal) ..............159
Confirming the Transmission Status During a Multicast (Relay Terminal/Receiver
Terminal) ......................................................................................................................160
Document Version 2015-12 User Manual 9
Table of Contents
Miscellaneous .......................................................................................161
Changing the Remote Control Batteries .....................................................................161
Cleaning the Unit ...........................................................................................................162
Input ......................................................................................................163
Inputting Letters and Numbers ....................................................................................163
Additional Information .........................................................................176
Troubleshooting ............................................................................................................176
Basic Operation ............................................................................................................176
Audio ............................................................................................................................182
System Settings ...........................................................................................................184
If These Messages Appear ..........................................................................................184
Registration Page of KX-VC Series NAT Traversal Service ........................................190
KX-VC Series NAT Traversal Service for this Device ..................................................191
If a message from the KX-VC Series NAT Traversal Service is displayed ..................192
Specifications .......................................................................................194
System Specifications ..................................................................................................194
Index............................................................................................................197
10 User Manual Document Version 2015-12
Table of Contents
For Your Safety
CAUTION
RISK OF ELECTRIC SHOCK
DO NOT OPEN
CAUTION: TOREDUCE THE RISK OF ELECTRIC SHOCK,
DO NOT REMOVE COVER (OR BACK).
NO USER-SERVICEABLE PARTS INSIDE.
REFER SERVICING TO QUALIFIED SERVICE PERSONNEL.
The lightning flash with arrowhead
symbol, within an equilateral triangle, is
intended to alert the user to the presence
of uninsulated "dangerous voltage" within
the product’s enclosure that may be of
sufficient magnitude to constitute a risk of
electric shock to persons.
The exclamation point within an
equilateral triangle is intended to alert the
user to the presence of important
operating and maintenance (servicing)
instructions in the literature
accompanying the appliance.
WARNING:
•The mains plug or an appliance coupler shall
remain readily operable.
•To prevent fire or electric shock hazard, do not
expose this apparatus to rain or moisture.
•The apparatus should not be exposed to dripping or
splashing and no objects filled with liquids, such as
vases, should be placed on the apparatus.
•All work related to the installation of this product
should be made by qualified service personnel or
system installers.
•The connections should comply with local electrical
code.
•Batteries (battery pack or batteries installed) shall
not be exposed to excessive heat such as sunshine,
fire or the like.
•This is a class A product. In a domestic environment
this product may cause radio interference in which
case the user may be required to take adequate
measures.
•This equipment is compliant with Class A of CISPR
32. In a residential environment this equipment may
cause radio interference.
•Do not use your headset at a high volume. The use
of excessive sound volume through a headset may
cause hearing loss.
CAUTION:
•Before attempting to connect or operate this
product, please read the label on the bottom.
•Be sure to use the specified type of batteries only.
•Ensure that batteries are installed with correct
polarity. Incorrectly installed batteries can burst or
leak, resulting in spillage or injuries.
•This product contains batteries. Replace only with
the same or equivalent type. Improper use or
replacement may cause overheating, rupture or
explosion resulting in injury or fire. Dispose of used
batteries according to the instructions of your local
solid waste officials and local regulations.
•When replacing the batteries for the remote control,
use R6 (AA) type dry cell.
For use only with power supply Panasonic,
PGLV1006. (KX-VC1300/KX-VC1600/
KX-VC1300SX/KX-VC1600SX)
For use only with power supply Panasonic,
PGLV1011. (KX-VC1300A/KX-VC1600A)
Important Safety Instructions:
1) Read these instructions.
2) Keep these instructions.
3) Heed all warnings.
4) Follow all instructions.
5) Do not use this apparatus near water.
6) Clean only with dry cloth.
7) Do not block any ventilation openings. Install
in accordance with the manufacturer’s
instructions.
8) Do not install near any heat sources such as
radiators, heat registers, stoves, or other
apparatus (including amplifiers) that produce
heat.
9) Protect the power cord from being walked on
or pinched particularly at plugs, convenience
receptacles, and the point where they exit
from the apparatus.
10) Only use attachments/accessories specified
by the manufacturer.
11) Unplug this apparatus during lightning storms
or when unused for long periods of time.
Document Version 2015-12 User Manual 11
For Your Safety
For Your Safety
12) Refer all servicing to qualified service
personnel. Servicing is required when the
apparatus has been damaged in any way,
such as power-supply cord or plug is
damaged, liquid has been spilled or objects
have fallen into the apparatus, the apparatus
has been exposed to rain or moisture, does
not operate normally, or has been dropped.
12 User Manual Document Version 2015-12
For Your Safety
Notes about Operation
Please pay attention to the following points when using
this device:
1. Please contact your dealer for installing,
upgrading, or repairing this device.
2. Do not forcefully hit or shake this device.
Dropping or bumping this device can damage or
break this device.
3. Do not place this device in a freezer or other
location where it is exposed to cold
temperatures.
Doing so may result in damage or malfunctions.
4. Place this device at least 2 m (6.5 ft) away from
radios, office equipment, microwave ovens, air
conditioning units, etc.
Noise from electronic devices can cause static and
interference in other devices.
5. Do not place this device in a location where it is
exposed to hydrogen sulfide, phosphorous,
ammonia, sulfur, carbon, acid, dirt, toxic gas,
etc.
Doing so may result in damage, and the usable
life-span of the device may decrease.
6. Do not apply insecticides or other volatile
liquids to the device, nor leave rubber bands or
vinyl objects on the device for extended periods
of time.
Doing so may result in alterations to the material or
paint peeling off the device.
7. Do not bring cards with magnetic strips, such
as credit cards and telephone cards, near the
microphone.
Cards might become unusable.
8. Do not bring the device near items that emit
electromagnetic waves or that are magnetised
(high-frequency sewing machines, electric
welders, magnets, etc.).
Doing so may result in static noise or damage.
9. Keep the device at least 10 cm (4 in) away from
all walls.
If placed against a wall, the device may not be able
to ventilate properly, which may lead to a system
malfunction due to overheating.
10. Avoid placing the device in areas with high
humidity, and exposing it to rain.
Neither the main unit nor the power plug is water
resistant.
11. The power outlet should be near the product
and easily accessible.
About the Operating Environment
This device includes a feature that automatically adjusts
voice transmissions to improve clarity. After beginning
a video conference call, adjustments to the call
environment may not complete immediately, and as a
result voices may cut out or echo. In such cases, at the
beginning of the video conference call, be sure to speak
in turn with other parties.
About Moving the Device
Do not move this device while cords are still connected.
Doing so may result in damage to the cords.
Other
•The unit may not operate in the event of a power
failure.
•After unpacking the product, dispose of the power
plug cap and packing materials appropriately.
Document Version 2015-12 User Manual 13
Before Operation
Before Operation
Data Security
We recommend observing the security precautions
described in this section, in order to prevent the
disclosure of sensitive information.
Panasonic is not responsible for any damages
caused by improper use of this device.
Preventing Data Loss
Keep a separate record of the encryption key and all
information stored in the contact list.
Preventing Data Disclosure
•Do not place this device in a location that can be
accessed or removed without authorisation.
•If important information is saved on this device,
store it in an appropriate location.
•Do not store sensitive personal information in the
unit.
•In the following situations, make a record of the
encryption key and the information stored in the
contact list and return the unit to the state it was in
when purchased.
–Before lending or disposing of the unit
–Before handing the unit over to a third party
–Before having the unit serviced
•Make sure the unit is serviced by only a certified
technician.
This device can register and store personal data (the
contact list, encryption key, connection history, etc.). In
order to prevent the disclosure of data stored on this
device, make sure to delete all data that is registered
and stored on this device prior to disposing of, lending,
or returning this device.
Preventing Data Disclosure over the
Network
•To ensure the security of private conversations,
only connect the unit to a secure network.
•To prevent unauthorised access, only connect the
unit to a network that is properly managed.
•Make sure all computers connected to the unit
employ up-to-date security measures.
•To prevent illegal access from the Internet, activate
a Firewall.
Privacy and Right of
Publicity
By installing and using this device, you are responsible
for maintaining the privacy and usage rights of images
and other data (including sound picked up by the
microphone). Use this device accordingly.
•Privacy is generally said to be, "A legal guarantee
and right not to have the details of one’s personal
life unreasonably publicised, and the right to be able
to control information about oneself. In addition,
right of publicity is a right not to have a likeness of
one’s face or figure photographed and publicised
without consent".
•When Automatic Answer or Forced Answering is
set as an answer method for incoming calls,
transmission begins as soon as a video conference
call is received (Page 109). The receiver of the
video conference call will begin transmitting as soon
as the video conference call is received at any time,
from any caller. Please be aware when the
Automatic Answer feature or Forced Answering
feature is enabled, there is a risk that due to an
unexpected, automatically answered video
conference call, privacy rights may be violated or
sensitive information may be transmitted to
unauthorised parties.
14 User Manual Document Version 2015-12
Before Operation
Precaution
For users in the United Kingdom
FOR YOUR SAFETY, PLEASE READ THE
FOLLOWING TEXT CAREFULLY.
This appliance is supplied with a moulded three-pin
mains plug for your safety and convenience. Should the
fuse need to be replaced, please ensure that the
replacement fuse is of the same rating and that it is
approved by ASTA or BSI to BS1362.
Check for the ASTA mark or the BSI mark on
the body of the fuse.
If the plug contains a removable fuse cover, you must
ensure that it is refitted when the fuse is replaced. If you
lose the fuse cover, the plug must not be used until a
replacement cover is obtained. A replacement fuse
cover can be purchased from your local Panasonic
dealer.
IF THE FITTED MOULDED PLUG IS UNSUITABLE
FOR THE AC OUTLET IN YOUR PREMISES, THEN
THE FUSE SHOULD BE REMOVED AND THE PLUG
CUT OFF AND DISPOSED OF SAFELY. THERE IS A
DANGER OF SEVERE ELECTRICAL SHOCK IF THE
CUT-OFF PLUG IS INSERTED INTO ANY 13 AMP
SOCKET.
How to replace the fuse: Open the fuse compartment
with a screwdriver and replace the fuse and fuse cover.
For users in the European Union only
Disposal of Old Equipment and Batteries
Only for European Union and countries with
recycling systems
These symbols on the products, packaging,
and/or accompanying documents mean that
used electrical and electronic products and
batteries must not be mixed with general
household waste.
For proper treatment, recovery and
recycling of old products and used batteries,
please take them to applicable collection
points in accordance with your national
legislation.
By disposing of them correctly, you will help
to save valuable resources and prevent any
potential negative effects on human health
and the environment.
For more information about collection and
recycling, please contact your local
municipality.
Penalties may be applicable for incorrect
disposal of this waste, in accordance with
national legislation.
For business users in the European
Union
If you wish to discard electrical and
electronic equipment, please contact your
dealer or supplier for further information.
Information on disposal in other
countries outside the European Union
These symbols are only valid in the
European Union. If you wish to discard these
items, please contact your local authorities
or dealer and ask for the correct method of
disposal.
Note for the battery symbol
(bottom symbol)
This symbol might be used in combination
with a chemical symbol. In this case it
complies with the requirement set by the
Directive for the chemical involved.
Document Version 2015-12 User Manual 15
Precaution
Precaution
For users in Taiwan only
Notice
•This product contains a CR coin lithium battery.
When disposing of the product, the battery must
be removed. Contact your dealer for details.
Direct current symbol
Alternating current symbol
We declare under our sole responsibility that the
product to which this declaration relates is in
conformity with the standards or other normative
documents following the provisions of Directives
2006/95/EC and 2004/108/EC.
For Malaysia Battery Regulation
Panasonic Malaysia Sdn. Bhd.
Lot 10, Jalan 13/2, 46200 Petaling Jaya, Selangor
Darul Ehsan, Malaysia
For users in Germany only
•Machine Noise Information Ordinance, 3rd
GPSGV: The highest sound pressure level is 70 dB
(A) or less according to EN ISO 7779.
•This equipment is not for use at video display work
stations according to BildscharbV.
For Canada
CAN ICES-3(A)/NMB-3(A)
For U.S.A.
This product contains a CR Coin Cell Lithium Battery
which contains Perchlorate Material - special handling
may apply.
See www.dtsc.ca.gov/hazardouswaste/perchlorate/
FCC Note: This equipment has been tested and found
to comply with the limits for a Class A digital device,
pursuant to Part 15 of the FCC Rules. These limits are
designed to provide reasonable protection against
harmful interference when the equipment is operated in
a commercial environment. This equipment generates,
uses, and can radiate radio frequency energy and, if not
installed and used in accordance with the instruction
manual, may cause harmful interference to radio
communications. Operation of this equipment in a
residential area is likely to cause harmful interference
in which case the user will be required to correct the
interference at his own expense.
FCC Caution: To assure continued compliance,
(example - use only shielded interface cables when
connecting to other devices). Any changes or
modifications not expressly approved by the party
responsible for compliance could void the user’s
authority to operate this equipment.
The model number and serial number of this product
may be found on the surface of the unit. You should note
the model number and serial number of this unit in the
space provided and retain this book as a permanent
record of your purchase to aid identification in the event
of theft.
Model No.
Serial No.
Disposal may be regulated in your community due to
environmental considerations. For disposal or recycling
information, please visit Panasonic website: http://
www.panasonic.com/environmental or call
1-888-769-0149.
16 User Manual Document Version 2015-12
Precaution
Accessory/Optional Accessory Information
The following accessories are included:
Included Accessories
Accessories Quantity
AC adaptor
Part No.:PGLV1006 (KX-VC1300/KX-VC1600/KX-VC1300SX/
KX-VC1600SX)
Part No.:PGLV1011 (KX-VC1300A/KX-VC1600A)
1
Power cord Depends on country/area
Remote control
Part No.: N2QAYB001001 1
Batteries (R6 [AA] dry cell) 2
Note
•The number and type of power cords may vary depending on the country/area of use. Please use
whichever is appropriate for the country/area.
Optional Accessory
The following products are available as optional accessories.
Proprietary main video camera
12x optical/10x digital zoom
Pan/tilt function supported
Proprietary main video camera
3x optical/4x digital zoom
Pan/tilt function supported
Model No.: GP-VD151 Model No.: GP-VD131
Document Version 2015-12 User Manual 17
Preparation
Preparation
Boundary Microphone
Boundary Microphone
(Digital Interface Type)
(Proprietary cable included.
Cable length: approx. 8.5 m [28 ft])
Boundary Microphone
(Analogue Interface Type)
(Proprietary cable included.
Cable length: approx. 7 m [23 ft])
Model No.: KX-VCA001 Model No.: KX-VCA002
Activation Keys
You can enhance the following types of features with an activation key. For details about the settings, refer to
"Activating Enhanced Features" (Page 138).
Model No. Product Name Activation
Key Type Target Model Description
KX-VCS701 Activation Key Card
(NAT Traversal 1 Year)
NAT
Traversal 1
Year
KX-VC1300
KX-VC1600
Extends the service
period of KX-VC
Series NAT Traversal
Service.
KX-VCS703 Activation Key Card
(NAT Traversal 3 Years)
NAT
Traversal 3
Years
KX-VC1300
KX-VC1600
Extends the service
period of KX-VC
Series NAT Traversal
Service.
KX-VCS304 Activation Key Card (4
Point Built-in MCU)
4 Point
Built-in MCU KX-VC1600
Enables the feature
for making
multiple-party video
conference calls with
10 parties, rather
than the default
maximum of 6
parties.
KX-VCS302 Activation Key Card
(Multicast) Multicast KX-VC1300
KX-VC1600
Enables the multicast
feature.
KX-VCS351 Activation Key (Mobile
Connection)
Mobile
Connection
KX-VC1300
KX-VC1600
Connects to a mobile
device in IP Mode.
18 User Manual Document Version 2015-12
Preparation
Part Names and Usage
Main Unit (Front)
A B
D E
C
Power LED
Shows the power status. The LED is green or red when power is being supplied from the AC adapter, and
off when power is not being supplied.
Remote Control Signal Receiver
Receives Remote Control signals. The maximum range of reception is approximately 8 m (26.2 ft) from
front of the unit, and approximately 3 m (9.8 ft) from 20° on each side, total 40°.
Headset Input-Output Terminal
Used to connect a headset to the unit (Page 31).
Note
•If a headset is connected, audio from the other party can be heard through the headset. Audio is
not played through the display or speakers. However, if "Output local site sound" is set to
"HDMI", audio is output via HDMI, not the headset (Page 134).
•If a headset is connected, how audio is sent to the other party differs depending on the type of
devices connected as follows:
Connected Device Audio Sent to Other Party
Boundary Microphone Audio is picked up only by the headset microphone. Audio
is not picked up by the Boundary Microphones.
General-purpose microphone Both the general-purpose microphones and the headset
microphone pick up audio.
Boundary Microphone and
general-purpose microphone
Both the general-purpose microphones and the headset
microphone pick up audio. The Boundary Microphones do
not pick up audio.
Power button
Turns the power on and off (Page 37).
Status LED
Shows the operational status of the unit (Page 24).
Document Version 2015-12 User Manual 19
Preparation
Main Unit (Back)
KX-VC1600
A B C D F
K M TON P Q R S U
E G H I J
L
KX-VC1300
A B C D F
K M TON P Q R
E G I J
U
Camera Control terminal
Not used.
RS-232C terminal
Normally not used. Used to connect a computer for maintenance.
USB jack (Page 136, Page 139)
Used to connect a USB memory device for saving the operation log and for updating the software.
MIC (Digital) jack (Page 27)
Used to connect the Digital Boundary Microphone (optional) (Page 18).
MIC (Analog) jack (Page 27)
Used to connect the Analogue Boundary Microphone (optional) (Page 18).
Audio In L/R jack (Page 28)
Used to connect general-purpose microphones (not for the Boundary Microphone).
Audio Out L/R jack
Used to connect an amplifier or active speaker (Page 32). Also used to connect the speakers of a display
without an HDMI terminal for audio output (Page 33).
Component terminal (KX-VC1600 only) (Page 33)
Used to connect to the display with a component video cable.
Functional Earth terminal
Used to connect an earthing wire for when there is a lot of noise over the connection.
Video Switch
Used to set the unit’s video frequency. Sets the unit’s video frequency to be the same as the connected
device.
LAN1 jack (Page 28)
Connect a LAN cable.
LAN2 jack (KX-VC1600 only) (Page 28)
Connect a LAN cable (Used when connecting to a network other than LAN1).
RGB terminal (Page 31)
Used to connect a computer for sending screens to participants.
20 User Manual Document Version 2015-12
Preparation

Other manuals for KX-VC1300

2

This manual suits for next models

5

Other Panasonic Conference System manuals

Panasonic WX-CT420 User manual

Panasonic

Panasonic WX-CT420 User manual

Panasonic KX-VC300 User manual

Panasonic

Panasonic KX-VC300 User manual

Panasonic SC-HG1-C User manual

Panasonic

Panasonic SC-HG1-C User manual

Panasonic KX-VC1600 Assembly instructions

Panasonic

Panasonic KX-VC1600 Assembly instructions

Panasonic KX-VC1000 User manual

Panasonic

Panasonic KX-VC1000 User manual

Panasonic KX-VC600 User manual

Panasonic

Panasonic KX-VC600 User manual

Panasonic SUNX SC-HG1-CEF User manual

Panasonic

Panasonic SUNX SC-HG1-CEF User manual

Panasonic KX-VC500CN User manual

Panasonic

Panasonic KX-VC500CN User manual

Panasonic KX-HTS Series User manual

Panasonic

Panasonic KX-HTS Series User manual

Panasonic KX-VC500 User manual

Panasonic

Panasonic KX-VC500 User manual

Panasonic KX-NS1000 User manual

Panasonic

Panasonic KX-NS1000 User manual

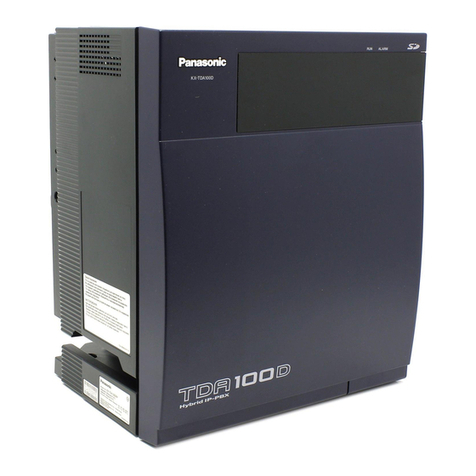
Panasonic KX-TDA100D Owner's manual

Panasonic

Panasonic KX-TDA100D Owner's manual

Panasonic KX-VC500 User manual

Panasonic

Panasonic KX-VC500 User manual

Panasonic EtherCAT SC-GU3-03 User manual

Panasonic

Panasonic EtherCAT SC-GU3-03 User manual

Panasonic KX-VC300 Instruction Manual

Panasonic

Panasonic KX-VC300 Instruction Manual

Panasonic HDVC-MPCS User manual

Panasonic

Panasonic HDVC-MPCS User manual

Panasonic KX-VC1600SX User manual

Panasonic

Panasonic KX-VC1600SX User manual

Panasonic WXC3010 - CENTER MODULE - MULTI LANGUAGE User manual

Panasonic

Panasonic WXC3010 - CENTER MODULE - MULTI LANGUAGE User manual

Panasonic KX-TVP50 User manual

Panasonic

Panasonic KX-TVP50 User manual

Panasonic KX-NS300 User manual

Panasonic

Panasonic KX-NS300 User manual

Panasonic KX-VC300 User manual

Panasonic

Panasonic KX-VC300 User manual

Panasonic SC-HG1-USB User manual

Panasonic

Panasonic SC-HG1-USB User manual

Panasonic KX-NS1000 User manual

Panasonic

Panasonic KX-NS1000 User manual

Panasonic KX-NS700G User manual

Panasonic

Panasonic KX-NS700G User manual

Popular Conference System manuals by other brands

Avaya Scopia XT5000 manual

Avaya

Avaya Scopia XT5000 manual

Polycom VSX 7000 Administrator's guide

Polycom

Polycom VSX 7000 Administrator's guide

MBTelehealth Tandberg 1700 MXP user guide

MBTelehealth

MBTelehealth Tandberg 1700 MXP user guide

Yealink CP920 quick start guide

Yealink

Yealink CP920 quick start guide

Aethra MCU+ Specifications

Aethra

Aethra MCU+ Specifications

Avaya scopia elite 6000 series Administrator's guide

Avaya

Avaya scopia elite 6000 series Administrator's guide

Nibe SMS 40 Installer manual

Nibe

Nibe SMS 40 Installer manual

Cisco MX300 G2 Quick reference guide

Cisco

Cisco MX300 G2 Quick reference guide

Crestron UC-MM30-T quick start

Crestron

Crestron UC-MM30-T quick start

BlueCard BS-1000 user manual

BlueCard

BlueCard BS-1000 user manual

Brahler Digivote III Hardware operating instructions

Brahler

Brahler Digivote III Hardware operating instructions

ErgoCentric iCentric Mesh user guide

ErgoCentric

ErgoCentric iCentric Mesh user guide

NEC UNIVERGE SL2100 Networking guide

NEC

NEC UNIVERGE SL2100 Networking guide

COMBA CriticalPoint BBU V1 Quick installation guide

COMBA

COMBA CriticalPoint BBU V1 Quick installation guide

Avipas AV-1280 user manual

Avipas

Avipas AV-1280 user manual

AbleNet QuickTalker Freestyle quick start guide

AbleNet

AbleNet QuickTalker Freestyle quick start guide

Polycom RealPresence Group 300 user guide

Polycom

Polycom RealPresence Group 300 user guide

Graco 24N978 Instructions - parts

Graco

Graco 24N978 Instructions - parts

manuals.online logo
manuals.online logoBrands
  • About & Mission
  • Contact us
  • Privacy Policy
  • Terms and Conditions

Copyright 2025 Manuals.Online. All Rights Reserved.